• Home
  • About
  • Privacy Policy
  • PRESS
  • SHOP
  • Contact Me

PLACE OF MY TASTE

Live and eat beautifully

  • Home
  • Recipes
  • DIY
    • CRAFTS
    • SEASONAL
      • CHRISTMAS
      • EASTER
      • Fashion
  • HOME DECOR
    • HOME TOURS
    • DECOR
  • PHOTOGRAPHY
  • SHOP
    • SHOP MY INSTAGRAM FEED
    • SHOP MY STYLE
    • SHOP
  • PRIVACY POLICY

Sign up to get my weekly newsletter!

DIY RECLAIMED WOOD BUFFET – IKEA HACKS

January 15, 2015 By Aniko 104 Comments

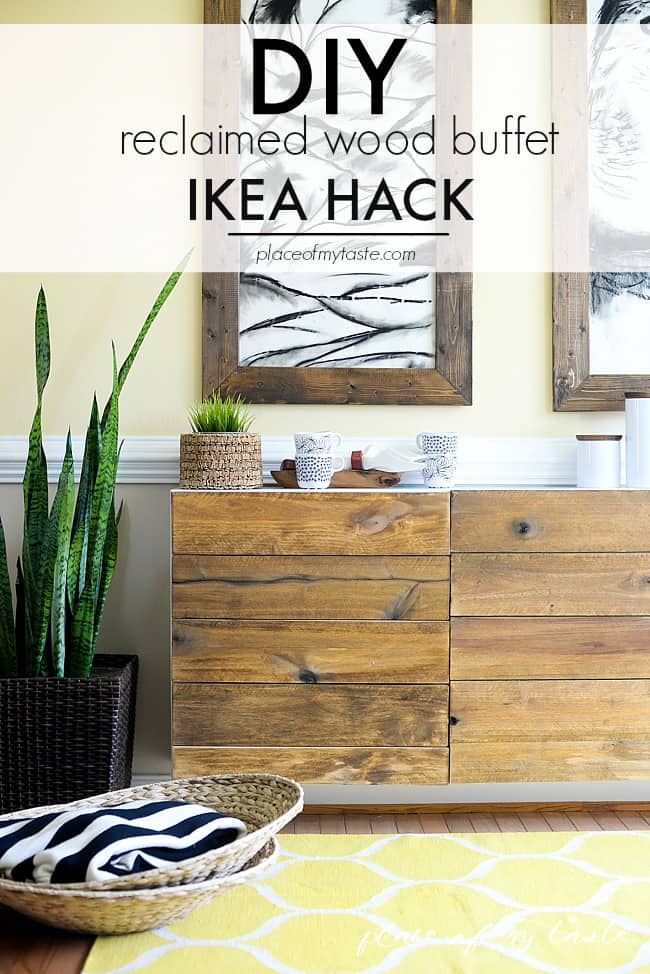
IKEA HACKS – DIY RECLAIMED WOOD BUFFET, This is what I’m sharing with you today. Everybody love Ikea hacks, and this is a great one!
Reclaimed wood buffet- IKEA HACKS

Two big projects in one week are not very regular around here, but I could not help it. I was itching to show you what we created with the hub last weekend. I shared a post on some GIANT DIY WALL ART on this past Tuesday
and today I will show you a fantastic one those Ikea hacks: a DIY reclaimed wood buffet.

I will say that this is one of my favorite projects of ALL TIMES. Seriously.

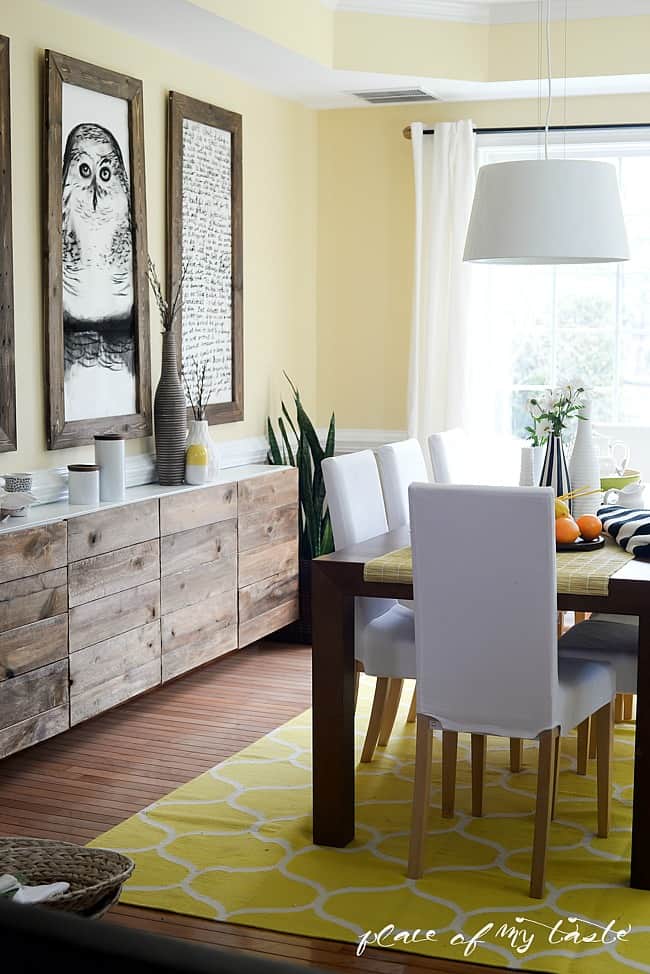
Our dining room had a few different looks already but this by far, is the BEST…In my opinion.

Well, to tell you the truth, I probably thought that for each design at the time when it was new. 🙂

Here are some of the previous looks of this room.
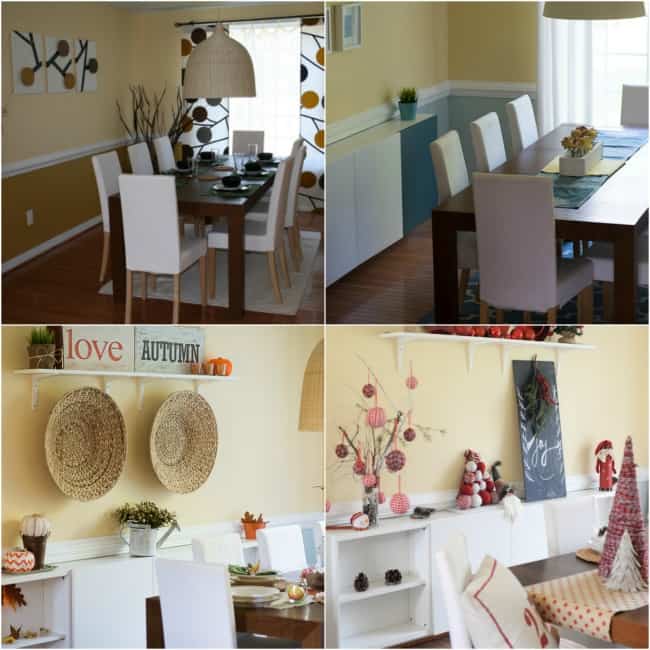
Dining room befores

We purchased a long dining table at IKEA almost seven years ago. It fits our dining room perfectly, and we love the table’s beautiful color. The chairs were purchased at the same time as well. The best part of these chairs that the covers are removable and washable. Some of my friends were asking if I was crazy to get white dining room chairs? I told them, NO – I was smart as the covers can be washed and bleached anytime. :-). They are almost seven years old, and there is NO stain on them. Every time I wash them they look totally new! Winner!

Anyways. A few years ago we wanted to add a little more storage space to this room, and we bought a white shelving unit at IKEA.

**Update: Many of you asked what is the name of the wall cabinet that we hacked so here ya go:

BESTA WALL CABINET WITH DOORS

It has four cabinets and four doors. I got two white and two turquoise doors. I mostly used the white doors, though.
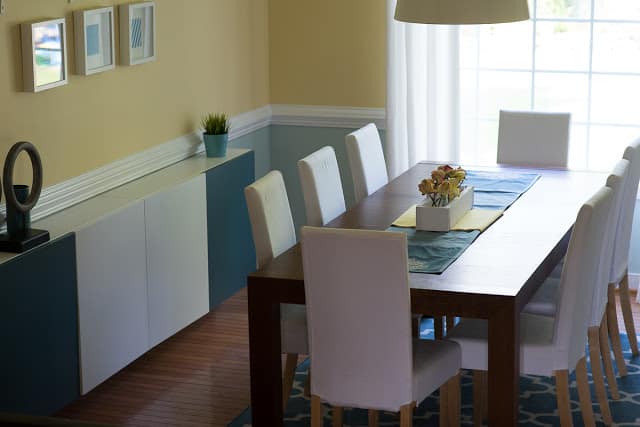
Dining room 2

Couple weeks ago I saw a very inspirational image while I was browsing West Elm.com. I FELL in love with this piece at first sight!
And at that moment I knew that I HAVE to create this very high-end designer look on my IKEA shelving unit.
I love West Elm design, but it is not for my budget. This incredible West Elm buffet is $1200. Yeah, it is so interesting with lots of texture,
but I think I can say that I created a very similar look without spending that kind of money. 🙂

IKEA HACKS – RECLAIMED WOOD BUFFET
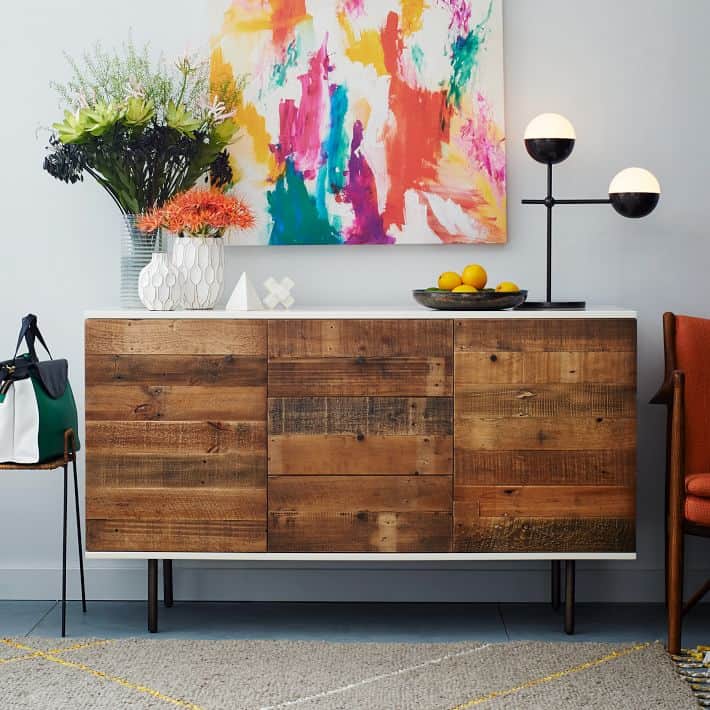
West elm image

 Here is what I had in the dining room (after taking all Christmas decor down) 2 weeks ago.

before

Pretty empty walls that needed my help!

I took off those shelves and created some awesome giant wall arts. If you missed seeing my giant frames couple days ago, check it out!!
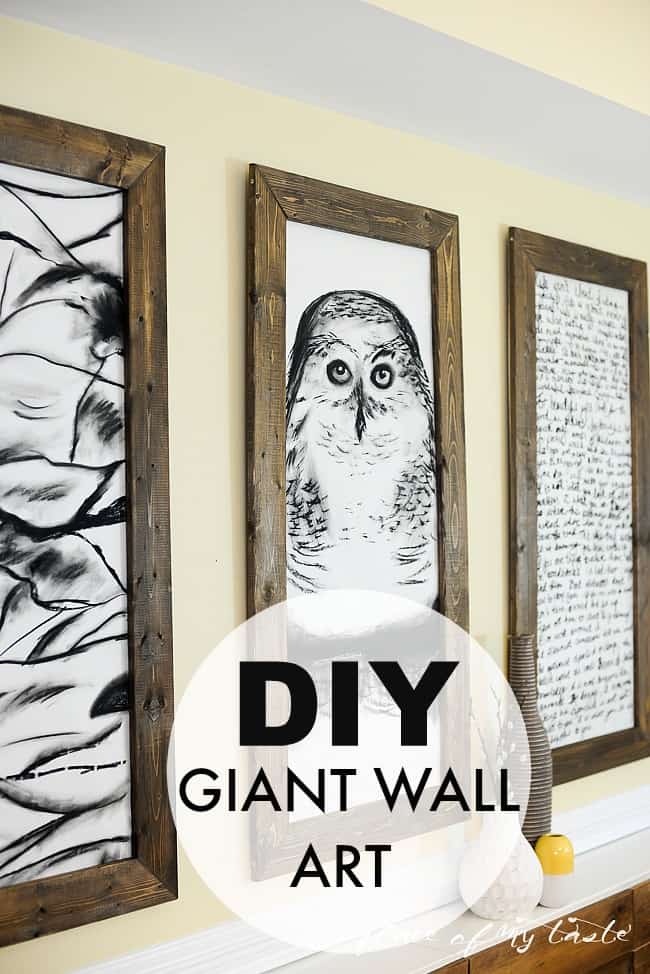
DIY GIANT WALL ART TUTORIAL

DIY GIANT WALL ART - Placeofmytaste.com

I went to a local business place where they made pallets and asked them if they perhaps have some wood pieces that they don’t need anymore. I gave them my best smile and got a bunch of timber panels. 🙂

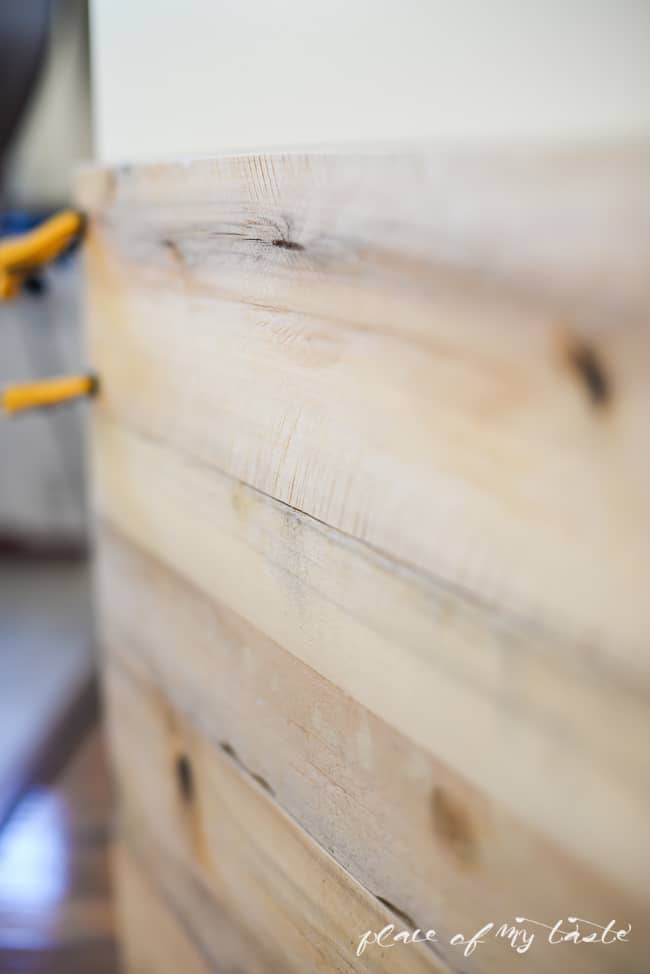
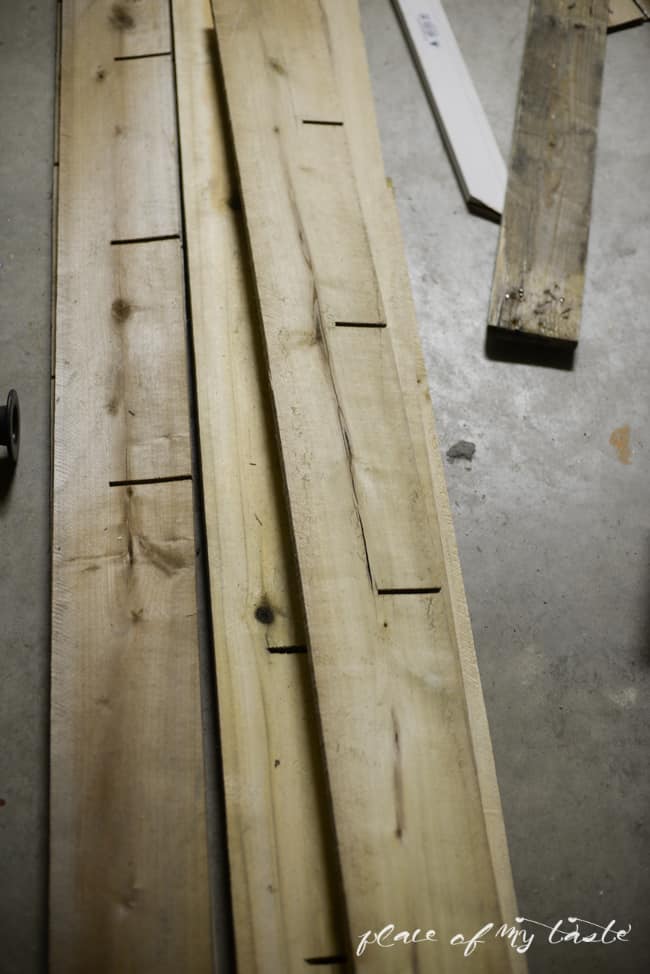
The ones they had for me were in OK shape, but  they had deep cuts (see below) on about 3/4th of the panels.
We were able to use one end of the wood boards.
Reclaimed wood buffet- Placeofmytaste.com-1-3

Reclaimed wood buffet- IKEA HACKS

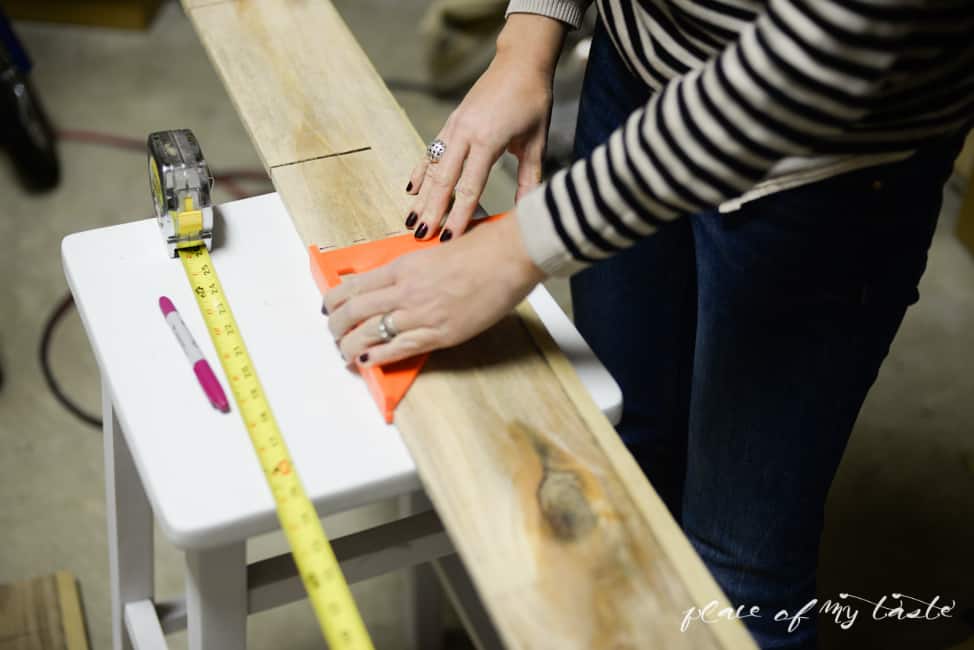
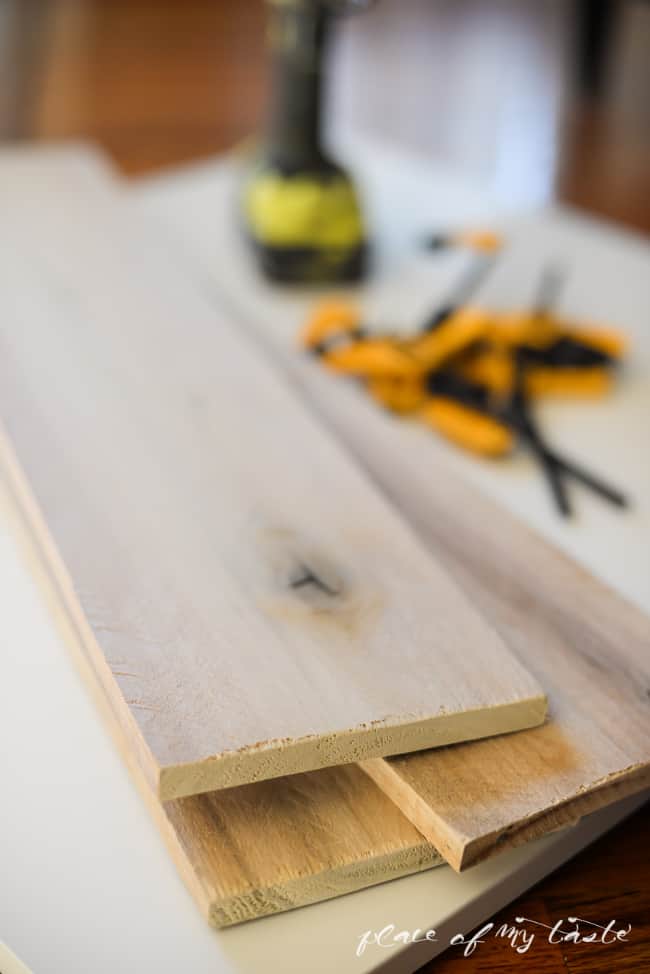
 We measured our doors and cut the panels to size. Each door had 4 and a half panels attached to them.

Out of the four doors, 2 were turquoise, so first I spray had painted the edges of those doors before we attached the panels to them.
Reclaimed wood buffet- IKEA HACKS

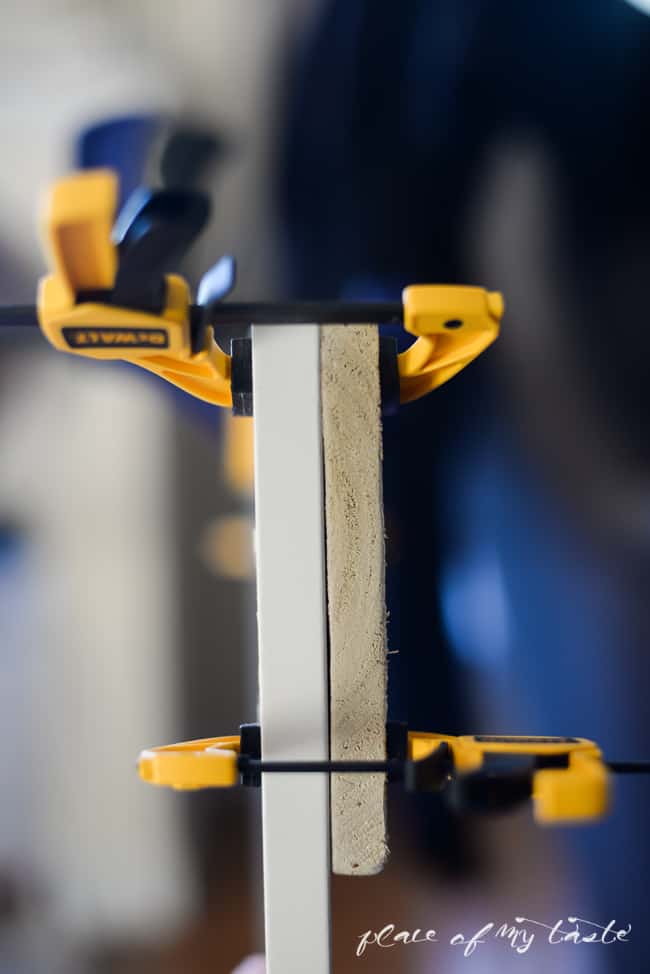
We used small trigger clamps to hold the wood panels to the doors and screwed six wood screws to each panel from the back of the door.
DIY GIANT WALL ART -4-2

DIY GIANT WALL ART -5-2

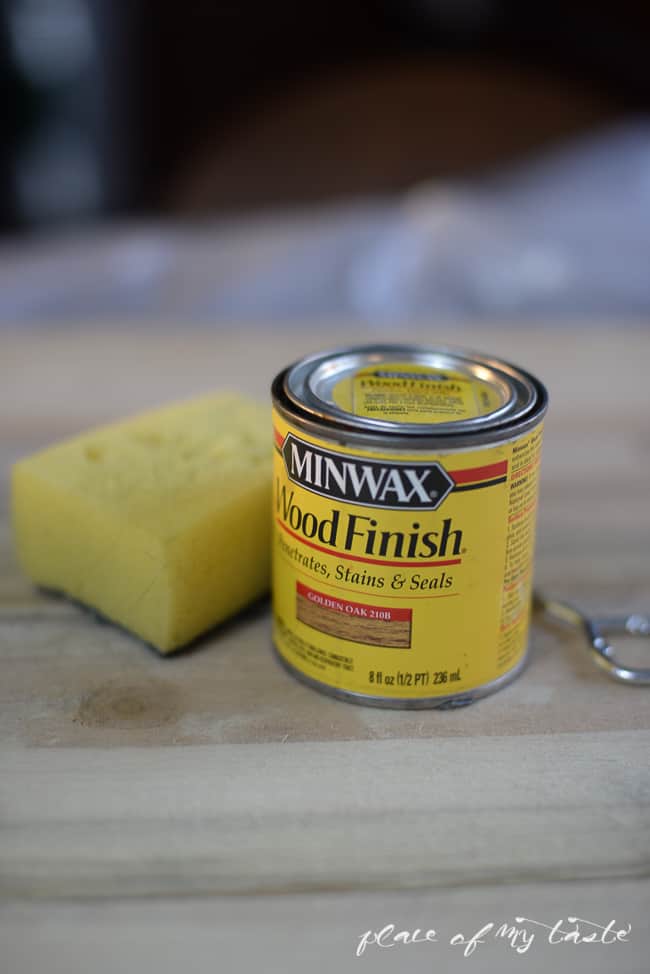
After all the panels had been attached, I stained them carefully with a sponge.
I used MINWAX Golden Oak 210 B finish. It is a lighter finish but turned out gorgeous on the panels.
DIY GIANT WALL ART -8-2

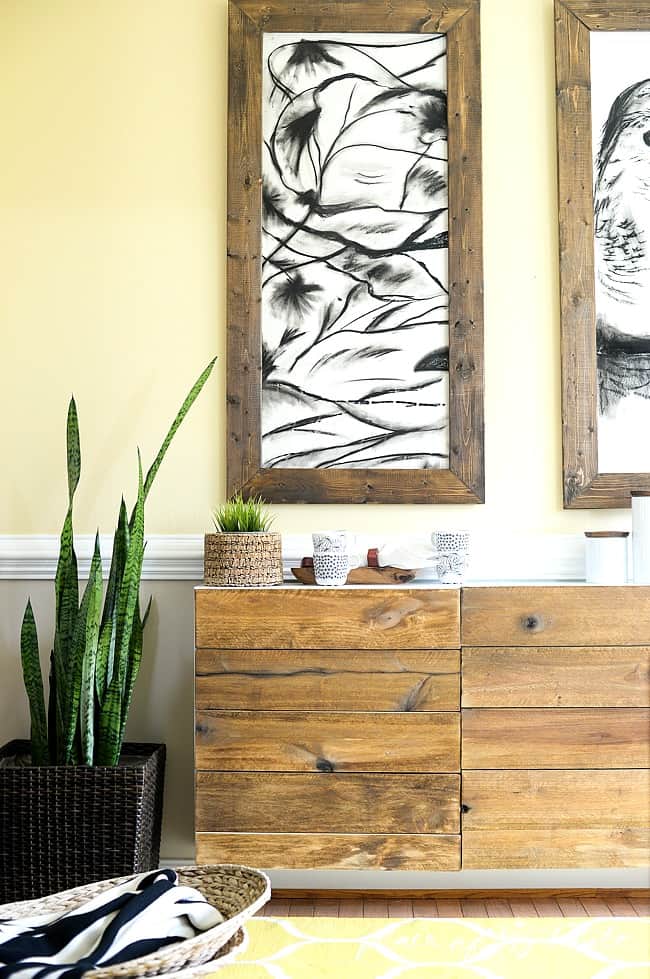
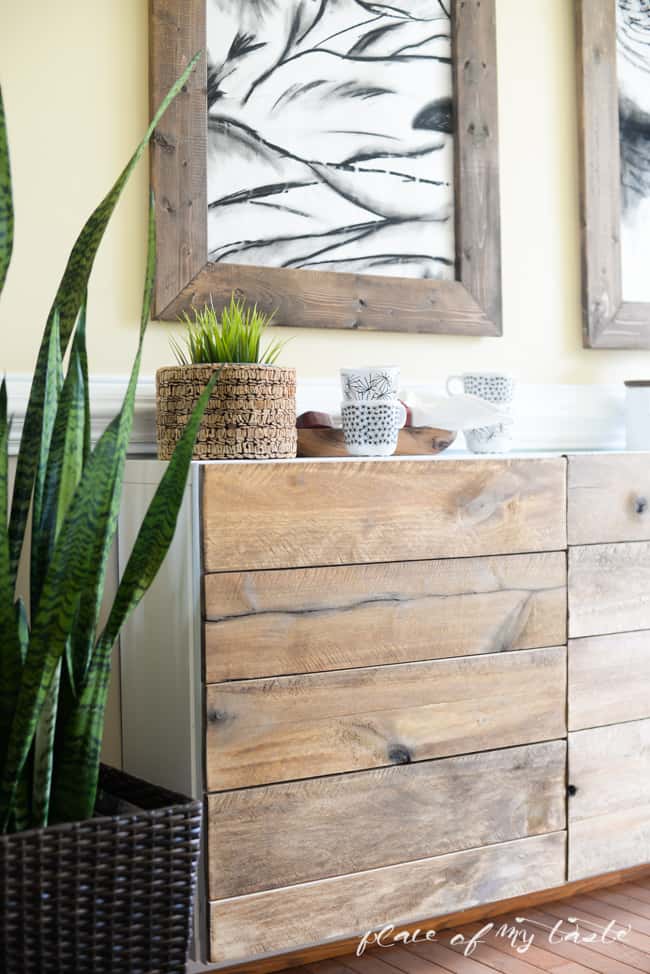
Loving this natural and rustic look on my doors.

DIY GIANT WALL ART -9

As the finishing step, I painted the door with a thin lacquer coat which protects the wood from stains and dirt.

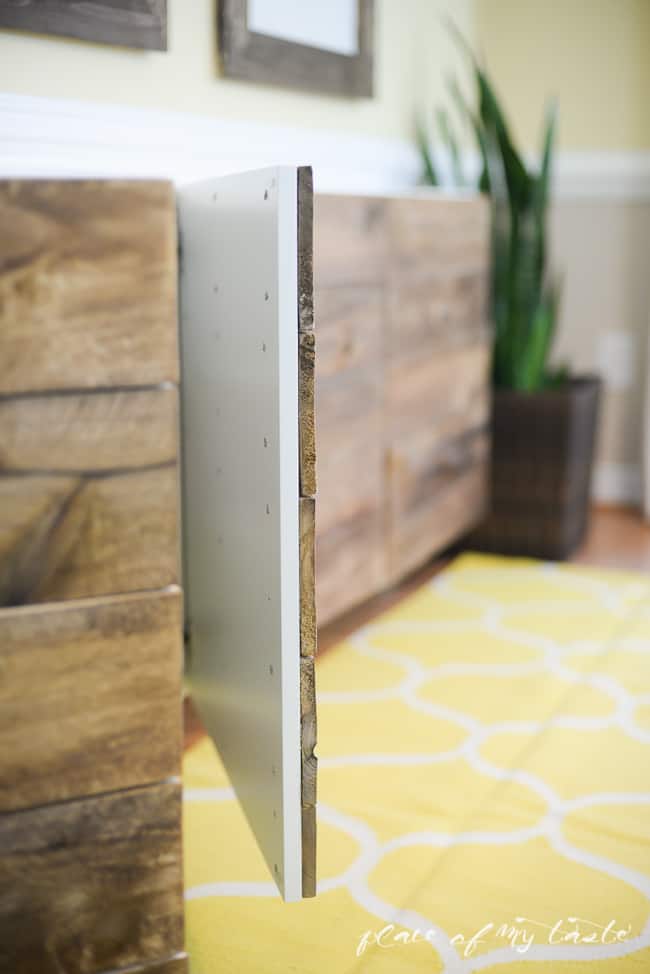
Here is a better look at how the doors look inside with the screws. The door got heavier of course and I was afraid that it wouldn’t hold
when we screw them back in place, but we had no issues.
Reclaimed wood buffet- IKEA HACKS

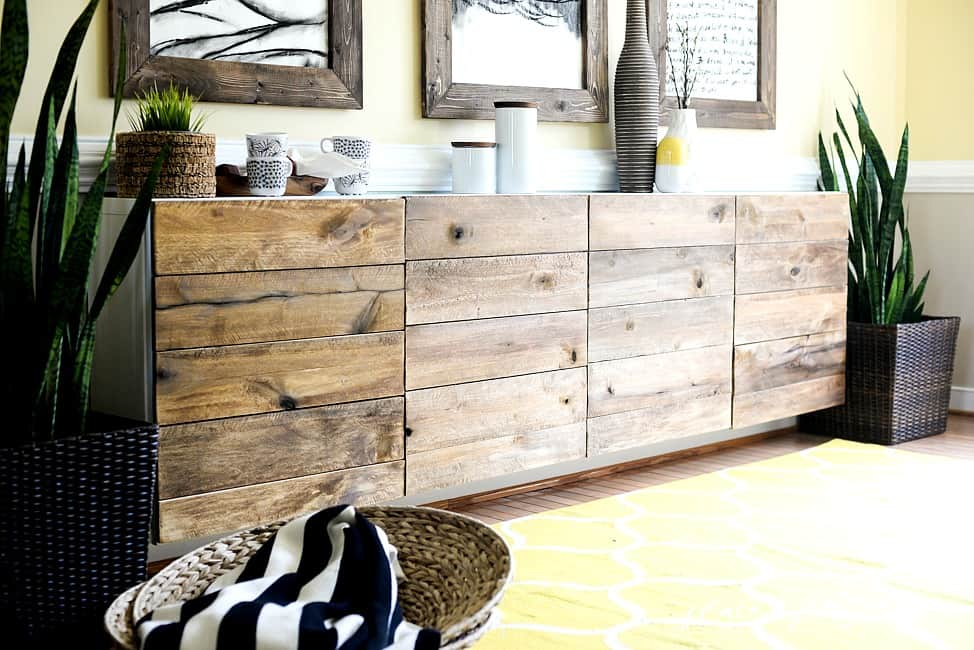
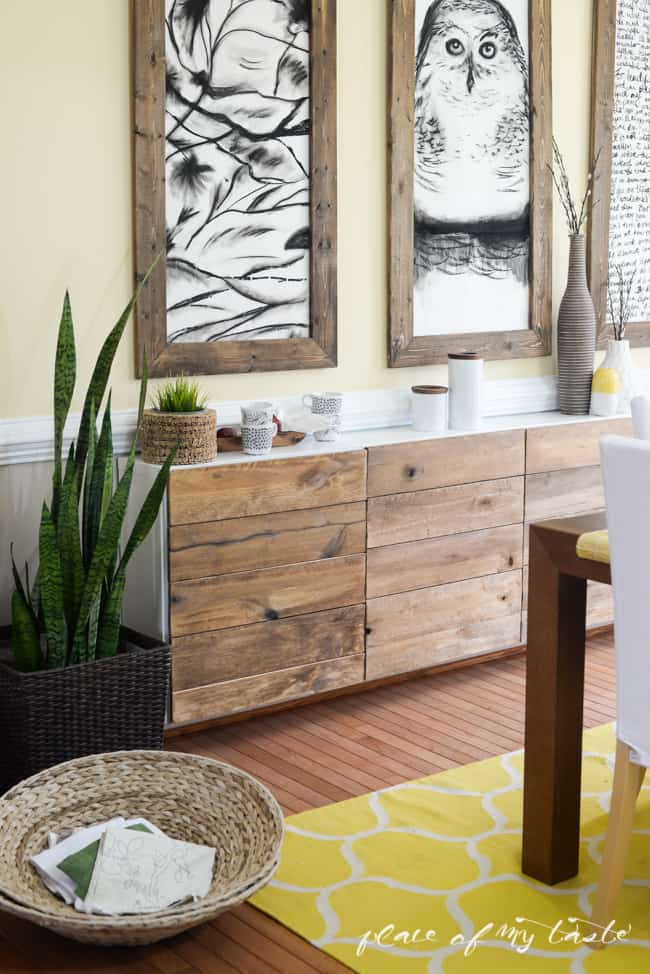
I can not believe the difference, guys!! Such dramatic change!

High end look at low cost!

Can’t get better than that. ♥
Reclaimed wood buffet- IKEA HACKS

Do you spot those huge planters that I scored for $6/each (if you are following me on INSTAGRAM you had seen it)
at Home Depot the other day?

They were meant to be placed there!
Reclaimed wood buffet- IKEA HACKS

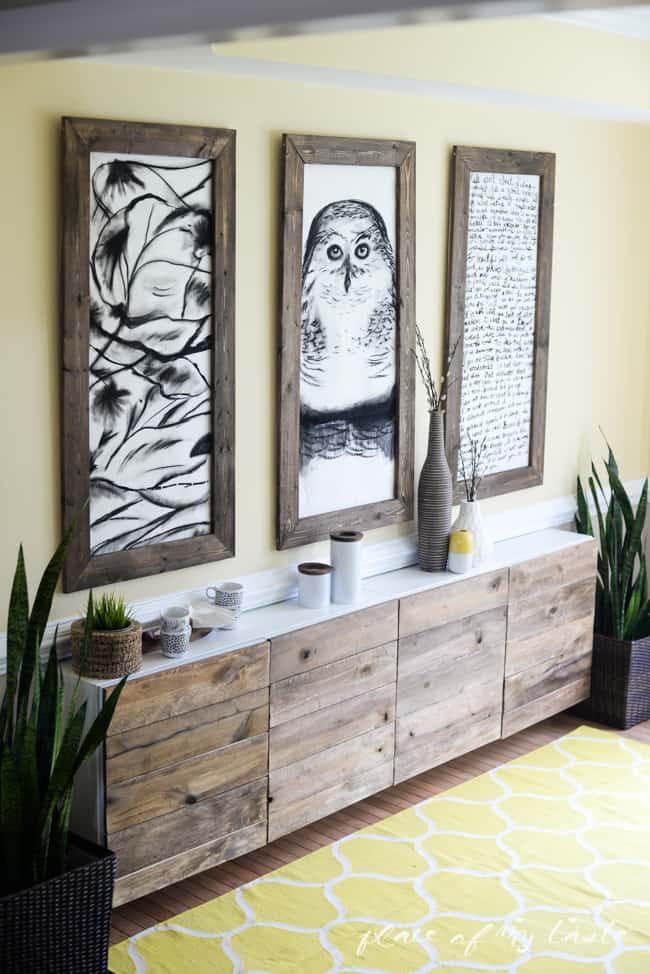
I think that we found the PERFECT wood for this project. It was somewhat thin and in excellent shape: exactly what we needed!
Reclaimed wood buffet- Placeofmytaste.com-15

Reclaimed wood buffet- Placeofmytaste.com-25

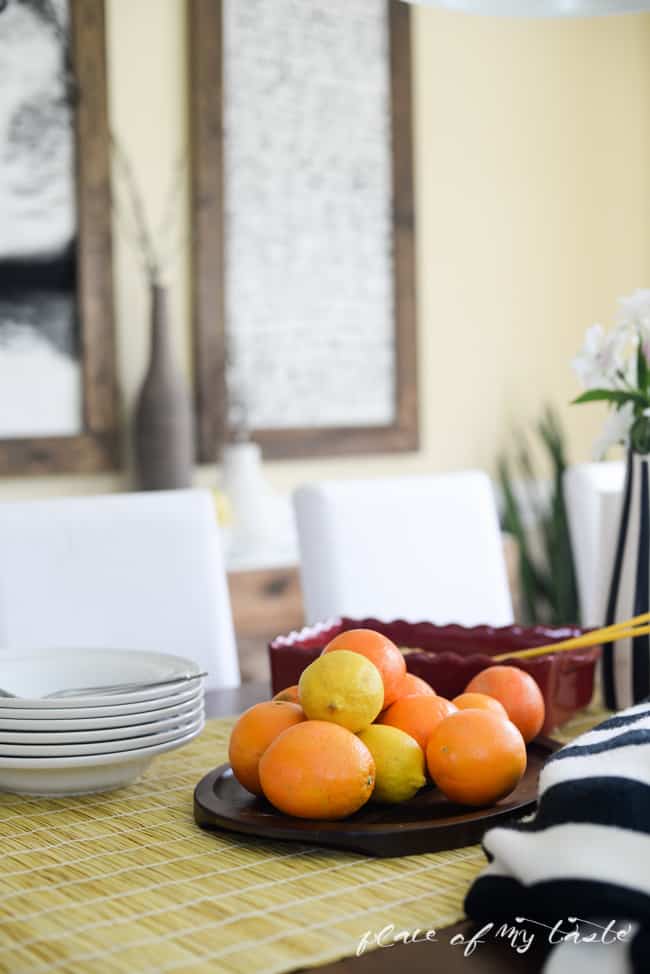
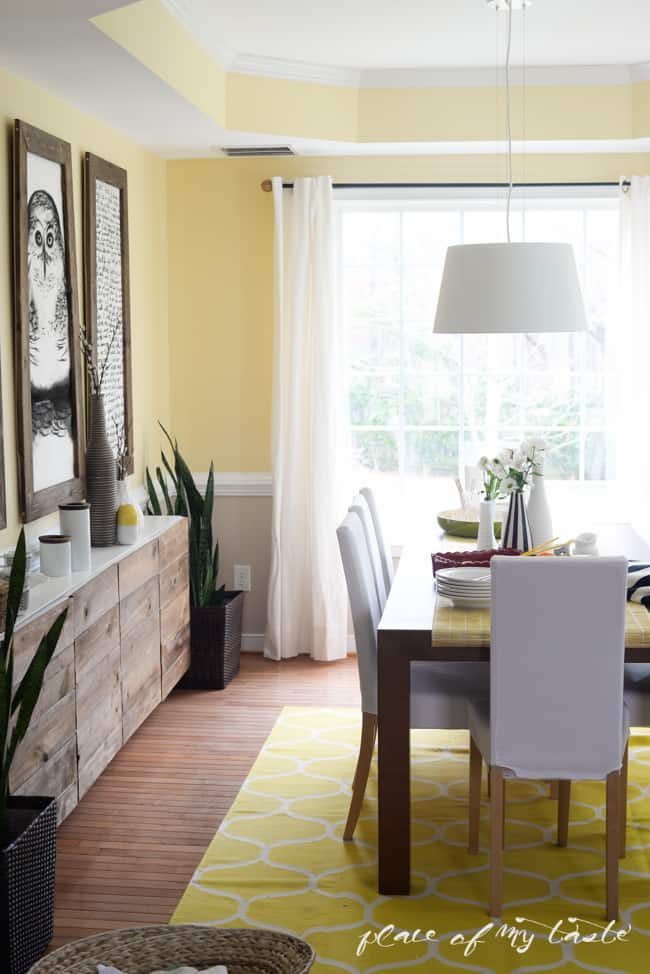
Now I am going to bomb you with some more shots from different angles so you can see the full room.
Reclaimed wood buffet- Placeofmytaste.com-1-8

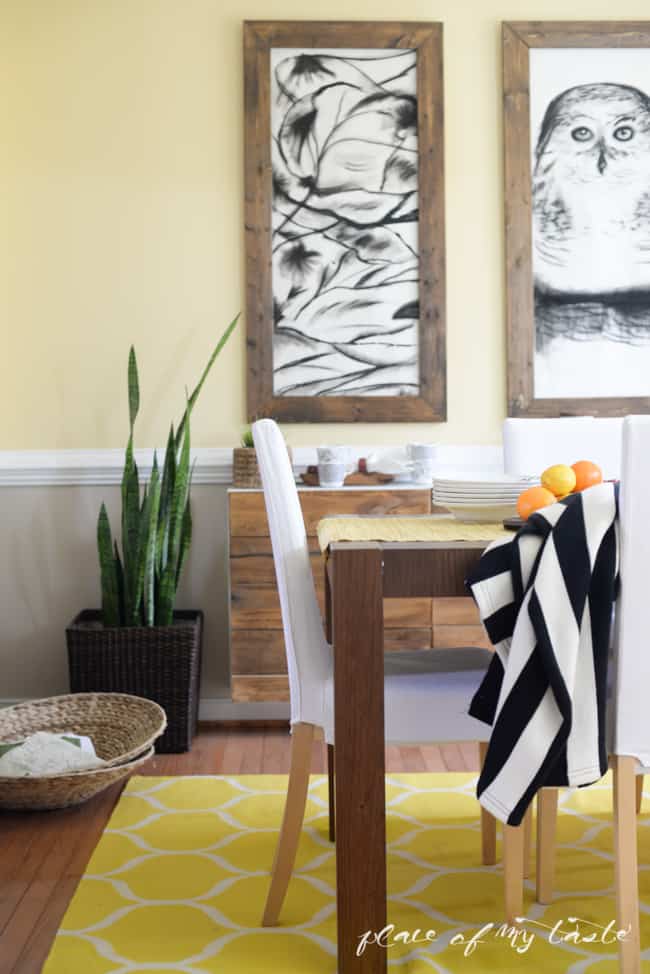
This beautiful yellow rug is from IKEA. I purchased it last year for my living room but never ended up using it there.
Of course, it’s been sitting in the garage waiting for me to take it back to the store but thankfully, I never made it back to IKEA ever since!

It looks stunning in this dining room.
Reclaimed wood buffet- Placeofmytaste.com-33

Reclaimed wood buffet- Placeofmytaste.com-19

Reclaimed wood buffet- Placeofmytaste.com-30

Love all the natural look in this room now! Such and eye candy every time I walk in here.
Reclaimed wood buffet- Placeofmytaste.com-40

Reclaimed wood buffet- Placeofmytaste.com-26

You would not believe that it is the same wall cabinet and the same room!
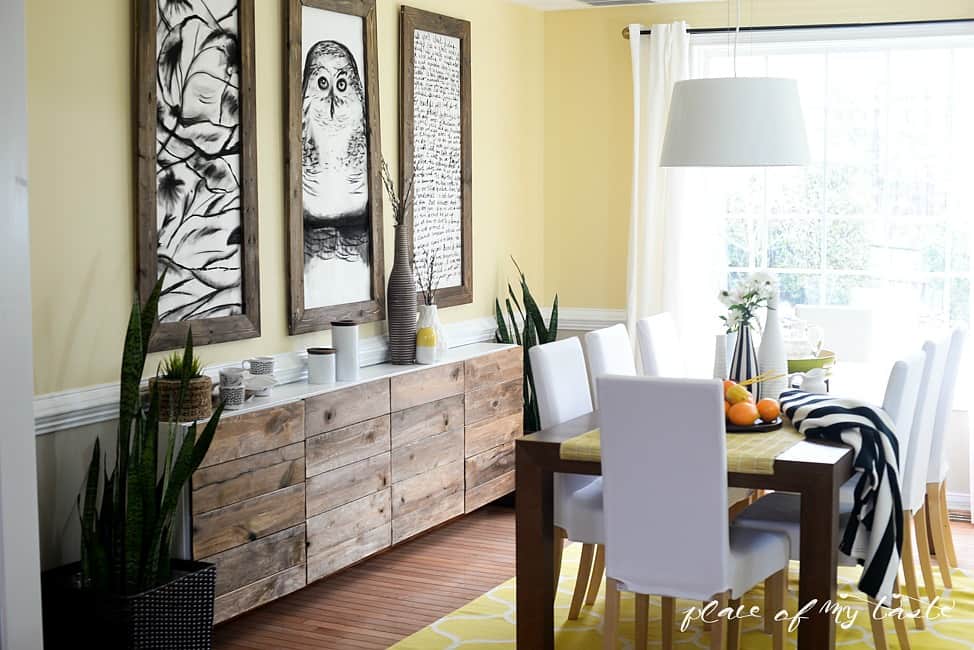
Reclaimed wood buffet- Placeofmytaste.com-35

So tell me what do you think? Yay or nay?

HERE IS THE COST OF THE MAKEOVER:

3 GIANT WALL FRAMES-ART: $30

WOOD FOR DOORS: FREE (I like that:-))

STAIN: $3.99

LACQUER: $13

Can you beat that? Really! As you see, one of these Reclaimed wood buffets is over a $1000 at West Elm.

Yay for Ikea hacks!!

DO IT YOURSELF!!! 

Here is a BEFORE AND AFTER just because we love to see a before and after of course!

PicMonkey Collage

Pin this image for later:-)

DIY rECLAIMED WOOD BUFET- IKEA HACK

Hope I inspired you to create a custom piece yourself!

If you liked this project, you might like this
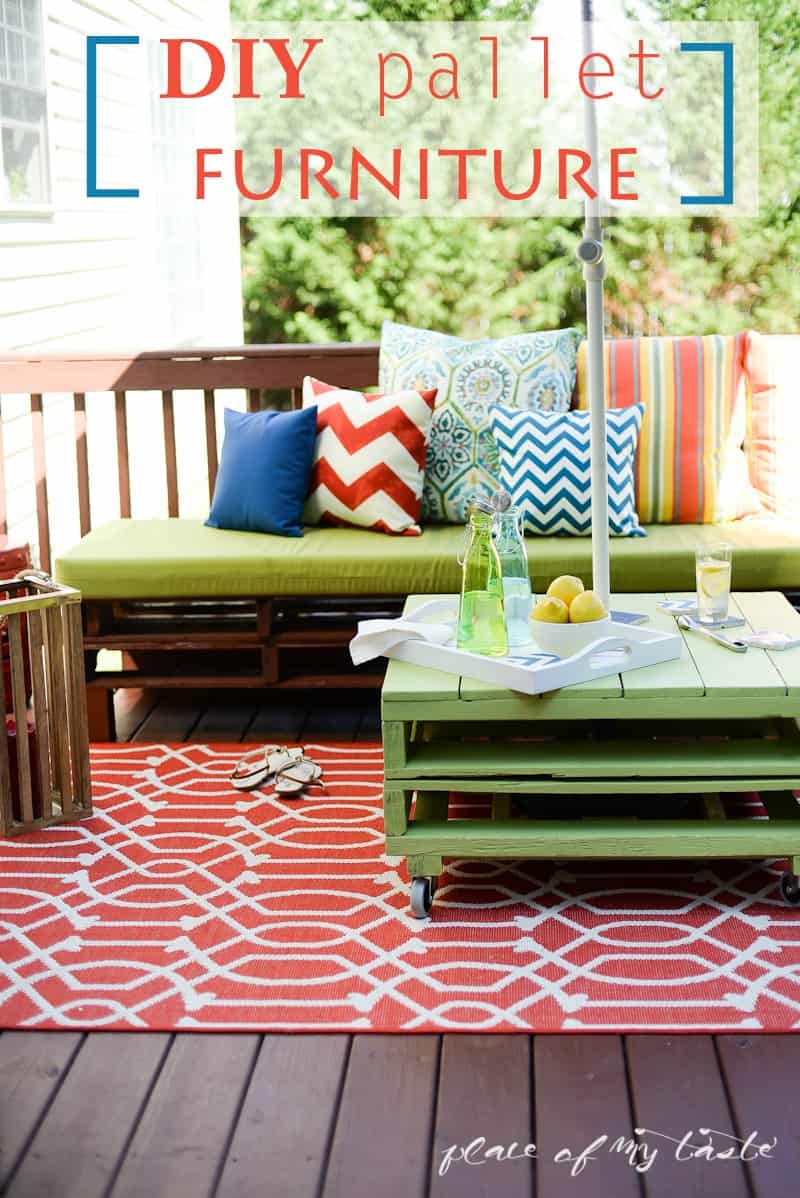
OUTDOOR DIY PALLET FURNITURE

DIY-pallet-furniture-patio-makeover-www.placeofmytaste.com_

Or perhaps you would enjoy some of my fabulous room reveals!

CHECK OUT MY ONE ROOM CHALLENGE MAKEOVERS
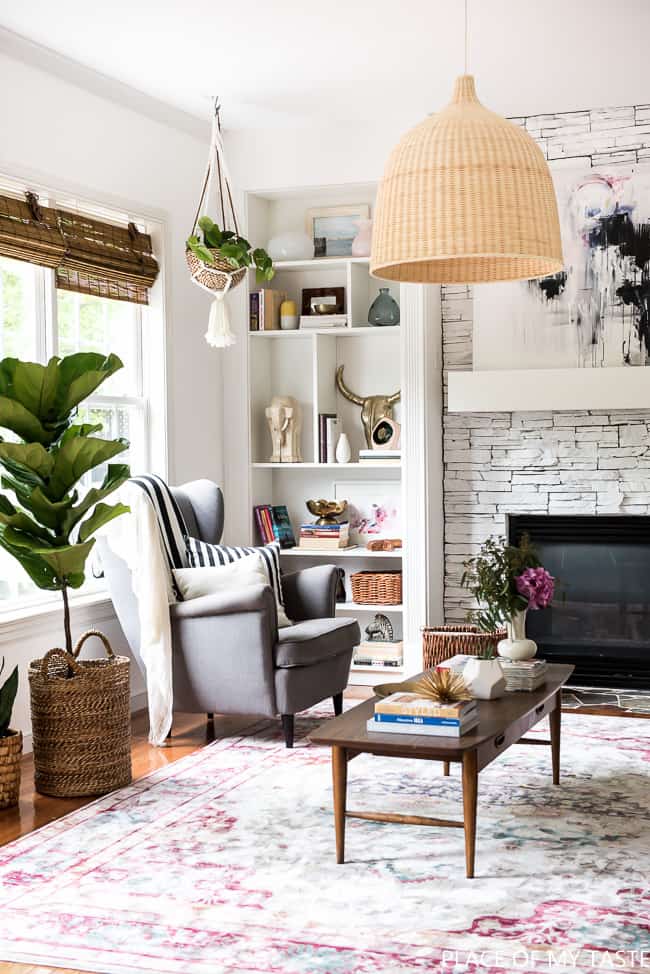
Family Room Reveal (49 of 50)

Glad you visited today! Have a fantastic weekend!

aniko sign

 *** This post includes affiliate links*

Sign up to get my weekly e-mail updates!
Once you signed up you will receive a FREE copy of my home styling mini guide!
Your information will *never* be shared or sold to a 3rd party.

Filed Under: DINING ROOM, DIY, FURNITURE, IKEA HACKS, June slides, most popular posts, POPULAR POSTS, Projects, ROOM MAKEOVER, THE TOP Tagged With: DINING ROOM, DIY, makeover, reclaimed wood

« WORK IT WEDNESDAY
BRUSSELS SPROUTS WITH ITALIAN SAUSAGE »

Comments

  1. Denise says

    January 15, 2015 at 9:05 AM

    Love this so much!! It turned out fantastic! An that art – wow! The room looks fabulous!

    Reply
    • Aniko says

      January 19, 2015 at 2:59 PM

      Denise, thanks a lot! Have a wonderful week!

      Reply
      • mary says

        June 8, 2016 at 7:43 PM

        Your site is amazing, thank you for sharing all your wonderful, cost efficient and easy directions. Please keep them coming.

        Reply
  2. Marty@A Stroll Thru Life says

    January 15, 2015 at 9:51 AM

    AMAZING. This looks fabulous. What a great idea and it totally makes the room too. I also really like the art.

    Reply
    • Aniko says

      January 19, 2015 at 2:58 PM

      Marty, thanks for your kind comment!have a great week

      Reply
  3. Kristi says

    January 15, 2015 at 10:28 AM

    Oh my goodness!!! This might well be my very fave IKEA hack yet! It’s absolutely gorgeous my friend!!!!

    Reply
    • Aniko says

      January 19, 2015 at 2:57 PM

      Thanks so much, Kristi! Glad you think of it as a great IKEA hack:-) Have a fantastic week!

      Reply
  4. katie says

    January 15, 2015 at 12:08 PM

    This piece is amazing, Aniko! Such a great DIY project for cheap. LOVE.IT.

    Reply
    • Aniko says

      January 19, 2015 at 2:13 PM

      Thank you dear Friend! I love it on the cheap..ALL.THE.TIME!!hugs

      Reply
  5. Theresa @DearCreatives says

    January 15, 2015 at 12:36 PM

    If I had an Ikea near by I’d be running there! Brilliant makeover!

    Reply
    • Aniko says

      January 19, 2015 at 2:56 PM

      Thank you Theresa!!I wish my IKEA was closer too!

      Reply
  6. Ashley@Biggerthanthethreeofus says

    January 15, 2015 at 3:08 PM

    This is so good! Love the vision and that room is just so stunning. Pinning!

    Reply
    • Aniko says

      January 19, 2015 at 2:54 PM

      Thank you Ashley! Have a great week!

      Reply
  7. Amy W says

    January 15, 2015 at 3:12 PM

    My heart did a happy dance the moment I saw your sneak peek on Instagram yesterday. I have loved that West Elm buffet for YEARS!!!!!! My issue is that it almost exactly matches our current flooring and I thought it would lose it’s loveliness having the buffet table with the stunning wood, too. YOURS however, is perfection in your living room! Job well done, my friend!!

    Reply
    • Aniko says

      January 19, 2015 at 2:56 PM

      Ha- funny that I only discovered this buffet just now on West Elm’s site…but it was LOVE for first sight ♥ and I knew that I need to tackle it! It definitely made our Dining Room to a whole new level;-) Thanks for your visit, Friend!

      Reply
  8. Leigh Anne says

    January 15, 2015 at 3:59 PM

    Gaahhh! I LOOOVE this! So gorgeous!

    Reply
    • Aniko says

      January 19, 2015 at 2:11 PM

      Glad you LOVE it, Leigh!Xo

      Reply
  9. Melissa @ A Prudent Life says

    January 15, 2015 at 8:09 PM

    It’s a yay for sure! The wood was absolutely perfect. I loved seeing the transition of your dining room throughout the year too.

    Reply
    • Aniko says

      January 19, 2015 at 2:11 PM

      Thank you,Melissa. I love changing things around while not spending a fortune and the wood was really just PERFECT!! Have a great week!Xo

      Reply
  10. Roaw says

    January 16, 2015 at 7:53 AM

    Your D/R looks fantastic.
    I love the look of the wood.
    And the pictures above the cabinet are beautiful. What an artist you are.
    I LOVE IT.**********
    Rose

    Reply
    • Aniko says

      January 19, 2015 at 2:12 PM

      Rose, thanks for leaving your comment, it made my day! Glad you love my work:-) Xo

      Reply
  11. Breanna says

    January 16, 2015 at 11:55 AM

    Absolutely stunning!! I like yours way better! How ridiculously priced is furniture?? It really brings your whole dining room together!

    Reply
    • Aniko says

      January 19, 2015 at 2:09 PM

      Those furniture are way overpriced and I may like my version better too-LOL. Thanks for stopping by!

      Reply
  12. Amanda @ Dwelling in Happiness says

    January 16, 2015 at 6:29 PM

    Holy cow Aniko this is GORGEOUS!!! I can’t believe what a huge difference adding wood made to that buffet, and the whole room! The wall art is so pretty too! 🙂

    Reply
    • Aniko says

      January 19, 2015 at 2:07 PM

      Thanks, Amanda you are so kind! Have a wonderful day!

      Reply
  13. Krista says

    January 16, 2015 at 8:45 PM

    SUPER AMAZING!!! This turned out so incredibly well – what an awesome knockoff!

    Reply
    • Aniko says

      January 19, 2015 at 2:04 PM

      You are so sweet, Krista! Glad you like it:-) Xo

      Reply
  14. dawn@joyfulscribblings says

    January 17, 2015 at 12:28 PM

    Projects like this make me wish I loved woodworking and painting. Beautiful job!

    Reply
    • Aniko says

      January 19, 2015 at 2:04 PM

      Thank you, Dawn! Have a wonderful week!

      Reply
  15. Emily says

    January 18, 2015 at 1:39 AM

    amazing!! Best IKEA hack I’ve seen in a long time… LOVE!!!!

    Reply
    • Aniko says

      January 19, 2015 at 2:02 PM

      Thanks sweet Friend! It really turned out gorgeous!XXOO

      Reply
  16. Katie @ Little House of Four says

    January 19, 2015 at 8:21 AM

    This is AMAZING and one of the best IKEA hacks/ knocks offs I’ve seen in a long time! Thanks so much for linking up to Your Designs This Time! I’ve added this incredible makeover to our favorites and features Pinterest board! Have a fabulous week!

    Reply
    • Aniko says

      January 19, 2015 at 2:01 PM

      Katie, thanks so much!:-)

      Reply
  17. Jaimi says

    January 19, 2015 at 1:37 PM

    Amazing! Love it and pinned it! Thank you for sharing!

    Reply
    • Aniko says

      January 19, 2015 at 2:01 PM

      Thank you, Jaimi! Glad you like it and thanks for pinning!:-)

      Reply
  18. Karisa | Petite Modern Life says

    January 19, 2015 at 8:06 PM

    Wow! What a gorgeous room and hack! You made those pallets look phenomenal and modern rustic. I love how it turned out!

    Reply
  19. Betty@ OhEverythingHandmade says

    January 20, 2015 at 4:54 PM

    Looks lovely Aniko, what a great idea to simply screw them onto the existing doors. Love the feel of your dining room!

    Reply
    • Aniko says

      January 21, 2015 at 10:04 AM

      Thank you my sweet girl! Glad you like it! Have a fantastic day!

      Reply
  20. asha says

    January 21, 2015 at 8:00 AM

    Absolutely Gorgeous!-

    Reply
    • Aniko says

      January 21, 2015 at 10:05 AM

      Thank you Asha! Have a great week!

      Reply
  21. mom929 says

    January 21, 2015 at 9:32 AM

    Can you tell me which Ikea product you hacked to get this? I’ve got pallet wood lying around and this would be the perfect solution for the lack of storage in the mancave

    Reply
    • Aniko says

      January 21, 2015 at 10:04 AM

      Hello!I just updated my post with the name of the cabinet…It is BESTA WALL CABINET ($80/unit- I had two- LINKED TO IT IN THE POST). Hope this helps! Get your hands on those pallet wood!!:-)Have a great day!

      Reply
      • Mercedes says

        June 17, 2015 at 2:41 PM

        Anika
        I can’t find the exact IKEA product you used for this hack, i clicked on the link and it goes to a general IKEA page. Please help I’m moving soon and would love this in my new place. Thank you for your time.

        Reply
        • Aniko says

          June 23, 2015 at 11:17 PM

          Hello there! This is what I found that looks like mine but it is vertical but I am sure you can hang it horizontal on the wall. http://www.ikea.com/us/en/catalog/products/S99057479/#/S19057483 Hope it helps. 🙂 Have fun with the project!

          Reply
  22. Sandy says

    January 21, 2015 at 11:31 AM

    I say, yay–yay–yay. You did a fantastic job on this furniture. It turned out absolutely beautiful and congratulations. Thank you for sharing your wonderful work.

    Reply
  23. Carissa Rasmussen says

    January 21, 2015 at 12:26 PM

    so absolutely incredible. You definitely hit it out of the park with this one! Come share at my link party http://www.carissamiss.com/2015/01/outside-box-no-19.html I’m so glad to have found your blog!

    Reply
  24. jessica says

    January 22, 2015 at 12:47 AM

    This is AMAZING!!! I am in love with this and loving your blog! I would love for you to stop over and link up with me!! I would be thrilled to have you!! Have a wonderful week!!
    Jess

    Reply
  25. Melanie says

    January 23, 2015 at 7:45 AM

    I can’t believe how good this looks! I’ve been wanting to replace our white Ikea buffet with something rustic like this for ages. Ours has glass doors though, so I can’t do this, but it has me thinking if I can find a cheaper piece to hack… thanks SO much for the inspiration. I’ve pinned it already!

    Reply
  26. Danielle says

    January 23, 2015 at 11:41 AM

    I’m impressed… It’s beautiful!!! Thanks for sharing at this week’s Motivational Monday link party! Hope you’ll join us again next week!!

    Danielle
    SewMuchCrafting.com

    Reply
  27. Breanna says

    January 23, 2015 at 1:03 PM

    Ok you know I’m already in love with this and I just HAVE to feature it Monday at YDTT! Hope you have a fabulous weekend my friend!

    Reply
  28. debbie says

    January 26, 2015 at 8:31 AM

    Gorgeous – fab job!

    Reply
    • Aniko says

      January 26, 2015 at 4:18 PM

      Thank you, Debbie!

      Reply
  29. Lindi says

    January 26, 2015 at 11:43 AM

    I LOVE this!!! So gorgeous and original! Where can I do this in my home?!? Lol. Thanks for sharing! Followed from Your Designs This Time 🙂

    Reply
    • Aniko says

      January 26, 2015 at 2:47 PM

      Thank you for hopping over to check this out!! Hope I inspired you to find a space in your home to replicate this project

      Reply
  30. sonja says

    January 26, 2015 at 1:56 PM

    This HACK is awesome! You said you used a lacquer coat to finish the wood. What does that mean? Can you please tell me the product’s name?

    Reply
    • Aniko says

      January 26, 2015 at 4:15 PM

      Sonja, Thanks for stopping by today and I am glad you like this HACK:-) It is a finish coat that would protect the wood from dirt and such. It is a Minwax- Lacquer from Home depot. They only had a quart size( which is a whole lot) and after researching more I found that other stuff (that home depot sells ) for less expensive would do the same thing. So if you ever need a finish coat on wood, just look for a finishing wax. Hope it answers your question. Have a great week!

      Reply
  31. rayana says

    January 26, 2015 at 4:31 PM

    GORGEOUS!!!

    Reply
    • Aniko says

      January 26, 2015 at 4:32 PM

      Thank you, Rayana!!:)

      Reply
  32. chris aka monkey says

    January 26, 2015 at 7:56 PM

    my word this is awesome sauce at it’s finest…. came over from little house of four… i will be back xx

    Reply
  33. Susan @ Oh My! Creative says

    January 27, 2015 at 5:47 PM

    Wow, that is gorgeous! I have a long dinning room wall that could use your skinny buffet. Pinning for sure…maybe I will try to create one too! Beautiful!

    Reply
  34. Elisha @ Pneumatic Addict Furniture says

    January 28, 2015 at 11:18 PM

    I love love love this! It doesn’t even resemble an ikea piece. I would love for you to come share this at the Outside [The Box] Link Party http://i1332.photobucket.com/albums/w610/PneumaticAddict/logo_zps2lmdsx2f.jpg.

    Reply
    • Elisha @ Pneumatic Addict Furniture says

      January 28, 2015 at 11:19 PM

      Ha ha, wrong link http://www.pneumaticaddict.com/2015/01/outside-box-link-party-20.html

      Reply
  35. Deb says

    January 29, 2015 at 8:43 AM

    This is amazing! Love the pictures above the buffet as well! I have to agree…seeing all the dining room looks, this has to be my fav!

    Deb
    @Seeking Lavender Lane

    Reply
  36. Patricia says

    February 1, 2015 at 11:17 AM

    This is really cool! I love to see how creative people are when it comes to IKEA hacks. Brilliant job! I love the result.

    Reply
  37. marksgrandma says

    February 4, 2015 at 6:32 PM

    Wonderful job. I need a piece in my very small living room. Do you think cabinets will hold my books.

    Reply
  38. Mima says

    February 5, 2015 at 12:33 PM

    This is gorgeous! Can you please confirm the how thick each of wood panels are? I would love to do this to our entertainment console in our living room.

    Reply
    • Aniko says

      February 5, 2015 at 9:26 PM

      Hello! The wood that we found was pretty thin, about an inch thick. Hope you can tackle this easy project for your entertainment console! Good luck!

      Reply
  39. Sherri aka The Junkin Chick says

    February 7, 2015 at 9:03 PM

    Love your style and how you transformed the buffet! I’m definitely going to have to “steal” your wonderful idea. Awesome job!!!

    Reply
  40. Tina B says

    February 9, 2015 at 2:46 PM

    This hack is AWESOME! I would love to put this treatment on a piece at my house. Tell me…since you added thickness to the doors, do the two middle doors bump the unit next to them when they’re opened?

    Reply
  41. Laetitia says

    February 13, 2015 at 11:49 AM

    WONDERFUL!! I love it. I am also a fan of West Elm but living in Europe i am not able to buy there, just day dreaming on internet 😉
    My only question is; do you have any problem opening the doors now, as you thickened them with the wood?

    i am really considering doing your project

    Reply
    • Aniko says

      February 13, 2015 at 12:36 PM

      Thank you so much Laetitia!The door got thicker of course and I can not open the doors all the way but I can still open them pretty wide and use the shelves normally.Can’t wait to see your project!Send it in my way once you are done!:-) Have a great weekend!

      Reply
  42. VintageBeachgirl says

    February 27, 2015 at 8:14 PM

    WOW!!! Saw this in an email from Knock Off Decor and I am sooooo impressed!! Yours looks better than the West Elm version to me…… (I like that it doesn’t have to be dusted under). Now all I have to do is look for some IKEA or similar cabinets/bookcases, already have some old cypress fence boards, woohoo!! Thanks so much for sharing this! Checking out your art & other posts next!

    Reply
  43. Bharati says

    March 10, 2015 at 6:03 PM

    Love it!! One of the Best Ikea hacks.

    Reply
  44. Anne says

    March 23, 2015 at 8:40 AM

    absolutely stunning! I love love love this look. Great job!

    Reply
  45. Bridget from Cali says

    March 25, 2015 at 5:50 PM

    Fabulous! Your West Elm inspired sideboard is a sexy big box hack! That rustic look is highly attractive and on trend! Your tutorial makes it seem attainable by ordinary folks who long for a touch of beauty in their home, but otherwise scared of DIY. In fact. this same treatment might just breathe new life in these hideous 80s style curio cabinets that I inherited that are structurally sound, but are simply no longer visually appealing.

    Also, on the subject of IKEA, it is constantly getting a bad wrap in the media. While not everything sold there is to my exact taste, many of their products have some good qualities and uses. I am pleased to read your testimonial on your dining room set. Whatever material it is made out of, I am glad that the table and chairs have withstood the test of time with a busy family!

    Reply
  46. Tara says

    April 9, 2015 at 1:31 PM

    This is the BEST IKEA hack I have ever seen! I am soooo doing this! Thank you! In with this. Your entire room is stunning. Loving the entire look!

    Reply
  47. Ali says

    May 29, 2015 at 5:34 PM

    First time here, came over from your links on gomi. Such a lovely diy! This looks easy and turned out fantastic. Very high end finish and of course I would love to have everything from your dining room also to go with it!

    Reply
  48. Mercedes says

    June 18, 2015 at 5:23 PM

    What dining table is that?

    Reply
    • Aniko says

      June 23, 2015 at 11:10 PM

      It is from IKEA but many years ago. Not sure if they still make it.

      Reply
  49. Jackie says

    June 30, 2015 at 6:27 AM

    What a FANTASTIC Ikea hack…just GORGEOUS! Are the snake plants, on either side of the buffet, real? If not, where did you find them?

    Reply
    • Aniko says

      July 1, 2015 at 6:13 AM

      Thank you Jackie! Well, let me just tell you that I don;t have a green thumb…I literally kill every single plants that comes into my home but these snake plants are REAL and still alive as they really don’t need much attention.!!Home Depot is your store:-) Xo

      Reply
  50. När Annie fotograferar i Kalifornien says

    August 12, 2015 at 3:24 PM

    This might be the best IKEA hack I have ever seen! So easy and so brilliant!!!

    Reply
    • Aniko says

      August 12, 2015 at 3:32 PM

      Thank you so much! I heard the exact same sentence from many people…I start believing that I created something awesome;) xo

      Reply
  51. npk says

    August 21, 2015 at 11:02 AM

    Awesome!! you are just brilliant 🙂 i just have one question for you ,do you have problem opening the door of the cabinet where the two cabinets meet because of the depth of the wood panel??

    Reply
    • Aniko says

      August 21, 2015 at 11:05 AM

      Thank you so much! ;)The door got ticker and heavier indeed, but I can open the doors wide enough to get things in and out. It works for me and I LOVE the look;) have a great weekend!

      Reply
  52. Mimi says

    November 14, 2015 at 3:12 PM

    It looks WONDERFUL – great job!
    My question: did adding the wood to the doors affect the way they opened? Did you have to adjust the hinges or anything to allow the doors to open?

    Reply
  53. Mimi says

    November 14, 2015 at 3:27 PM

    Your “snake plants” are what I always heard called “mother-in-law’s tongue” LOL. They are Sansevieria — a GREAT indoor plant for low light conditions And they “drive on neglect” — so, except for over-watering, it’s hard to kill them; they adapt well to dark, dry, cold, & drafty conditions that you find in many homes & apartments.. They give a great vertical element to decor – as they do in your dining room.
    Great choice!

    Reply
  54. Cabidor says

    February 4, 2016 at 1:47 AM

    Great design! I never thought unpainted woods would still look neat in the house. Thanks for sharing this!

    Reply
  55. Maybel says

    March 1, 2016 at 3:59 PM

    Wow!!!! I love what you did to get this look. I actually own the reclaim wood table and bench i bought it at west elm over a year ago and I have been looking for a sale to buy the buffet but this is a splendid Idea!! I really love this. Thank you for sharing I may just dare myself to do it.

    Reply
  56. Kelly says

    April 5, 2016 at 4:48 PM

    What shelving units from Ikea did you use? Thanks!

    Reply
    • Aniko says

      April 5, 2016 at 10:58 PM

      Hello! I used the BESTA wall cabinets. http://www.ikea.com/us/en/catalog/products/S49046426/ best-Aniko

      Reply
  57. Nancy says

    July 1, 2016 at 2:34 PM

    Love it! Thanks for sharing!

    Reply
  58. Marie C. says

    September 5, 2016 at 9:46 AM

    I love it!!!. Looks wonderful. I might try it myself. I have a question; what size of wood screws did you use?. Also did you do it from outside in or the other way around?.
    Thank you!
    Marie

    Reply
  59. Ileana Perez says

    September 6, 2016 at 3:29 PM

    Hi Aniko!

    This is amazing.

    May I please ask what type of wood that is??? Is it pine or oak??

    I want that exact look for a media stand me and my SO are working on currently.

    Thank you kindly,

    Ileana 🙂

    Reply
  60. Nancy says

    November 5, 2016 at 11:51 AM

    Just seeing your AWESOME hack! I do a lot of work with Ikea merch… Quick question… by adding to the depth of the door, do you have first open the end cabinet to be able to open the center cabinet? Seems like the “zero clearance” hinge is only designed to rotate in the normal depth of the single door thickness. I’d like to try this on our own Besta cabinets that we already have, so this info would be very helpful. Happy Hacking. Nancy

    Reply
    • Teresa says

      May 7, 2017 at 4:44 PM

      I was wondering this too!

      Reply
  61. Hannah says

    December 27, 2017 at 2:51 PM

    We’re attempting this. Did you have to sand your pallet boards? We went and picked some up from a pallet yard like you suggested but they are in pretty rough shape. Very weathered.

    Reply
    • Aniko says

      January 31, 2018 at 9:59 AM

      Our boards were nice (er) but we still sanded it off a little bit. It won’t hurt! Have you started on the project? I can’t wait to see it!

      Reply
      • Hannah says

        February 1, 2018 at 10:48 AM

        we have. However, we customized it a bit and my hubby is going to build the white cabinet. We needed it to be a little longer and deeper than what we could find at Ikea. However, it’s been so cold here in WA that it’s taking a little bit longer.

        Thanks for the feedback. I’ll let you know when we get it accomplished.

        Reply
  62. Carolyn Beard says

    January 31, 2018 at 12:55 PM

    Where did you get your chair rail? Did you make your own?

    Reply
  63. Pınar says

    September 4, 2018 at 12:44 PM

    The best Ikea hearing I’ve ever seen. I will try. Thank you for sharing.

    Reply
  64. Ron says

    January 27, 2019 at 3:09 PM

    Hello ,

    This project gives an amazing result. Congratulations.

    What is the total thickness of the doors uncluding the wood? How did you solve the hinges problem due to the thickness of the door?
    Ikea standard hinges are not compatible with the additionnal thickness.

    Thanks in advance for your help!

    Reply
    • Aniko says

      January 29, 2019 at 7:11 PM

      Hey there! The thickness of the door is basically doubled. The wooden boards are the same thickness as the door. I have to be super honest, I did not change the hinges but that should not stop you changing them. My hinges are still doing great.:-) let me know if you find a great solution for the hinges!

      Reply
  65. Sadie says

    September 9, 2019 at 9:52 PM

    Hello Aniko,

    I’d been looking for a rustic looking buffet for long and when I came across your profile and fell in love what you had done! I am not handy at all, so had to engage my brother in law and my husband to do all the craft in a week long project!
    We just assembled the doors and the result looks phenomenal! T o problems we have encountered though:
    1) doors became so heavy that the unit is falling forward, so we have to attach the unit to the wall (we were using legs)
    2) the thickness of the new doors does not allow one of the doors that has an adjacent hinge of the next unit to open. Did you by any chance cane across this problem? I think we have to put some space between the two units for the door to open conveniently. Could you please let me know what you think?

    Thanks again for the great idea and the details you shared!

    Reply

Leave a Reply Cancel reply

Your email address will not be published. Required fields are marked *

Recipe Rating


Are you looking for something??

HEY THERE!

Ancsi

My name is Aniko!  A mother to two. A loving wife. A passionate photographer. A lover of all things creative. An artist and a dreamer. I am so happy to have you here and I truly hope you will leave with lots of inspiration and I hope you will return for more!

AS SEEN ON

featured on

FEATURED IN

betterhomes and garden

RECENT POSTS

NEWSLETTER

Sign up to get e-mail updates!

Archives

YOU MIGHT ALSO LIKE

BEDROOM REFRESH WITH BASSETT’S NEW MODERN Collection

FREE WATERCOLOR DESKTOP SCREENSAVER – FEBRUARY

Peppermint Snow Dream Ice Cream

PEPPERMINT SNOW DREAM ICE CREAM

My new kitchen addition: Delta Esque Collection Faucet with ShieldSpray Technology

FREE WATERCOLOR DESKTOP SCREENSAVER – JANUARY

Copyright © 2021 · Savory theme by Restored 316

Copyright © 2021 · PLACE OF MY TASTE · ALL RIGHTS RESERVED

Sign up to get my weekly e-mail updates!
Once you signed up you will receive a FREE copy of my home styling mini guide!
Your information will *never* be shared or sold to a 3rd party.
Sign up for the Place of My Taste Newsletter and receive freebies and great home decor tips in your inbox!
Your information will *never* be shared or sold to a 3rd party.