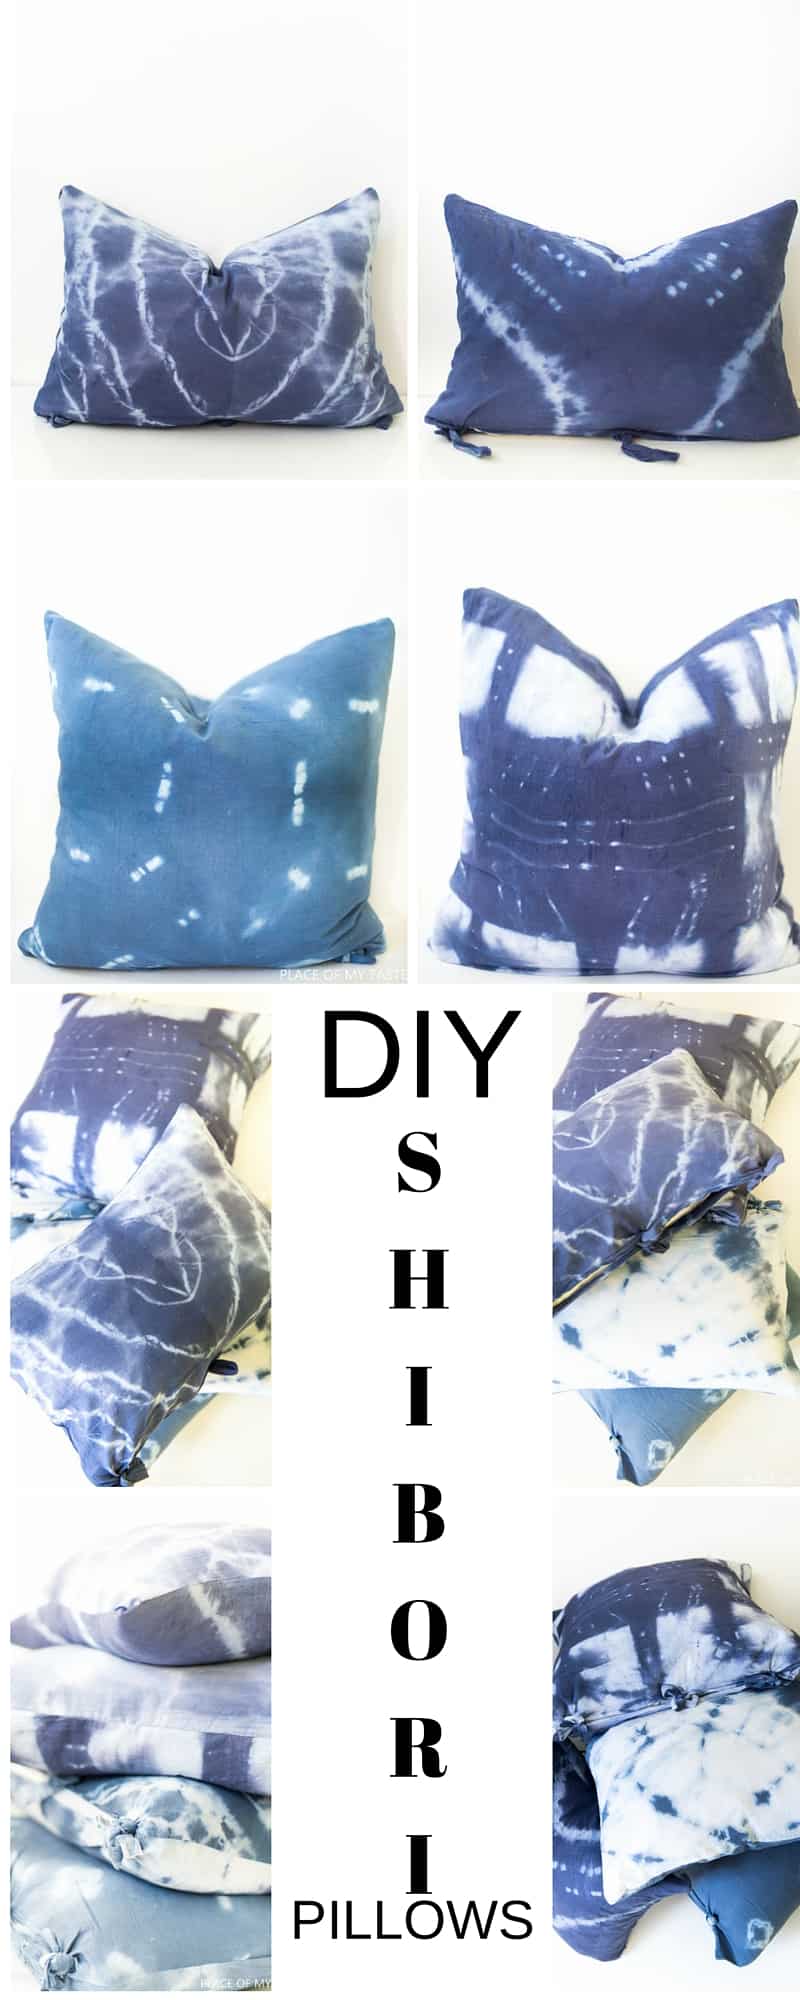
SHIBORI TIE DYE PILLOWS
Time to make some shibori tie dye pillows, my friends!
Shibori pillows are so much in trend now, and I can see why. They are simply fun, funky and add such character to a home. Trying the shibori tie dye pillows has been on my list for quite a while now, but I never got to it until this past weekend. Shibori is a Japanese dyeing technique that involves twisting, folding the fabric and dyeing it in indigo. There are INDIGO DYING KITS that you can purchase, but I did not use one. I used a simple RIT dye that I purchased at Michaels. I used two different colors. You need to dedicate some time to fold and dye your fabric. I did the whole process outside on a sunny Sunday as it can be a little messy if you do in indoor. Once I was done with my dyeing, I let these pretties completely dry outside from the breeze. ( it took about 15 minutes)

So are you ready to make some SHIBORI TIE DYE PILLOWS?
Here are the materials you will need to start the project:

- RIT liquid dye – NAVY BLUE ( for the darker pillows, it creates a nice indigo look)
- RIT liquid dye – DENIM BLUE ( for the lighter pillows)
- 2 buckets
- Flour sack towels
- Rubber bands
- GLOVES
- Wooden sticks
- Clothespins
- Stick to stir
- Foam board ( cut to small squares for the square pattern pillows)
TIPS BEFORE YOU START:
** Be sure to wear gloves**
**Indigo will leave you with visible bright spots, so if you get into dyeing inside of your home, make sure you prepare your work surface before start dyeing**
I used flour sack towels ( I got 14 in a pack for $8), and they worked perfectly. The best material to use for dyeing is cotton.
You will need to dedicate some to fold and bundle your fabric. These folds will create the unique patterns on your towels as folding and twisting will prevent the dye to reach certain areas on your fabric.
I tried eight different variations, but the limit is endless. I was delighted with my patterns so I will show you how I folded and twisted my towels to create specific patterns.
RINGS pattern
Lay the towel flat.
Pinch the fabric and pull upward at every 2 inches. I made four rows up and four rows across. Secure the fabric with a rubber band. Repeat it as many times you wish.
 SPIRAL pattern
Lay the towel flat.
Pinch the fabric in the center.
Start twisting the fabric in a circular motion and continue until all of the fabric is in a spiral shape.
Secure the spiral with three rubber bands.
3.SQUARE pattern
Lay the towel flat.
Fold the towel from 2 sides to the center. Then fold towel from the other two sides to the center
Add wooden sticks ( I added three sticks per square)
Then fold again.
Add cut foam boards then fold fabric again. Secure the fabric with rubber bands.

4. CIRCLE pattern
Lay the towel flat.
Roll the towel up.
Secure rubber bands on four different spots. Be sure that the rubber bands are tight.

5. BULLS EYE pattern
Lay the towel flat.
Pinch the towel in the middle and secure it with a rubber band.
Pinch the fabric together into the four corner and as you pinch each corner add a small wooden stick then pinch it together with a clothespin. Repeat it to each corner.
Then secure a rubber band to each corner.

6. PINCH pattern
Lay the towel flat.
Fold it in a triangle shape.
Pinch it with clothespins.

7.FUNKY pattern
Lay towel flat.
Roll fabric and secure the towel with a rubber band in the middle.
Tie a knot in the middle.
Then pinch and secure the towel with rubber bands in 4 different spots.
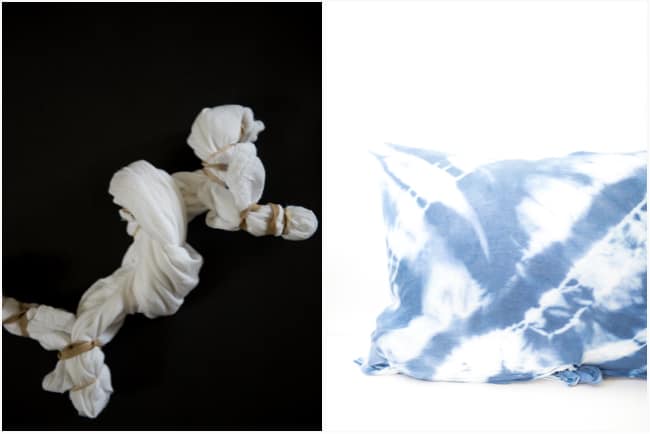
8. SHIBORI pattern
Lay towel flat.
Using a stick roll the fabric onto the stick and secure with rubber bands.

As I said, I was just playing with the folds and twist and I LOOOOOVE the results.
STEPS:
- Prepare your dye according to the description on your RIT bottle. I made two different color ( using the two color RIT DYE I mentioned above)
- Once you have your textile or towels folded and twisted make them vet.
- Put your we textiles into the buckets and stir them well making sure that the dye gets to everywhere on your textile.
- Leave the fabric in the dye for at least 10 minutes but for darker results you should leave it longer.
**Tip: If you would like to have an ombre look, leave one end of the fabric sitting in the dye first, then gradually let the fabric soak in the dye all the way.**

( my little helper had a good time working with mommy:-))
After the textile was thoroughly soaked ( for about 10 minutes), I took them out from the bucket and rinsed them with water. I took off the rubber bands and let my towels dry outdoors.

Oh, how GOORGEOUS!!
Then I grabbed my sewing machine and made some pillows out of them. If you don’t have a machine, you can totally sew the towels together with a sewing needle, too!
I just used my old pillow case, placed them on the top of my towels and cute them around, leaving an inch extra on each side.

To make my life easier AND to make the pillows two-sided ( I made 8 towels and made 4 pillows – so I have 8 different designs ) I did not make a zippered pillowcase, but I made little fabric stripes, and I stitched three stripes on each inside of the fabric on the opposite side to be able to tie a knot at the bottom of the pillow:-)

Then I tied the knots and TADA!!

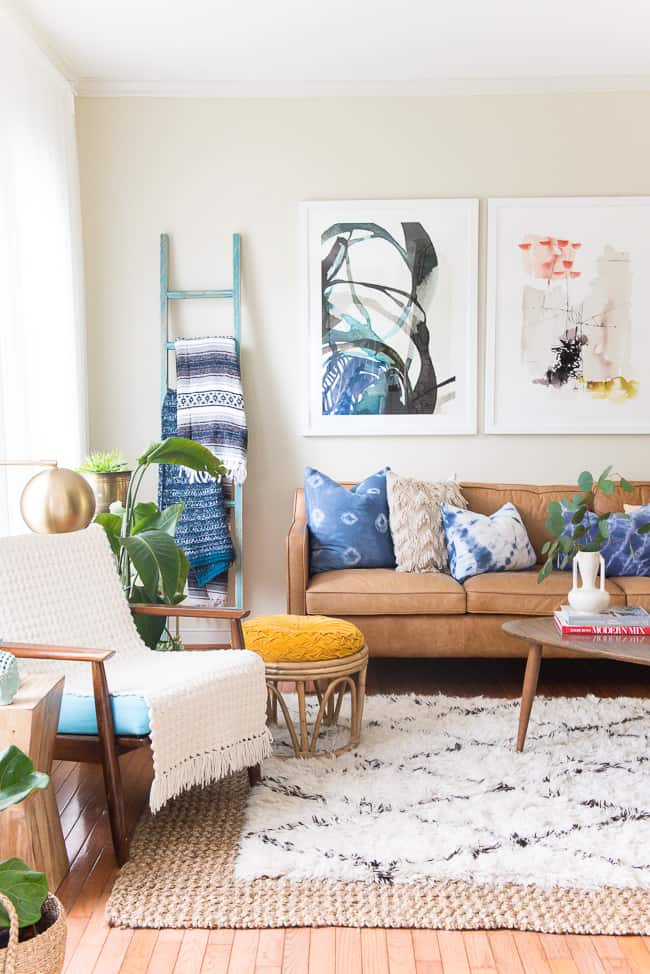
I am delighted with these pretties!! So fun!


They are smiling back at me from my comfy leather sofa🙂
Are you going to make some SHIBORI TIE DYE pillows? You will love them, too, I promise!
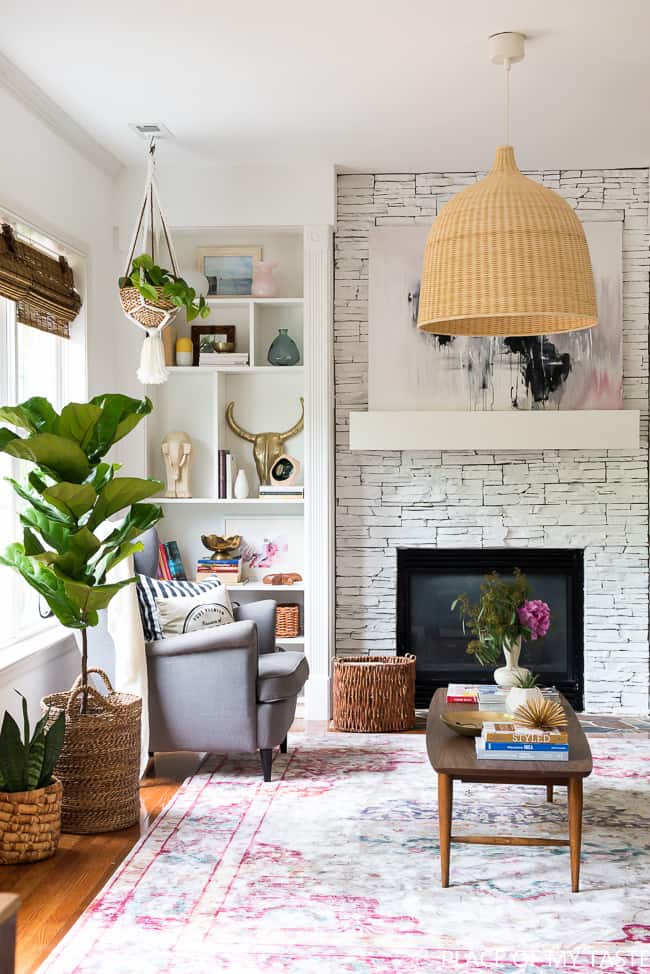
Before you leave be sure to check out my full SUMMER HOME TOUR if you have not seen it already!
Thanks for visiting my friends!
You might also like:
Cheers,
Aniko
I love these pillows! :)) Another idea – you can use simple bleach for the same effect 🙂
I love your DIY project!!!! I’m featuring it on my blog post today! I’m including great globally inspired projects with red, white, and blue. http://casawatkinsliving.com/2016/07/ten-great-global-red-white-and-blue-diy-projects/
Thank you for the feature, friend! I should say that those pillows are one of my favorite projects:-) Xo
How neat! I love tie dye! The monochromatic color scheme gives it a fun vibe while still staying modern 🙂 Thanks!