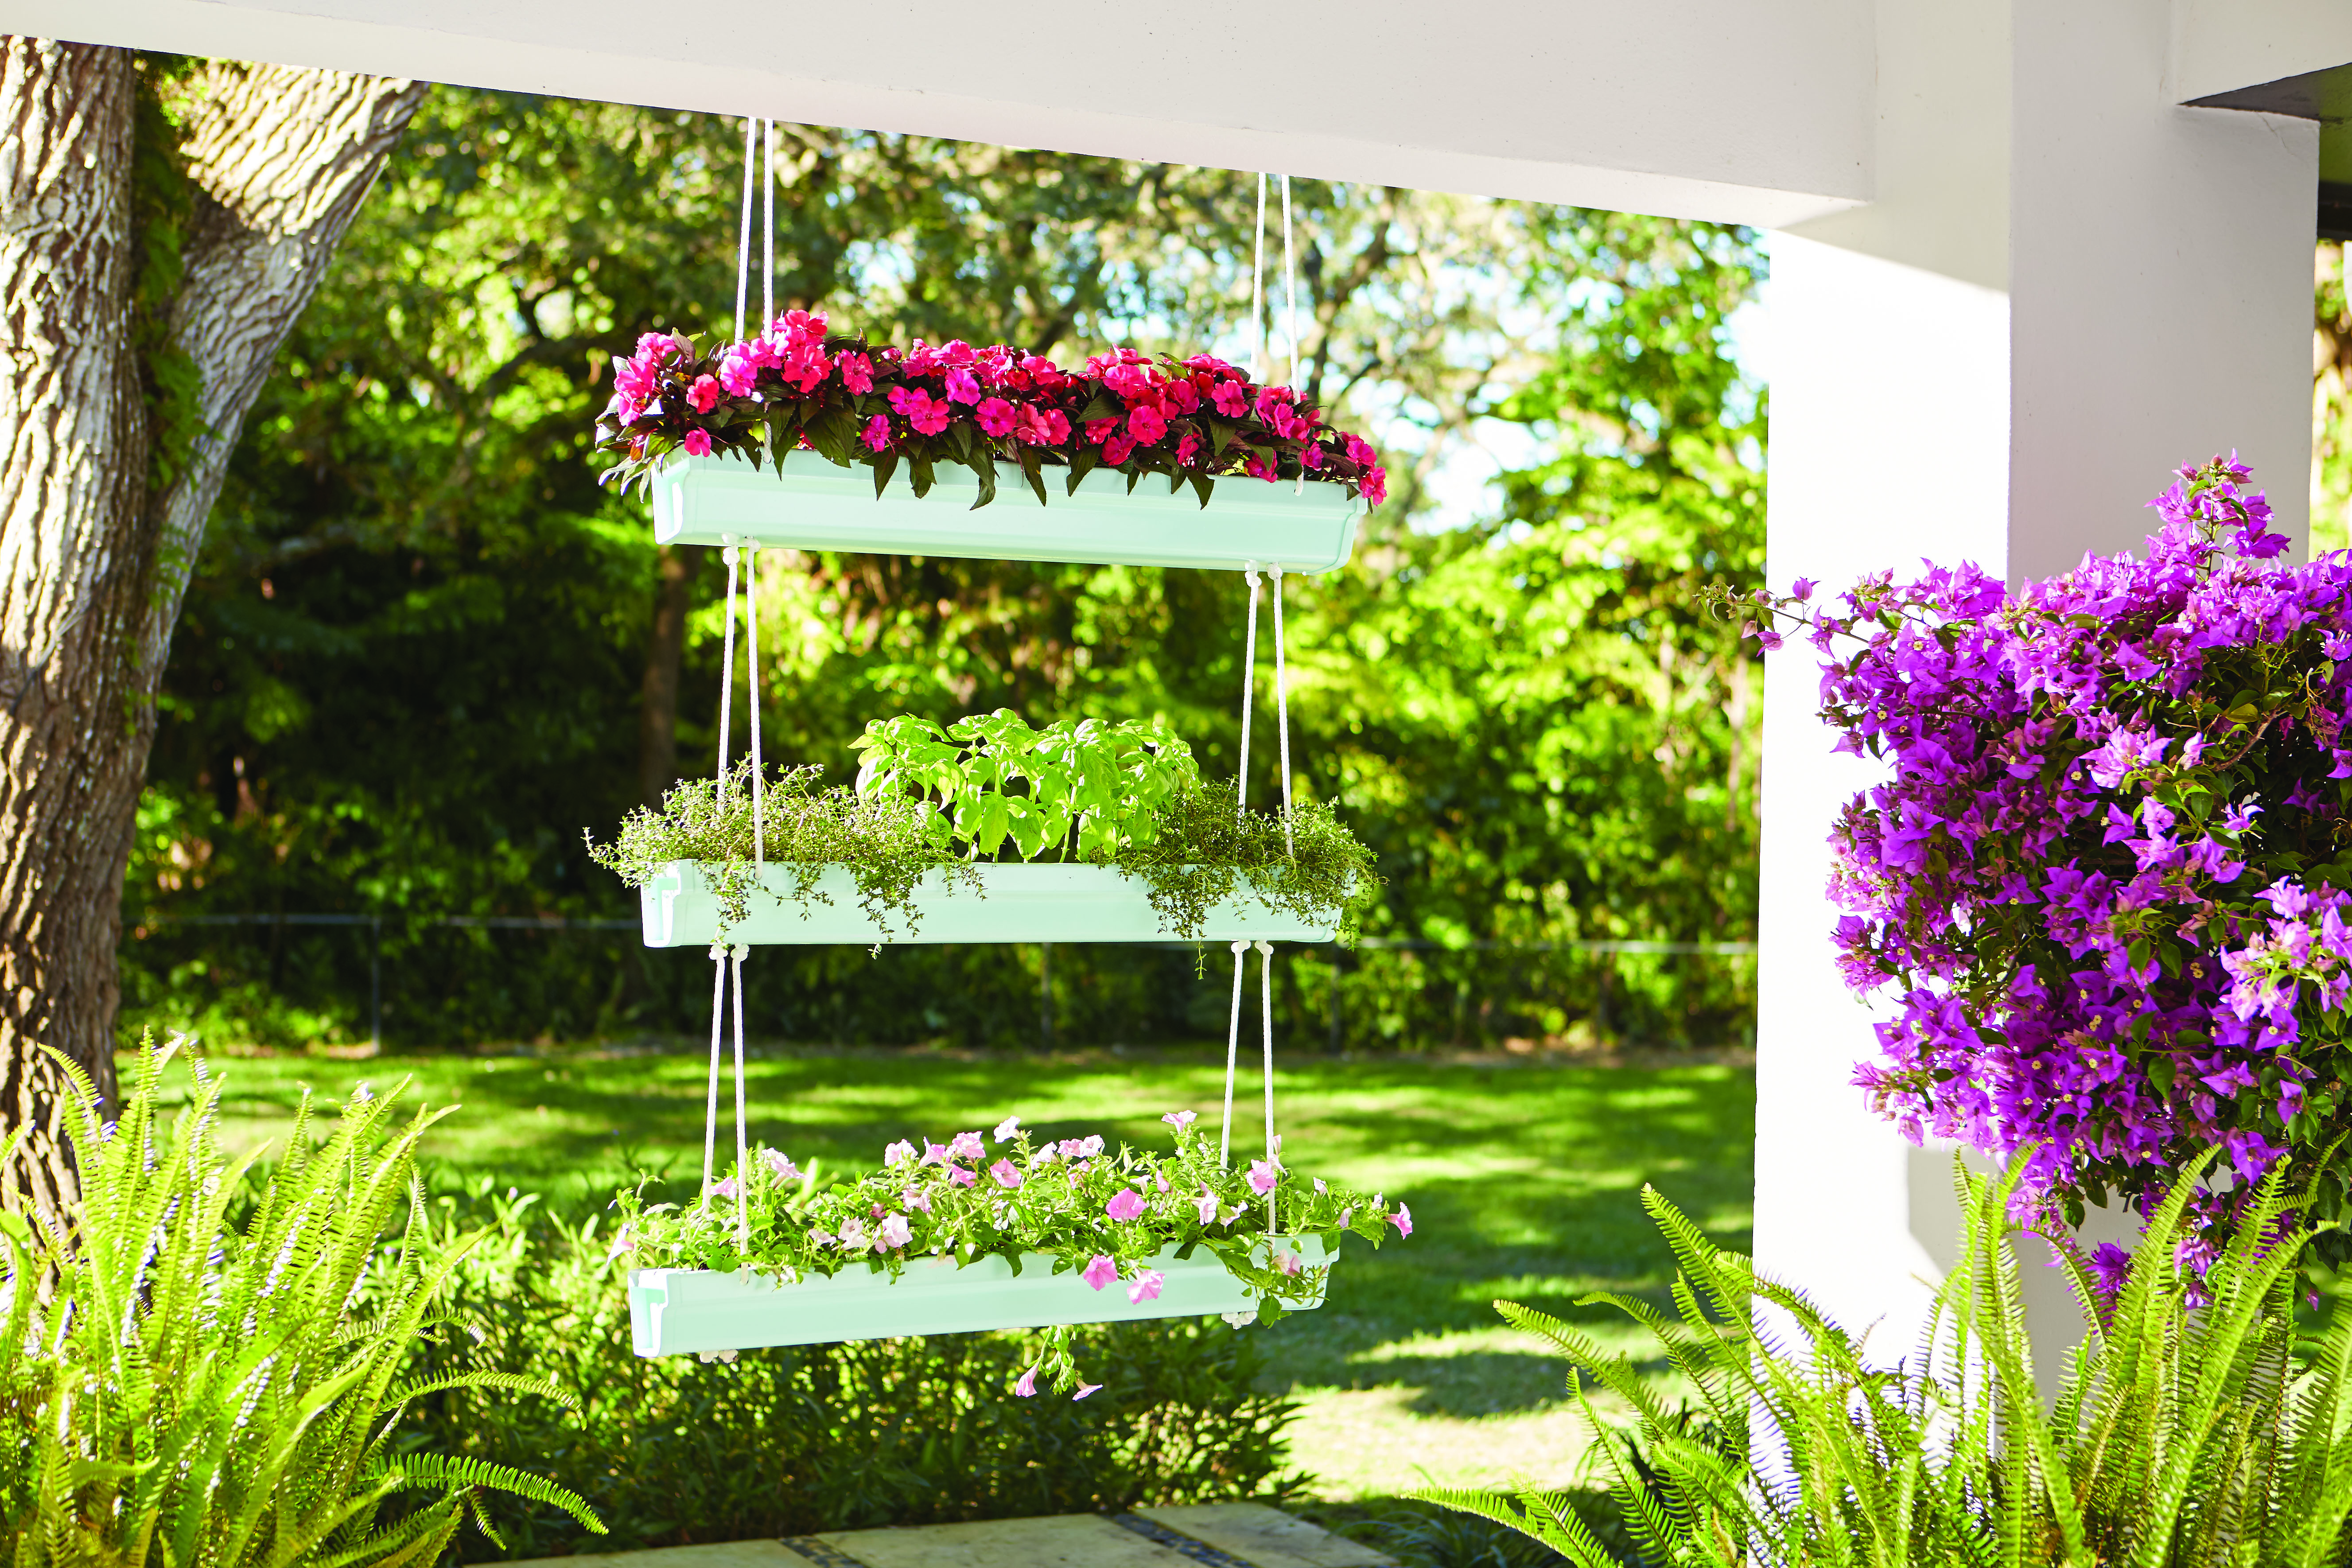
DIY HANGING GUTTER PLANTER

I am so excited to share this fun project with you all today!
If you remember, I posted about our #DIYworkshop last Monday, and I hope you all signed up to make your own DIY Gutter hanging planter at your local Home Depot! So last week I shared an image of the planter that I had given to recreate.
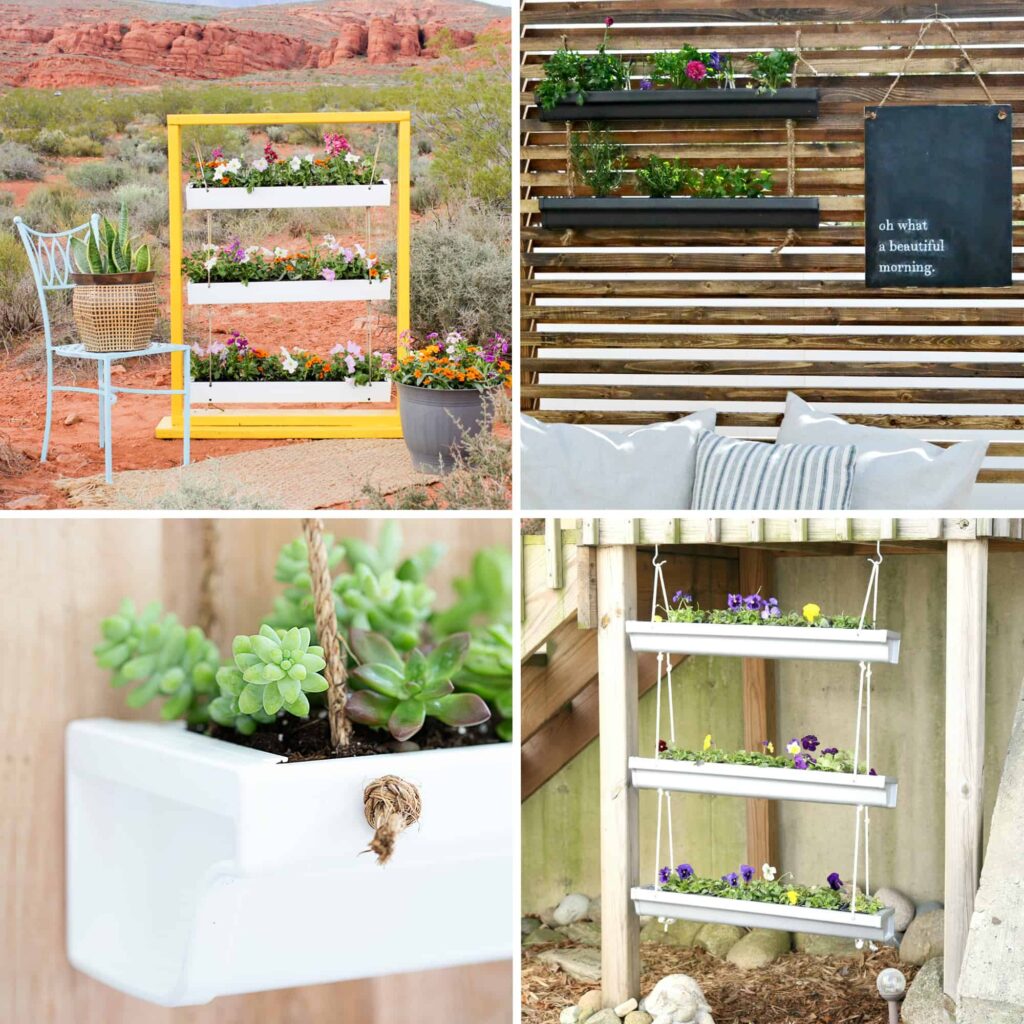
 Many participant bloggers recreated the project and put their own spin on it. So fun! I LOVE these challenges as I can start my creative mind spinning. I also love that I get to see many different versions of the same project. Each and every one of them is super creative, and it’s sprinkled with a personal touch. My initial idea was to something else ( psss… I will share that idea later🙂 but then the herb planter was born in my mind. Exactly the way I made it.
Did you guys know that you can use gutter to create a hanging planter? I never thought of that fantastic idea and man, what a great, easy, practical and inexpensive project idea it is!
If you want to make your own GUTTER HANGING PLANTER, mark your calendar and visit the DIY Workshop at your local Home Depot store.
The Home Depot #DIHWorkshop
Thursday, April 21, 2016
6.30.p.m. to 8:00 p.m.

The Home Depot offers Workshops at all of their locations for do-it-yourselfers of all ages and experience levels. There are three types of Workshops offered – Do-ItYourself (DIY), Do-It-Herself (DIH) and Kids. Customers can learn how to build décor projects, how to make easy home repairs and how to operate tools through demonstrations and step-by-step instructions.
And now let me show you how I made this awesome hanging planter!
MATERIALS
- • 1 – 10 ft. White Traditional Vinyl Gutter
- • 3 Sets – White Vinyl K-Style End Cap Set (2-pack)
- • 30´– 1⁄4 in. x 1 ft. White Braided Nylon and Polyester Rope
- 3/8 inch round wood dowel
- Wood stain to stain the dowel
- Sharpie pen
- Steel Screw-In Plant Hook
TOOLS
- • Heavy Duty Scissors or Box Cutters
- • 3 /8˝ Drill Bit
- • Drill
- • Jigsaw
- • Measuring Tape or Carpenters Square
- • Pencil
- • Safety Gloves
- • Safety Glasses
Steps:
- Measure and mark (3) 30˝ sections from the 10’ gutter and the (2) 5´ and (2) 8′ sections of the rope. ( The reason I cut two pieces of rope longer ( one on each side) to create the top three above the wooden dowel.
- Cut (3) 30˝ from the 10´ gutter using the jigsaw. Then cut the rope using heavy duty scissors or a box cutter.
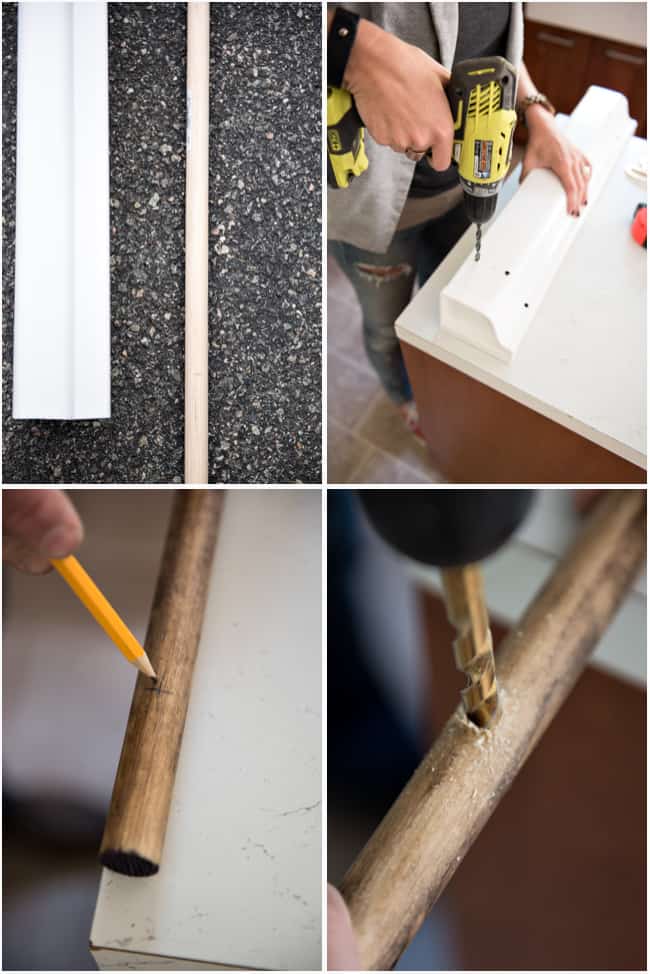
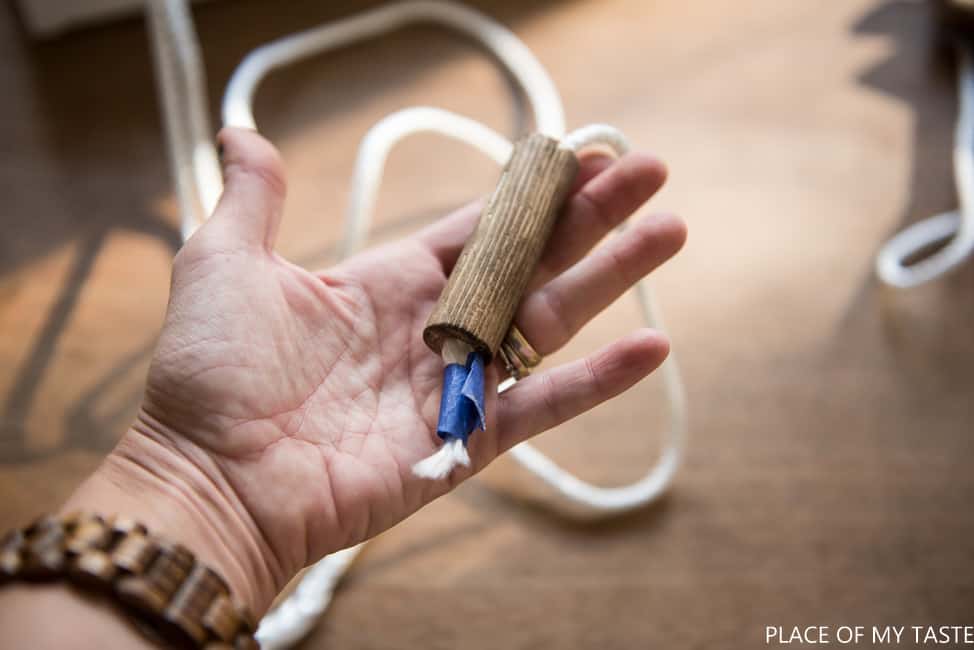
- Cut your dowel pieces. I cut the long upper piece to 30″ long and I cut the small wooden pieces to 3″ long. Drill a hole on the small pieces( big enough hole to fit TWO pieces of rope through).
- Stain the wooden dowel and it dry. ( I love DARK WALNUT stain the most)
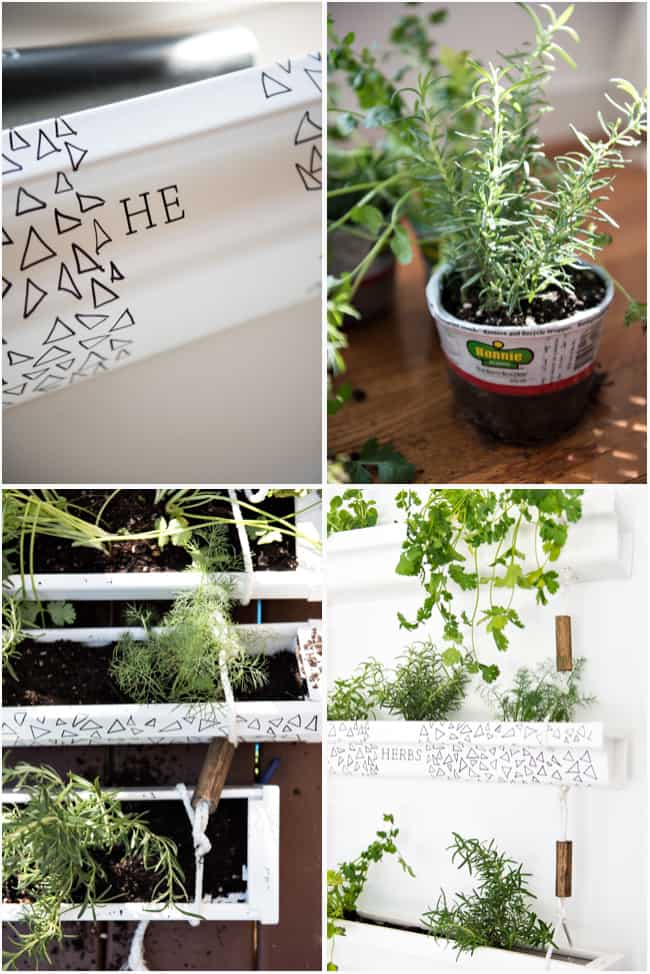
- Draw you designI (I drew simple triangles) on any or all gutter pieces using SHARPIE PAN.
- Turn all gutters upside down. Measure and mark 3” in from the short side and ½” in from the long side on all four corners of all three gutter sections. Next, turn all gutters right side up. Measure and mark 3” in from the short side and ½” from the long side on all four corners of all three gutter sections. You should now have two marks on each side of all three gutter sections.
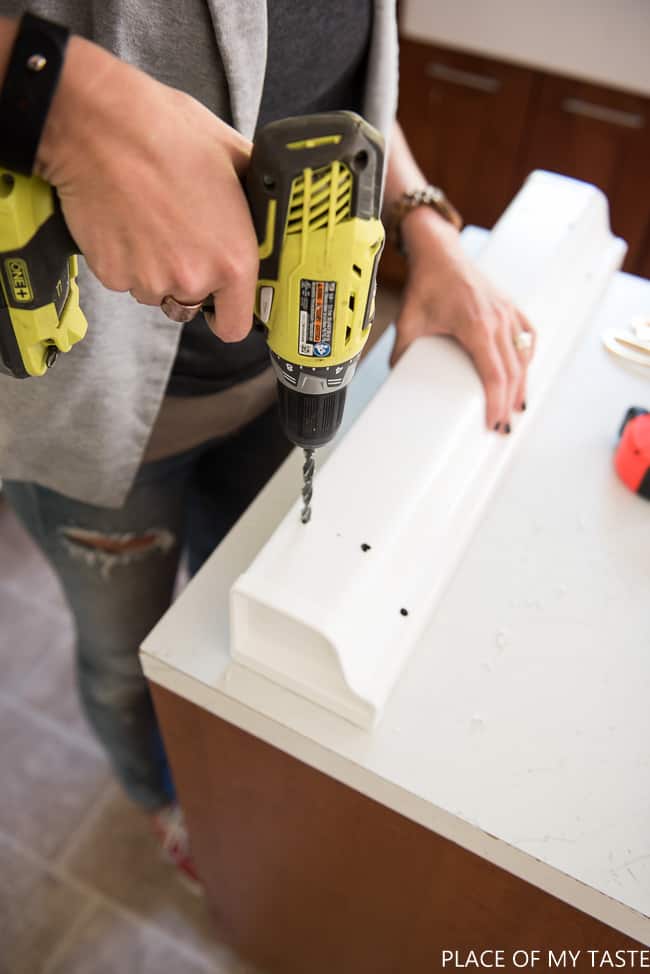
- Using a 3⁄8˝ drill bit and drill, drill holes where the marks were made. There should be four holes in the bottom and two holes on both of the top, outer sides of all three gutter sections. TIP: Depending on the type of plants used, you may need to drill several very small drainage holes on the bottom of the gutter section to allow drainage
- Place all White Vinyl K- Style End Caps on the ends of the three gutter sections.
 9. Tie a knot at one end of the both 5´L rope and both 8′ L rope. Thread the unknotted end of the ropes through the bottom holes of the left gutter section and then out the hole in the side. Repeat threading up through the bottom hole and out through the side hole on the next two left gutter sections. Be sure to measure 6-12 inches ( depending on the length you need between the gutters) of slack and tie a knot right above your first gutter, then pull both of your rope through the wooden dowel then tie a knot again before you push the rope through the second gutter. Repeat the same thing between the second and third sections. Once all three-gutter sections have been threaded, tie a knot and push the rope through the long wooden dowel then tie a not again.Once the rope has been pushed through the hole Repeat these steps for the right side of the gutter with the other 10´L rope. TIP: Wrapping the end of the rope with tape makes threading easier.
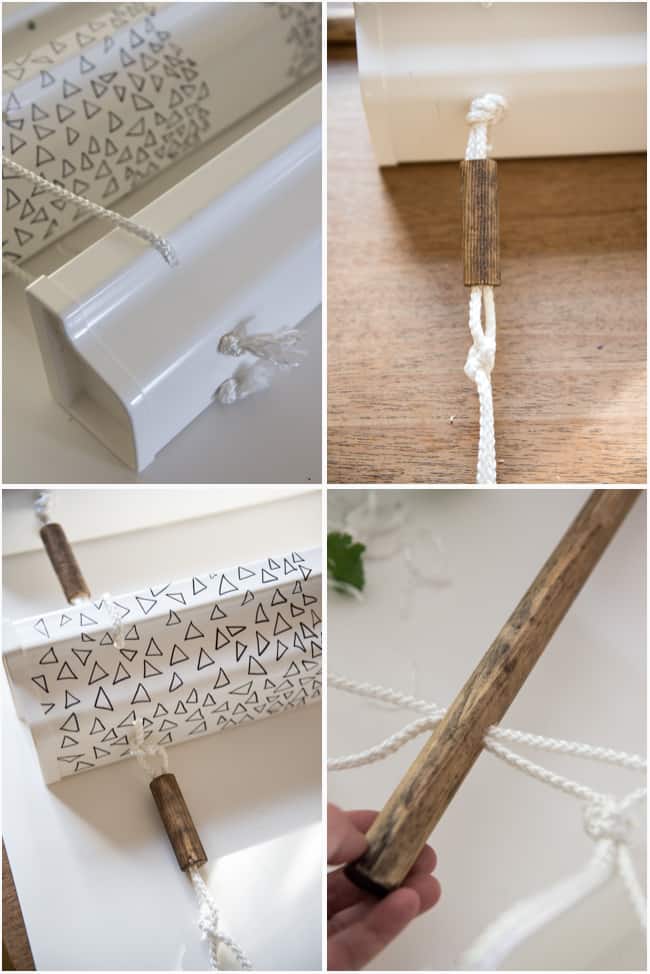
Once all three-gutter sections have been threaded, tie a knot and push the rope through the long wooden dowel then tie a not again.
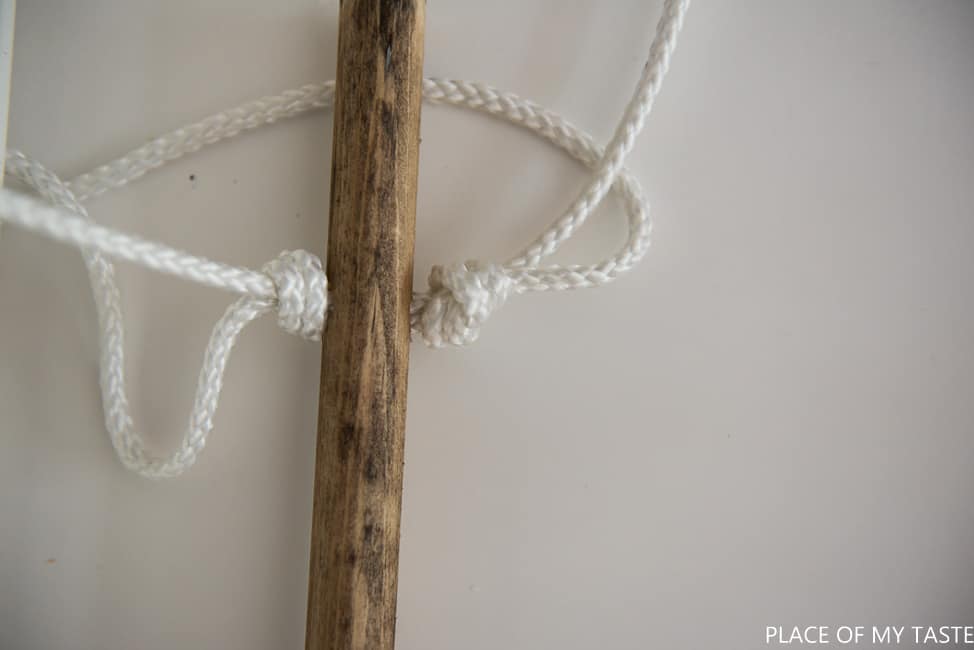
TIP: Wrapping the end of the rope with tape makes threading easier.
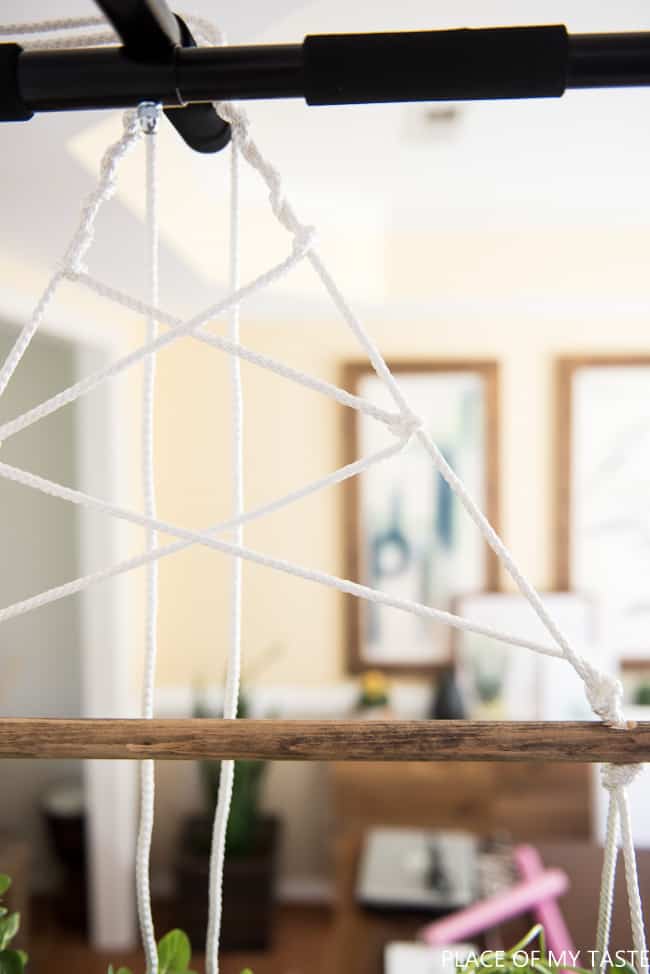
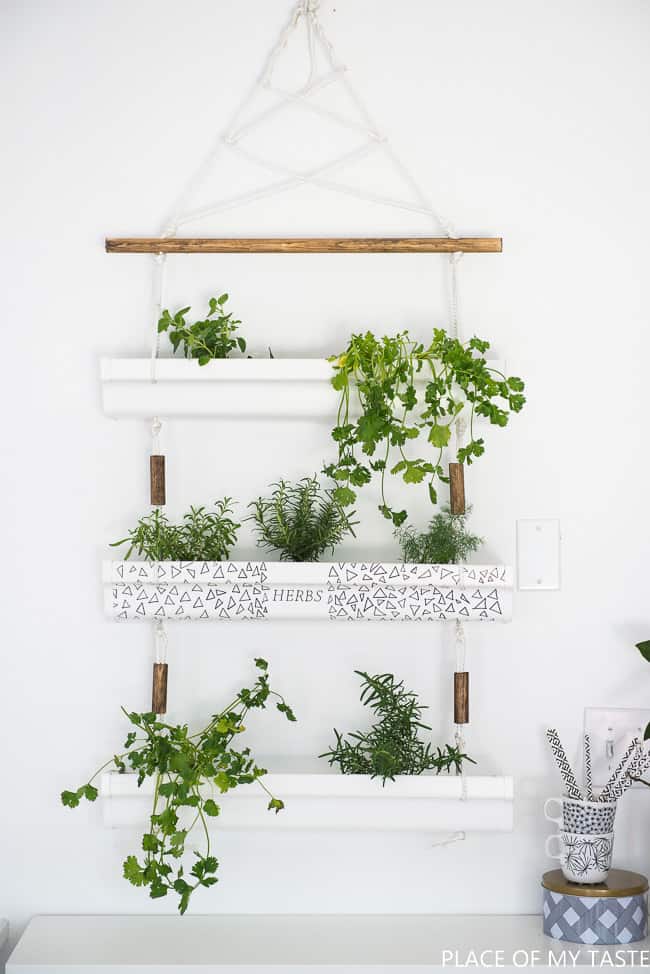
Once you are done with threading the rope through you will have two longer and two shorter pieces of rope on the top of your hanger. Tie a knot using the shorter pieces. At that point, I hung the planter on something high ( I used my hub workout thing:-)) as it was much easier to create the design with the ropes on the top part of the hanger that way. I pulled the longer piece across and I tie a knot, then I repeated two more times, pulling the rope across. I repeated this with the other longer rope as well. Then at the top, I pulled the rope all the way to the top, and I tie a knot. Cut the excess of the rope.
Then you can plant your herbs, flowers, succulents, fake plants, real plants or whatever you want to this awesome hanging planter.
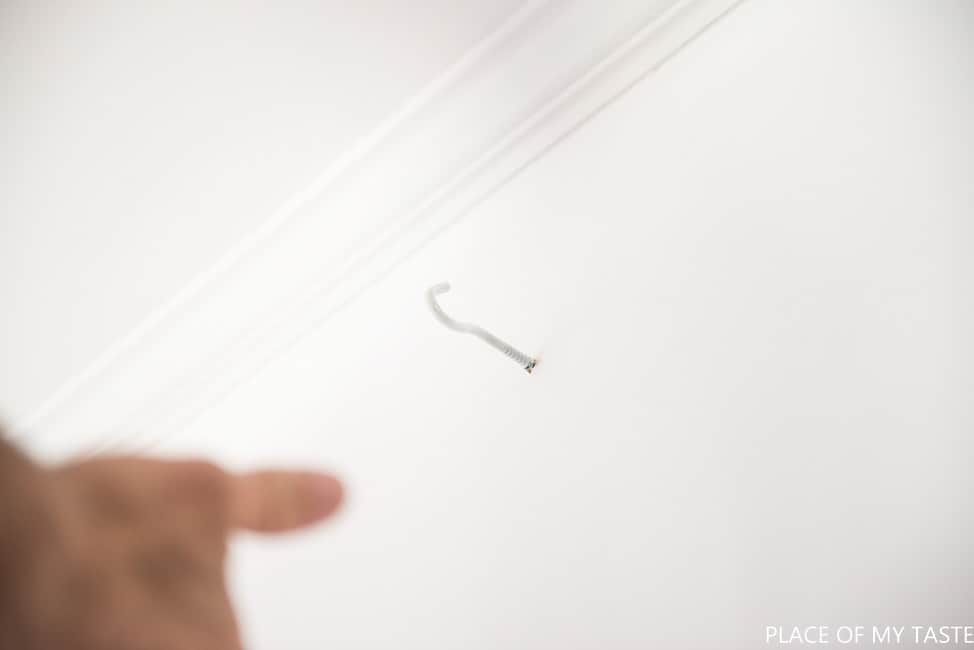
Secure a Plant Hook into a support where you intend to hang your garden.
For now, I planted herbs in the planter. I will see how my herbs going to do in there. Herbs need lots of sunshine so I might end up hanging this planter outdoor once I clean and refresh my back patio. 🙂
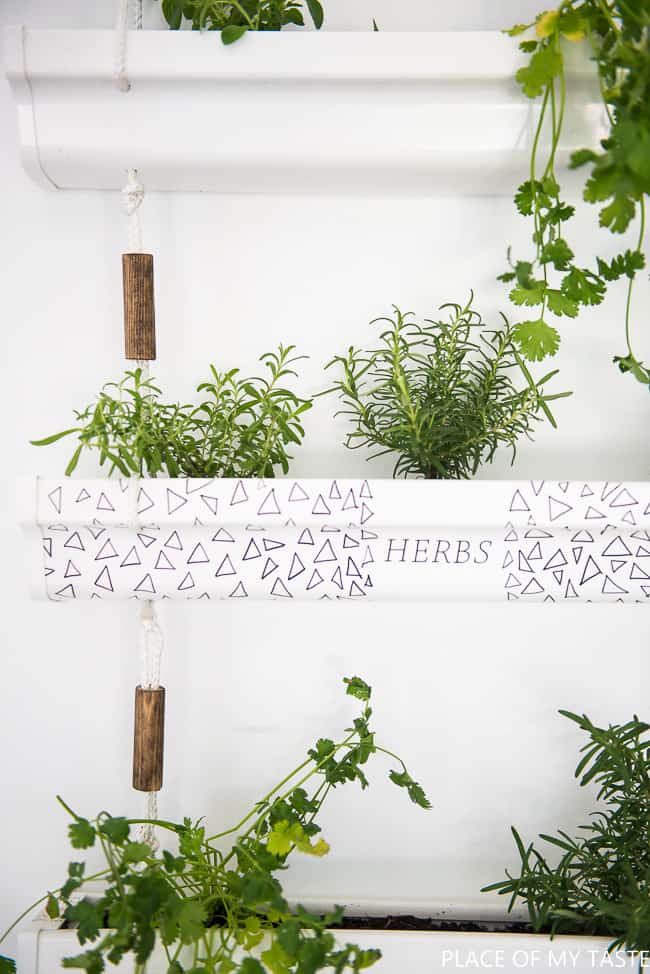
The word HERB was cut with my Silhouette machine.
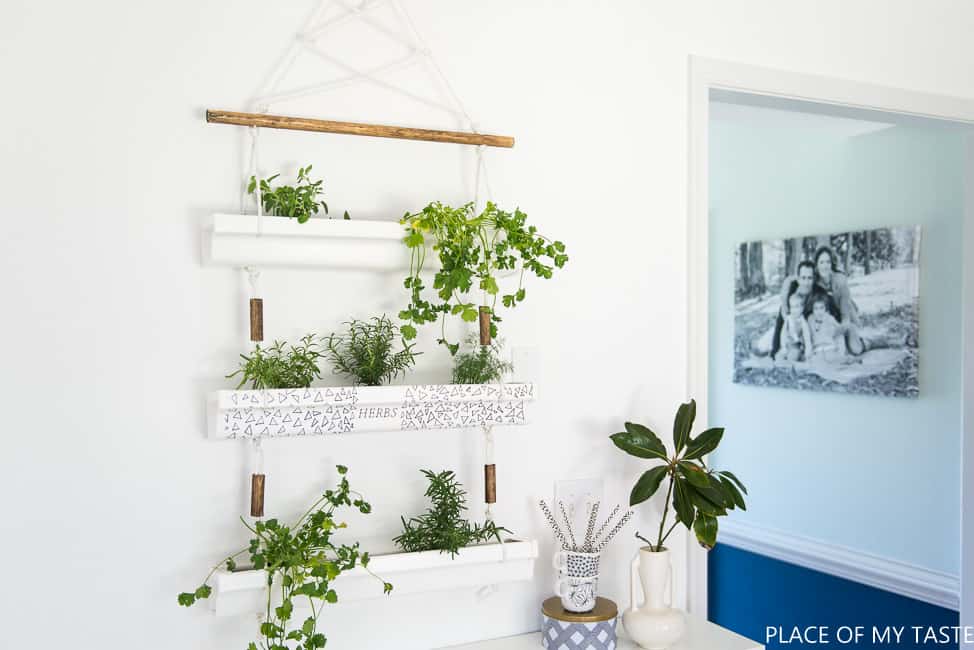
So what do you think? Isn’t it a cool and unique piece?? I love how it turned out!
To see our fun team’s take on this project, visit the links below
 Hawthorn and Main | My Fabuless Life | Live Laugh Rowe | House by Hoff
And there is more to see!
The Glam Farmhouse
Boxwood Avenue
Our Vintage Farmhouse
VISIT THE HOME DEPOT website and REGISTER NOW!
* The Home Depot is partnering with me to participate in this #sponsored Workshops Program. As a part of the Program, I am receiving compensation in the form of products and services, for the purpose of promoting TheHome Depot. All expressed opinions and experiences are my own words.
Have a fabulous week!
Aniko


This is by far my favourite among all those amazing hanging planters you guys did this month – so clean and pretty. 🙂
I just had this idea in my mind ad it turned out exactly how I pictured it. Thanks for hopping over! Best
Oh girl I LOVE it! I so wanted to try adding copper touches the way you added the wood, but then I panicked when I couldn’t get the rope to be even. I should have cut individual pieces! Yours turned out amazing!!!
Thanks, girl! It took a little balancing to even out the ropes but at the end it turned out just perfect:)Take care!
Love how you turned this into an indoor piece. The little wooden pieces fit perfectly with the white and green.
Thanks Betty! I love it ,too!
I love this! At first I thought the triangles were a part of some fabric but how awesome that you just drew them on. This may just be my favorite hanging planter!
Ha. And that was the easiest part of the project:-) You gotta love simple things! Have a great day, Katie!
Love how this turned out!
Thanks Amy! I can’t wait to cook with my fresh herbs!:-)
This turned out amazing Aniko! I love the added wood pieces, so pretty!
-Shonee
Thanks so much, Shonee!Xo
LOVE! The wood and white! And the way you hung it. All of it!
Glad you like it, Jenn!Have a wonderful weekend!
Oh, wow! I absolutely love the modern take on this planter! Fabulous!
Thank you so much! Have a great week!
Aniko,
Your use of dowels with the hanging gutter planter is very clever and creative. I love the look it gives the planter.
gail
Glad you like it! I think it turned out great, too!