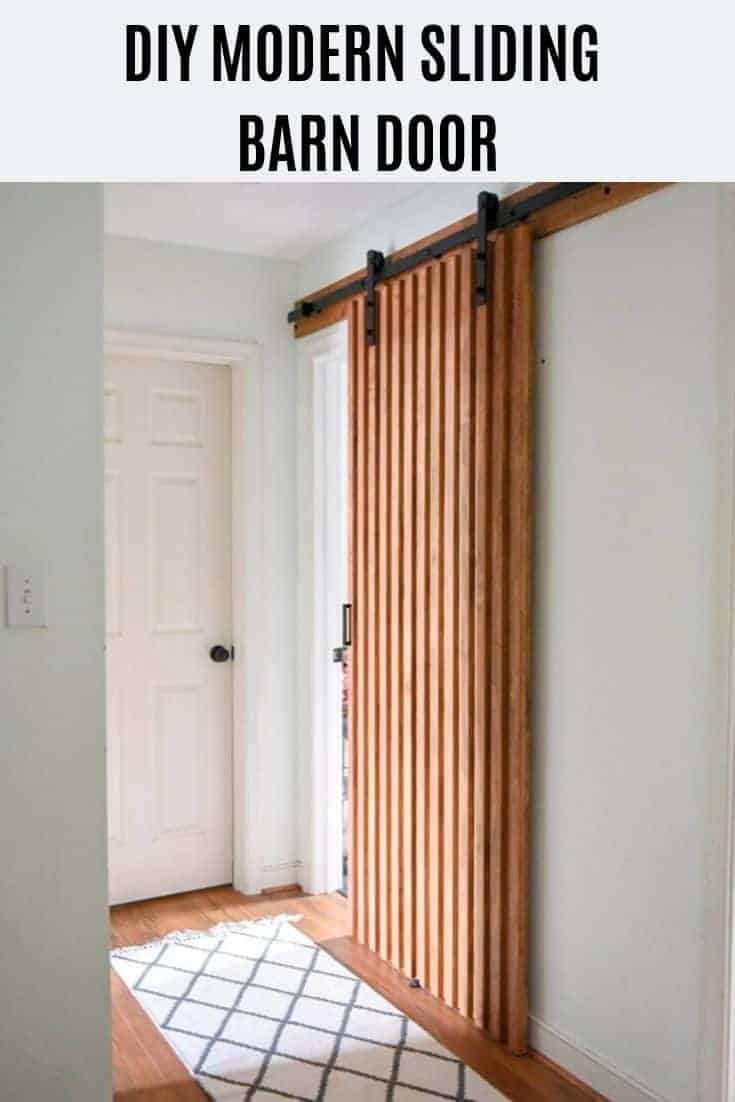
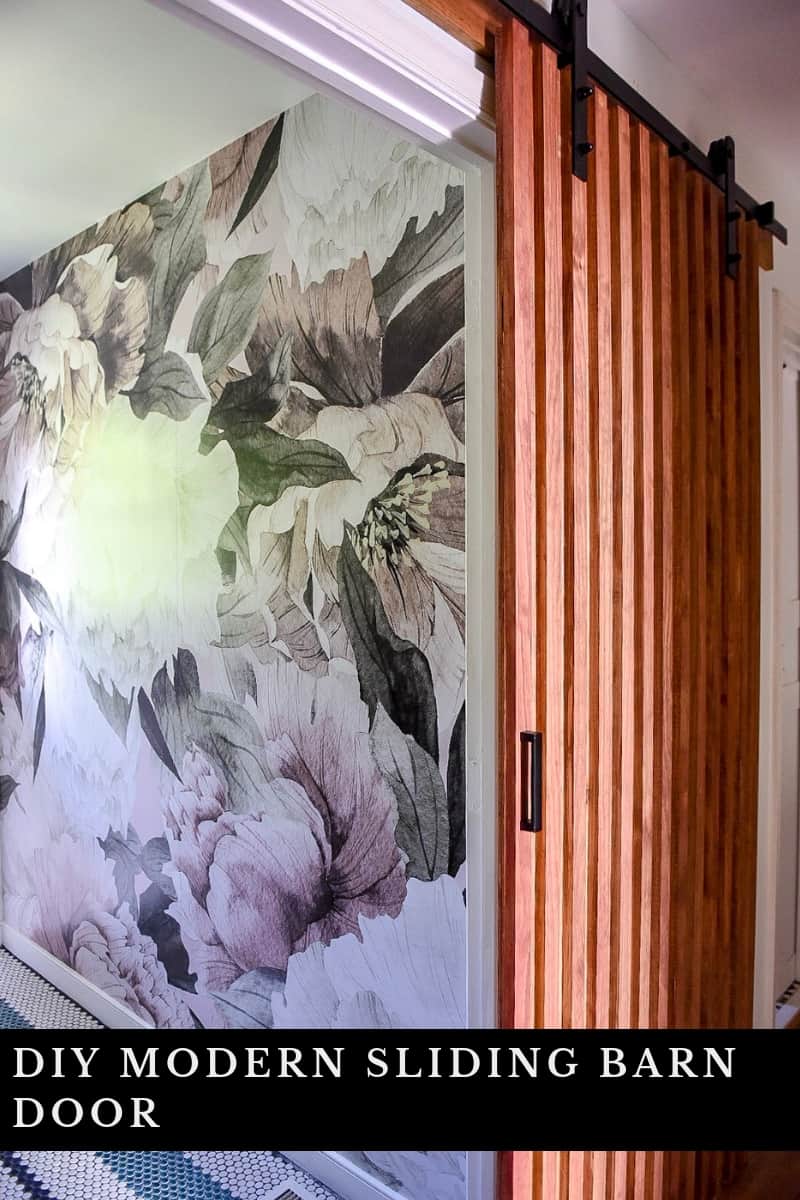
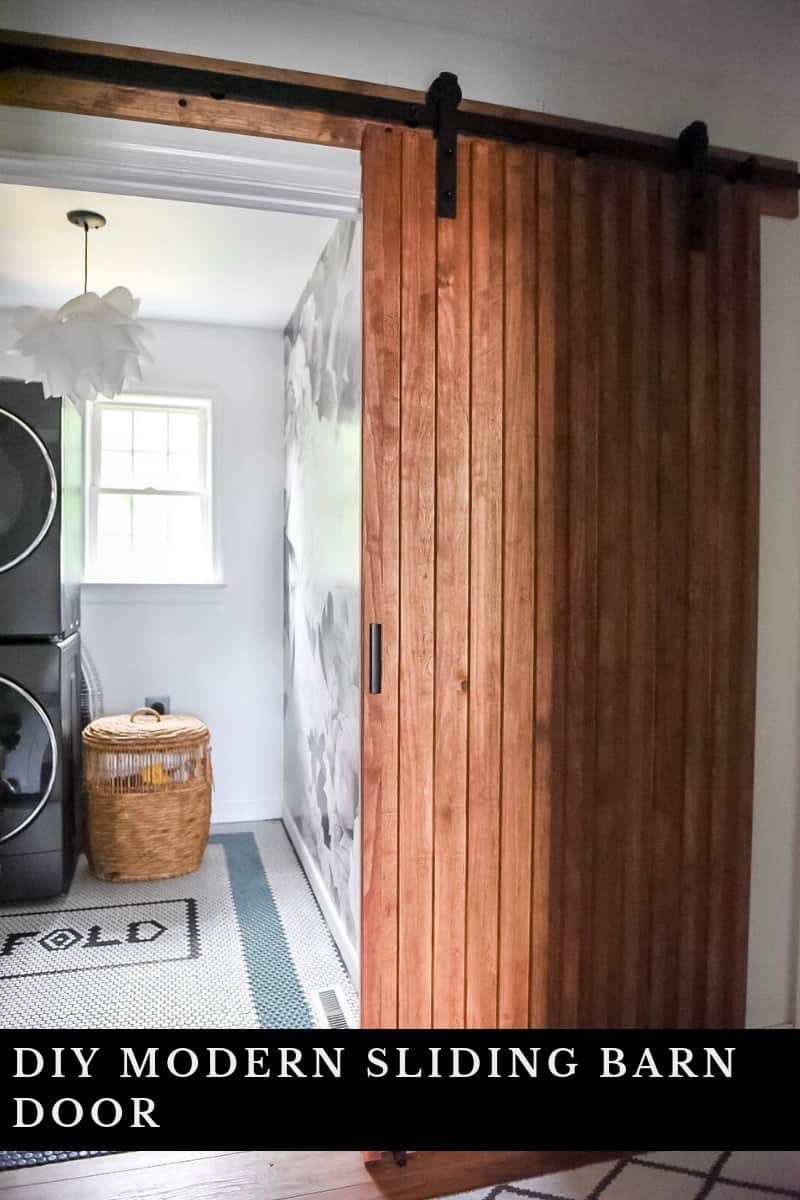
DIY MODERN SLIDING BARN DOOR
I made a DIY MODERN sliding barn door, and today I will show you ho you can make yours too!
It’s been a while!
YESSSSS!
It’s been a while!
I know!
Summer took over, and I took a much-needed blogging break. You know when you need a break you make it! So anyway. There was not much happening on the blog in the last few months other than the monthly freebies. And honestly, I really wasn’t into DIYing, building, crafting or decorating at all.
Just a few weeks ago we, however, started working on our laundry room makeover. It’s been on the list forever, and we finally have begun on the project. The room is not done yet, but here is a mood board I shared on INSTAGRAM, and this is the direction I am going to.
I wanted something modern but fresh, little moody but still stylish.
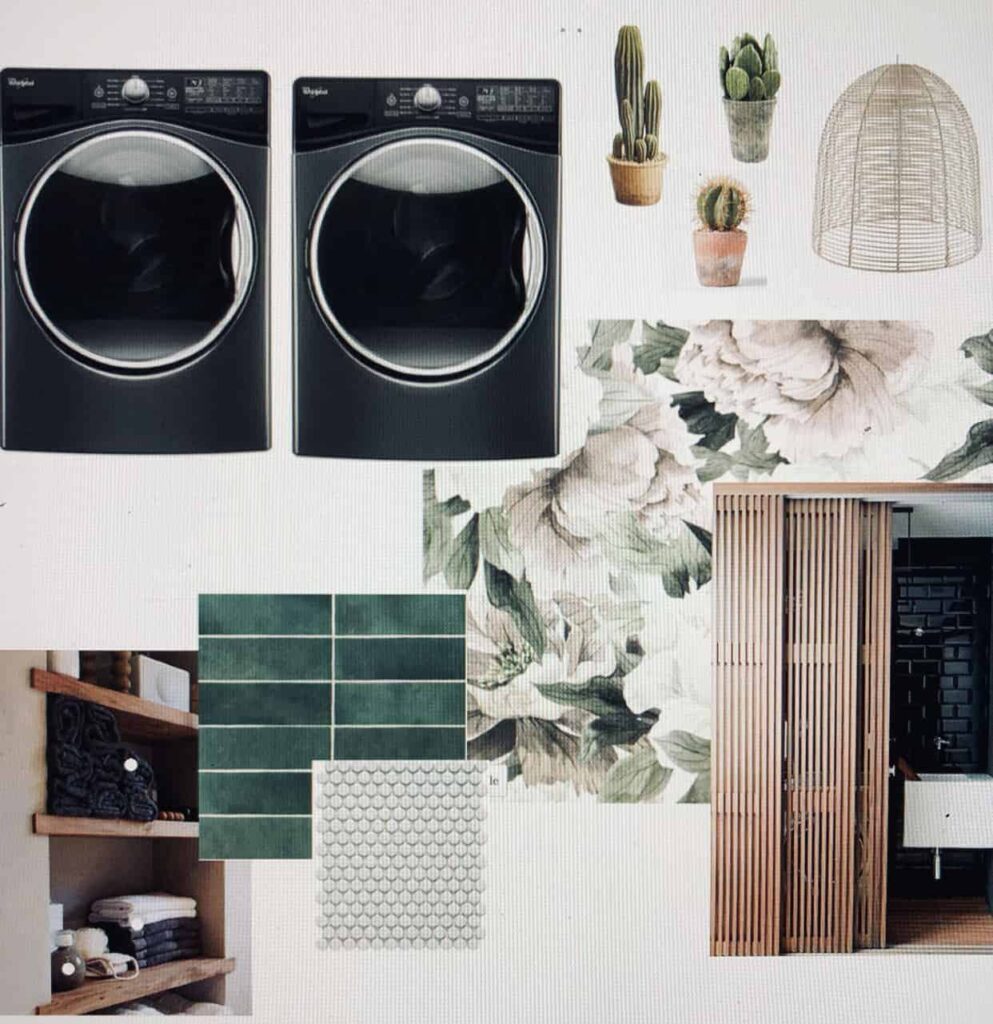
Love it? Cause I do!
We tiled already, I wallpapered already, and we built the modern sliding barn door already. And while I am typing this, I thought I could share a post on my cool wallpaper wall and on my super unique tile too! So stay tuned for those!!
But today I am sharing the DIY MODERN SLIDING BARN DOOR tutorial.
We built a sliding door a few years ago, and it turned out great, but this door is a very different door that I am sharing today. The idea of this modern wood slat sliding door came from our fun and modern wood slat ceiling in my son’s room.
Materials you need for the MODERN SLIDING BARN DOOR:
- 1 X PLYWOOD 3/4 inch thick – 4′ x 8′(the better quality!) cut to size of your door
- 1×2″ 8ft pine boards ( I installed 8!) ( we also used the better quality!)
- finishing nails
- wood filler
- stain
- Barn door hardware
Measure your door opening!
Step number 1 is to measure your door opening. My opening was pretty wide.
I made them cut my plywood ( which is the base for your door!) at The Home Depot. I made sure that I leave at least a few inches extra on the side as well as the top of the openings.
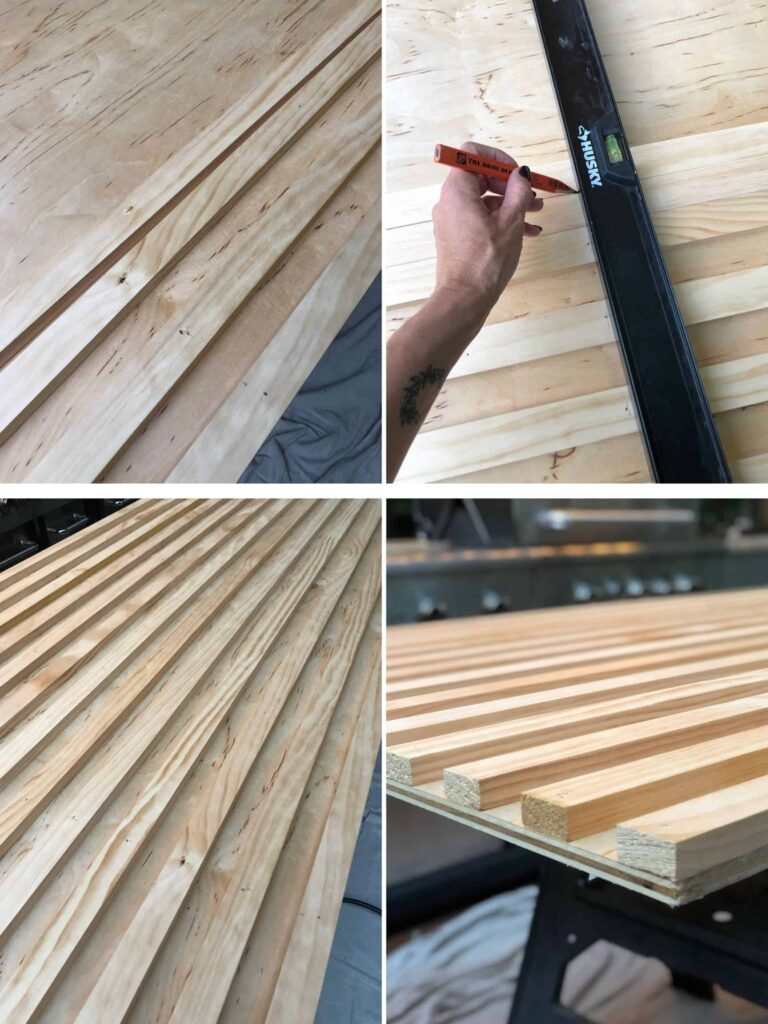
Cut your wood boards to the length of the door size
Cut all the wood boards that will go on the door to the length of the door.
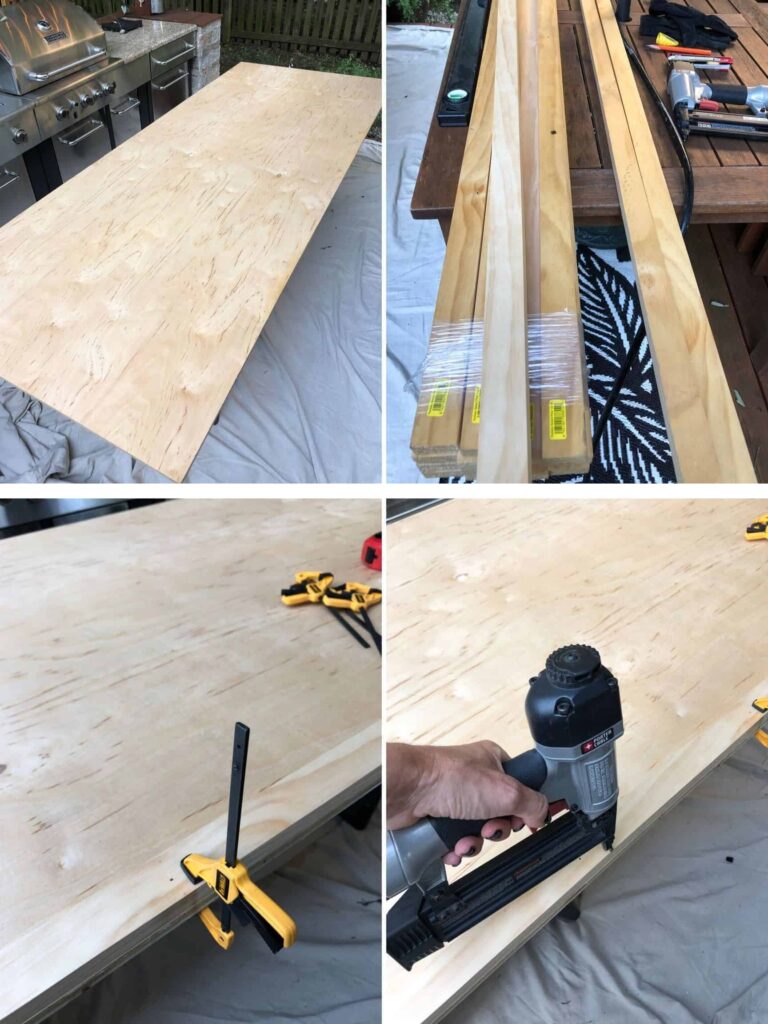
Nail the wood boards to the door
Using a nail gun, attach the wood board to the base panel. We used a WOOD panel to measure out the distance between boards.
Fill the holes
I wanted to make sure that the holes are not visible, so I used wood filler to fill the holes. I let it dry ( I have the quick-drying one!) for an hour.
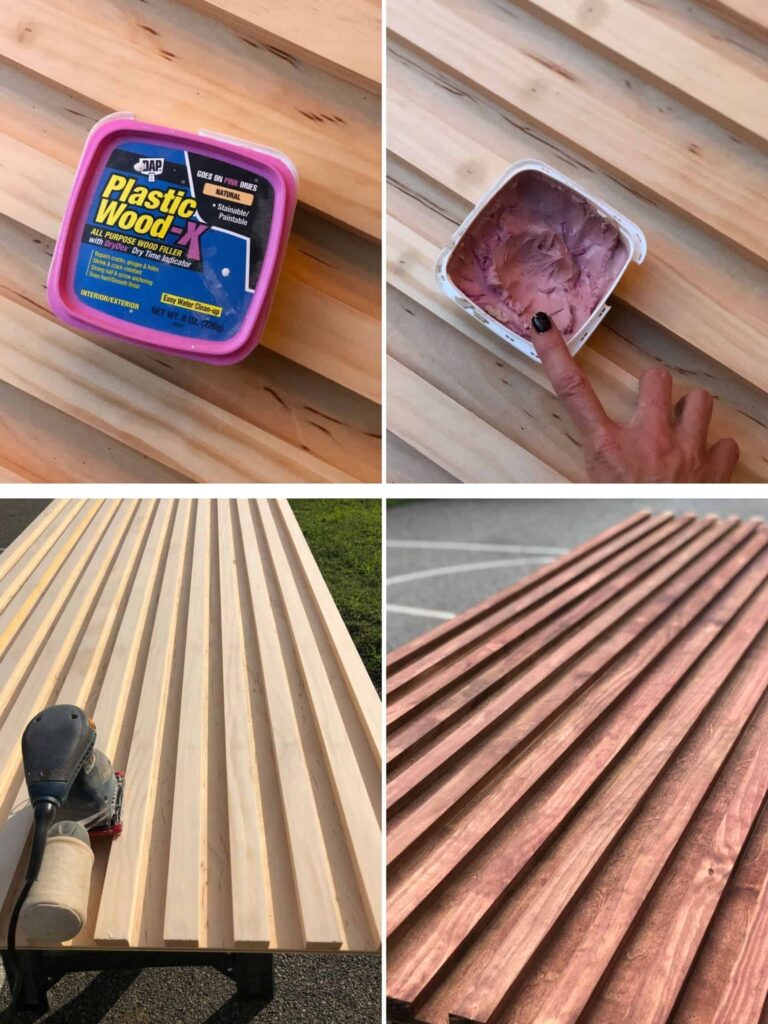
Stain the door
As the last step, I stained my beautiful door; I used two different tones to get the perfect color.
I used THIS BARN DOOR hardware which was super affordable and great quality and easy to install followed the instructions given.
What do you think? I love it so much that I am ready to tackle my next door!:-)
I hope this tutorial helped to get started on your MODERN SLIDING BARN DOOR project!
Cheers,
Aniko


I absolutely love this DIY modern sliding barn door! The design is so sleek and matches perfectly with my aesthetic. Thanks for sharing such detailed steps and beautiful inspiration—can’t wait to tackle this project myself!
I love this DIY project! The modern sliding barn door adds such a unique touch to any space. The tutorial is clear and easy to follow, making it perfect for beginners. Can’t wait to try this in my home! Thank you for sharing!
I’m curious, did it start warping? That the issue I have when I build my own doors. I’ve now started buying slab doors to use as my base. It turned out beautiful!
WE didn’t have that issue. Thank you:-)
Hi Patricia! What kind of slab doors are you purchasing? I want to do something like this but am struggling to find a slab in the barn door dimensions. Is there a special store you went to? Thanks
Hi, I love your door! I can see if the picture that you have a floor guide and it looks like you have a groove In the bottom of the door to make a track for the floor guide. Can I ask how you did this please?
Sliding barn door is awesome and its a very good DIY on modern Sliding barn door, like this.
Thanks for your good share.
I am trying this for my bedroom bathroom and closet door. Thank you for the helpful info … Wish me luck lol
Hi .
Beautiful!
What was the distance between the slats? Was it the same width of the slats? Thanks!
What color stain and brand did you use?
Did you install handles on the inside of the door? Would this door be sturdy enough for a bathroom install?
We did not initially but yes, later. And I am sure it would be perfect for a bathroom as well. I have it on three rooms already:-)
Is it possible to have slats on both side of the door or would that make it too thick?
I think it would make it too thick. 🙂 plus your door frame is there and it would not allow for slats on the inside of the door
On the backside of my bathroom sliding door I installed a nice wallpaper.
you could just offset them and skip the plywood