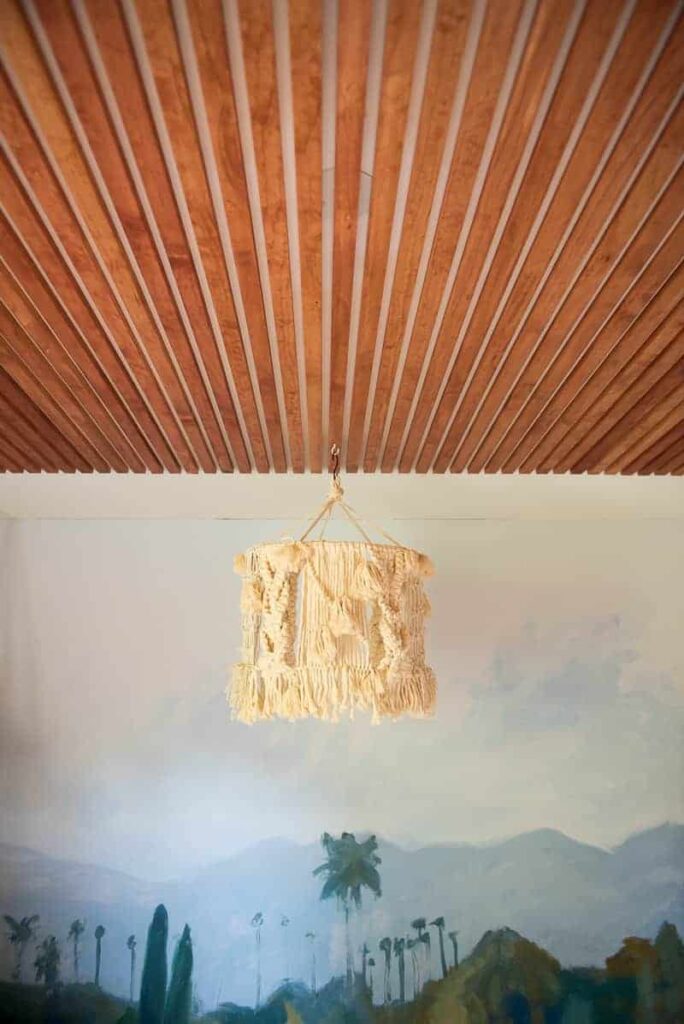
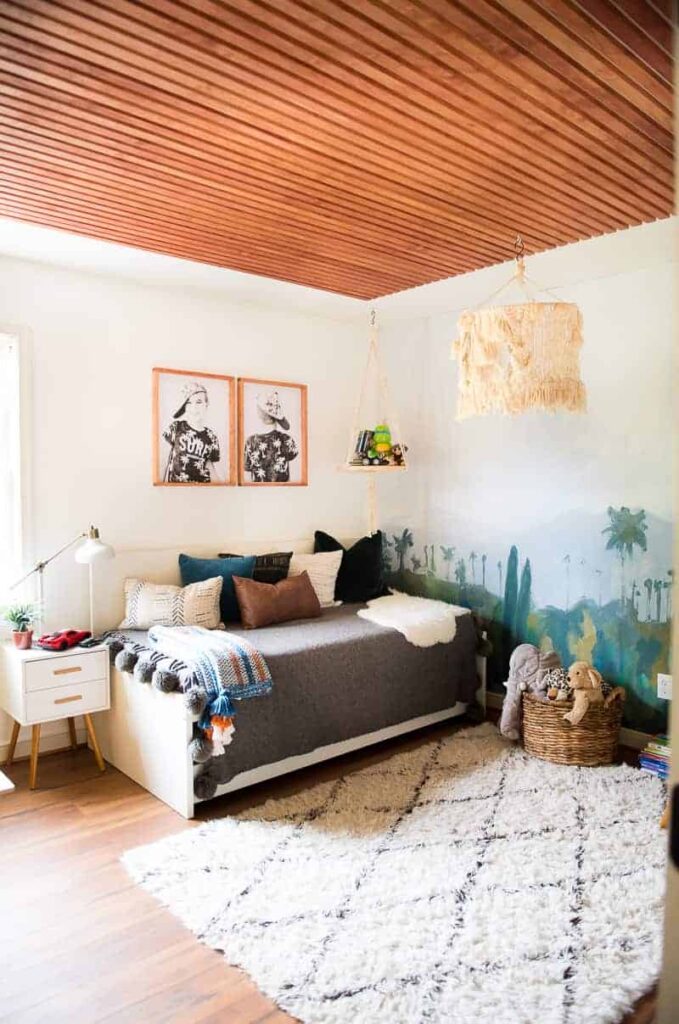
DIY MODERN WOOD CEILING
It’s time to share how we DIYed that incredible modern wood ceiling that you might have seen in our kids’ room.
Sometimes all you need to do is to think a little out of the box, a little further than what you would normally do. This awesome ceiling idea crossed my mind on a blank Saturday morning while I was driving to my son’s soccer game. And while driving, I said it out loud. I asked the hubby if it would be a crazy idea to install wooden boards across the ceiling for a dramatic look? And baaammm! He was sold right at that moment.
And that means he liked the idea so much that he is ALL in helping his crazy wifey to finish this project before the room reveal ( next day!).
He is an all the way awesome guy! Frankly, I could not do so many of my projects without his help. And this project definitely required two people! So hallelujah for the hubby!
Okay!
It was a last-minute idea! Yup! Somehow, most of my creative ideas come super last minute. I feel like my brain works better under pressure, and that’s when I can see the unique things in my head. So the story behind adding this ceiling to my son’s room was the new wall mural. If you missed seeing that post, you must see it! It’s a really cool new feature that Minted offers!
So I applied the mural, and I felt like the room needed something to complement the new design.
I have seen wooden ceilings before but nothing like this. I guess I just generally loved the look of a warm, different look. But I had no idea how to apply or do these ceilings, so we came up with our own, easy way, and it worked out. I hope it will help you to recreate the project if you decide.
Materials you will need to create the wood ceiling:
- 1×2″ 8ft pine boards ( I installed 43!)
- Wood stain ( the color of your choice)
Tools:
- airgun
- nails
- stud finder
Installing the wood ceiling is easier than you think, guys!
First, disconnect the electricity and remove all light fixtures.
MEASURE!
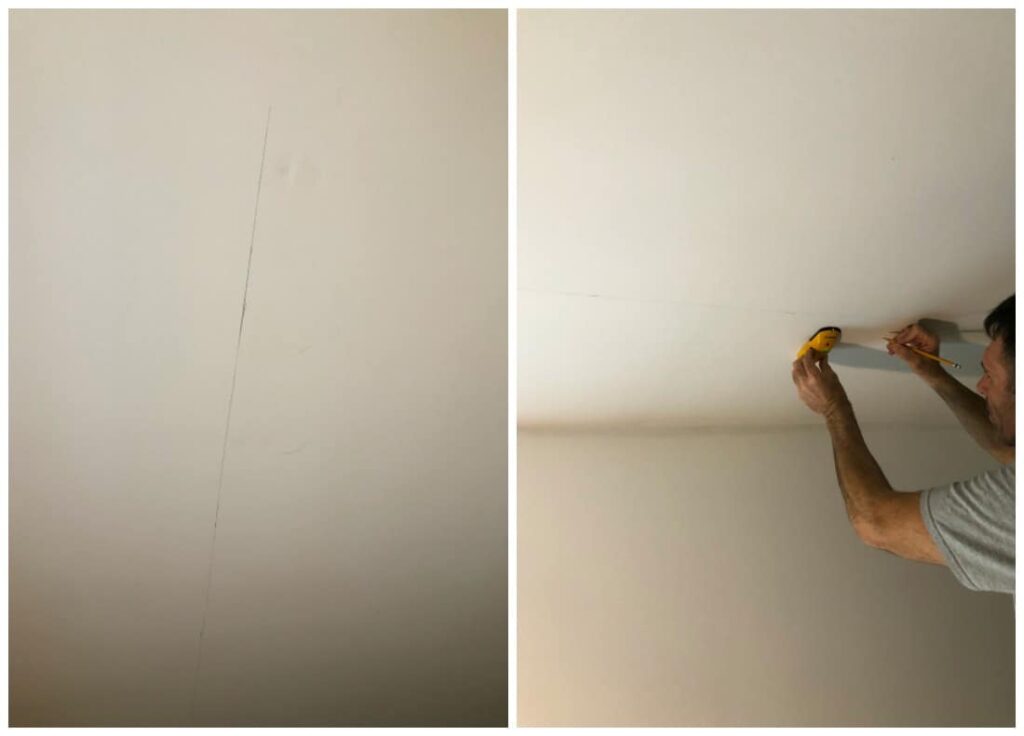
Measure your ceiling and decide how big is the area that you want the wood ceiling to cover. It’s essential to know your measurements beforehand so that you can get the right amount of boards.
When you measure your ceiling, be sure to measure the wood board width and the wood board depth ( the depth will be your spacer between the boards you install). Then divide the space you want to add panels to, and you will get the number of boards you will need to purchase.
Use a stud finder on the ceiling to locate ceiling joists. You will install the boards perpendicular to the studs.
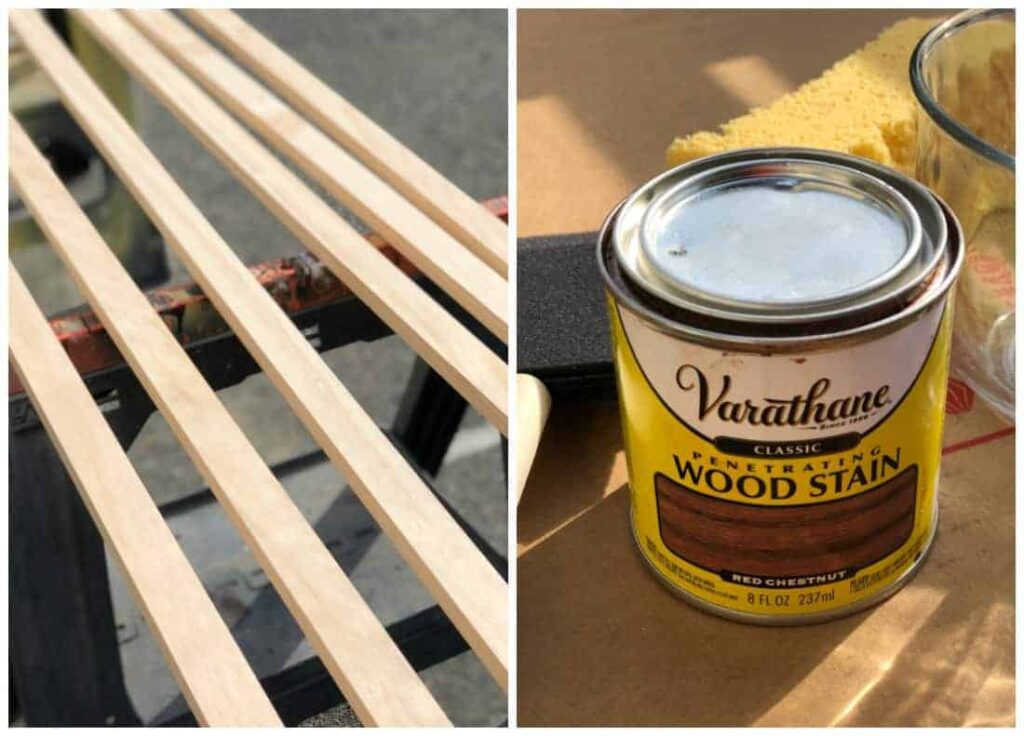
STAIN!
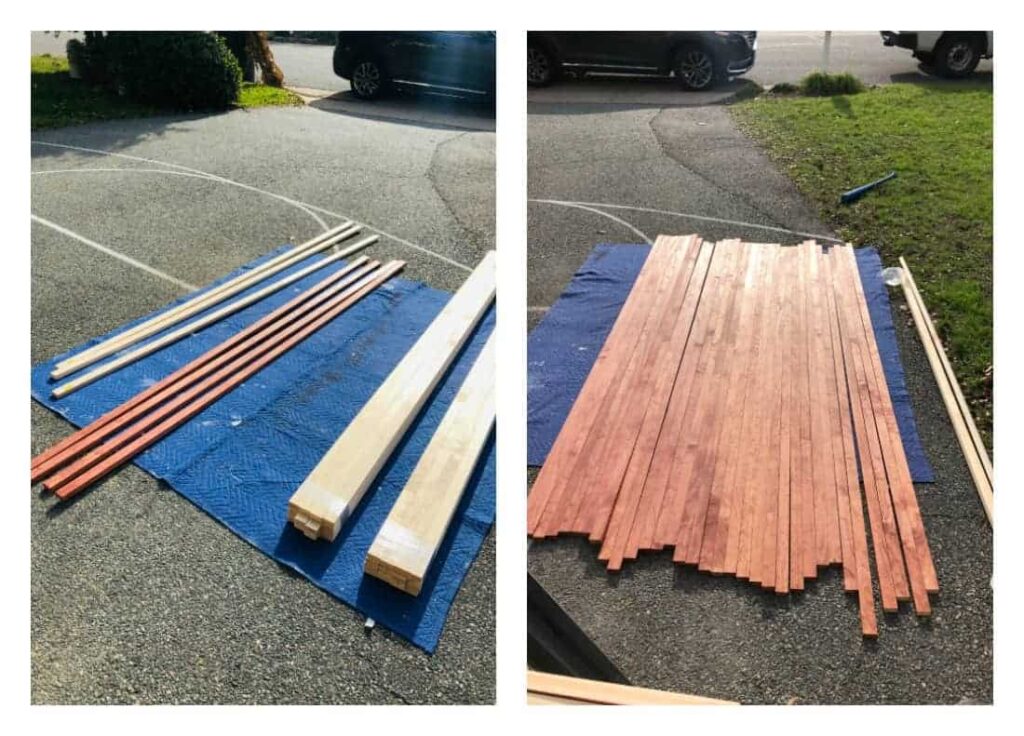
After you have purchased the right amount of boards, stain them to the color you wish! Stain them outside as the stain have a powerful smell.
Let the boards dry!
INSTALL!
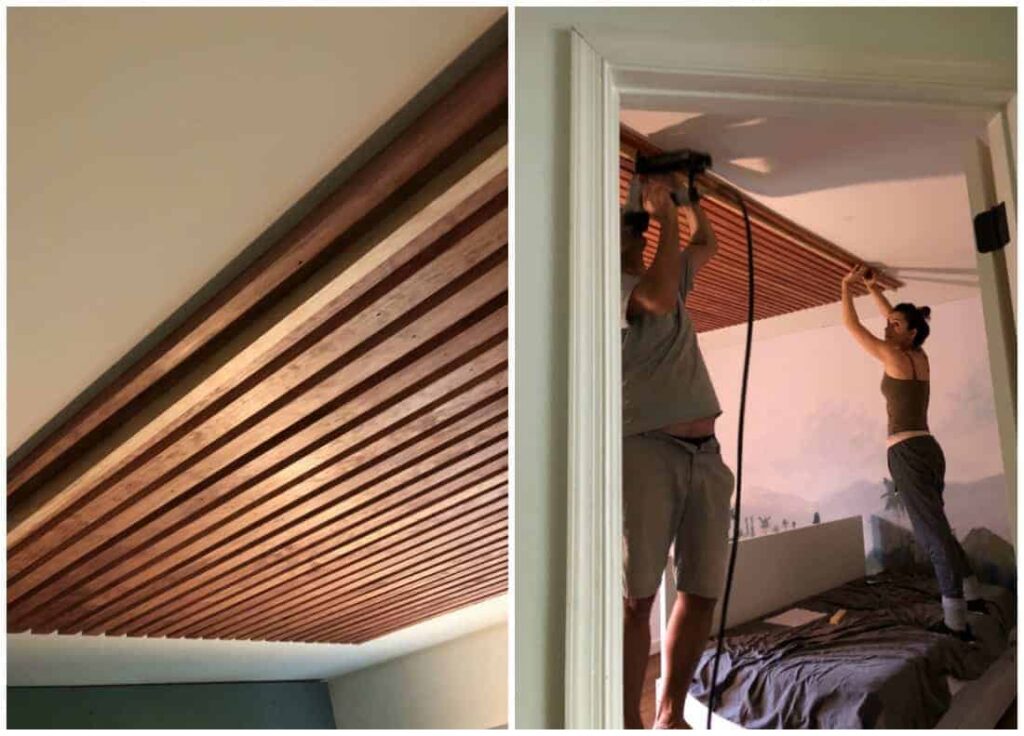
Begin installation of the first board and then use another board but with the smaller side to measure the spacing, then add the second board and nail it in at the joints ( we found five joints across the room!).
Then go and do it 43 ( or as many more you have left!) more times! Phew!
This part of the project does require two people.
……And That is it, my friends.
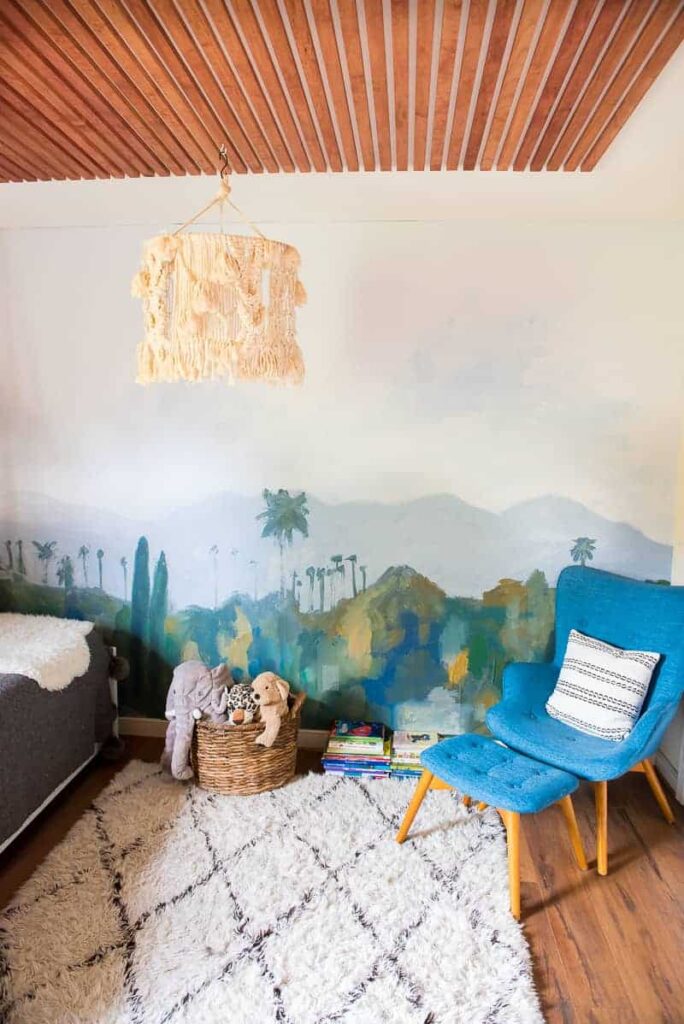
Not a crazy challenging project; you can have it all done within a few hours, but adding the panels will add a dramatic visual look!
What do you think? Would you install a wood ceiling in your home?
Yay or Nay?
Thanks for checking in today! I am sharing next those easy DIY picture frames, so stay tuned!
Cheers!


How did you join the boards together?
I’m going to give it a try in our guest house. The previous owner’s drywall and finishing were not up to par! I believe this will address the obvious visible seams. One thing, terminology … in the ceiling and floors the “studs” are called joists.
Thanks for pointing that out and I hope your project will turn out great!:-)
Hi. I’m also curious how you managed when you needed two boards to line up?
Awesome project!
How did you join two boards together to extend across the whole room? Just by butting them against each other? Is the join line visible?
Did you stagger it? Or are all the boards joined at the same line across?
Thanks!!
Would I be able to create the same look underneath my outdoor patio? And for Florida weather would I need to use a different wood? Cedar?
I love how you make you a wooden ceiling. I love the idea of creating a theme of wood over my ceiling. This is perfect for my next project! Thanks!
So glad to finally find someone who has done this! I’ve wanted to do it for some time as a cost-effective alternative to a modern nickel-gap linear wood ceiling on my covered porch. Did you use regular pine 1×2 common boards? They’re certainly inexpensive, but I’ve worried about warped boards that won’t give the super straight, modern clean lines I want. Were you lucky enough to find relativelt straight lumber, or did you use a more expensive grade, kiln-dried, etc?
David, I used the more expensive boards for that exact reason. But I wanted to see this ceiling in my home and I still say that it was worth that $200.!!:-) I spent $4.32 on a 1x2x6 pine board and I bought 43 pieces.BUt LOVE LOVE LOVE how it turned out! Good luck!
I’m assuming you had to connect two pieces together to make it
Long enough for the room…can you see the break in the wood at all?
what’s the name of the stain you have used? It’s gorgeous!
It was Red Chestnut!:-)
Love it!
What size was the room?
Ghaw…I think maybe 12×12
This is SO cool!!!