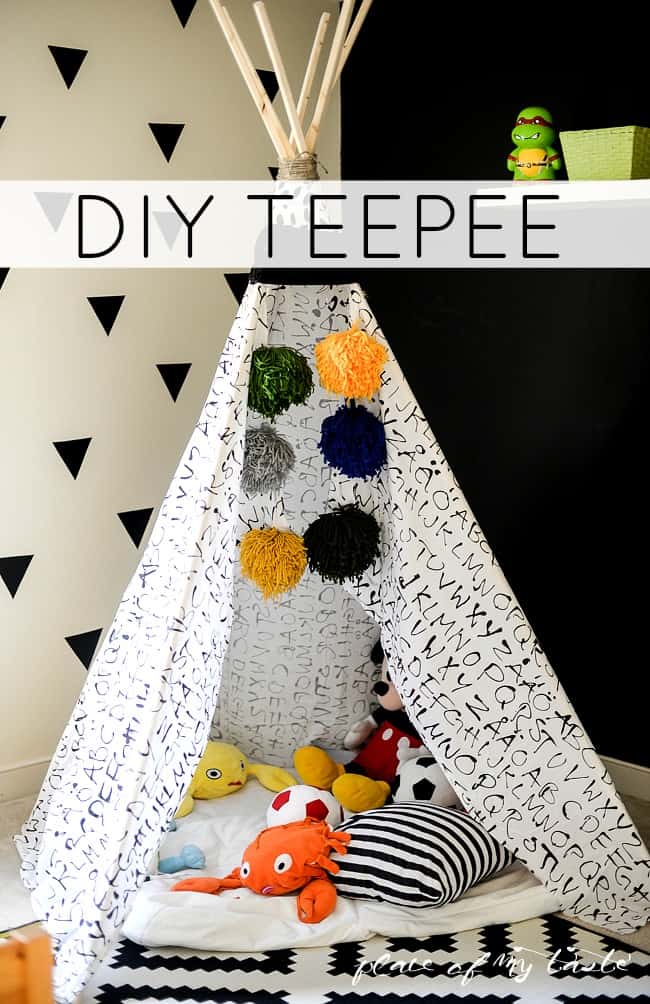
DIY TEEPEE
If you are following me on Instagram ( if you are not, you should be as there are always great sneak peeks shared) you probably saw that a few weeks ago we were painting and projecting for my little man’s room. Well, long story short: In the beginning of last year I decided to put together my two boys. Crazy me…ha…I thought it would be lots of fun for them and it would help my older son’s waking up and coming to mommy’s bed n the middle of the night issue.
What was I thinking?
Really..
Not only that it did not help my older son’s night trips to my room but it made every evening a nightmare as the boys were just chatting and playing with each others for late night. They sure had fun but it was quite hard wake up time in the mornings.
We decided that little P need his own room back.
Have you seen those cute colorful big pom-poms last week on the blog…wait, it was two weeks ago…time flies like crazy!!
Now you can see how I used them!
Part of this fun DIY TEEPEE.
We thought,little P would want him to sleep in a separate room if there is something fun about it.
We made a fun TEEPEE.
It was so inexpensive, easy and YOU CAN DO IT TOO project!
Ready to start? Here ya go!

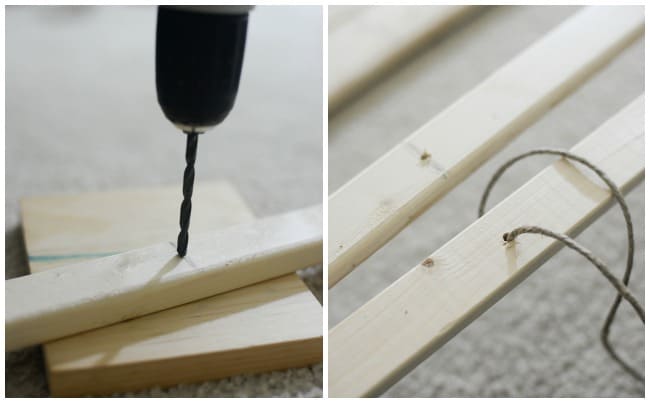
Materials you will need:
– 6 pieces of 8 foot 2 x 1 wood slices from Home Depot ( $1.69/piece)
– fabric of your choice or I used my old duvet cover
– twine
-drill
-hot glue gun
-4 hands:-)
STEPS:
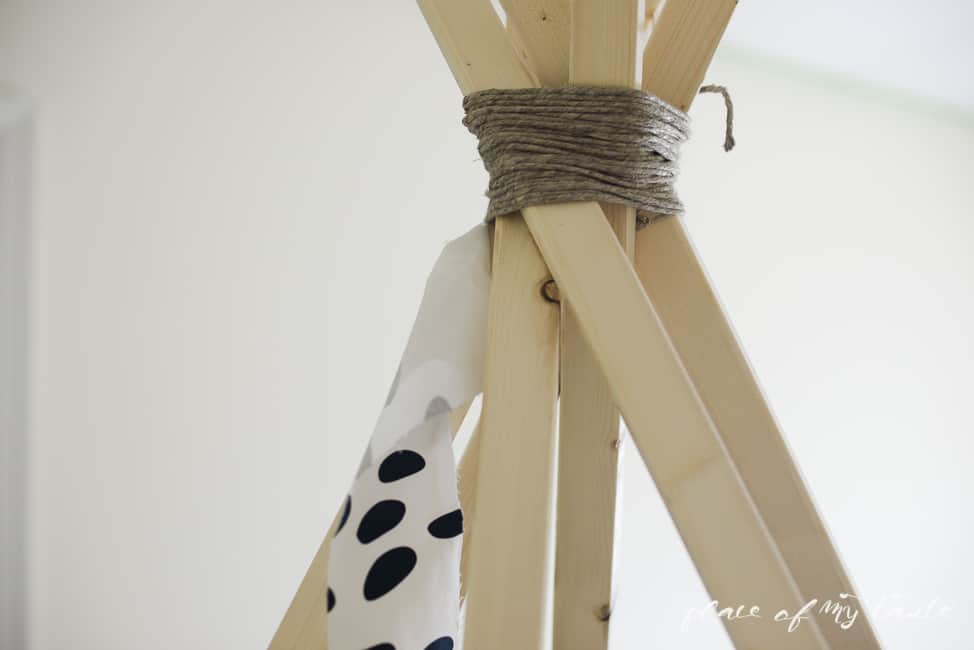
1. Lay all 6 8 foot wood panels on the floor and drill a hole on each of them on the same level.
2. Push wine through on all 6 holes
3. Stand the structure up and tighten the twine around the top of the structure (see below)
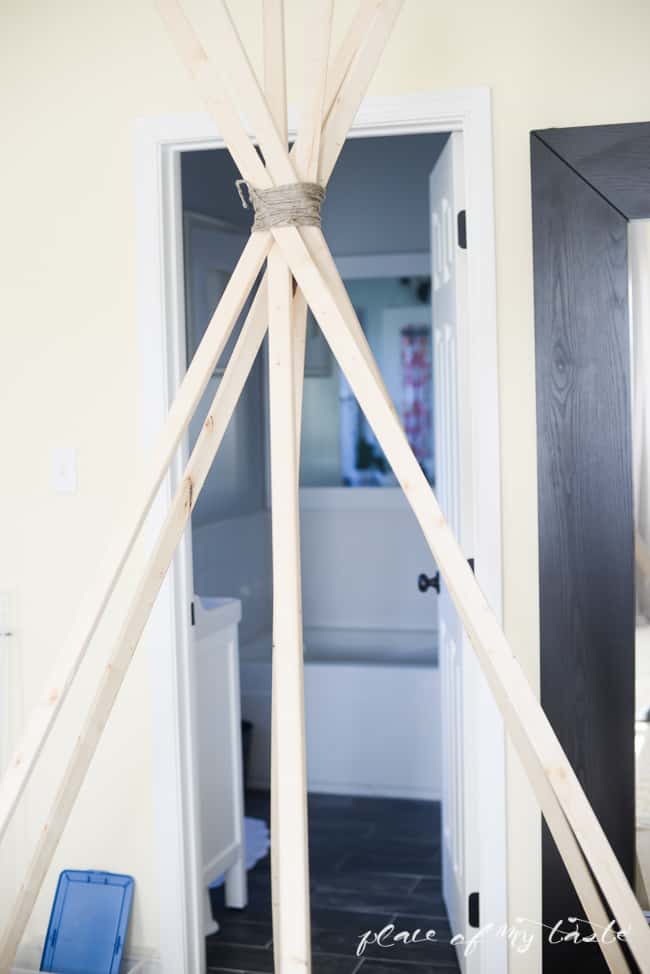
Easy enough to make the base for your teepee, right?
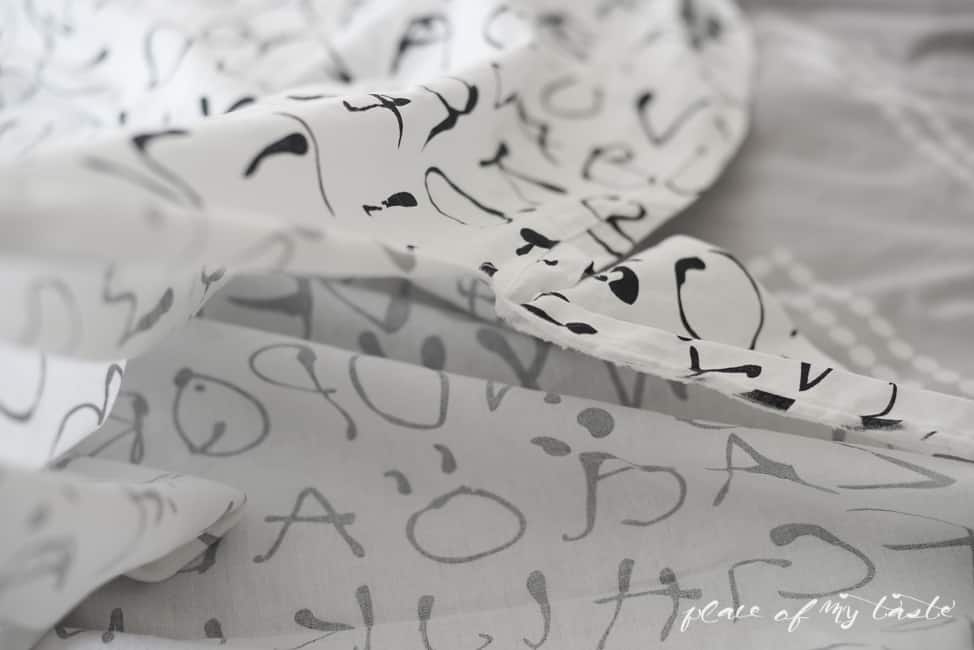
I had this fun ABC duvet cover from IKEA that I did not mind cutting up for this project. I thought it would look fun for a kid room.
(You can use a fabric of your choice.)
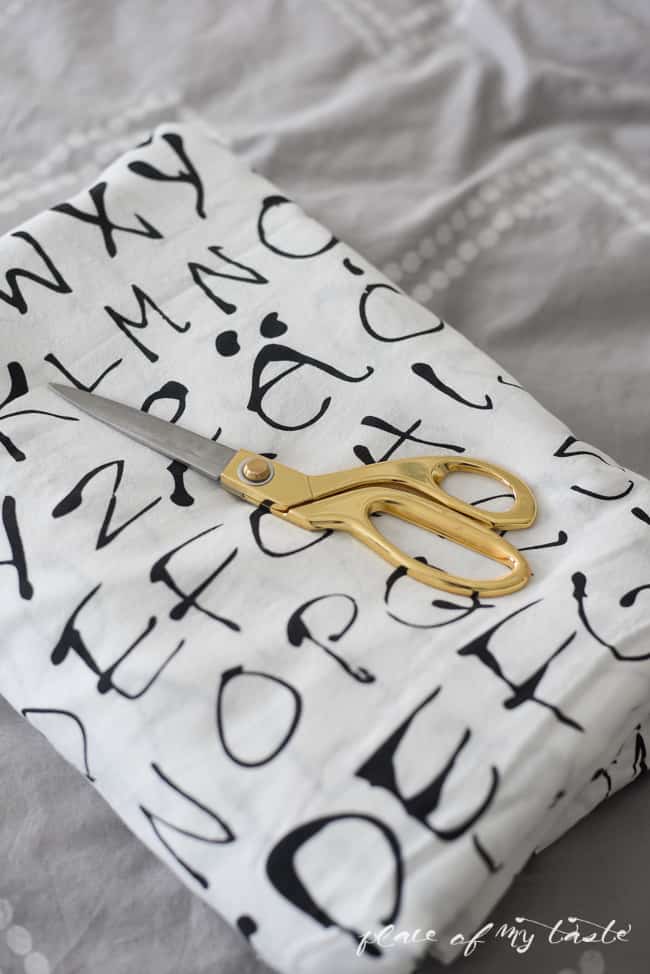
This was a twin sheet. I cut the sheet lengthwise on one side so when it was cut I had this huge rectangle shape fabric.
I threw the sheet on the structure but of course it did not look right, also it was a bit short if I pulled it up all the way.
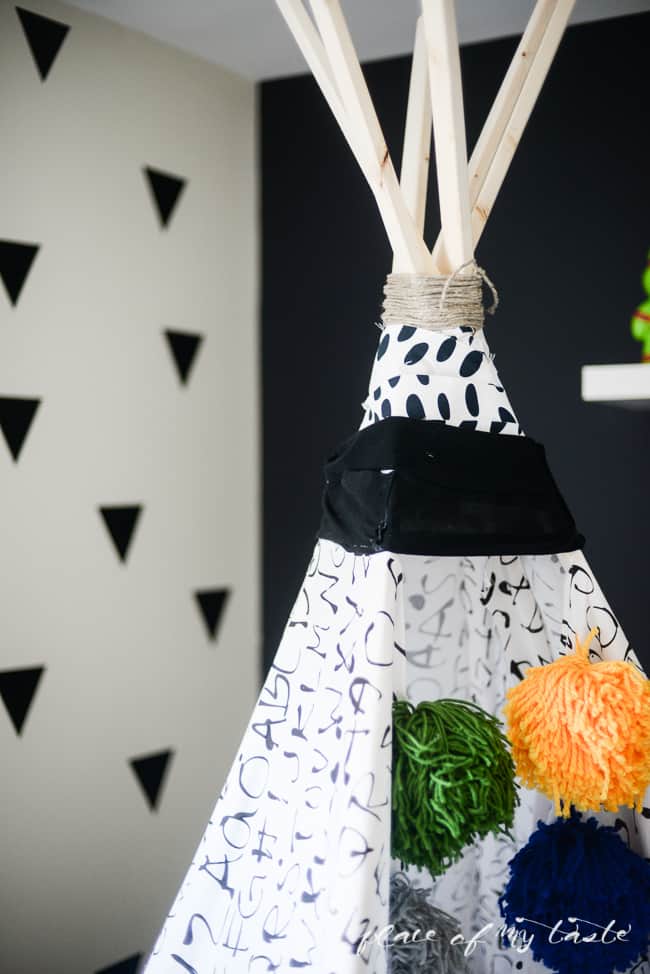
Because my fabric was just a bit shorter what I needed, for the top of the teepee I cut small stripes from some leftover fabric and covered it all up. I think it looks interesting with a different pattern on the top of the teepee. I cut small stripes and started gluing them on the structure.
Then I cut my bed sheet for 6 pieces. I really just laid the sheet on my teepee base and cut out a big triangle shape, that was covering my structure’s sections. Then I cut the other 5, repeating the same size as the first triangle.
Using my hot glue gun, I glued the fabric to the wood. Going in order.One after the other.Kind of folding the fabirc around the wood.
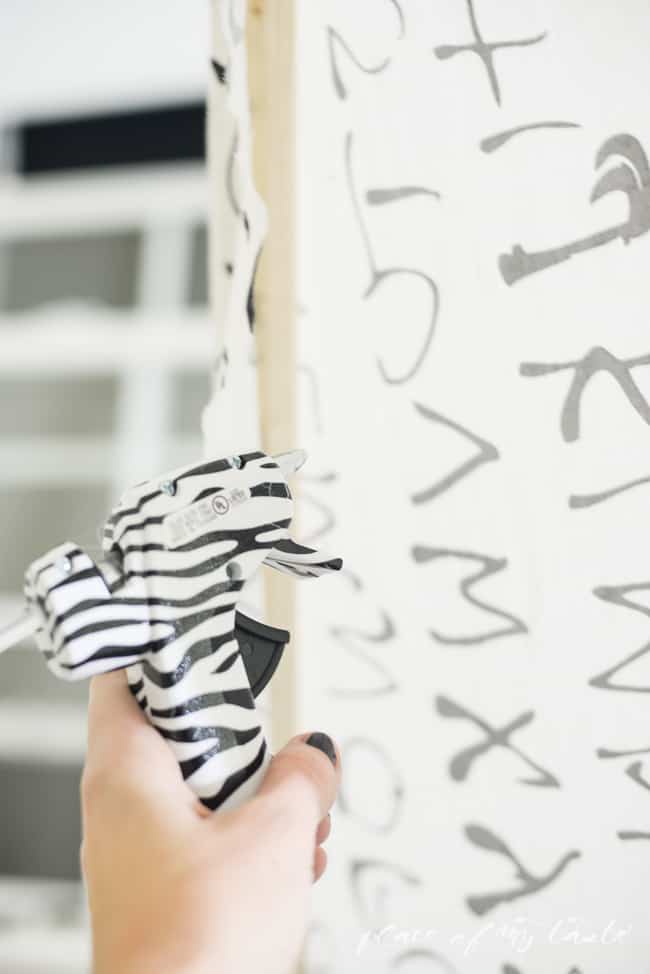
Here you can see that I was able to nicely glue the fabric on the outside, as for some wood it would have to be glued on the top of the fabric that was already glued on the wood.
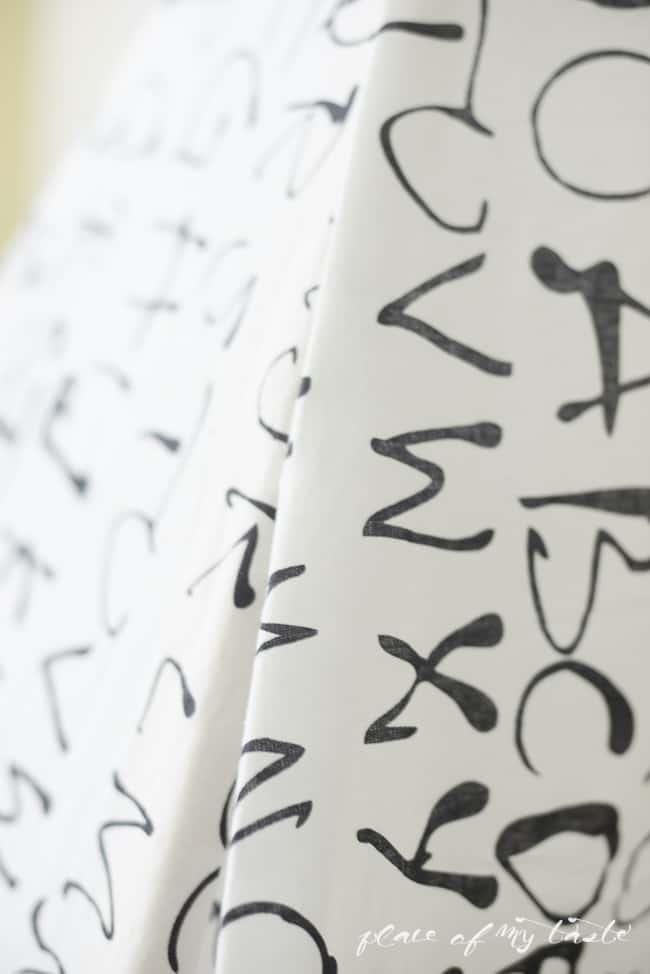
For a more intereting look I added a plain black fabric stripe to the top.
Just play around with your colors and make up a fun combo:-)
Then I added my pretty colorful
GIANT POM-POMS
Poked a small hole and pushed trough the yarn on the fabric, then made a big tie on the back so the yarn would not slide through.
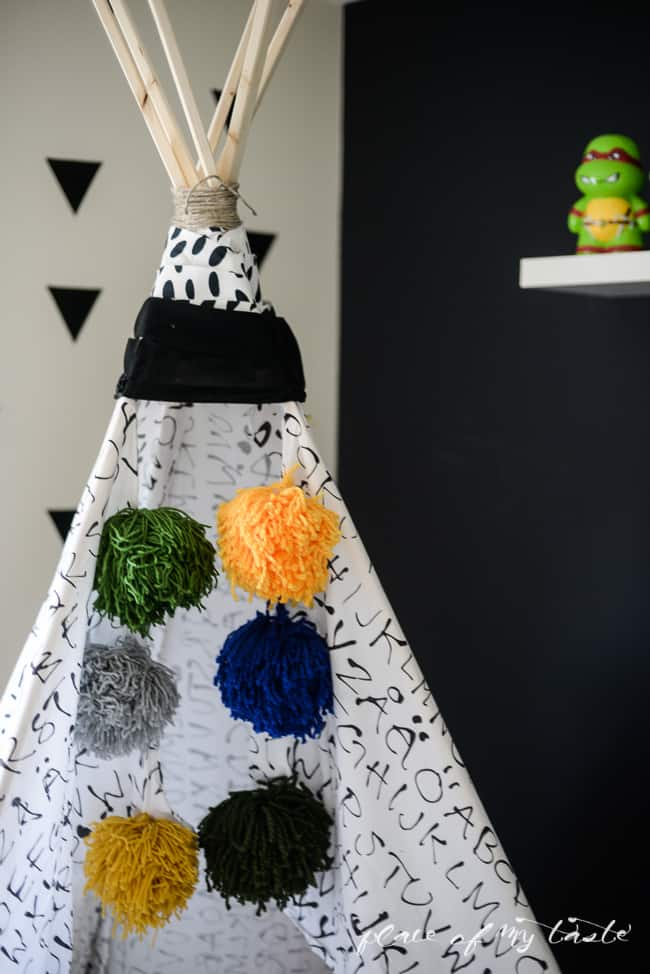
I love how it looks in the room.Fun, colorful and my kiddos loved it.
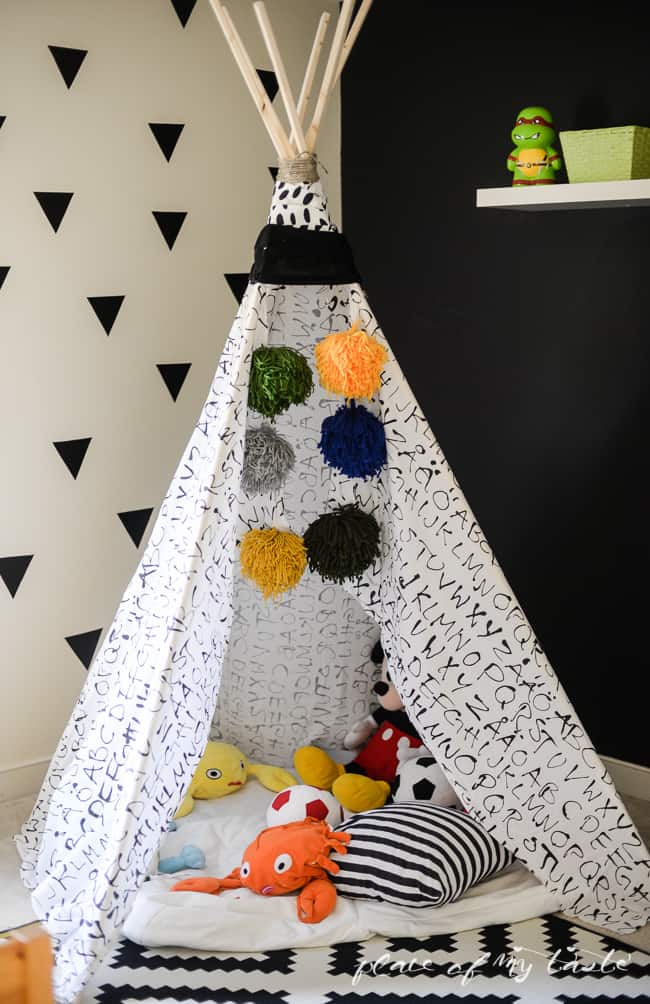
Mickey Mouse is in the house:-) I threw in lots of pillows, soft animals and it was the perfect place for reading up on some books.
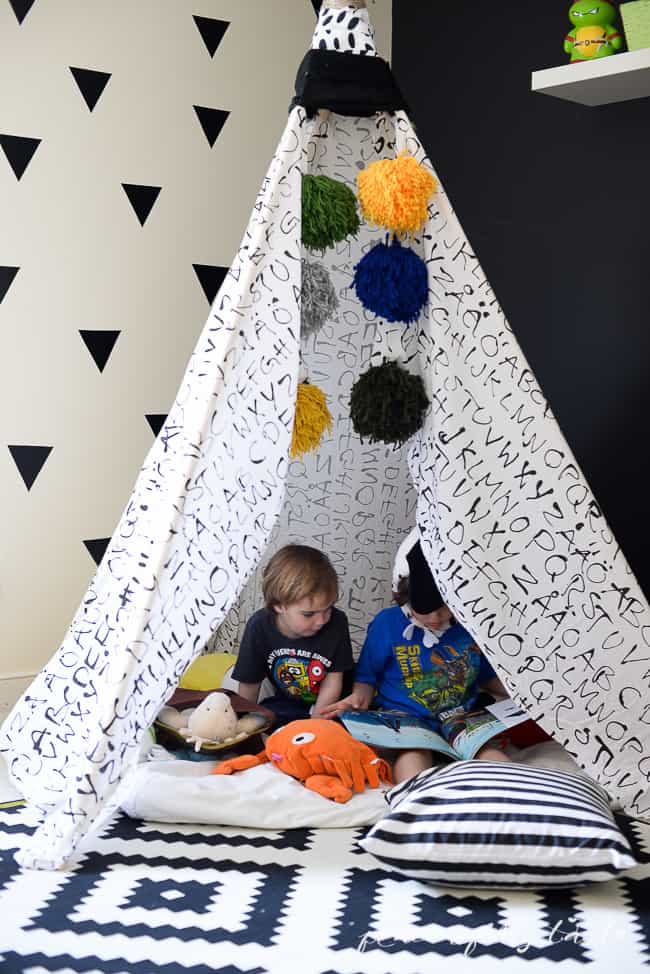
Now the only problem we have that both of them wants to share this room-haha!
Hope you likedthis fun teepee tutorial.
Check out how I made the triangle wall and the giant pom poms


Cheers!


Thank you for sharing how to make a tepee! I’ve seen them, b but had no idea where to start! Looking forward to making possibly 2 or 3 tepees in my future: grands and nephews!
This is so adorable and fun DIY tutorial.
This is such a neat idea, but I do have a question. Does it collapse fairly easily? I’m thinking of building something for the outdoors for our little boy to play in, but want to know if it is easily collapsible?
I love it all! Featuring you this Wednesday! Thank you for partying with us!
xo
This is so adorable and fun and I want one for myself! You have some lucky kiddos 🙂
Such a cute teepee.. No wonder you are having a tough time getting both the little guys to bed. They must be having so much fun in there 🙂
-FarZain
@http://colorsofourrainbow.blogspot.ae/
Thank you for stopping by and commenting. They love this teepee so much ♥ Have a fantastic week!
That’s so cute! What a fun little place to hide 🙂
Christine- Thanks so much! Boys are having fun in there:-) Have a great week!
Oh my gosh! This is SOOOO cool! Our little guy has a teepee too (though far less creative than this one) and he just loves to hang out in there with his favorite books! SO fun my friend!
Thank you so much sweet Friend! Have a wonderful week. Xo
This is such a fun project. Great tutorial and the children look like they love it.
Marty, they love it. Thanks for visiting. Have a great week!