How to make IKEA BILLY BOOKCASE built-ins
How to make IKEA BILLY BOOKCASE built-ins…that’s what I am going to share with you all today.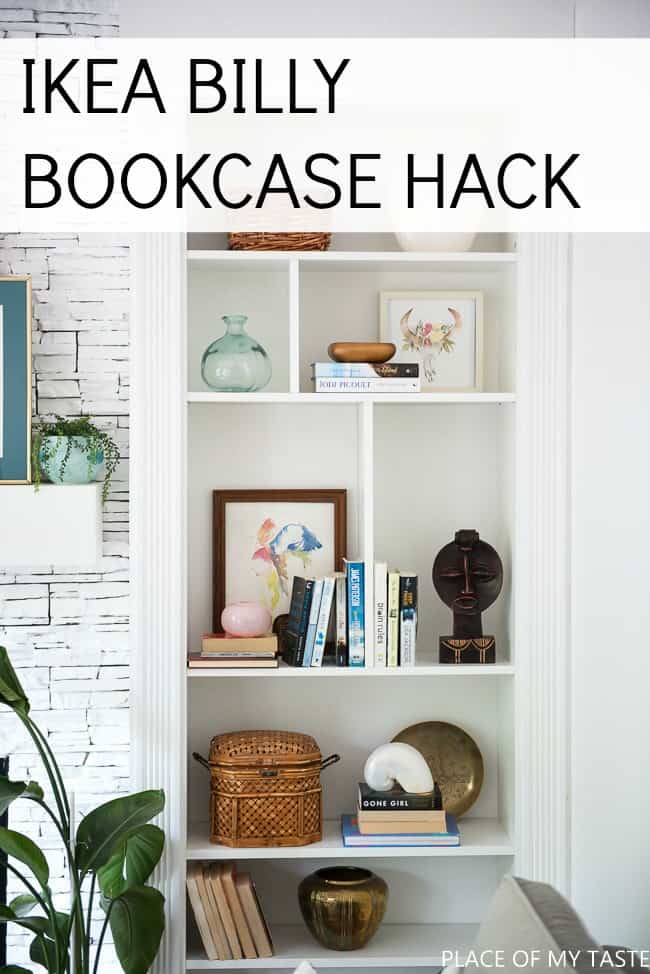
Phew! This project required a little more time and planning than what I thought it would take. Plus I needed some extra glasses of mimosas as well along the way from start to finish. But it was all worth it at the end of the day because I love the new look of our living room. These billy bookcase built-ins totally changed the room. If you are new here, let me fill you in real quick of what I am working on right now. I am a linking participant of the ONE ROOM CHALLENGE, hosted by Linda from Calling it Home. The challenge requires us to makeover a room in 6 weeks ( well, it’s only five weeks as we reveal the room on the 6th week). I love to take the challenge as I know I will finish a room from start to finish in 5 weeks. It’s though! No doubt that it is. Especially when someone is a thrift shopper, like me. Sometimes I have to hit Goodwill and thrift store multiple times before I find what I need. This week is the 4th week, and I love to see that the room is coming together nicely. Today’s project was the biggest project we tackled in this room. It took a couple of weekends ( not all day of course but when we were able to free up from the kiddos).
I looked up many Billy Bookcase hacks, like HERE, HERE and my favorite was the one HERE, but I could not find any tutorials where the shelves were built around the fireplace. This tutorial HERE kind of gave us a good start on how to build our shelves in. And I also found this tutorial on DIY built-ins .
The reason why our project was a little more complicated is that we had a particular measurement to work with and finding the right pieces of materials were not easy. But we found everything we needed after looking through the isles of HOME DEPOT several times.
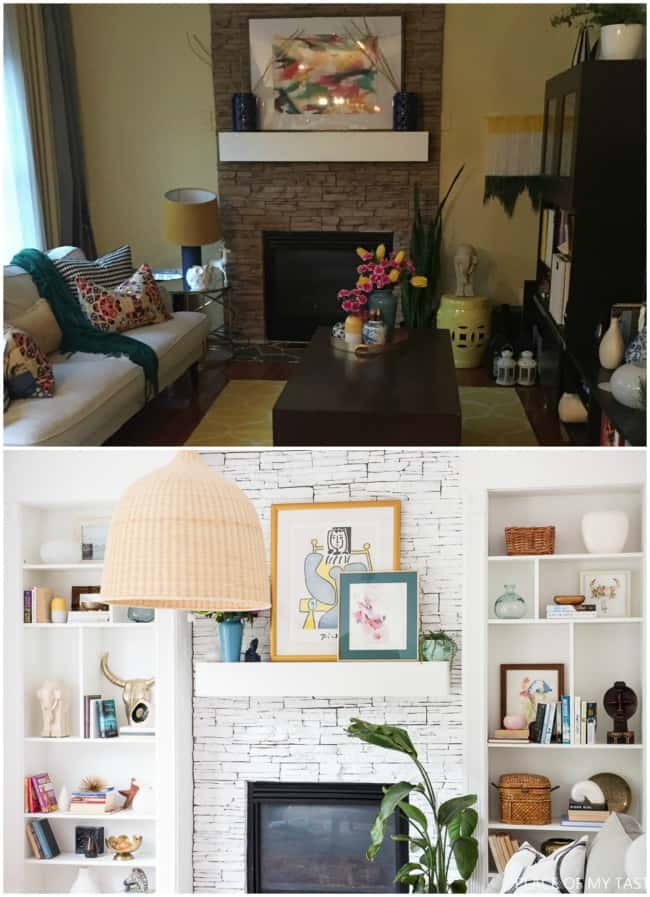
Here is our BEFORE PIC of the wall with the fireplace. Well, first of all, I hated that yellow shade on the wall for a long time, okay? This room is a relatively small room, and I thought to have bright white walls, and WHITE fireplace will help this place a lot. And it did. Big time! 
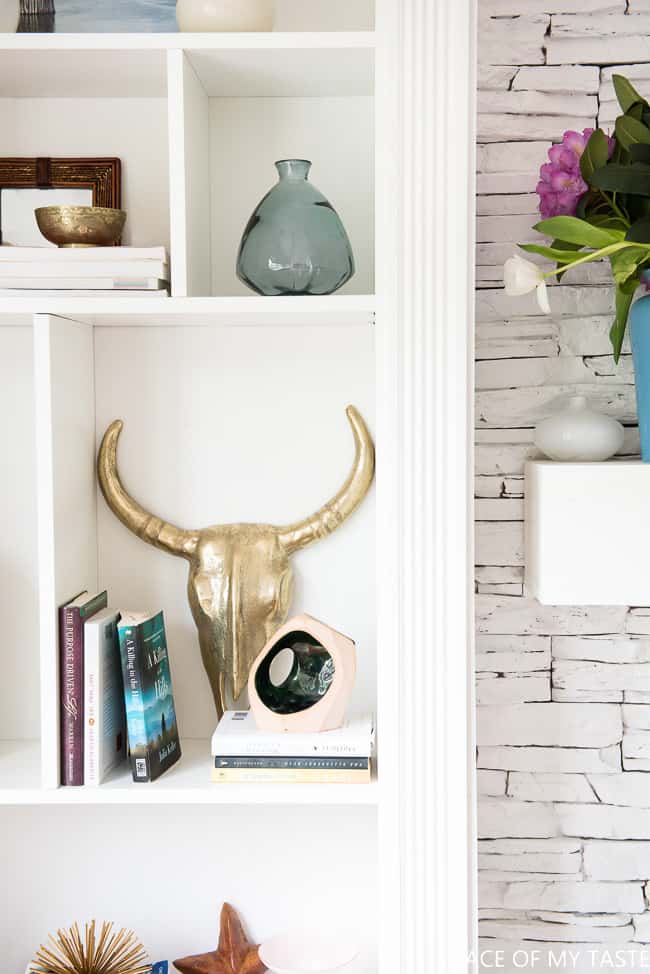
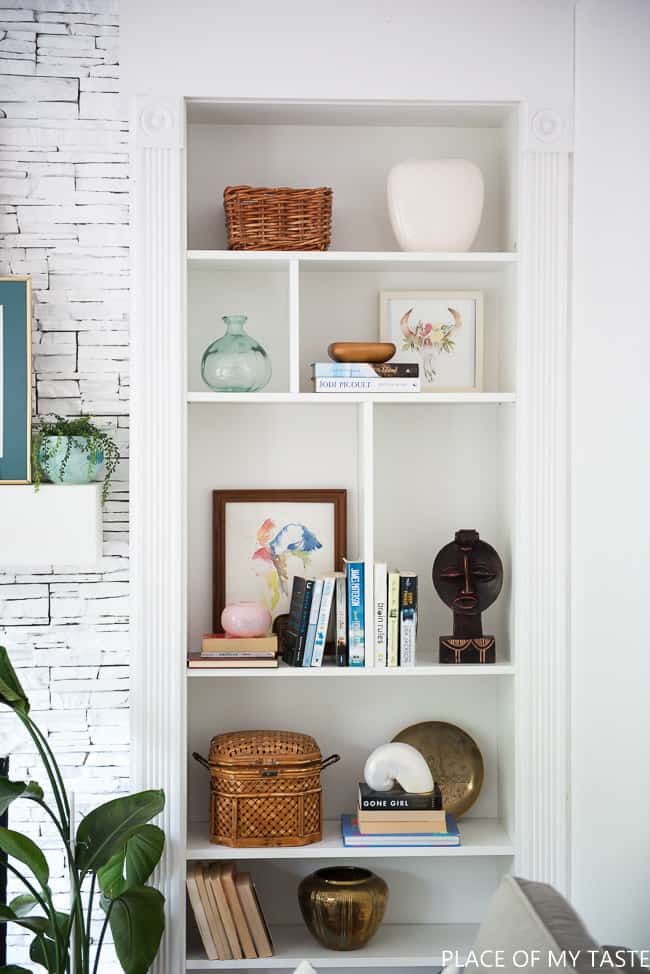
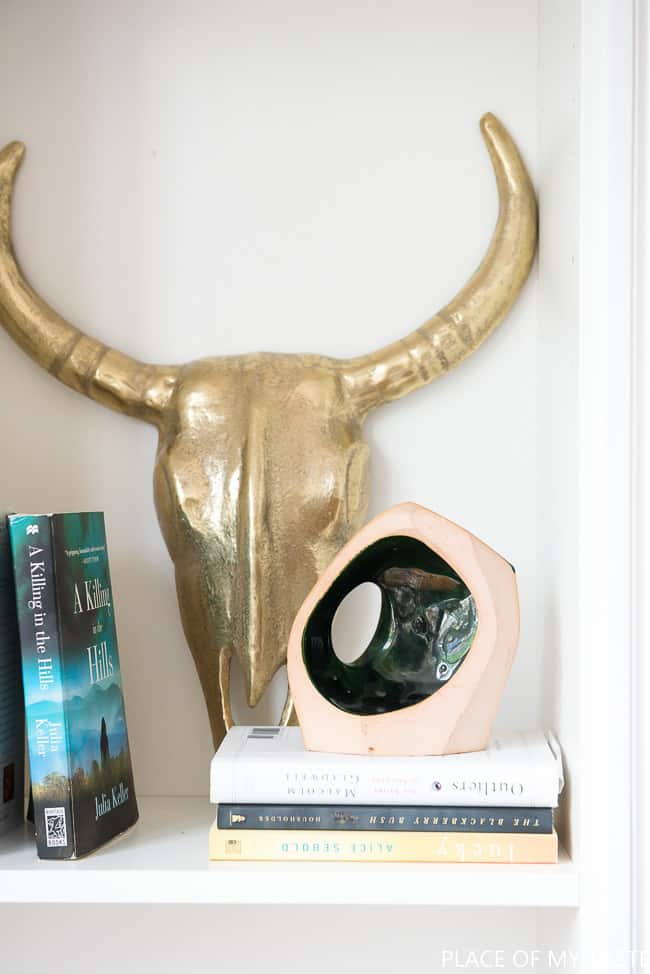
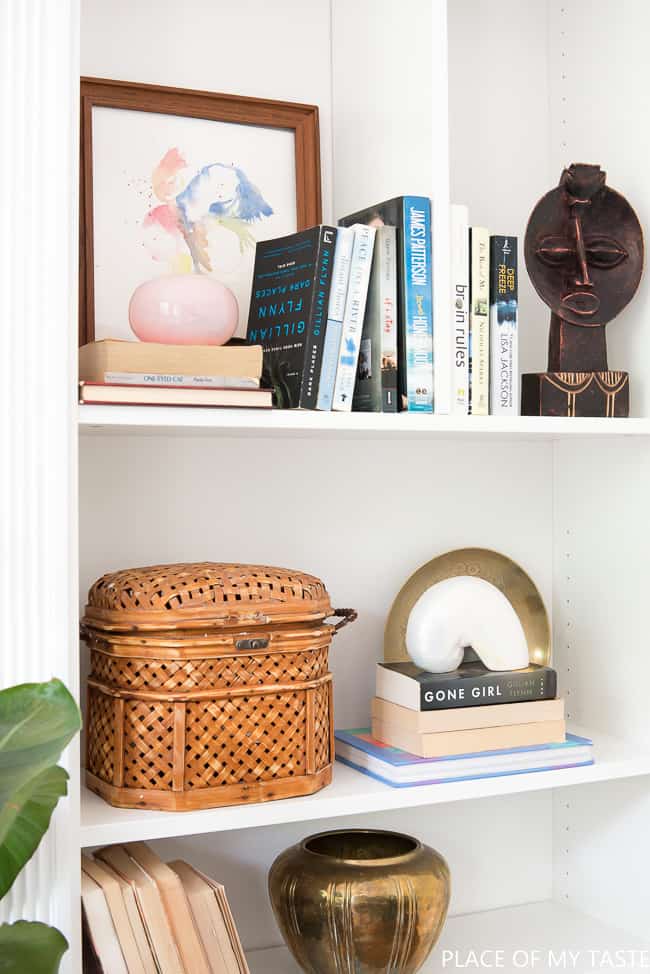
Built in bookcases are great as when you style your bookcases you can truly shine your personality. Styling a bookcase is not an easy task (I will have another post on that later) but it’s fun. I love thrift shopping and I found the best little additions that fit my taste for pennies:-)
Here is a short video where you can see the room and how I styled these bookcases
So shall we start the tutorial?
How to make BILLY BOOKCASE built-ins
OUR MEASUREMENTS WERE: 41″ on one side of the fireplace and slightly more, 43″ on the other side.
MATERIALS we used:
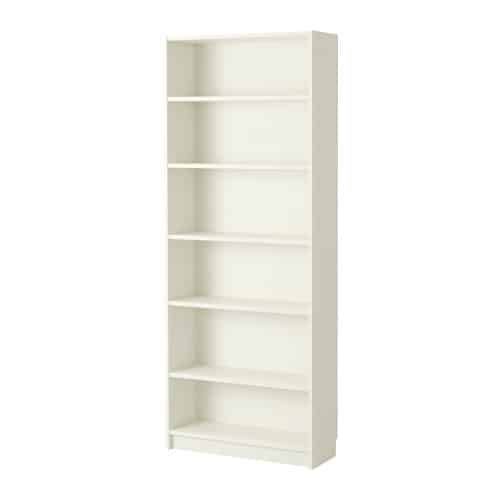
2 BILLY BOOKCASES ( $69 each) with EXTENSION ($20 each)
2 X 1′ x 12′ x 10′ WHITEWOOD BOARD ( for side board)
2 X 1′ X 12′ X 6′ WHITEWOOD BOARD ( for top)
1′ X 4′ COMMON BOARD ( for behind the cabinets as the whiteboard that went on the side was 12″ and the Billy bookcase was 11″)
2 x 2x4x 10′ for the wall side of the cabinet
2x4s ( cut small pieces ) for filling gaps
WOODGRAIN MILLWORK
4 PC NEXUS PLINTh BLOCK
TOOLS:
I will list the step by step in-case anyone would love to replica this tutorial.
But before I start let me just PRAISE my awesome hub! This project could not be done without him! He is the biggest complainer of all when I bring up new ideas, but I tell you what, he jumps right in at every single project as I think he enjoys making them, too:-) #teamwork♥♥
So. Let’s start!
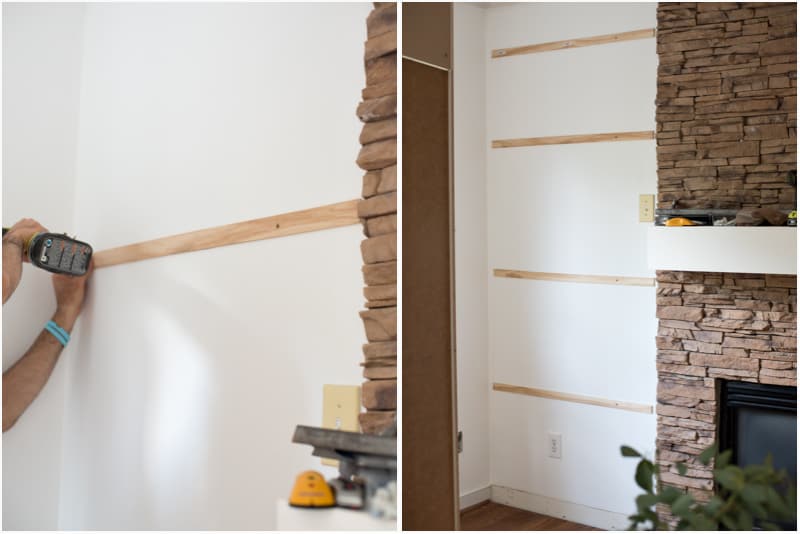
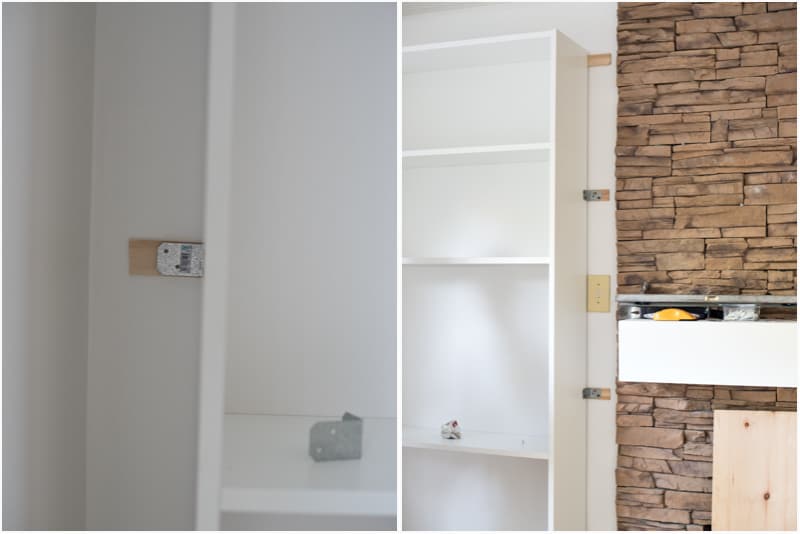
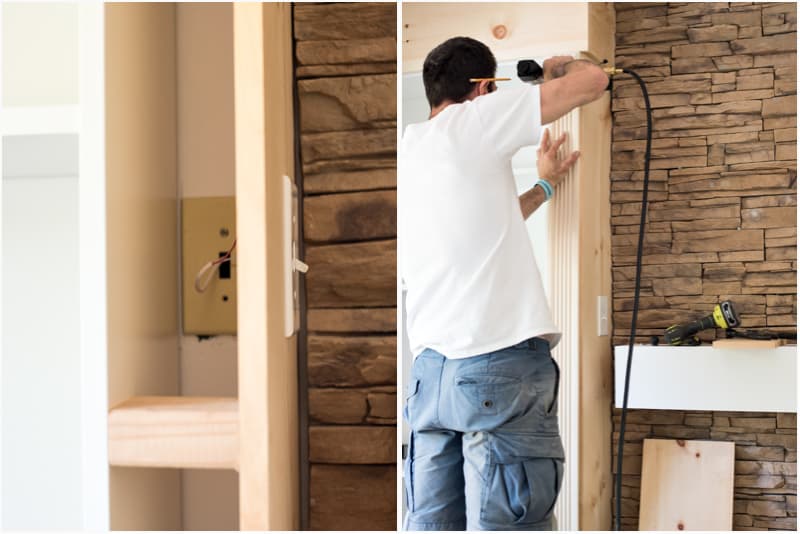
- We added four pieces of wood panels on the walls ( both sides of the fireplace) as the long board that goes on the side was 12″ wide, and the Billy bookcase was 11″ so we needed to make up that 12″.
2. The hub cut the baseboard out from the back wall so the Billy Bookcase could be pushed up against the wall.
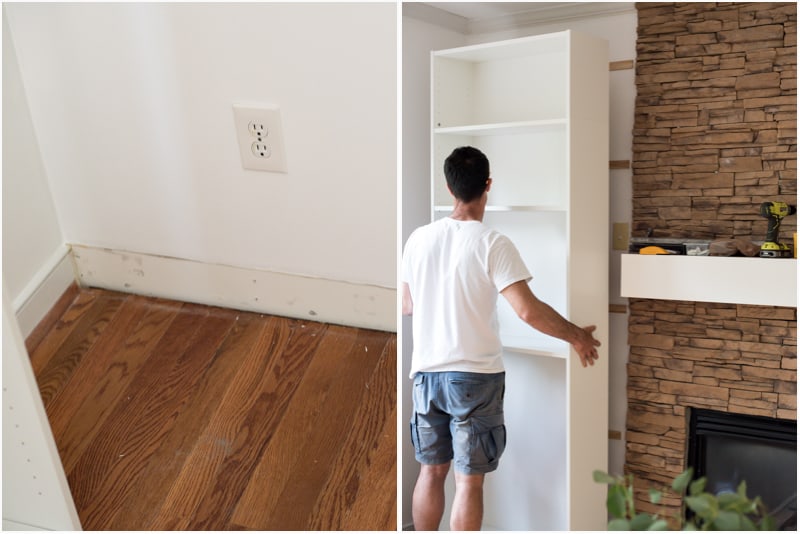
3. Using L-brackets, we secured the shelves to the wall ( to the horizontal wood panels) so it would be stable.
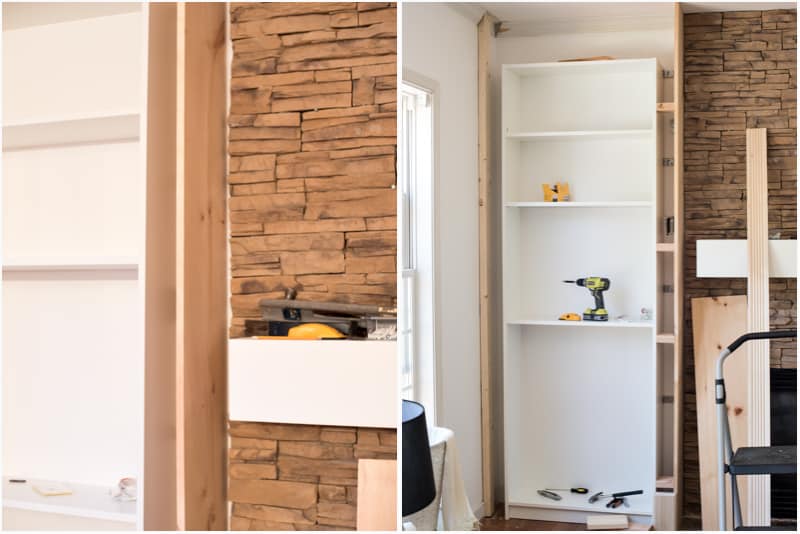
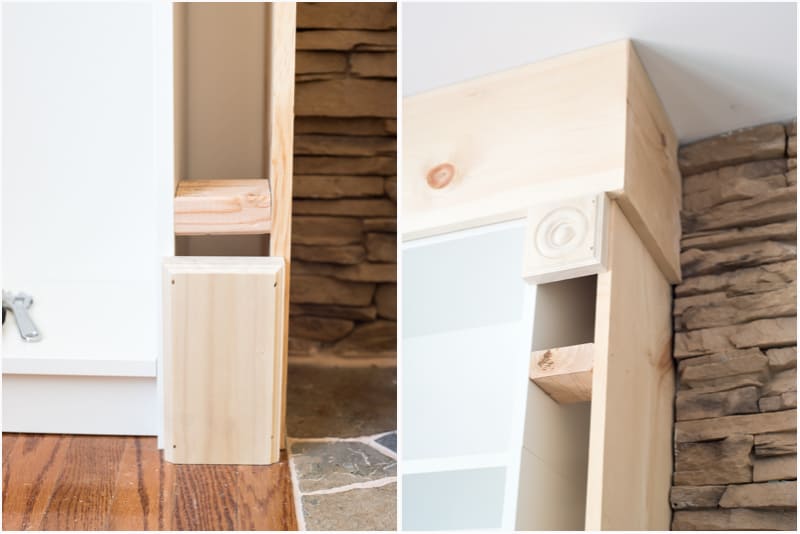
4. We added the side board ( the 1x12x12) on the fireplace side. We measured it and cut it to the exact measurement from ceiling to floor. We added a small filler to the gap between the shelves and the side board.(from 2×4)
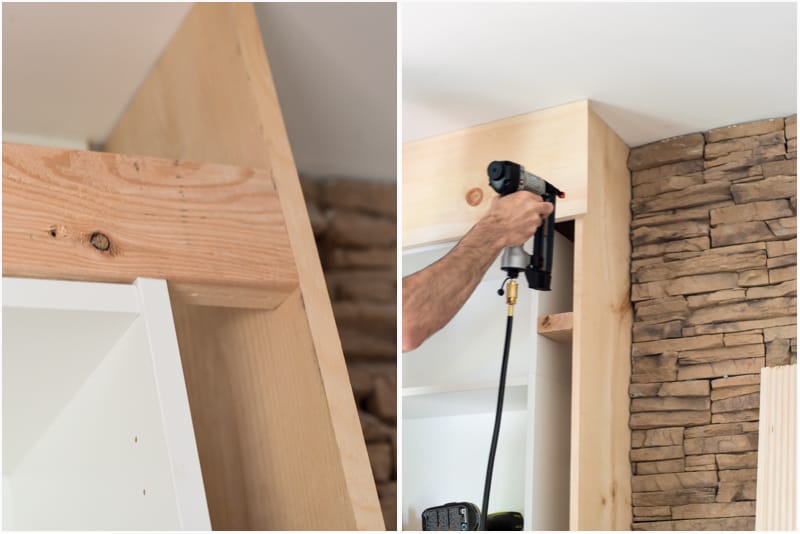
5. Added a piece of 2×4 ( size of the whole built-ins) onto the top of the bookcase so we could nail the top board that goes on the front fo the selves.
(Tip: JobWe invested in a brad nail gun and OMG…the job was done in no time! Worth every penny!)
6. We pieced together the top board and side boards ( they were measured and cut to pieces).
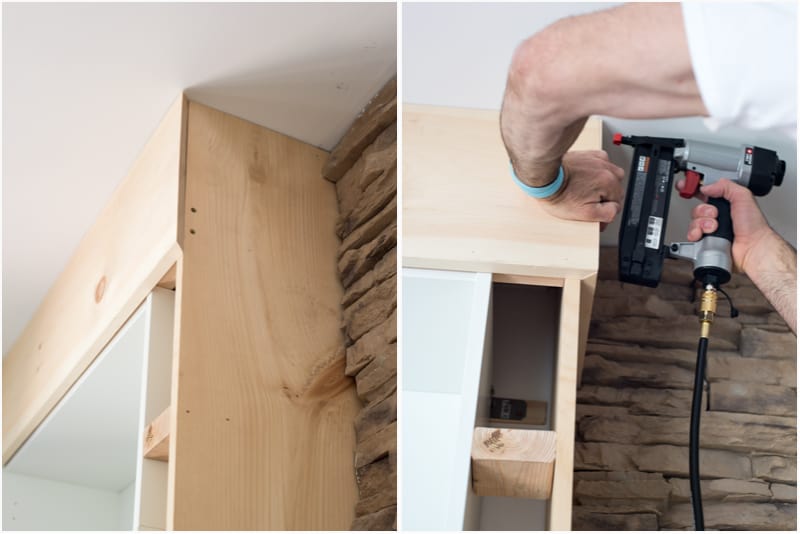
7. We added the woodgrain millwork pieces ( square on top and rectangle to bottom) and then we cut the board to an exact size to cover he gaps.
My genius hub moved the fireplace switch to the outside of the built-in, so we can still control the fireplace:-)
Then we added the shelves that came with the Billy Bookcase. I did not want to have the plain horizontal shelves al the way so we cut in shelves ( that came in the box) and push them in vertically between two selves. We also bought a white a wood board and cut it in size for the longer pieces.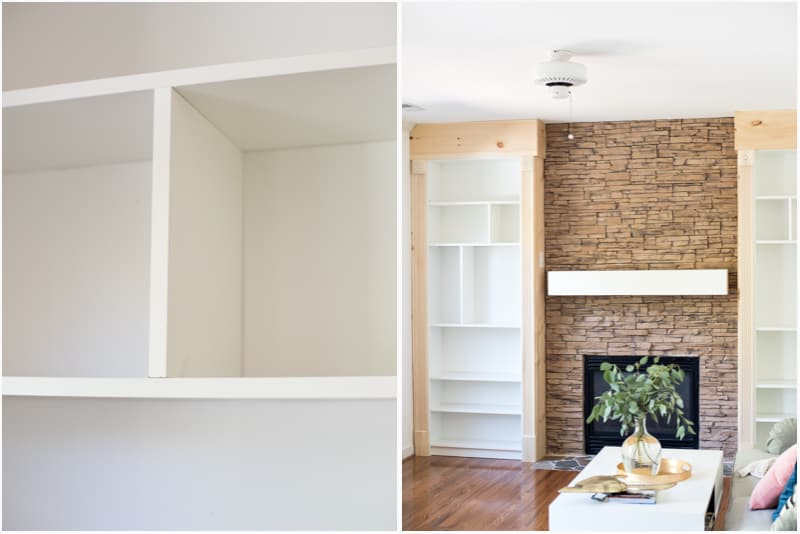
And as the last step, I painted the boards with Ultra White from BEHR!
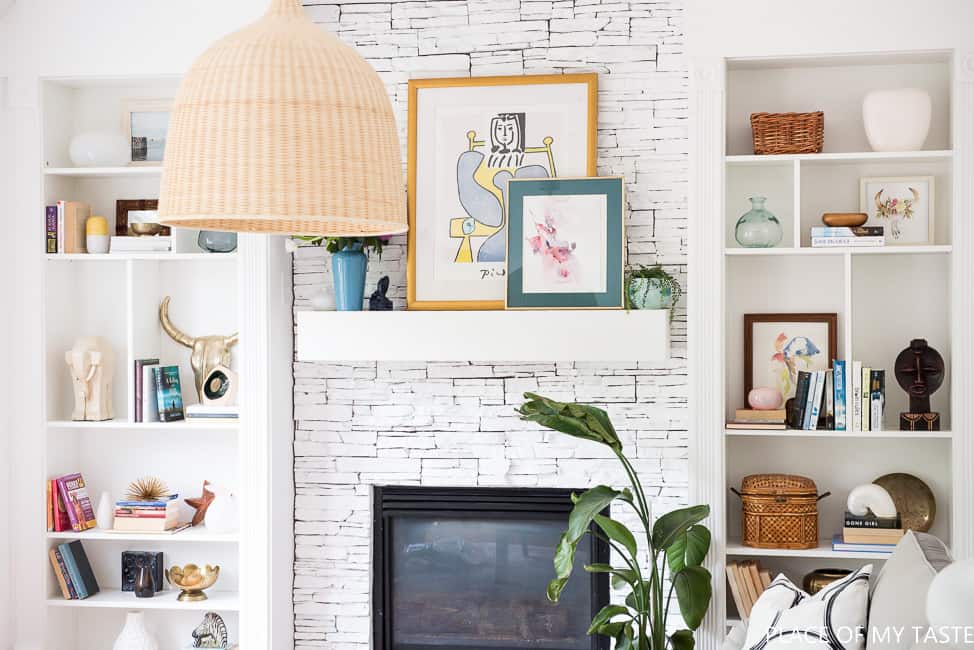
Voila! Billy Bookcase Built-ins are in, and they shine my living room, you all!
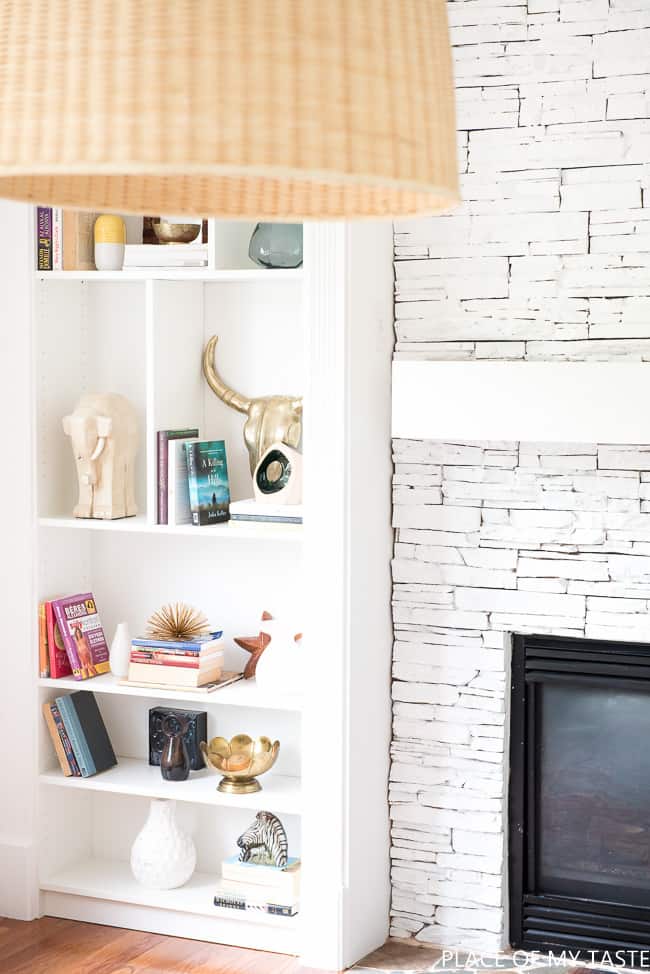
Billy Bookcase Built-ins are in, and they shine my living room, you all! I dragged down this huge wicker lamp ( it was in my living room for years) from the attic, and I think it will be perfect in this room as I will bring in textures and layers with a touch of bright colors in to break up the clean whiteness.

I am smitten with the result, my friends! I can stare at these built-ins ALL DAY. What do you think?
As you see, I turned our boring brown fireplace to a white beauty as well. I just wanted to go all the way with WHITE:-) I will share the HOW TO on that as well but not before next week’s room reveal, perhaps in a couple of weeks.
And I, of course, played around with the mantel styling a bit, but I am sure it will change many times before I’ll be happy with the look.
Can you believe this is the same wall? WOOOOWWWWW!
And WAIT, the room is not done just yet:-)
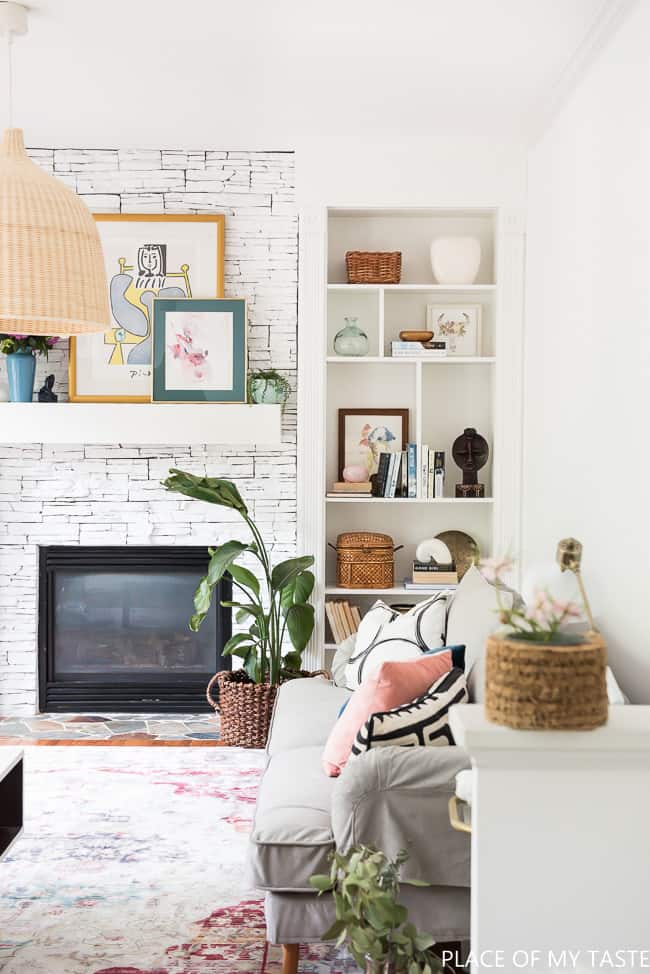
Will you come back to see the full reveal next Thursday? There are some missing pieces still ( like artwork, coffee table- I found a beautiful mid century one on Craigslist from Lane for $50:-) which I am going to pick up this weekend, and some window treatment, possibly bamboo – I am also thinking on a bar cart perhaps).
Thanks for stopping by today! Now be sure to head over to Calling it Home to see the updates from all of the other guest participants .
Cheers,
Aniko
*Affiliate links are listed in the post)
Hello,
How did you attach the boards that are vertical to provide a variety of shelving heights and spaces?
Hi,
How were you able to change the pattern of the shelving? You have a much more modern arrangements than the traditional set up for the Billy. Did you cover that in a different wall post?
We took one of the shelves out and cut to size to fit in between two shelves. We did not secure it in any way but we made sure it fits in tight enough between two shelves.:-)
Love this project — found it when I googled as I am thinking of doing a similar project around my fireplace.
I am curious, though, did you just not need the outlet(s) on that wall? I think it would have been pretty easy to just cut a hole in the bookcases’ back and use an extension to bring the outlets out half an inch or whatever. (I don’t have ENOUGH outlets in my 1960 house so I am always looking at what happens to them in projects like yours!)
I am sure I will be back soon for more inspiration! Great site! 🙂
I must say it was hard to find your blog in google.
You write awesome content but you should rank your
blog higher in search engines. If you don’t know how to do
it search on youtube: how to rank a website Marcel’s way
you forgot to show how you made that secret pot stash compartment behind the sideboards
Love the bookcases, but I can’t believe you painted over that beautiful fireplace! What a tragedy!!!!
LOVE this look! I am looking to do something similar to flank a double door entry into an office off my living room. Do you feel the shelves themselves are strong and weigh bearing? Just curious if you reinforced them.
They are definitely strong and weight bearing! All we did was that we built it around and it made the entire shelving unit to one strong piece! We love it!
The bookcases look fantastic, and I love your styling video!
Glad you liked my “silly” styling video. I had fun creating it:-)! Thank you! And I am obsessed with those built-ins myself! Take Care!
I love it from top to bottom!!
Your bookcases are gorgeous! I especially love the vertical supports between the shelves. It’s hard to believe that these pictures aren’t the actual reveal. Definitely can’t wait to see the final reveal.
Aniko, you are just so darn cute! Your shelves turned out great and completely transformed the room. I’ll share this on Facebook.
Thank you for joining Thoughts of Home!!
What a difference! Looks fabulous; can’t wait to see the entire room. Love thrift store treasures!
Thank you so much, Brenda! You can’t beat those thrift treasures for sure!:-) Have a great week!
Your fireplace wall transformation is magazine-worthy! Kudos to your husband for his carpentry and electrical skills and for being such a big part of your ORC. Great styling on the shelves.
I totally love how it turned out! Your Build-ins are so gorgeous and the styling is right on.
Thank you, Betty! I am obsessed with the new built-ins. Can’t get my eyes off of them:-) XXOO
The bookcases just look so good! And the lampshade is perfect in there. The room is gorgeous already – will definitely be back to see the finishing touches next week!
Thanks, Lizzie! Yeah, indeed, the lamp was made to be in this room! I am so glad that I walked up to attic-haha. I totally forgot that lampshade and finding it saved me some dollar:-) Thanks for the visit!
Aniko I adore your bookcases and I can’t wait for the reveal! I love the direction the space is going in. As a fellow ORC participant it’s been wonderful to gather some fantastic inspiration. I’d love for you to share your progress at Thoughts of Home on Thursday. Our readers would love to see it. The gathering is at http://www.decortoadore.net
Thank you, Laura! isn’t it amazing to browse through all those fantastic inspirations linked up to the ORC? Have a great week!
Aniko this looks absolutely AMAZING! Wow, you’ve been busy and special thanks to your handyman! Great minds think a like as we both did our living room last ORC round and now doing our family rooms and painting fireplace white. 🙂 You’re way more finished then me, but can’t wait to see this on reveal day my friend! XOXO, Sarah
I know, Sarah, right? High five on the room makeover. It’s funny as it would be our family room but I call it a living room. I just call both rooms our LIVING room-HAHA. I wish that there were ONE better size rooms instead of having two smaller rooms, but oh well, I guess I have more space to decorate:-) I LOVE, LOVE, LOVE the white fireplace! Can’t wait to see your reveal!
WOWZA!!!! Those are some amazing bookcases- they look incredible!!!!
Thank you, Christine!Xo
By the way, I could not leave a comment on your blog:-(
These bookcases look amazing!! You did an awesome job! They really do look like they’ve always been there!
They really do, Denise! Exactly how I envisioned them! Thanks for stopping by!
Those bookcases look amazing! I can’t wait to see the entire space, it’s gorgeous! ~Sonya
Thanks a bunch, Sonya!Xo