KIDS ROOM MAKEOVER WITH MINTED WALL MURALS
Today’s blog post will introduce you to the NEW awesome Minted Wall Murals.
This is a sponsored post by Minted. All opinions are 100%on my own.
Well. Well. When one kiddo gets a room makeover, then you probably know what’s coming next. Room makeover for his brother. 🙂 We made a super fun big boy room ( I mean it’s really GOOD!) for my son a few months ago, and of course, I planned to redo my little man’s room at some point as well. When I discovered the new Minted Wall Murals, I fell in love with all the beautiful, chic designs they had in their collection, and I let my little P pick out his favorite mural for his room makeover.
It was not mommy’s choice.
I wanted him to LOVE his new room, and I wanted HIM to pick his favorite! And he sure did, in a blink of an eye!
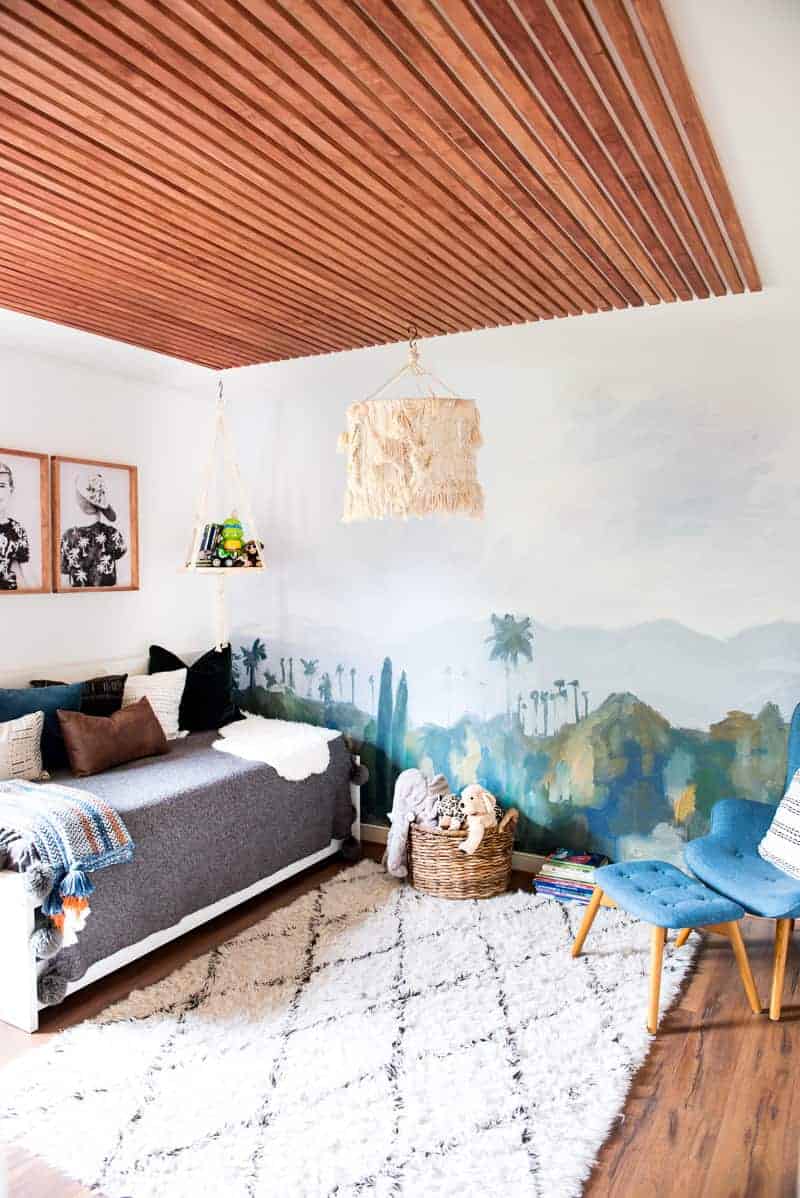
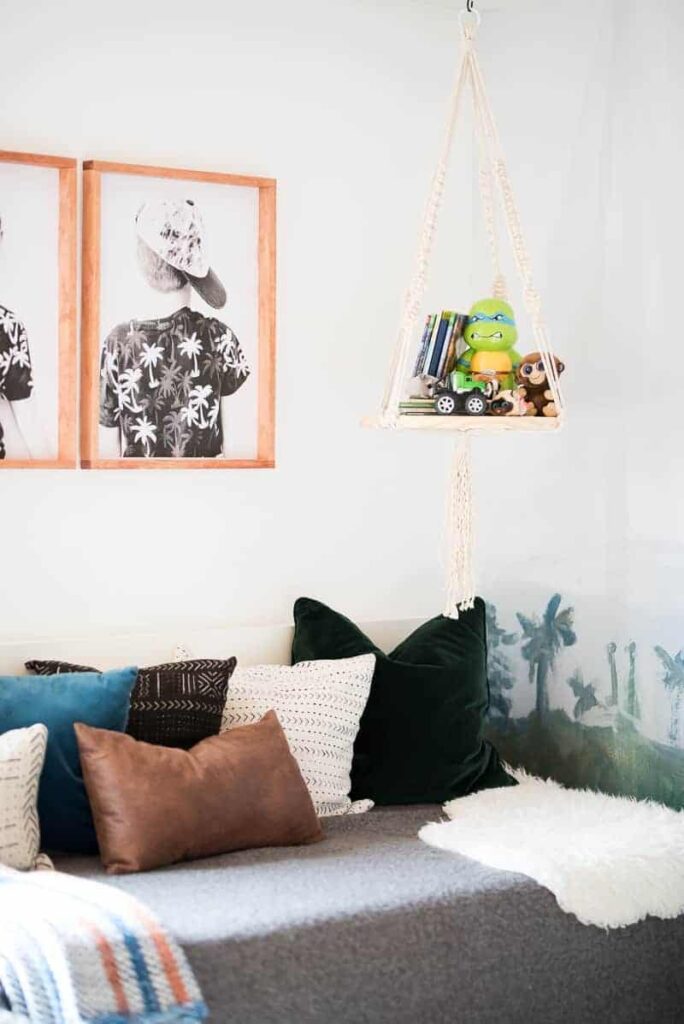
His choice was the LOS ANGELES landscape design from Kelly Witmer. P loved this fun design so much that he did not even want to look further. We ordered it right away, and it was at my doorstep within a few days.
Here is a background of P’s room… It was a little left alone, and this room really needed some TLC!
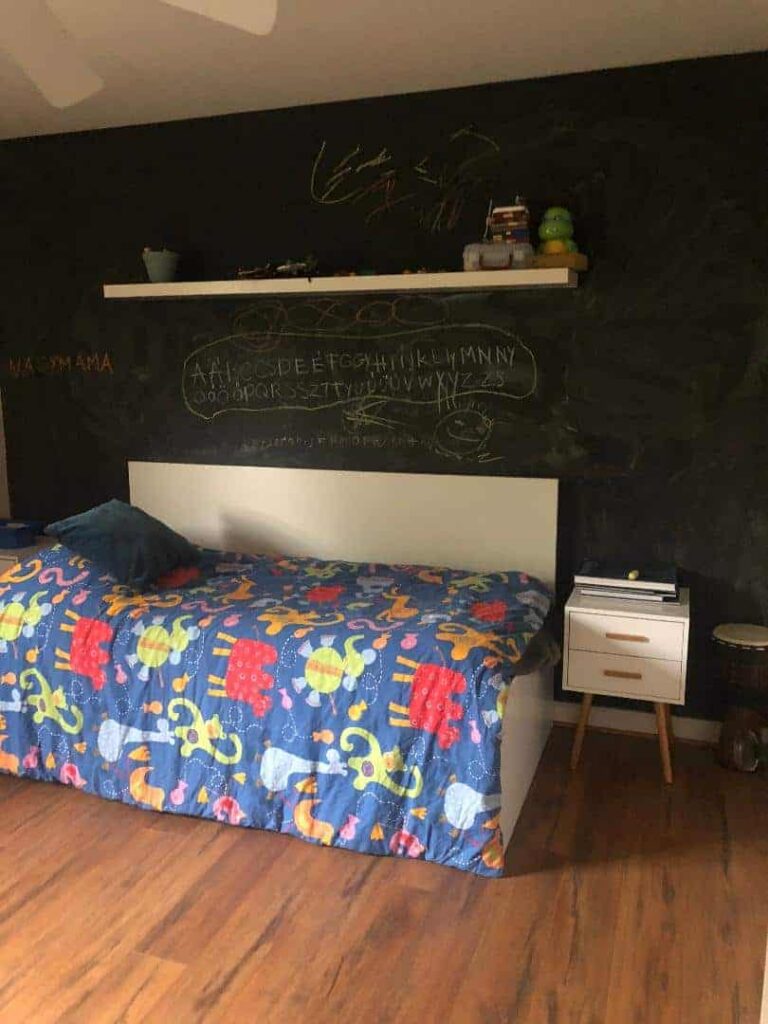
The chalk wall we painted a few years ago worked for a long time, but as my son was getting older, he cared for that chalk wall less, and less over time.
Steps I took to apply the Minted wall murals:
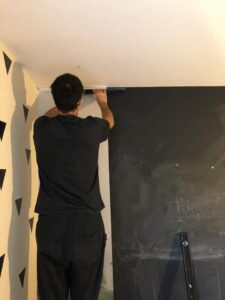
- I prepared the walls! I could have painted the chalk wall, but I didn’t. It worked out perfectly, even though our design had some white areas. So if you have a dark wall, you will be fine without painting your wall. If you have time to paint it then do it!
- I cleaned the surface with a clean rag.
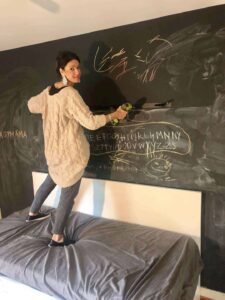
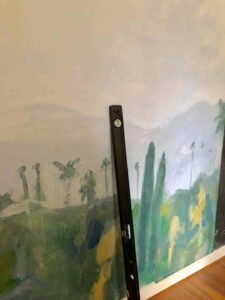
- We laid out our design on the floor to make sure we apply them in the right order.
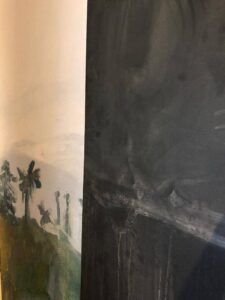
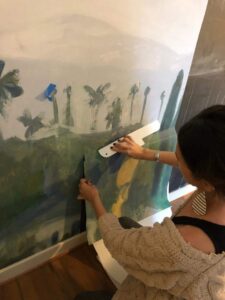
- The murals come in rolls, and the rolls have a sticky back.
We hung the panels by starting applying them from the ceiling. It was super easy to apply all the rolls ( our from was 11.75″x 8.25″). I used a flattening tool to squeeze out bubbles, but overall it was a piece of cake to install this gorgeous murall!
Voila!
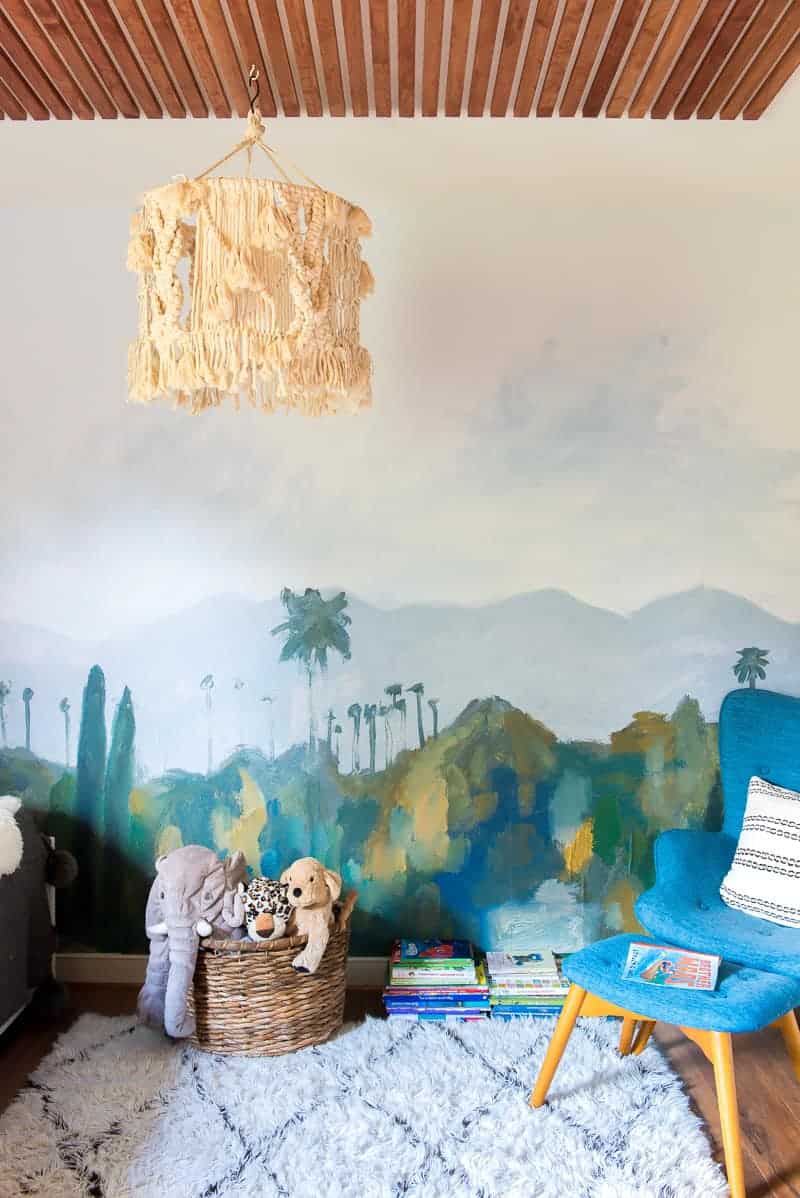
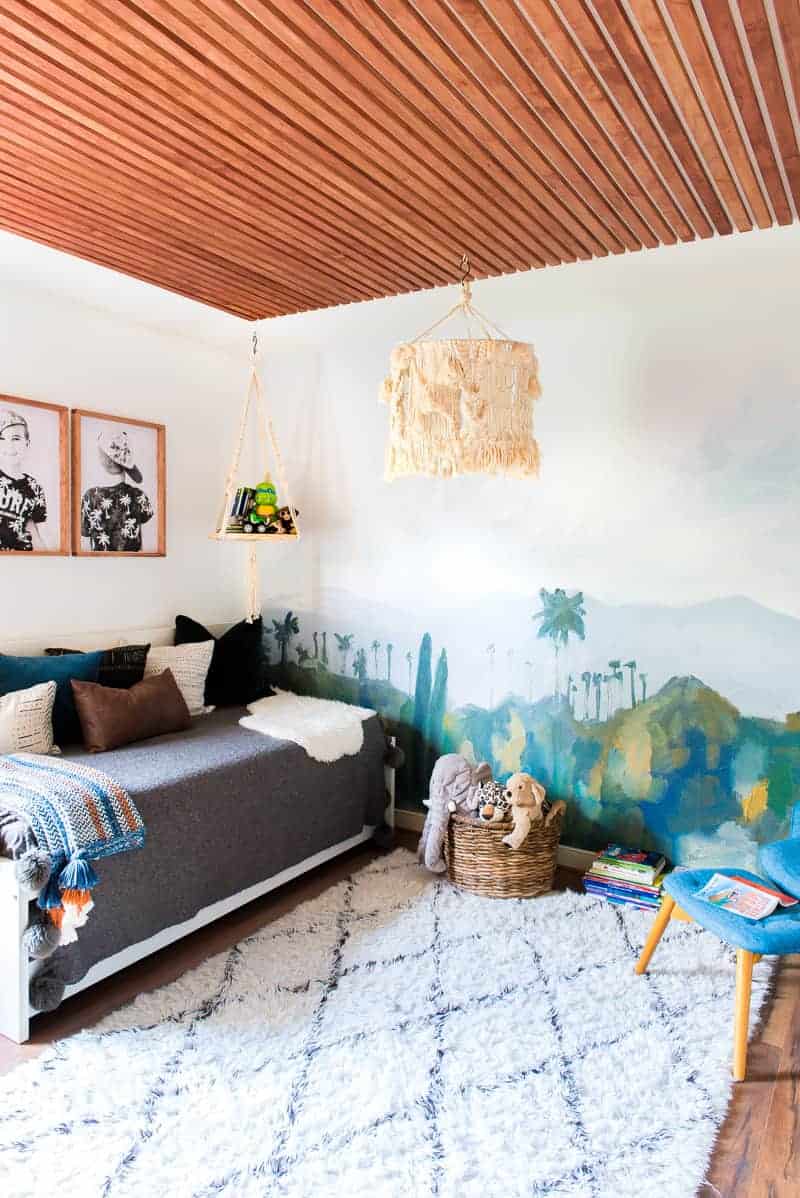
Of course, I had to turn on my DIY switch, and I tackled a few other easy projects in the room to achieve the warm California style that I imagined for my little man after picking out this chic LA style mural.
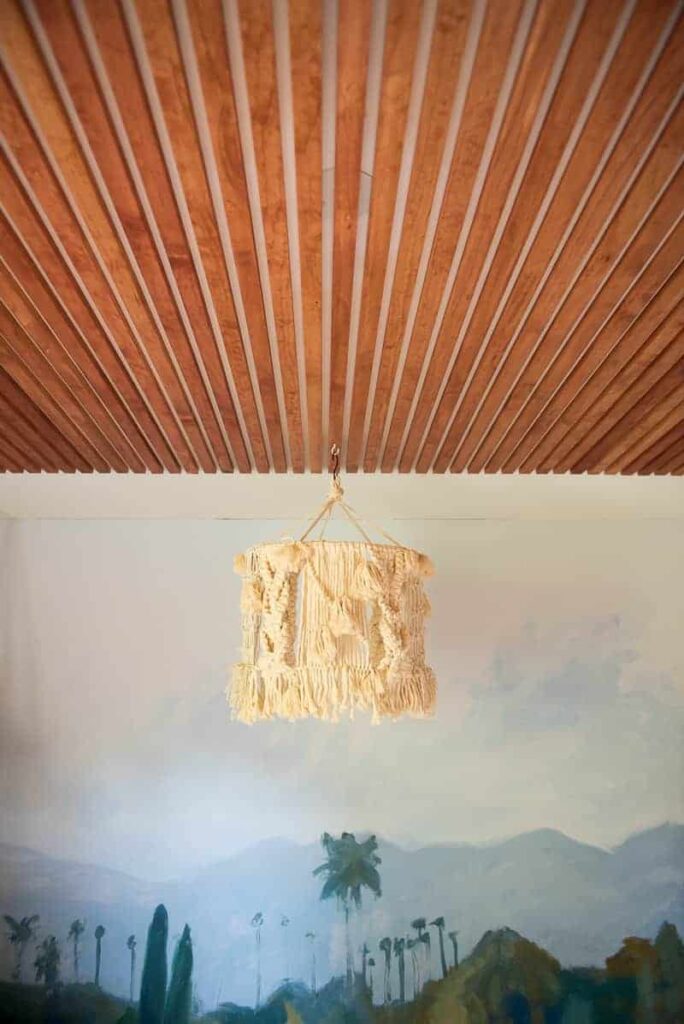
I added a dramatic WOOD SLAT CEILING to compliment the large mural, and I also DIYed a few picture frames for the photos I took of my son (wearing his palm tree shirt!! -tutorials will follow for the frames!). Plus I also made a cool macrame chandelier for his room just for FUN! 🙂
Little P was super happy for his new design. And so did I!:-)
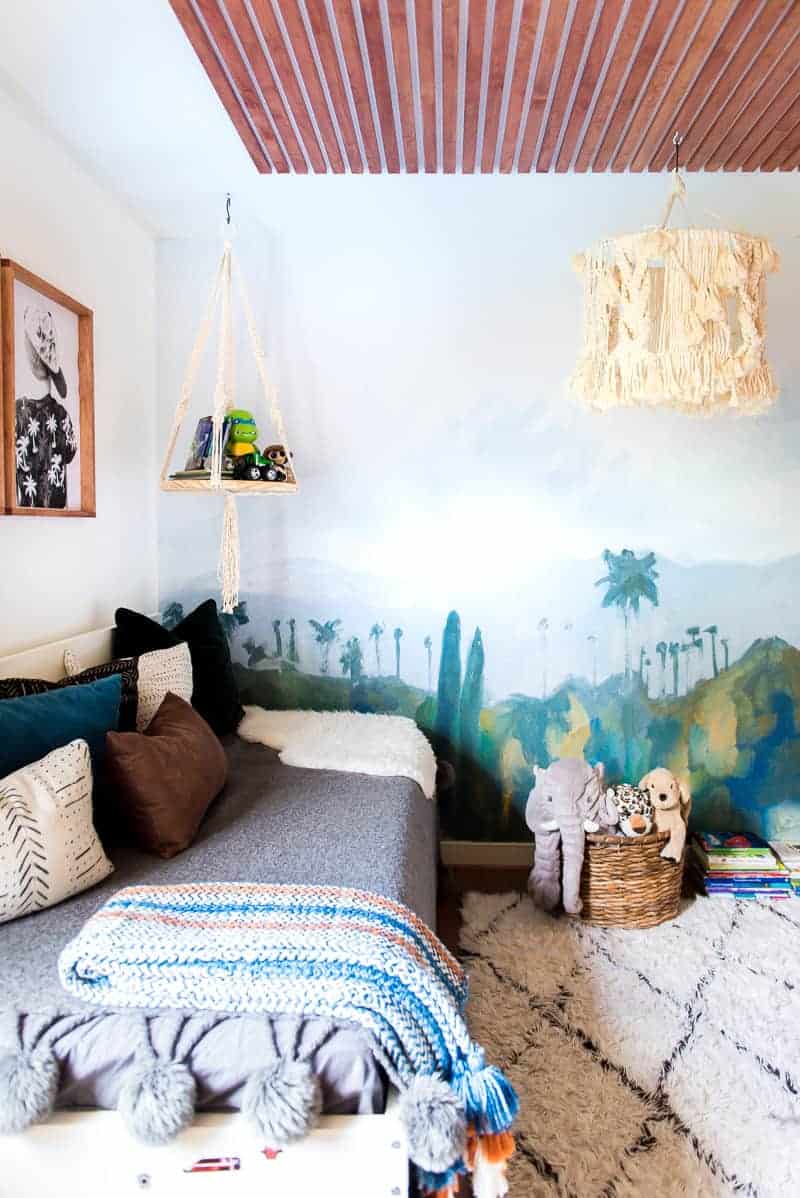
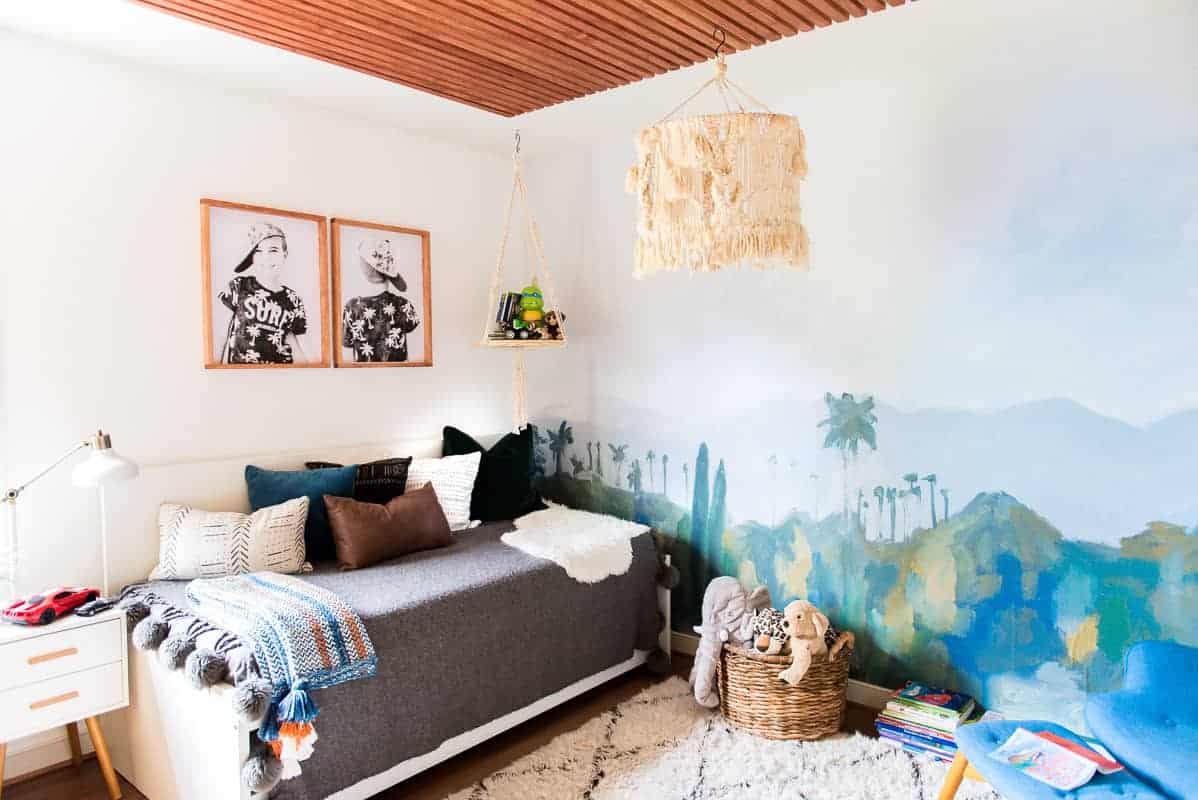
I am absolutely stoked to see this fantastic room makeover, you guys! I did not purchase any extra furniture – we just changed the look of the wall!
I had the bed, the chair, the nightstand ..literally everything! It’s incredible what a simple, but dramatic wall design can do to any forgotten space.
Here are some of the other DIY’s I tackled in this room:
This room went from Blah to Beautiful in a short weekend ( including all those other projects!)
Will you try the New Minted Wall Murals?
I sure hope so!
Let me know what you think in the comments! And if you need a girl room inspiration, be sure to check out this THIS fun girls room. You will love it!
Cheers,
Aniko
Big Thank you to Minted to working with me on this fun collab!;-)