DIY NO SEW PLACEMATS
*I received free product from Tonic Living. All opinions are 100% mine.*

Can’t believe we are almost at finish line. And what even more unbelievable is that I literally tackled every single projects I had planned. How did this even happened? Being 4 days away from home concerned me a bit about not being able to finish what I wanted, but I guess with just a little effort I managed to do it.
Are you new here? Let me quickly fill you in. One Room Challenge, hosted by Calling it Home is a 6 week progress of a room that needs some help. I picked our breakfast room that really lacked style and personality and it happen to be the center of our home. Yuk!
Here is the before
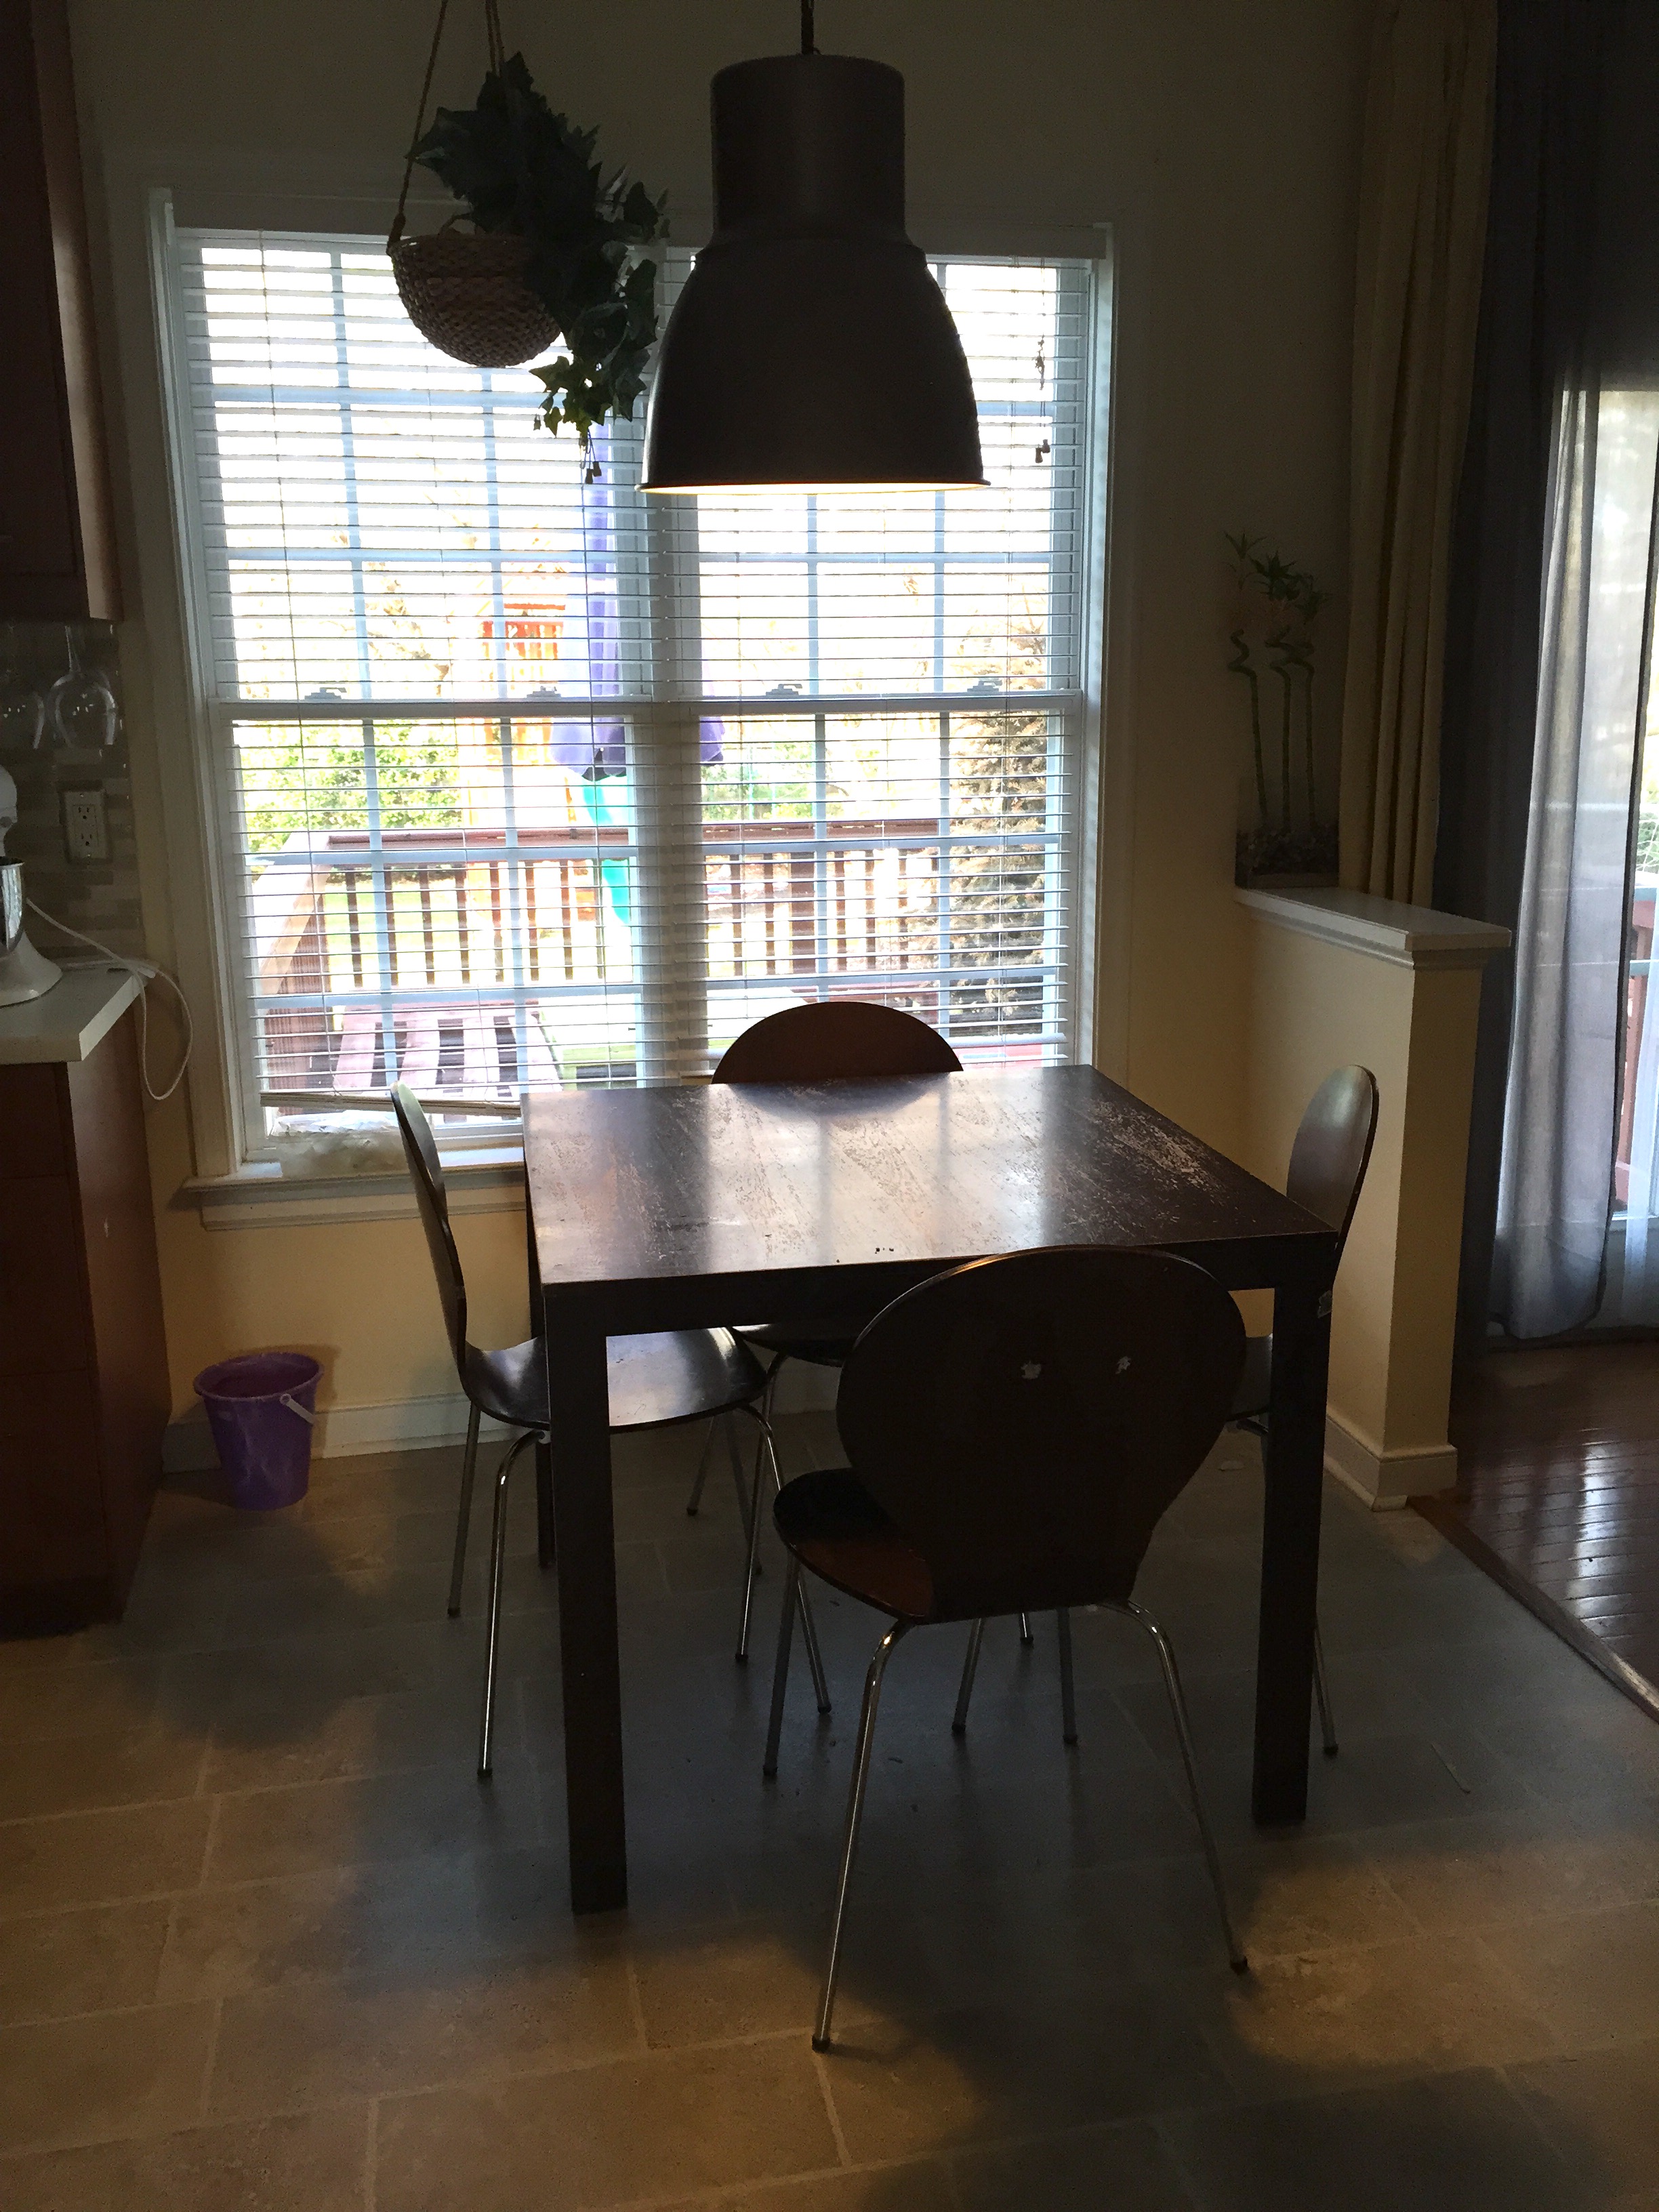
I know, I know, I know…I show you this BEFORE image every single time…
you know why?
Because I am loving how the room literally turning to a beautiful, new ( on old) colorful and fun room. I like to remind myslef of how ugly and BLAH it was before.
If you want to see each week’s projects, be sure to visit this page where you can find all previous weeks posts.
But today guys, I have an AWESOME news!! I am not only going to introduce you to a fantastic ONLINE FABRIC STORE but I also going to show you a quick tutorial of how you can make your own DIY NO SEW placemats.
Oh…and wait! At the end of the post you can also enter for a FUN GIVEAWAY!! Sounds fun?
So couple weeks ago I discovered TONIC LIVING on INSTAGRAM. Just beautiful feed, my friends! You know when you peek through the suggested pages? Well, their feed stood out and I started following them. I fell in love with every single fabric design they have in their online shop. They were awesome enough to provide me with their fabulous fabric for my project and with a
$50 gift card
for their online shop to one of my lucky readers!! How cool is that?
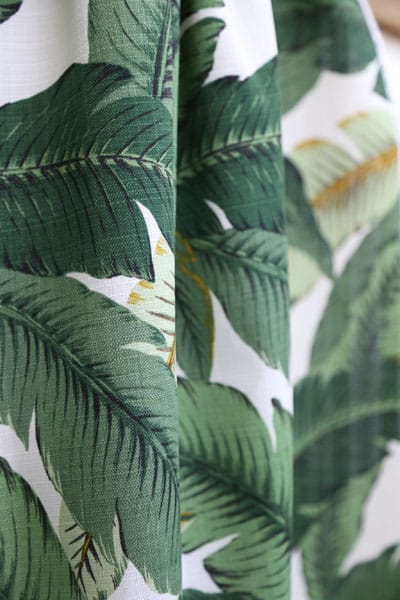
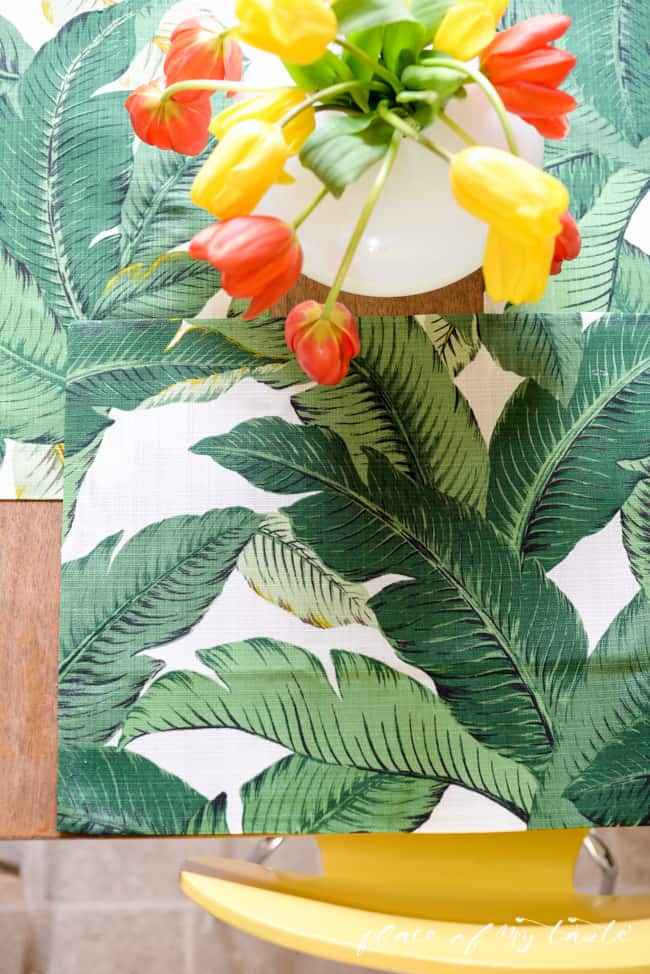
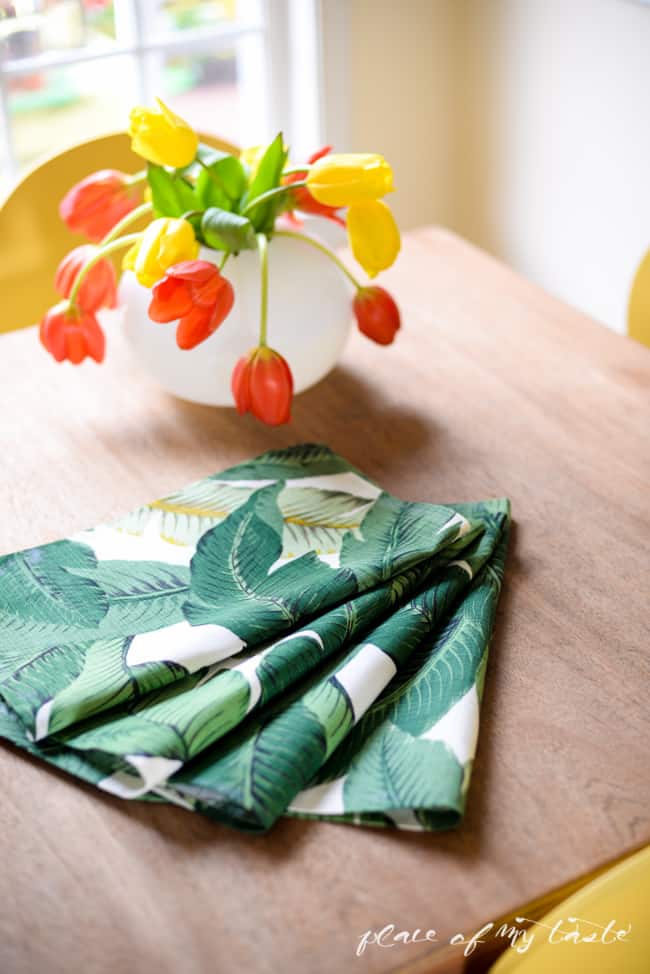
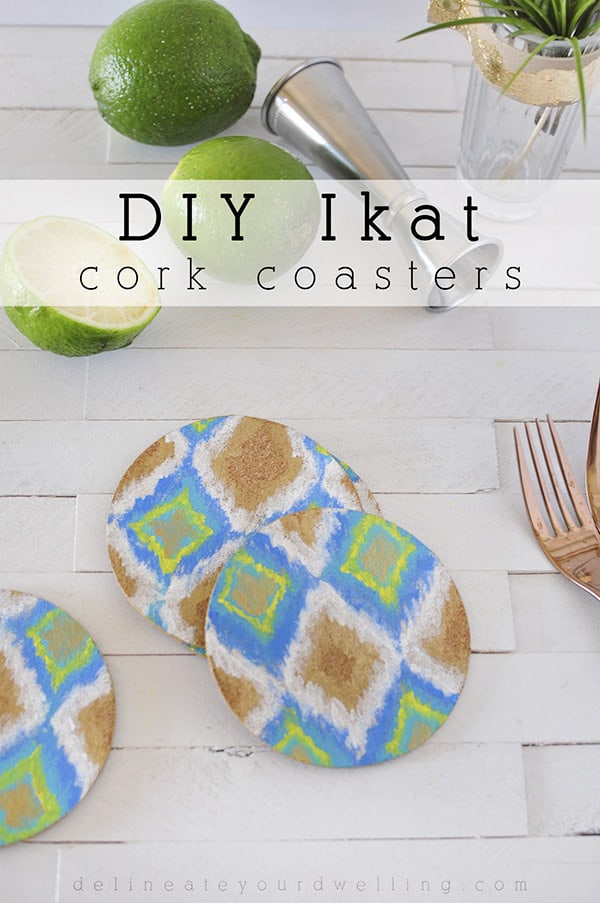
I choose this fantastic BANANA LEAF fabric for my placemats. I thought it would look lovely with my yellow and golden brown accents.
MATERIALS I USED FOR THE PROJECT:
-fabric
– scissors
– fabric glue ( super awesome) – affiliate link

– iron
– old placemat
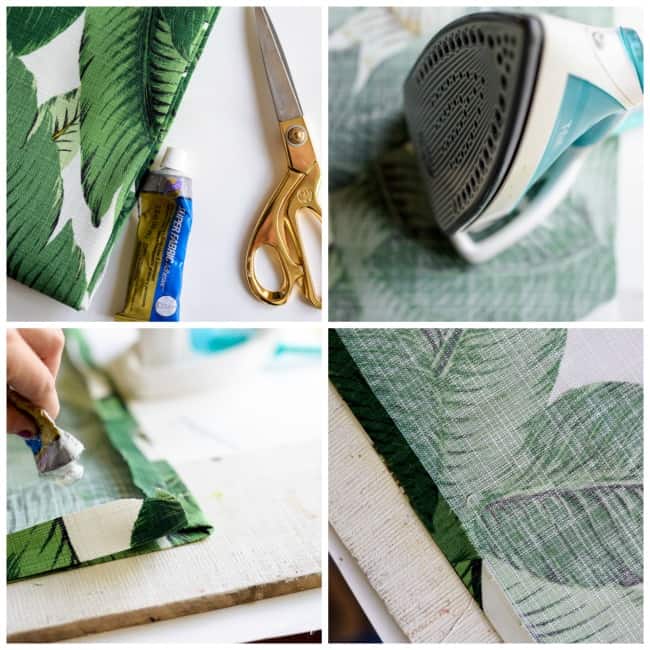
Steps:
1. I took an old placemat and I cut my fabric to that size. Left 1 1/2 inches fabric on each side so I can fold it back.
2. I ironed the edges of the fabric.
3. Then I applied FABRIC SUPER GLUE along the ironed line and gently pushed down all edges and let it dry.
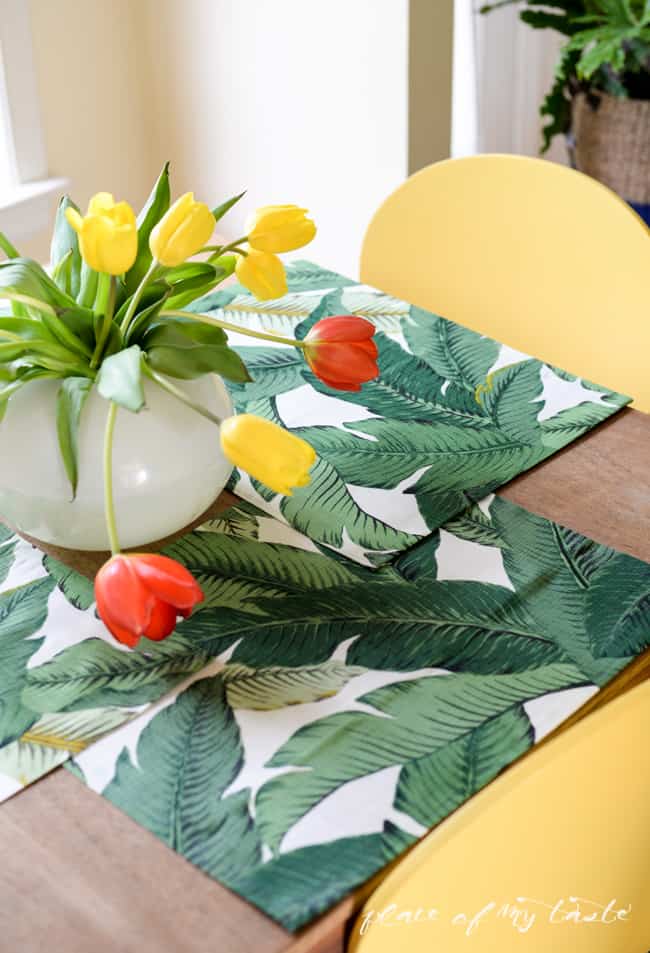
I have to admit that I just want to sit here ALL day now! Isn’t it look fun, edgy and unique?
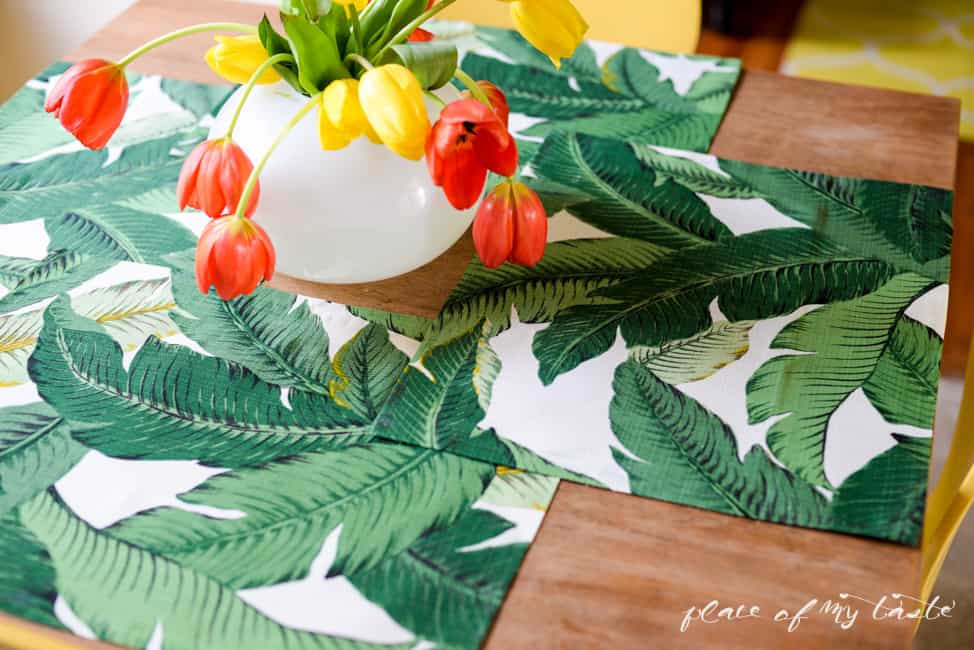
This was the easiest and shortest tutorial of mine in a long time.
Are you ready to see what Tonic Living has for you ? They have great designer pillows and gorgeous fabrics in their shop.
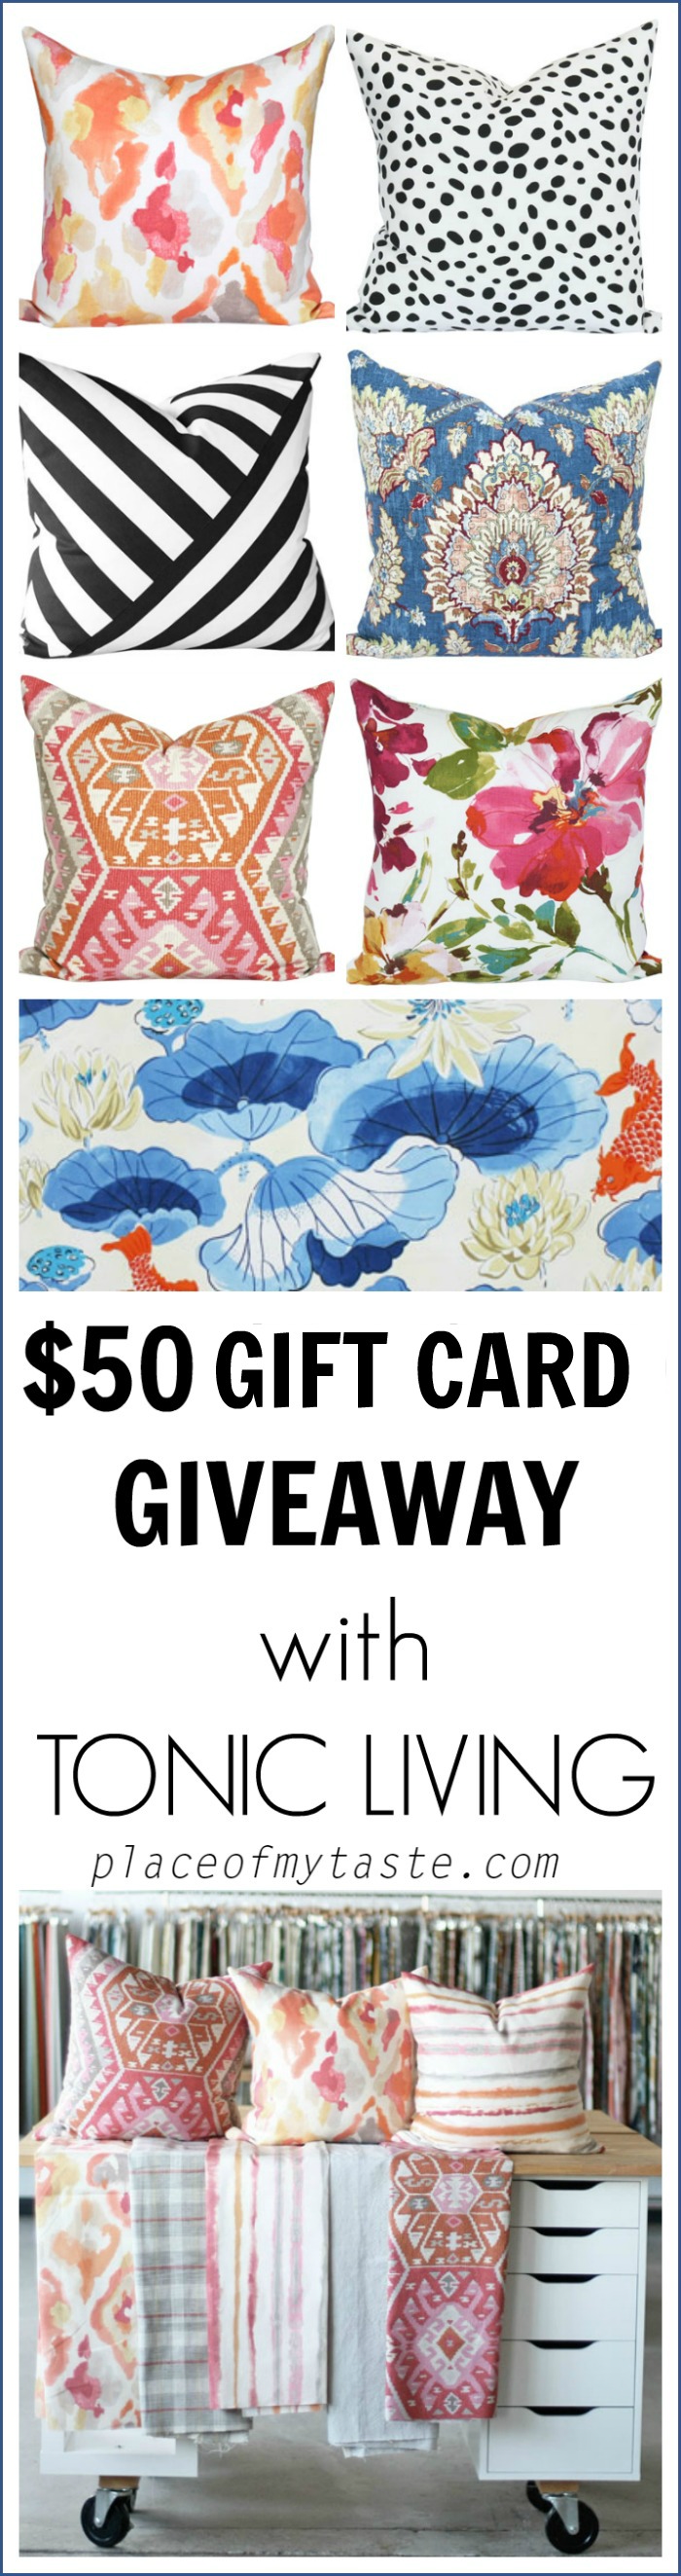
* This giveaway is worldwide, shipping charges may occur*
I hope YOU enjoyed your visit today and I wish you win!! Next week is our last week and a full ROOM REVEAL is coming up. So excited and I feel accomplished!
Enjoy the weekend!
Cheers

A pillow! (:
I would choose a pillow-so I can take a break and enjoy summer 🙂
Great no sew project! Love Tonic Living and have a few things already earmarked for the master bedroom refresh, but may have to make some new placemats soon!
Tonic Living is new to me! I’m so happy to find it. Thank! (Sure could use the fabric)
What a great tutorial! I would love a pillow in that fabric!
Pillow! I’m looking to update my living room. I love tonic living!!!
I have a mild obsession with pillows (just ask my boyfriend)! I would definitely love to get a gift certificate and revamp my living room with these amazing pillows!
I love finding new resources for fabric. Thanks for sharing.
Either…Everything is beautiful! Thanks for a great giveaway!
I’d pick fabric!
I’d ick fabric!
Fabric! I love everything Tonic living has! Your placemats turned out great! I’ve been admiring that fabric for awhile:) Thanks for the giveaway!!
gyönyörüek a párnahuzatok! Ha én lennék a szerencsés nyertes, azok közül választanék! Gratulálok a blogodhoz, nagyon inspiráló!
Agnes, jo neha egy kis magyar hozzaszolast is olvasni:-) Koszi hogy ellatogattal ide es orulok, hogy inspiralonak talalod az oldat! Udv,Ancsi
Fabric! Hello pretty drapes!