WALL ORGANIZER { Entry Way }
DECORATING | DIY | ENTRY WAY | HOME DECOR | ORGANIZING | Projects | ROOM MAKEOVER

Finally I get to share the last piece of our entry way update.
If you remember, I really wanted to add some sort of wall organizer to our entry way where i can store all the arts that we bring home from preschool and all the in and outgoing mails.
If you remember, I really wanted to add some sort of wall organizer to our entry way where i can store all the arts that we bring home from preschool and all the in and outgoing mails.
Anytime I stepped into my house, the first thing was to walk into the kitchen and throw everything on the kitchen island. Wasn’t too pretty!
This piece of wall organizer can hold it all. The mess and clutter is off the kitchen island, and It also holds our always lost keys.
This piece of wall organizer can hold it all. The mess and clutter is off the kitchen island, and It also holds our always lost keys.
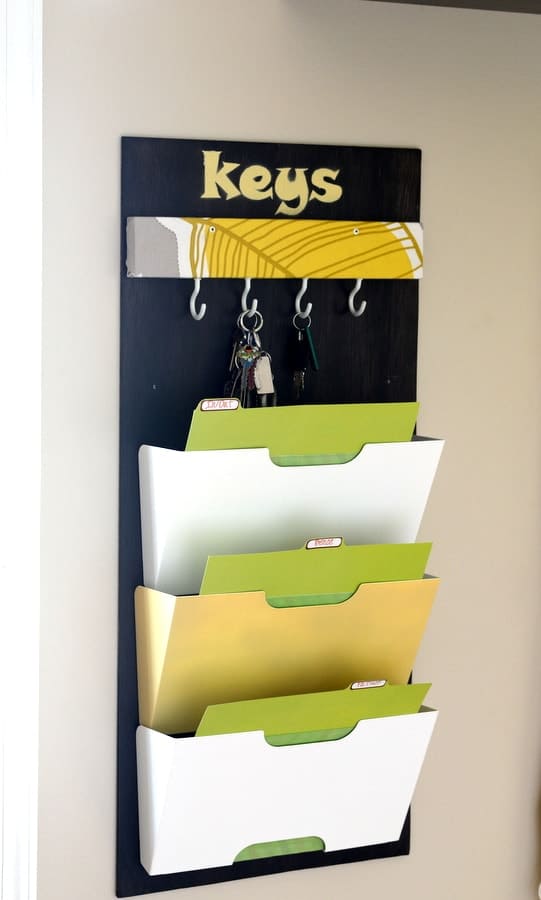
I found this super simple wall organizer / magazine rack at IKEA for $14.99.
I thought I would spice it up a little bit by attaching these holders to a wood panel, which I painted black brown first.

One of the most lost items after my sunglasses are our keys in our home.
To hang our keys,
I covered a piece of wood with fabric {the same fabric that was used in other projects in the entry way – CORK BOARD } and screwed hooks into it than I attached it to the wooden panel.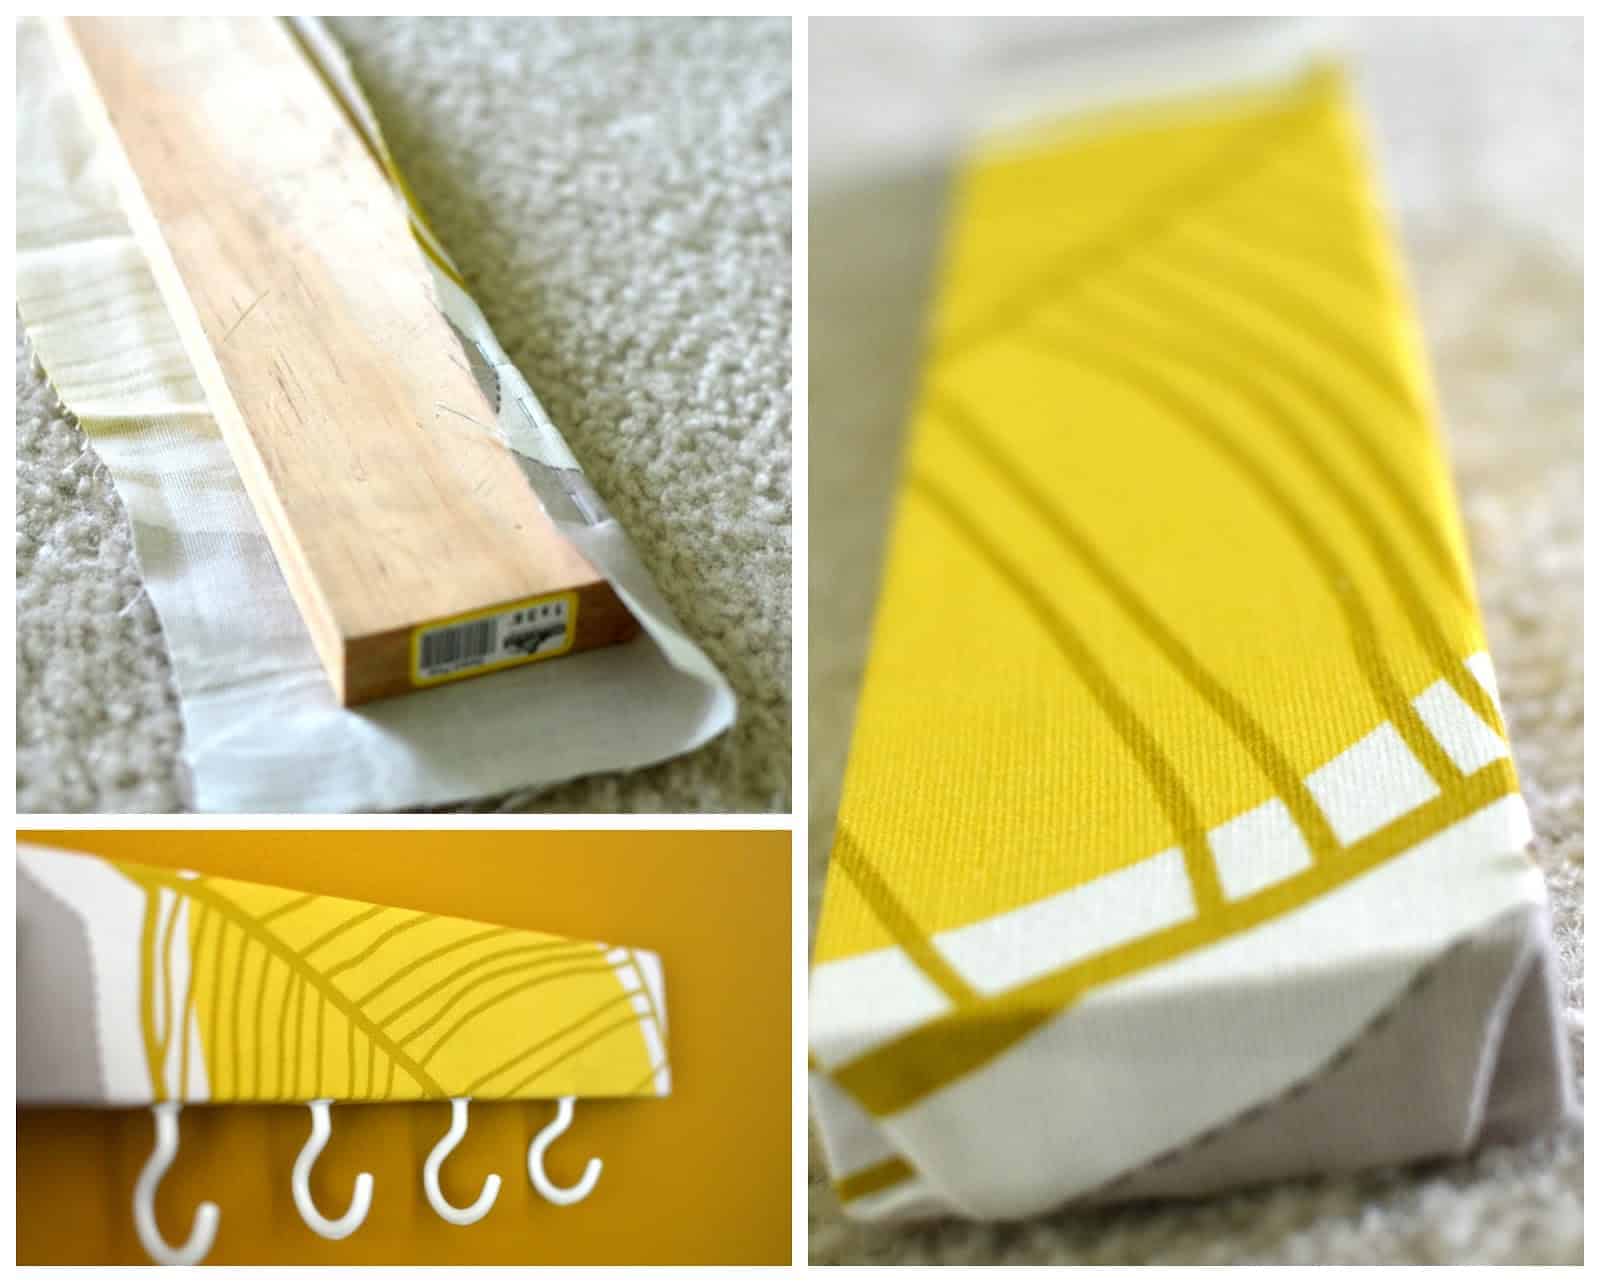
I covered a piece of wood with fabric {the same fabric that was used in other projects in the entry way – CORK BOARD } and screwed hooks into it than I attached it to the wooden panel.
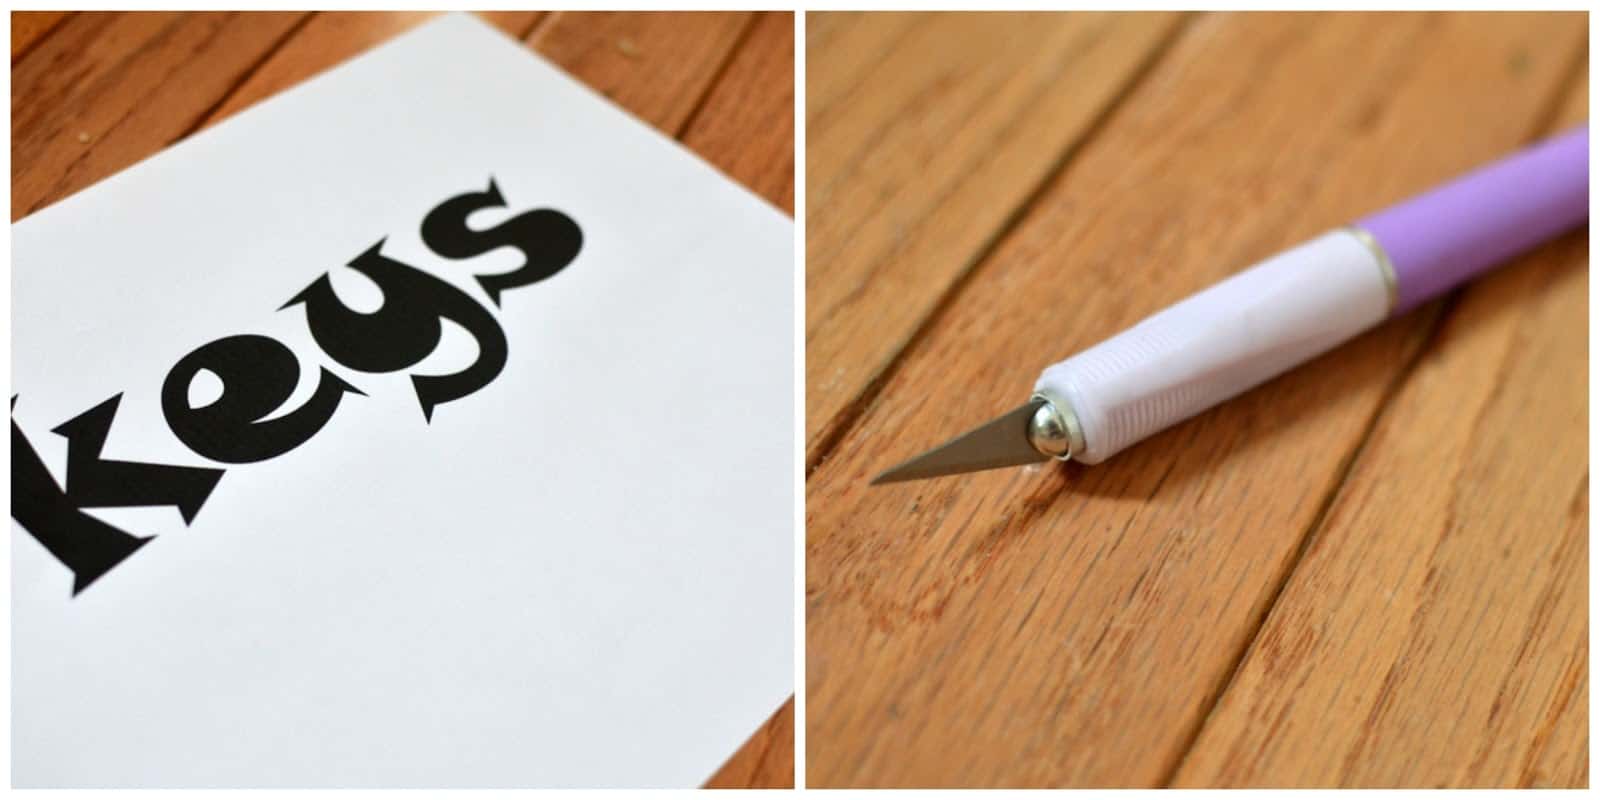
I stenciled a printed word { KEYS }to the panel. Cut the shape of the letters and spray painted onto the panel.
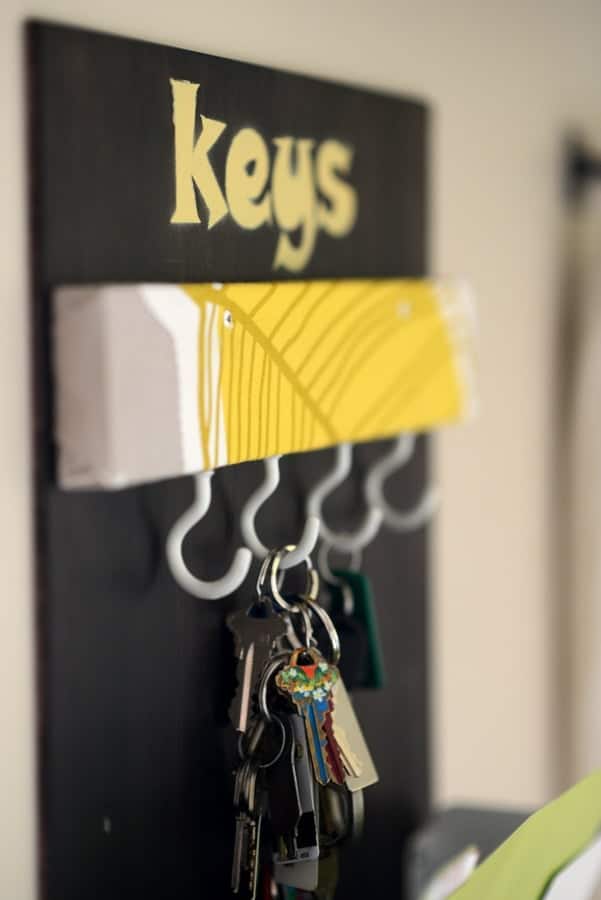
Little before this project was done I still did not like it to a 100%, so I spray painted the middle holder to a matching yellow color.I think that really made the final look.
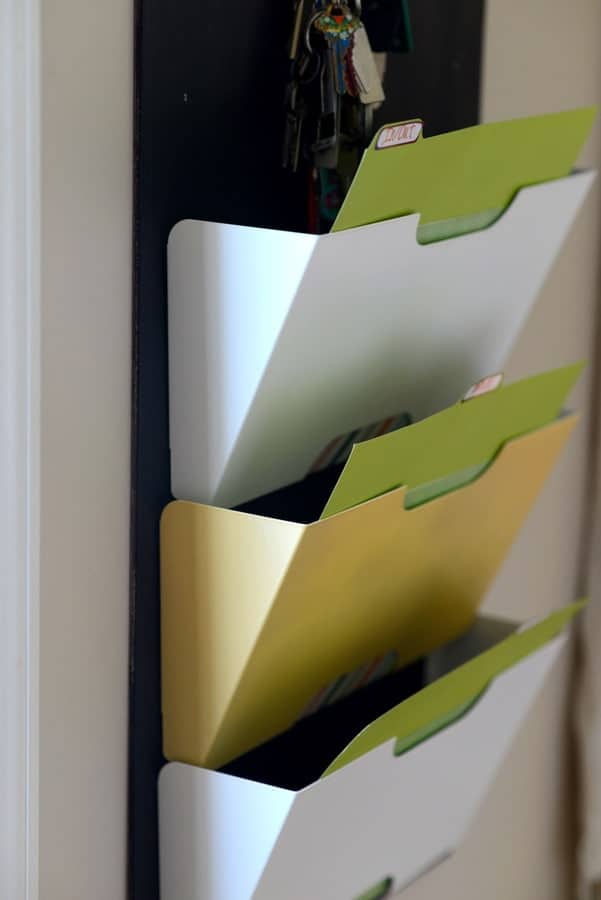
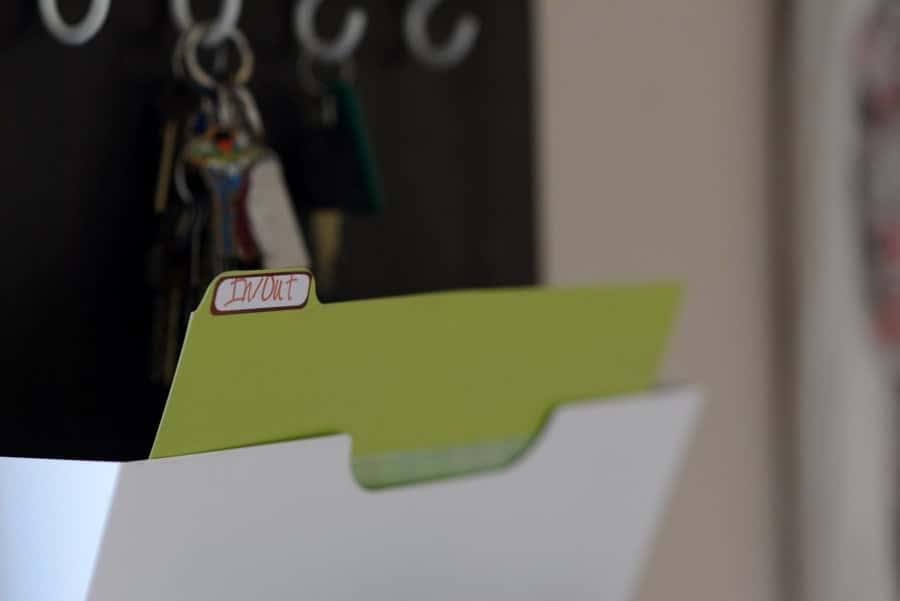
Placed some colorful folders into the organizer, made cute labels and it was all done!
Our Entry Way wall organizer…
How do you like this wall organizer
and where do you store all your school papers and mails?
{ Linking this post in here }
THIS POST WAS FEATURED ON:
BEBETSY


How did you attach the fabric to the wood board for the keys?
I stapled the fabric to the back of the wood board. Hope this helps:=)Have a great day!
How did you attach the organizer to the wood; my husband is questioning my sanity… 🙁
Hello! I was attached with tiny little screws.But you can also use Probond multi-surface glue.Go for it girl, you will love it.:-) Hope you have a great week!
Pinned! So need this. Thanks for the idea!! *hugs*
The gang at My Personal Accent thinks your post about the Wall Organizer is WONDERFUL. We would like to invite you to party with us starting at 5:00 Thursday nights at our new Blog Strut Peacock Style Link Party to share your creative ideas. Come on over!! http://wp.me/P2Vf55-1K
This is really cute, and very useful! I could use one. Thanks for sharing.
Sarah
http://www.creativeramblingsblog.com
Aniko – your organizer turned out great, colors are wonderful and we love the DIY instructions. Terrific project.
YOU'VE BEEN FEATURED! on the BeBetsy BRAG ABOUT IT No.14. http://bebetsy.com ♥
Grab a featured button here http://bit.ly/11S2wN1. Our next party starts at midnight tonight so find something cool to BRAG ABOUT and link it up.
Sharon and Denise
Ladies, Thank you for the feature! Awesome!!
Ooh this is awesome! Thanks for sharing at Party In Polka Dots!
Shelley
http://www.piggyinpolkadots.com
Great idea! How did you attach the ikea rack to the wood securely?
That’s what I want to know!
We NEED to make something like this. Right now we store everything on our breakfast counter or my husbands desk… not very pretty. LOVE this. pinning!
Krista @ joyfulhealthyeats
Love your organizer,what a great way to simplify the clutter! As I write over at http://www.ritewhileucan.com I love getting mail, the snail mail kind, and this is a great place to corner all incoming goodies! visiting via 36th Ave link up
Thanks BARB, I am glad you like it:-)