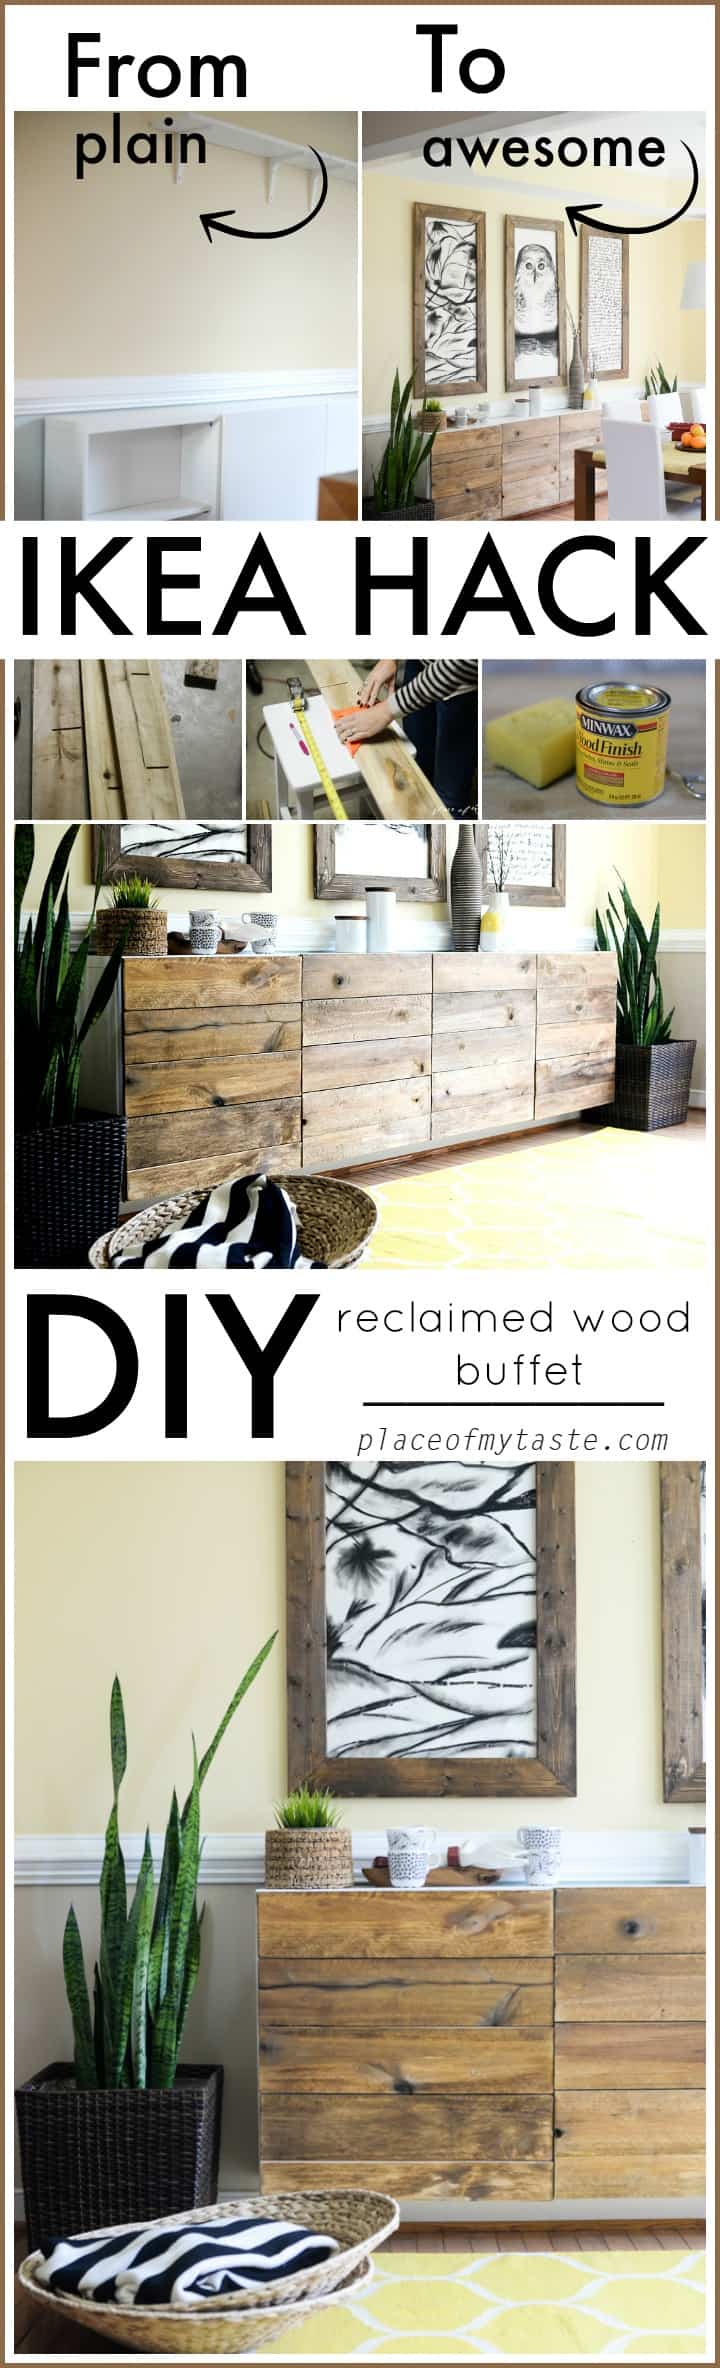
DIY RECLAIMED WOOD BUFFET – IKEA HACKS
IKEA HACKS – DIY RECLAIMED WOOD BUFFET, This is what I’m sharing with you today. Everybody love Ikea hacks, and this is a great one!

Two big projects in one week are not very regular around here, but I could not help it. I was itching to show you what we created with the hub last weekend. I shared a post on some GIANT DIY WALL ART on this past Tuesday
and today I will show you a fantastic one those Ikea hacks: a DIY reclaimed wood buffet.
I will say that this is one of my favorite projects of ALL TIMES. Seriously.
Our dining room had a few different looks already but this by far, is the BEST…In my opinion.
Well, to tell you the truth, I probably thought that for each design at the time when it was new. 🙂
Here are some of the previous looks of this room.

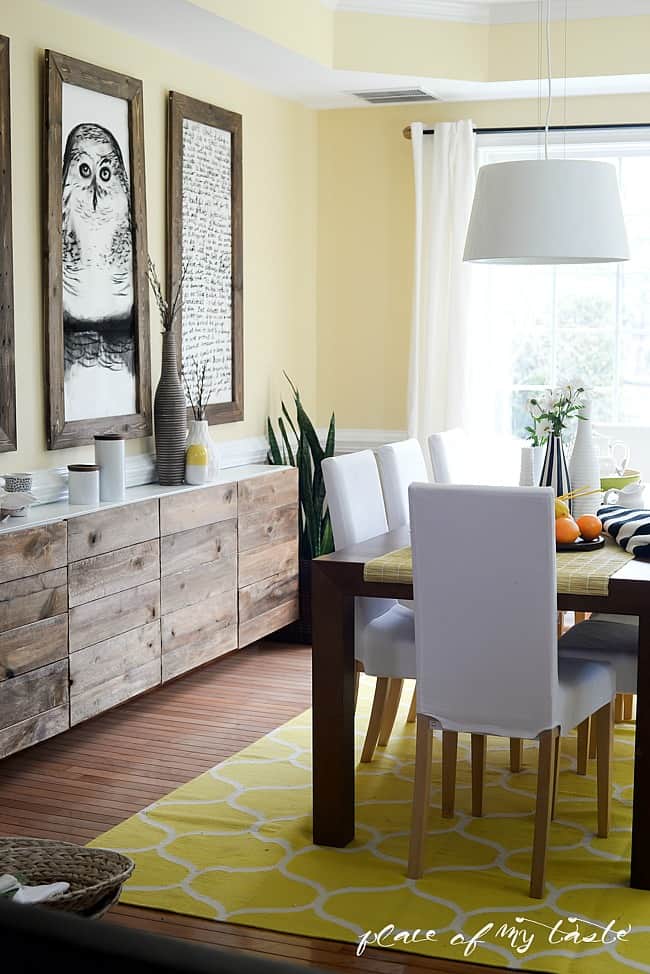
We purchased a long dining table at IKEA almost seven years ago. It fits our dining room perfectly, and we love the table’s beautiful color. The chairs were purchased at the same time as well. The best part of these chairs that the covers are removable and washable. Some of my friends were asking if I was crazy to get white dining room chairs? I told them, NO – I was smart as the covers can be washed and bleached anytime. :-). They are almost seven years old, and there is NO stain on them. Every time I wash them they look totally new! Winner!
Anyways. A few years ago we wanted to add a little more storage space to this room, and we bought a white shelving unit at IKEA.
**Update: Many of you asked what is the name of the wall cabinet that we hacked so here ya go:
It has four cabinets and four doors. I got two white and two turquoise doors. I mostly used the white doors, though.

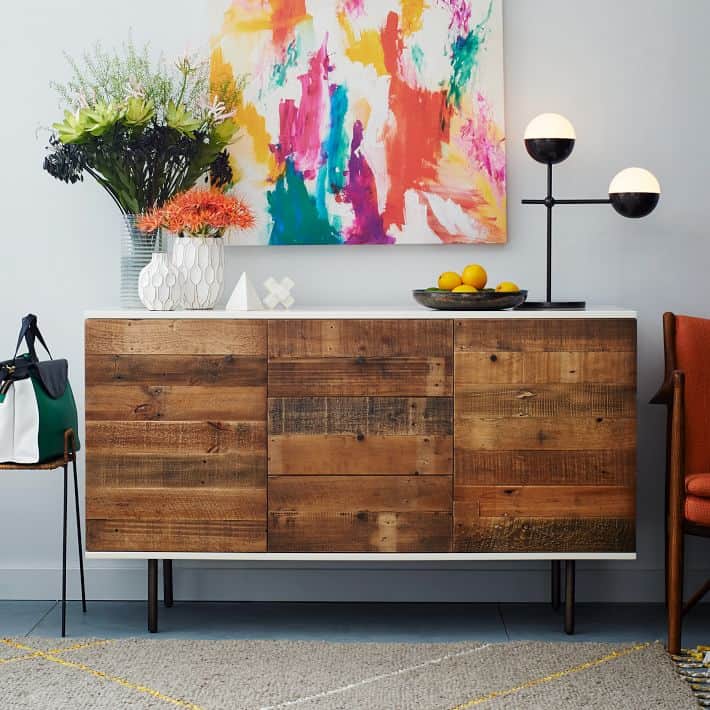
Couple weeks ago I saw a very inspirational image while I was browsing West Elm.com. I FELL in love with this piece at first sight!
And at that moment I knew that I HAVE to create this very high-end designer look on my IKEA shelving unit.
I love West Elm design, but it is not for my budget. This incredible West Elm buffet is $1200. Yeah, it is so interesting with lots of texture,
but I think I can say that I created a very similar look without spending that kind of money. 🙂
IKEA HACKS – RECLAIMED WOOD BUFFET
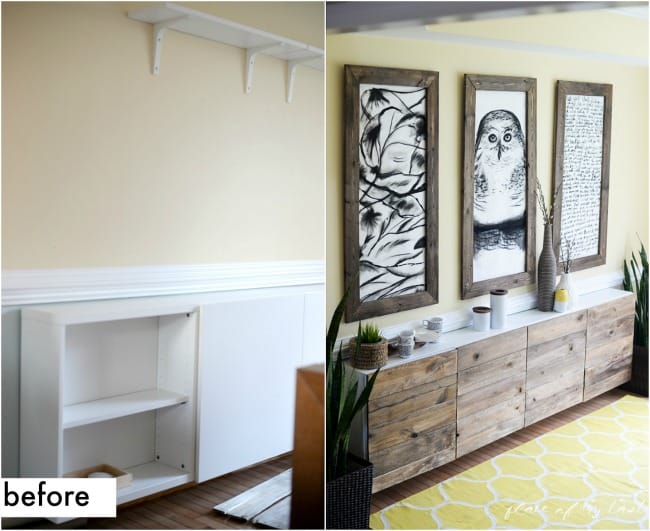
Here is what I had in the dining room (after taking all Christmas decor down) 2 weeks ago.

Pretty empty walls that needed my help!
I took off those shelves and created some awesome giant wall arts. If you missed seeing my giant frames couple days ago, check it out!!

I went to a local business place where they made pallets and asked them if they perhaps have some wood pieces that they don’t need anymore. I gave them my best smile and got a bunch of timber panels. 🙂
The ones they had for me were in OK shape, but they had deep cuts (see below) on about 3/4th of the panels.
We were able to use one end of the wood boards.


We measured our doors and cut the panels to size. Each door had 4 and a half panels attached to them.
Out of the four doors, 2 were turquoise, so first I spray had painted the edges of those doors before we attached the panels to them.

We used small trigger clamps to hold the wood panels to the doors and screwed six wood screws to each panel from the back of the door.


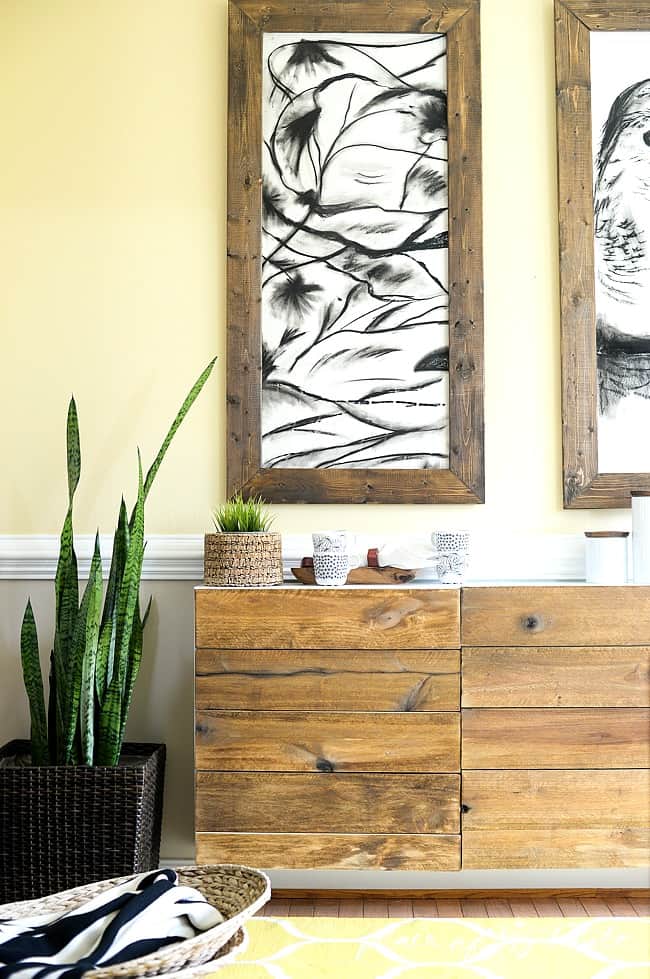
After all the panels had been attached, I stained them carefully with a sponge.
I used MINWAX Golden Oak 210 B finish. It is a lighter finish but turned out gorgeous on the panels.

Loving this natural and rustic look on my doors.

As the finishing step, I painted the door with a thin lacquer coat which protects the wood from stains and dirt.
Here is a better look at how the doors look inside with the screws. The door got heavier of course and I was afraid that it wouldn’t hold
when we screw them back in place, but we had no issues.

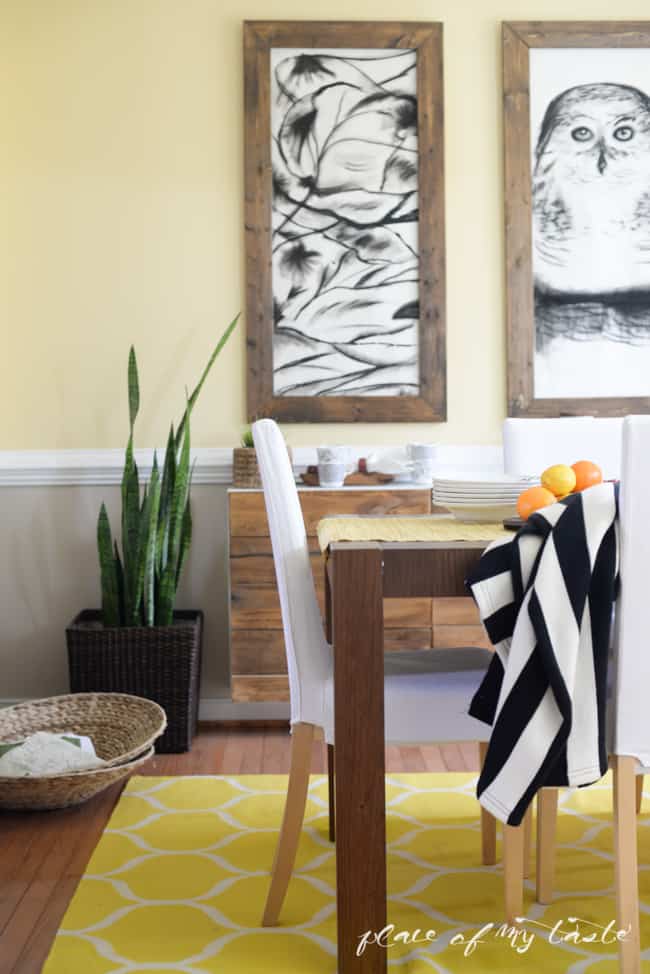
I can not believe the difference, guys!! Such dramatic change!
High end look at low cost!
Can’t get better than that. ♥

Do you spot those huge planters that I scored for $6/each (if you are following me on INSTAGRAM you had seen it)
at Home Depot the other day?
They were meant to be placed there!

I think that we found the PERFECT wood for this project. It was somewhat thin and in excellent shape: exactly what we needed!


Now I am going to bomb you with some more shots from different angles so you can see the full room.
This beautiful yellow rug is from IKEA. I purchased it last year for my living room but never ended up using it there.
Of course, it’s been sitting in the garage waiting for me to take it back to the store but thankfully, I never made it back to IKEA ever since!
It looks stunning in this dining room.
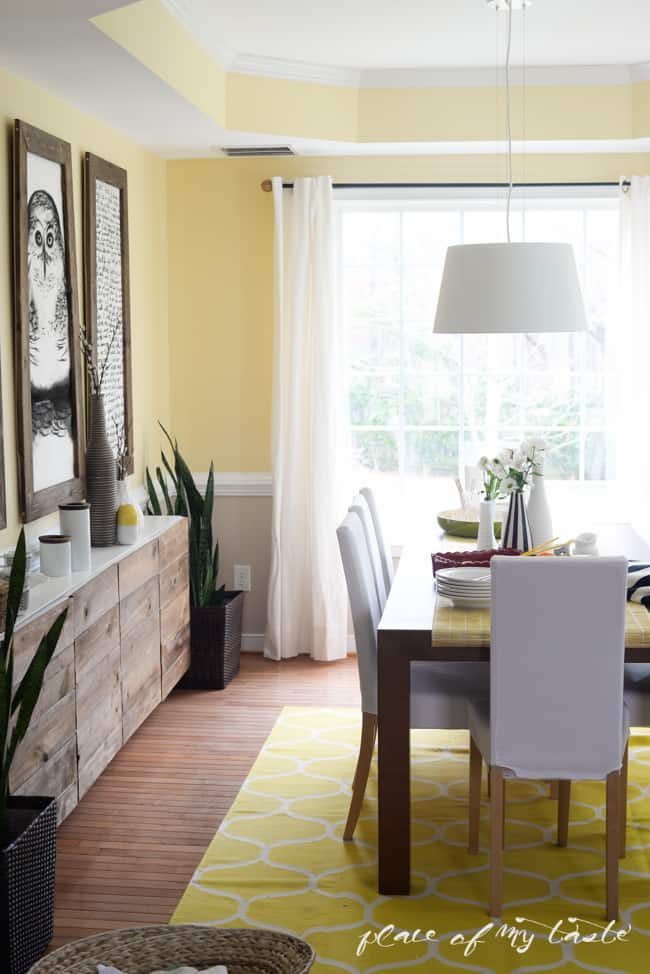

Love all the natural look in this room now! Such and eye candy every time I walk in here.

You would not believe that it is the same wall cabinet and the same room!

So tell me what do you think? Yay or nay?
HERE IS THE COST OF THE MAKEOVER:
3 GIANT WALL FRAMES-ART: $30
WOOD FOR DOORS: FREE (I like that:-))
STAIN: $3.99
LACQUER: $13
Can you beat that? Really! As you see, one of these Reclaimed wood buffets is over a $1000 at West Elm.
Yay for Ikea hacks!!
DO IT YOURSELF!!!
Here is a BEFORE AND AFTER just because we love to see a before and after of course!
Pin this image for later:-)
Hope I inspired you to create a custom piece yourself!
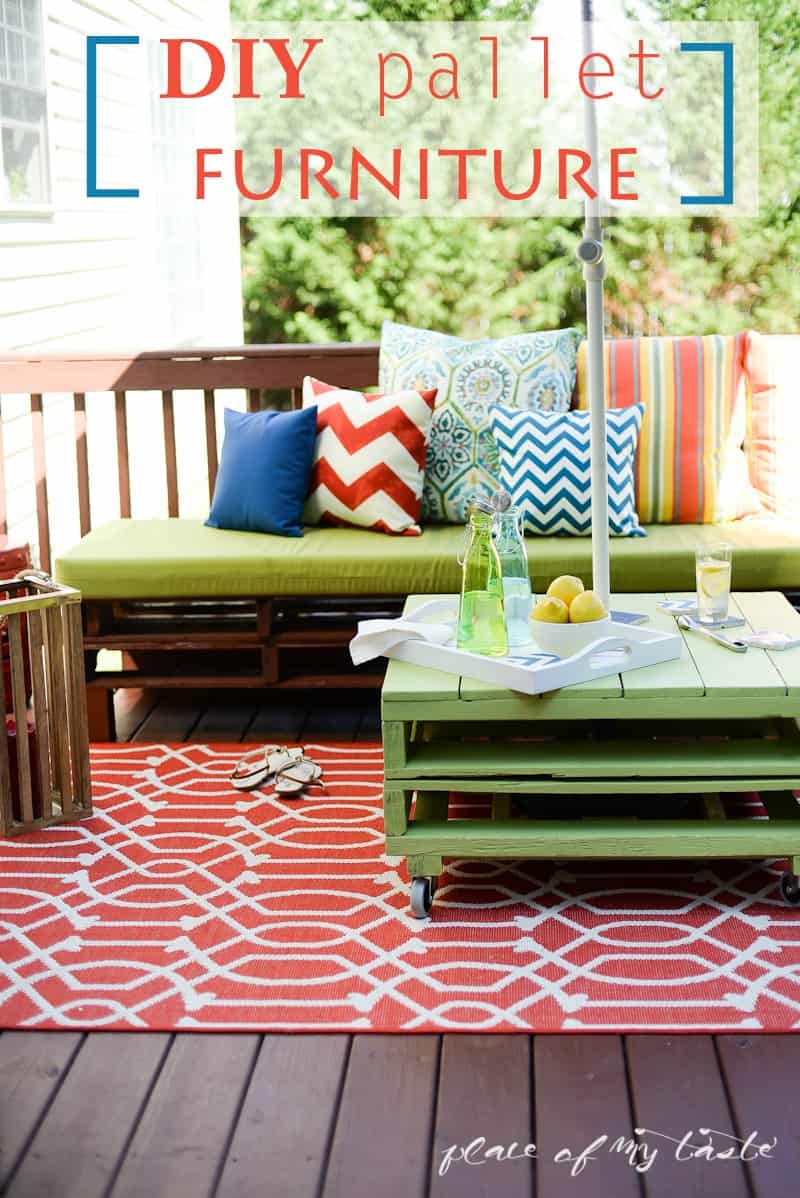
If you liked this project, you might like this
Or perhaps you would enjoy some of my fabulous room reveals!
CHECK OUT MY ONE ROOM CHALLENGE MAKEOVERS
Glad you visited today! Have a fantastic weekend!

*** This post includes affiliate links*


This hack is AWESOME! I would love to put this treatment on a piece at my house. Tell me…since you added thickness to the doors, do the two middle doors bump the unit next to them when they’re opened?
Love your style and how you transformed the buffet! I’m definitely going to have to “steal” your wonderful idea. Awesome job!!!
This is gorgeous! Can you please confirm the how thick each of wood panels are? I would love to do this to our entertainment console in our living room.
Hello! The wood that we found was pretty thin, about an inch thick. Hope you can tackle this easy project for your entertainment console! Good luck!
Wonderful job. I need a piece in my very small living room. Do you think cabinets will hold my books.
This is really cool! I love to see how creative people are when it comes to IKEA hacks. Brilliant job! I love the result.
This is amazing! Love the pictures above the buffet as well! I have to agree…seeing all the dining room looks, this has to be my fav!
Deb
@Seeking Lavender Lane
I love love love this! It doesn’t even resemble an ikea piece. I would love for you to come share this at the Outside [The Box] Link Party http://i1332.photobucket.com/albums/w610/PneumaticAddict/logo_zps2lmdsx2f.jpg.
Ha ha, wrong link http://www.pneumaticaddict.com/2015/01/outside-box-link-party-20.html
Wow, that is gorgeous! I have a long dinning room wall that could use your skinny buffet. Pinning for sure…maybe I will try to create one too! Beautiful!
my word this is awesome sauce at it’s finest…. came over from little house of four… i will be back xx
GORGEOUS!!!
Thank you, Rayana!!:)
This HACK is awesome! You said you used a lacquer coat to finish the wood. What does that mean? Can you please tell me the product’s name?
Sonja, Thanks for stopping by today and I am glad you like this HACK:-) It is a finish coat that would protect the wood from dirt and such. It is a Minwax- Lacquer from Home depot. They only had a quart size( which is a whole lot) and after researching more I found that other stuff (that home depot sells ) for less expensive would do the same thing. So if you ever need a finish coat on wood, just look for a finishing wax. Hope it answers your question. Have a great week!
I LOVE this!!! So gorgeous and original! Where can I do this in my home?!? Lol. Thanks for sharing! Followed from Your Designs This Time 🙂
Thank you for hopping over to check this out!! Hope I inspired you to find a space in your home to replicate this project
Gorgeous – fab job!
Thank you, Debbie!
Ok you know I’m already in love with this and I just HAVE to feature it Monday at YDTT! Hope you have a fabulous weekend my friend!
I’m impressed… It’s beautiful!!! Thanks for sharing at this week’s Motivational Monday link party! Hope you’ll join us again next week!!
Danielle
SewMuchCrafting.com
I can’t believe how good this looks! I’ve been wanting to replace our white Ikea buffet with something rustic like this for ages. Ours has glass doors though, so I can’t do this, but it has me thinking if I can find a cheaper piece to hack… thanks SO much for the inspiration. I’ve pinned it already!
This is AMAZING!!! I am in love with this and loving your blog! I would love for you to stop over and link up with me!! I would be thrilled to have you!! Have a wonderful week!!
Jess
so absolutely incredible. You definitely hit it out of the park with this one! Come share at my link party http://www.carissamiss.com/2015/01/outside-box-no-19.html I’m so glad to have found your blog!
I say, yay–yay–yay. You did a fantastic job on this furniture. It turned out absolutely beautiful and congratulations. Thank you for sharing your wonderful work.
Can you tell me which Ikea product you hacked to get this? I’ve got pallet wood lying around and this would be the perfect solution for the lack of storage in the mancave
Hello!I just updated my post with the name of the cabinet…It is BESTA WALL CABINET ($80/unit- I had two- LINKED TO IT IN THE POST). Hope this helps! Get your hands on those pallet wood!!:-)Have a great day!
Anika
I can’t find the exact IKEA product you used for this hack, i clicked on the link and it goes to a general IKEA page. Please help I’m moving soon and would love this in my new place. Thank you for your time.
Hello there! This is what I found that looks like mine but it is vertical but I am sure you can hang it horizontal on the wall. http://www.ikea.com/us/en/catalog/products/S99057479/#/S19057483 Hope it helps. 🙂 Have fun with the project!