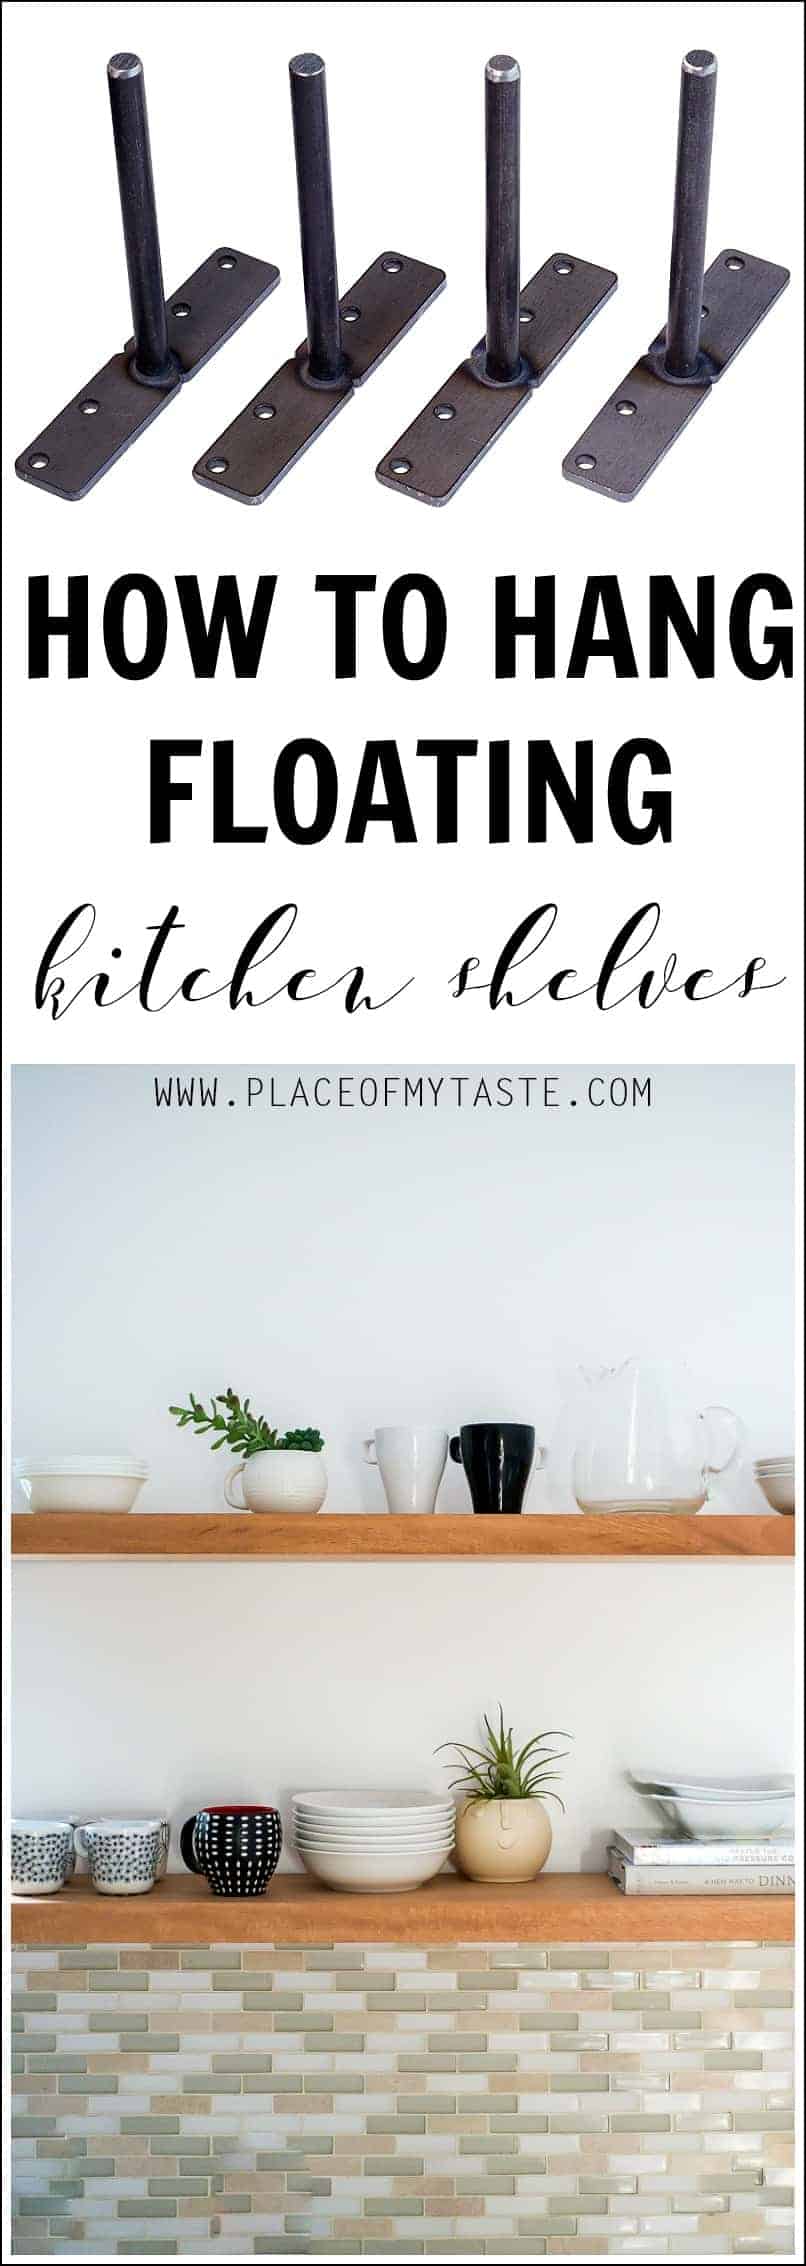
HOW TO HANG OPEN KITCHEN SHELVES
I am sharing today how to hang open kitchen shelves the easiest way!

This is week three for this fall’s One Room Challenge hosted by Linda over at Calling it Home. If you are new here, you can read on my kitchen refresh plans ON THIS POST. I haven’t got too far in the last two weeks with the KITCHEN makeover as I had to travel out of town for three days. But as soon as I got home I started working because I know that I am seriously out of time already. Oh man! Wish me luck guys! I am super excited about this kitchen refresh but I think it’s a way bigger project than what I thought it was gonna be! Anyways! That’s always the case with my makeovers haha!
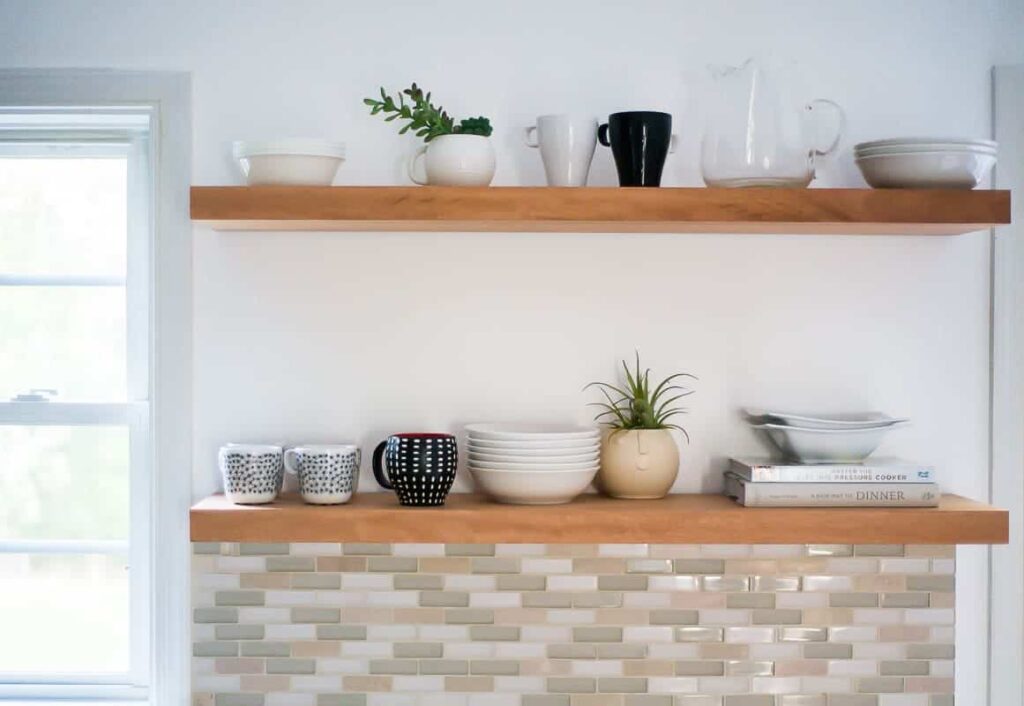
So today, I am sharing how I hung these sleek floating shelves in the kitchen.
I am waiting on the tiles to arrive and the cabinets paint to arrive so I had to put thise projects on hold, but I was able to tackle adding on some awesome floating kitchen shelves today. I have been crazy about open kitchen shelves for the longest time and I knew I would love to add those open shelves to my kitchen when the time comes! So the time came!
Last week we took off part of the cabinets and today we added those sleek shelves which were really easy peasy to put on!
I was going to DIY the chunky shelves myself but when I went to THD and I gathered my materials I quickly realized that if I build the shelves they will be a lot chunkier and more of a farmhouse style shelves than what I had envisioned for our kitchen. So I put all materials back to the shelves at The Home Depot and I went home and I did my research.
***This post contains affiliate links, please read my disclosure HERE.***
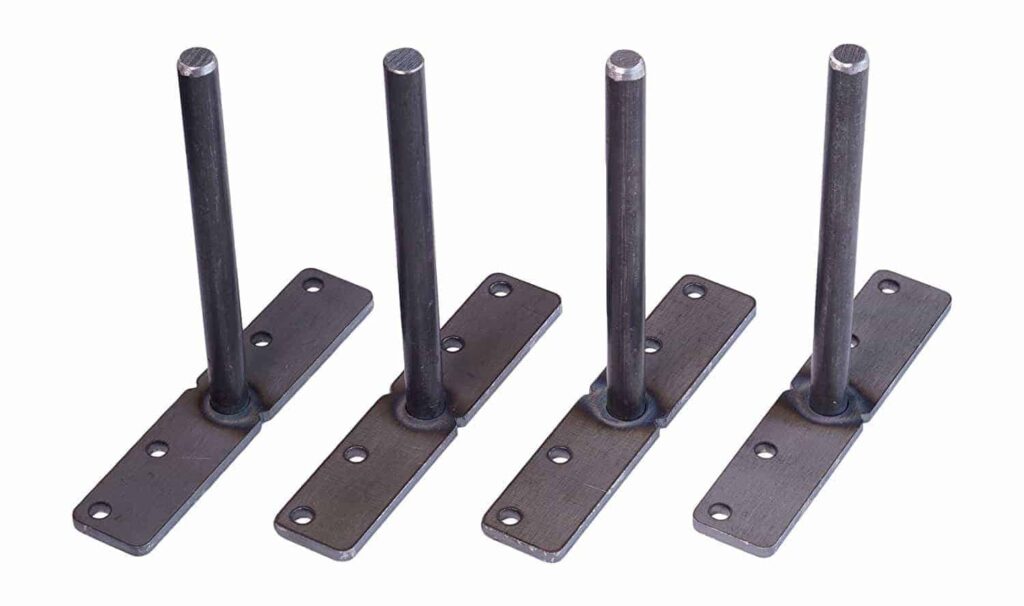
I came across this open shelves brackets on Amazon and I immediately ordered them. They literally shipped it out to me for FREE of charge the same day! ( I pay for PRIME membership though). How cool is that??
Then I went to a local lumber shop, and I picked out a gorgeous piece of lumber for my shelves. My wood was 1 3/4″ thick.
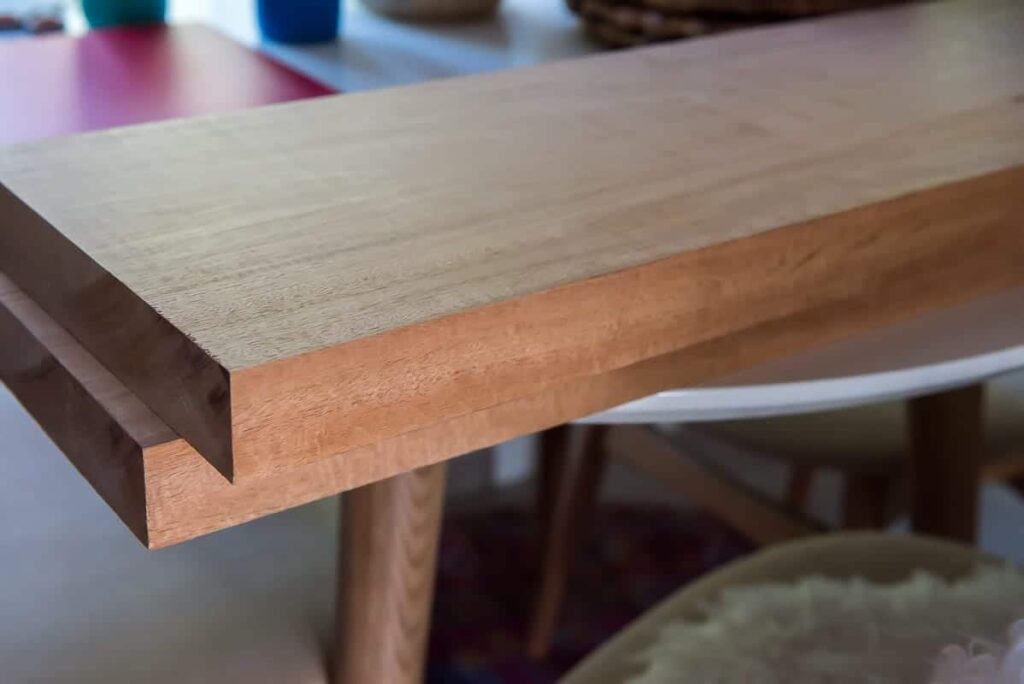
It was not the least expensive option to go with, but I wanted something that will be holding up for years and is also a gorgeous finish wood. I picked Mahogany, and I couldn’t love it more. So beautiful! My shelves measurements are 42,5″ long and 9,5″ wide. I purchased a 7′ long lumber, and I made them cut to size for me at the lumber shop. All I had to do was to take the wood home and hang it with the brackets. I love it!
Tools you need for the project:
- measuring tape
- pencil
- drill
- 1/2″ drill bit
- safety glass
- level
- FLOATING SHELF BRACKETS
Learn how to hang open kitchen shelves – floating shelves an easy way!
STEPS
First, we measured out the spots for the brackets on the wall then we measured the wood.
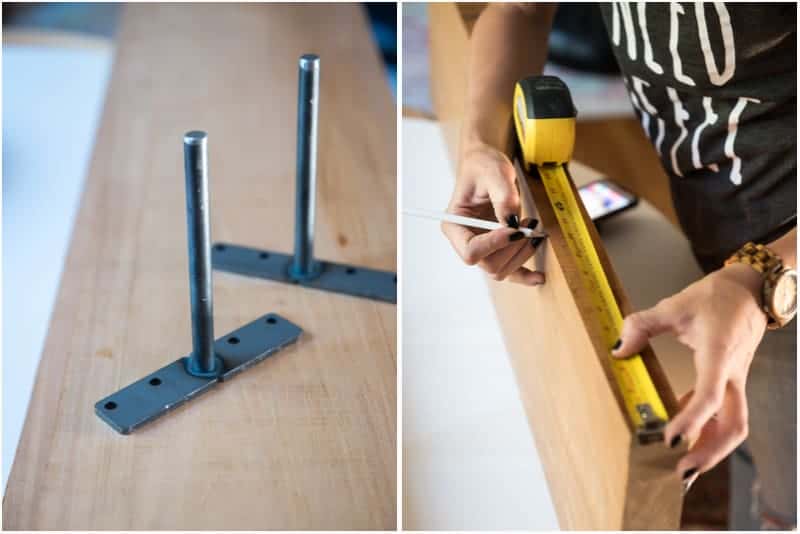
With a 1/2″ drill bit we drilled a hole going deep enough so the bracket would fit in. Our drill bit wasn’t long enough, so we used an extension to drill deeper.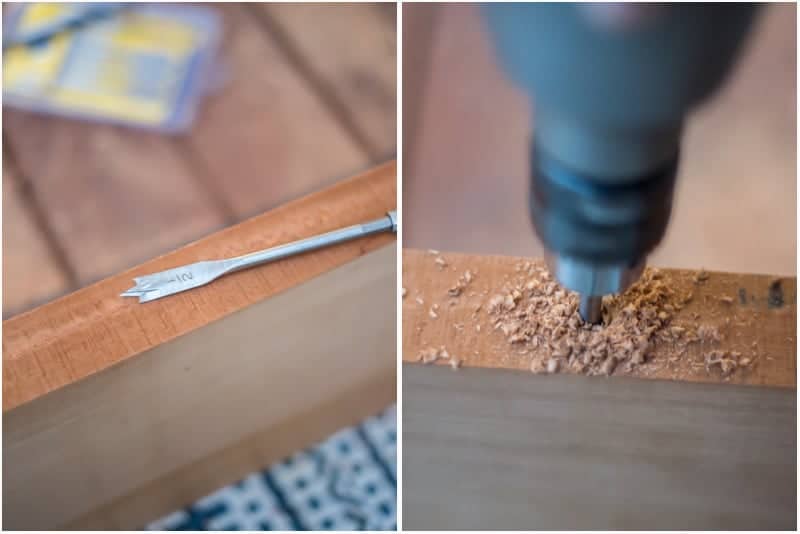

Then we drilled a pilot hole on the wall and secured the floating shelf brackets. We were able to secure our brackets to studs but if you can’t find studs, you just going to use the included drywall screws and anchors.
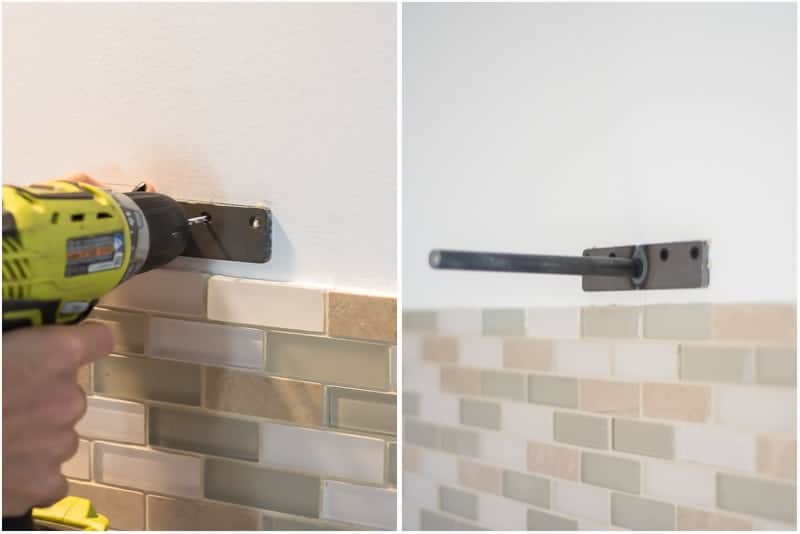
And when the brackets were secured we pulled on the shelves, and that was it my friends! Easy, right?
We did not countersink holes into the mahogany and you almost can’t see the tiny little space between the wall and the shelves.

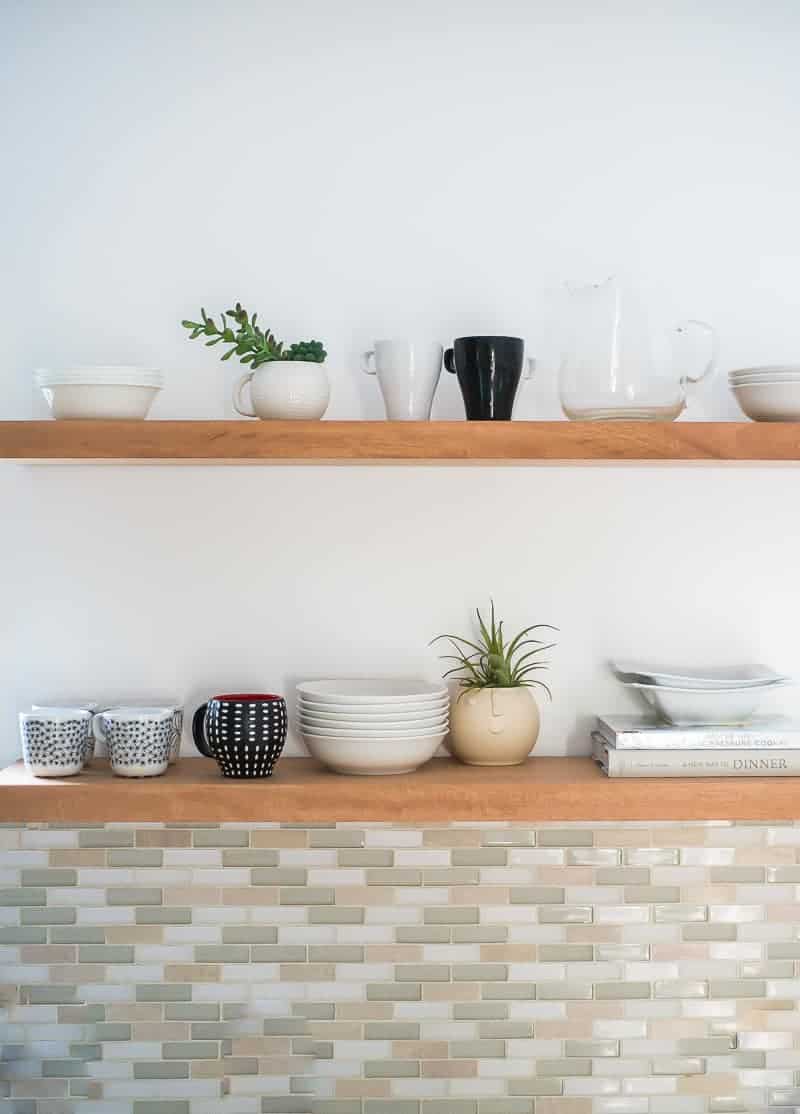
I am so much in love with these shelves already even though I hate the backsplash and I can’t wait to see it painted.
Total cost for these open shelves:
- FLOATING SHELVES BRACKETS – 4 PC – ENOUGH FOR TWO 42,5″ SHELVES: $50
- LUMBER – MAHAGONY- 7′ – ENOUGH FOR 2 – 42,5″ SHELVES: $140
TOTAL COST: $190
What do you think?
Yay or nay for open shelves?
Pin this project for later!
Stay tuned because I am going to be back with another fun project next week!
Cheers!
Aniko


They look very nice. How much weight can such shelves hold? And what is the best way to finish them?
Did you use large or small brackets? On amazon it lists both sizes.
How far apart are th e shelves
how much weight can 4 brackets hold if each bracket hits a stud with at one screw?
Hi. Im wondering what the right heights should be for two shelves over the countertop. What is the height of the shelf just above the backsplash and what is the distance between the two (the taller one)? If you had a chance to do it again, would you change the heights higher or lower? Thanks.
This might be a silly question, but how do the shelves not slide forward off of the brackets?
Nope! They are in perfect place ever since I hung them!:-)
You didn’t glue them onto the the brackets? So you could technically just yank them off the wall if you wanted? Swap out for a different piece of lumber?
Hi there,
These shelves look beautiful! I was trying to find ready made shelves but after reading your post, I want to get them made. Did you have to sand them and stain them yourself before you hung them on the wall? Or did the lumber shop take care of that for you?
Ashley, I’ll be honest! I have not done either sanding or staining to the shelves and they are perfectly fine. My mahogany shelves were just ready to shine in my kitchen as is!!:-)
I love this idear and is very fantastic. But how durable can this shelve be?
Hi! I love these shelves. We’ve been considering doing them as well since it’s much cheaper than new cabinets and my husband and I LOVE that minimalist look. My only concern is drilling the holes for the brackets. Were you nervous about the holes being perfectly straight? Any tips on how to make sure you don’t drill at an angle? Thanks!!
Hmm. I can’t remember if I was nervous but I guess just try to hold your drill as straight as you can and go for it! It made a huge change in our kitchen and I could not love it more!
Hi! Love the color of the shelves! What lumber shop did you get the wood from in Richmond?
Hey! It’s Mahogany…And I went to Siewers Lumber. Good luck!:-)
Is there a small gape between the shelves and the wall because of the thickness of the brackets? Or are they flush with the wall?
There is a minimal gap-like you can only see from sideways a tiny bit and it really doesn’t bother me. I could have countersink the holes to the Mahogany but I didn’t bother to mess with that beautiful lumber. But you can totally countersink yours if the gap would bother you.:-) Xo
great DIY shelves!! I will have to try it in my next condo!
Good luck! you will love them!:-)
Beautiful! How sturdy are the shelves / how much weight do you think they could bear?
Very! According to the brackets, these shelves can hold up to 75lb if attached to the drywall with drywall anchor and over 200 pounds if attached and screwed into studs. We were lucky to screw them into studs.:-)
Awesome! I had no idea brackets like this existed. How thick are your shelves? Just wondering if there is a minimum thickness for using the brackets.
Me neither! My shelves are 1 3/4 inch thick. Thanks for visiting!