HOW TO MAKE A ZIPPERED PILLOW COVER tutorial
Yes! Today I will show you how to make an easy zippered pillow cover!

This is week 5 of the One Room Challenge hosted by Linda over at Calling it Home! Yup, there is only one week left, and you get to see the full reveal of our breakfast nook! I can’t wait to show you every little detail, you all! If you just wandered to this blog the first time, be sure to follow through the previous week’s projects and the progress of our breakfast nook makeover by visiting the weekly updates:
WEEK1 | WEEK2 | WEEK3 | WEEK 4
The DIY storage bench we built for this space is pretty amazing, and it became one of our family favorite lounge pieces in the house. After we painted the bench and upholstered the cushion, I knew something was missing.
PILLOWS!!
And that’s when I decided to make some cool Zippered Pillow Covers!
And today I am showing you a quick tutorial on how to make an easy zippered pillow cover!
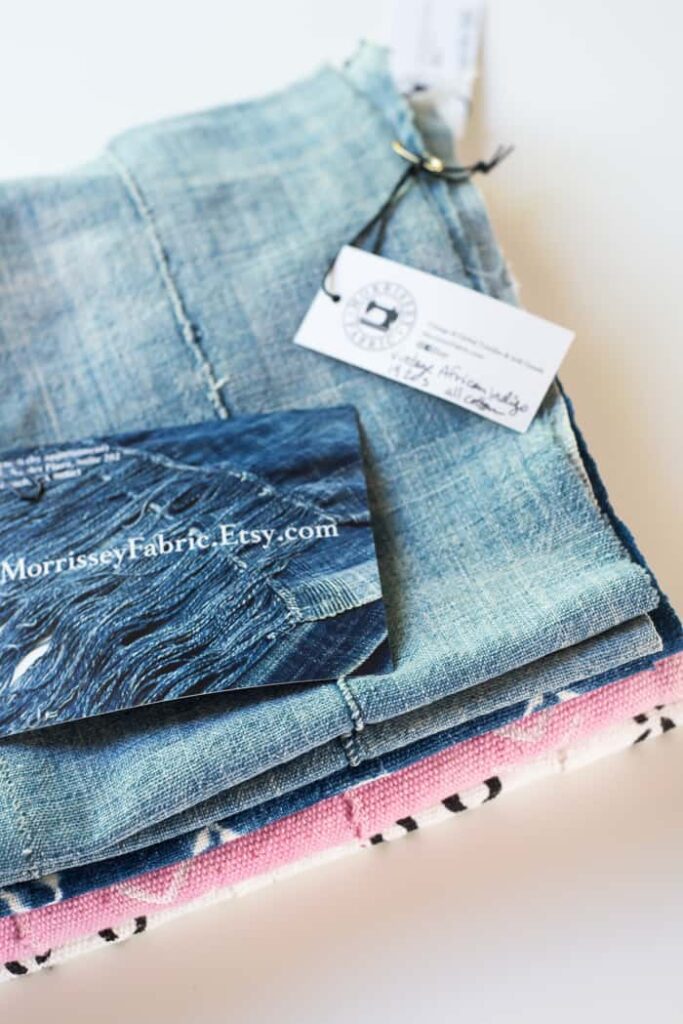
I am a huge fan of Indigo and mud cloth lately, and while I was browsing Etsy and Instagram, I found a fantastic textile retailer, MORRISSEY FABRIC. Anita’s collection and store are pretty amazing. She has a little shop in California, and she also has an online store that includes a thoughtfully curated selection of vintage and global-style textiles and bohemians style fabric. Seriously so good! She provided me with some of her fabulous textiles for my zippered pillow covers. Awe! I could not be happier when my beautifully packaged textiles arrived. And the fun part!!
We have an amazing GIVEAWAY going on right now on INSTAGRAM!!
Morrissey Fabric is giving away $100 credit to the online store. You have a choice to pick out your favorite fabric or pillow cover if you win!!
There are many Etsy stores out there selling funky, vintage pillow covers, and Morrissey Fabric has some brand new pillow covers she just made up in her shop as well, but I decided to make my own since I have a machine and I actually never use it. My mom used to sew a lot, and she taught me a little bit of this and that, but I never in my life have tried to make a zippered pillow cover. I’ve made some envelope pillow covers before and some easy to make ones without the sewing machine but this was my very first time to try to make zippered pillow covers!
And here is the thing.
You probably heard it already from someone how easy it is to make a zippered pillow cover! Right? But you have always been terrified of the idea of making one of your own! I hear ya!
Trust me; I have felt the same way. That’s why it took my 38 years to try my first zippered pillow cover lol!
I will be the first who tell you that your FIRST zippered pillow cover is easy to make! But I can also assure you that you will most likely to screw up making your very first pillow cover!! But after the fifth pillow cover, I felt like a pro!
I sew the zipper backwards at my first try…But after the fifth pillow cover, I felt like a pro!
But after the fifth pillow cover, I felt like a pro!

I read through my dear friend’s Corey from Hey There Home’s tutorial from her excellent Sewing eBook.

She just launched her fantastic eBook that has ten simple sewing projects for the home! How awesome! You guys should check it out, especially if you have a sewing machine and you are a beginner!!

So let’s start on this fun project!
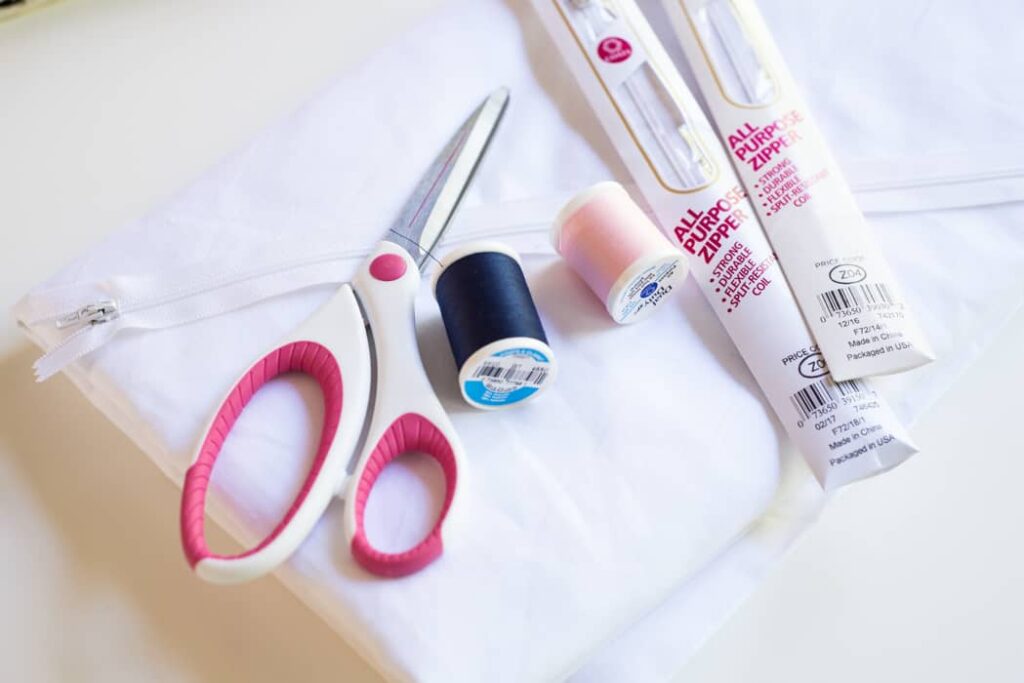
Here is what you need to make some kind of cool Zippered Pillow Covers:
This post contains affiliate links. Please read my disclosure here.
- sewing machine + zipper foot
- fabric ( I used Morrissey Fabric)
- scissors
- zipper
- pins
- threads that coordinate with your fabric
I picked out four different textile designs from Anita’s store.
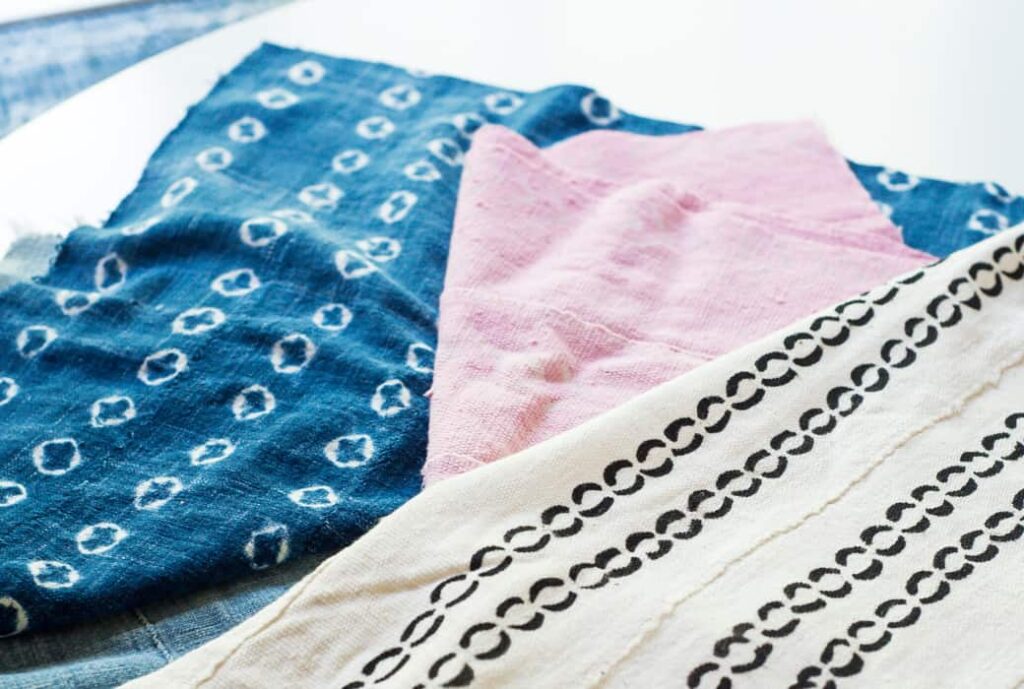
- Vintage African Shibori Mud Cloth
- Faded Blue Bogolanfini Vintage Indigo
- Medium Pink and White Tibal Print
- Black and White abstract chain link print
I have a Singer sewing machine, which is a super easy to use a sewing machine and that’s all you need if you would like to make basic things for your home!
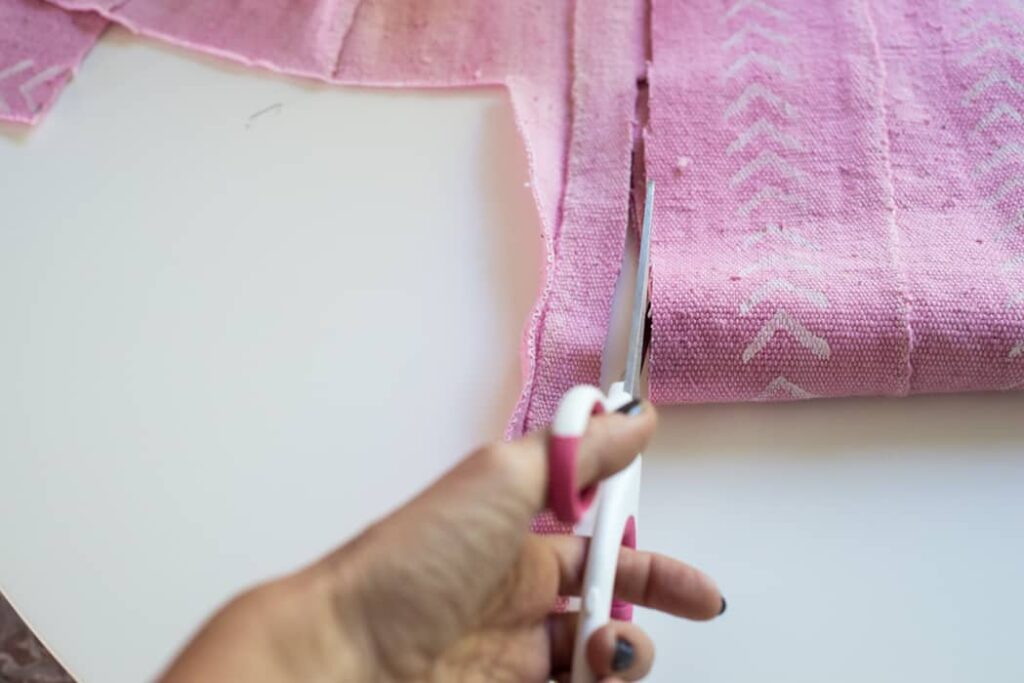
Step One: Cut your fabric
Cut your fabric to size. I bought a few 16″, 18″ and 20″ down pillows and I cut my fabric to the same size, 16″, 18″ and 20″. I made one-sided pillows, so the back of the pillow cover ended up being plain white cotton fabric. You have the choice to make two-sided pillows as well.
So I cut my fabric to size. I was so much in love with this pink mud cloth! Isn’t it amazing?
Face down both of your fabric and decide which will be your side for the zipper. Pay attention for your pattern!
Step two: Mark the zipper
Place the two pieces of fabrics right sides together and pin/mark the fabric where the zipper will be placed. You don’t have to pin your zipper down!
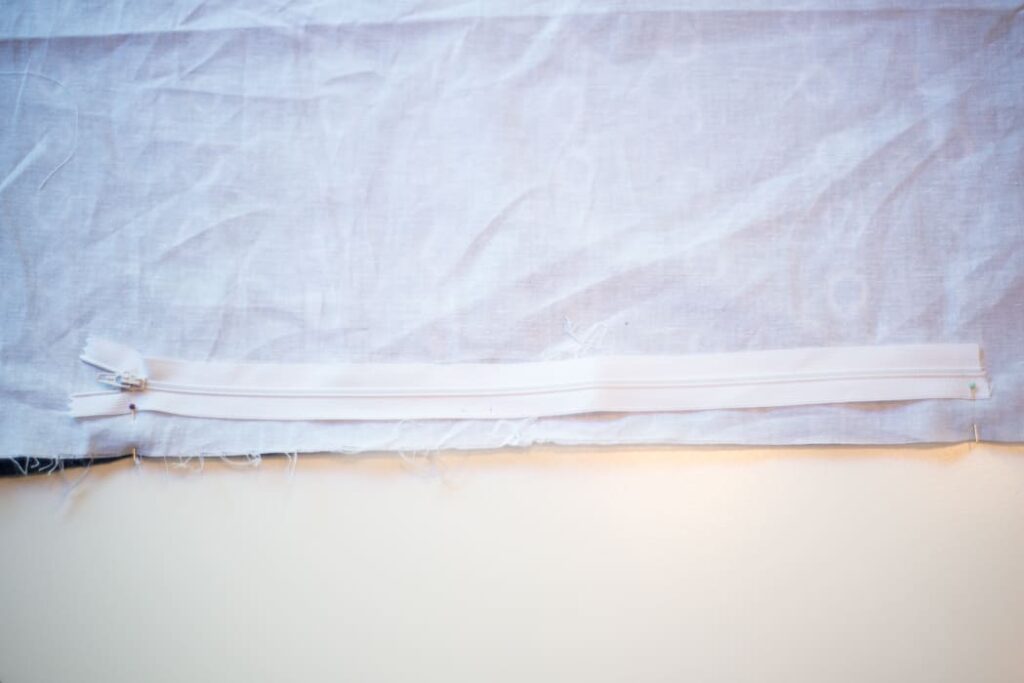
Step three: Sew the bottom edges
You are going to sew the bottom edges on the fabric – all the way to the pin that marks the place of the zipper. Backstitch at the beginning of the seam and sew to the first pin. Sew the to other edge and backstitch one more time.
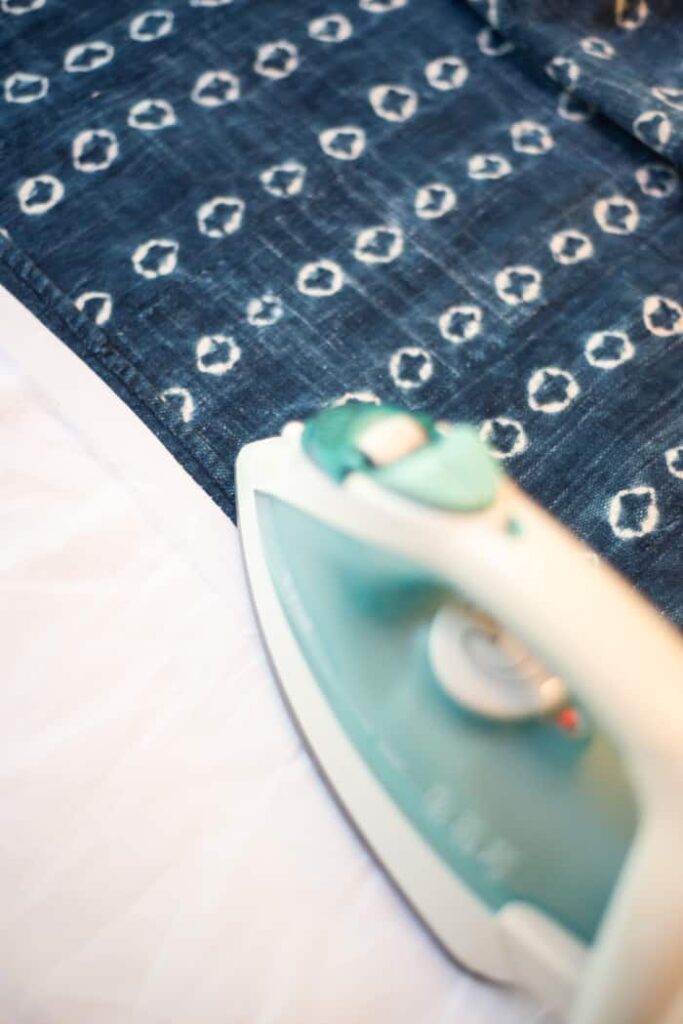
Step four: Iron the steam and place zipper
Open the seam that you sew and press on a with a hot iron. Place the zipper on top, facing down and pin it to the fabric, so the zipper will stay in place.
Step Five: Change to zipper foot
Place the zipper foot on your machine. Don’t get scared! I’ve never done it before, and it only takes about two seconds. Just follow your instruction book that comes with your machine if you do it the first time!!
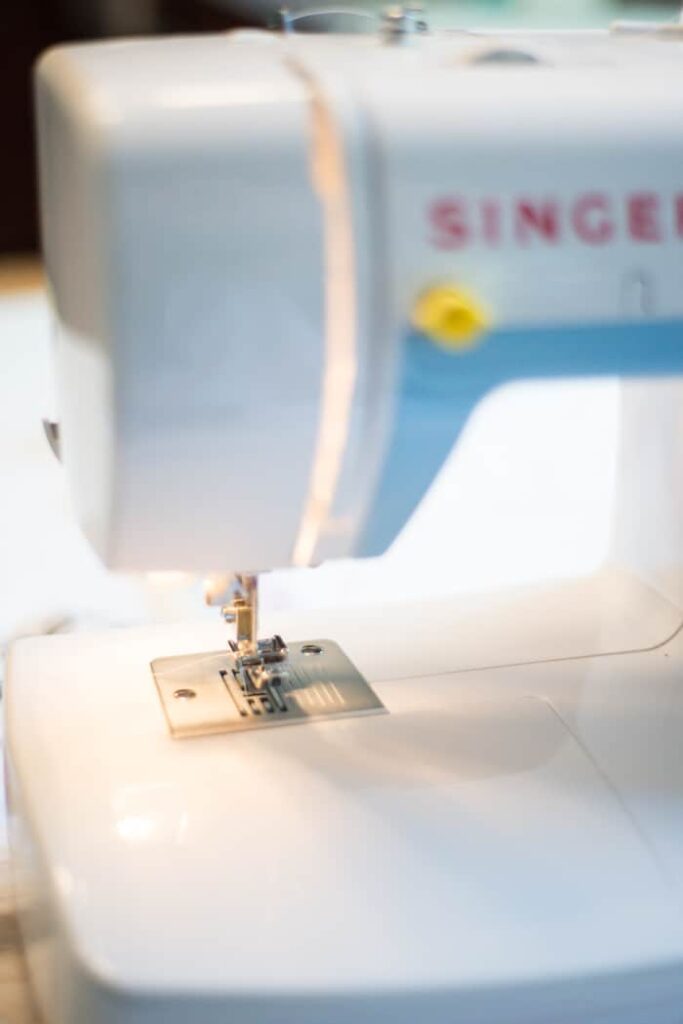
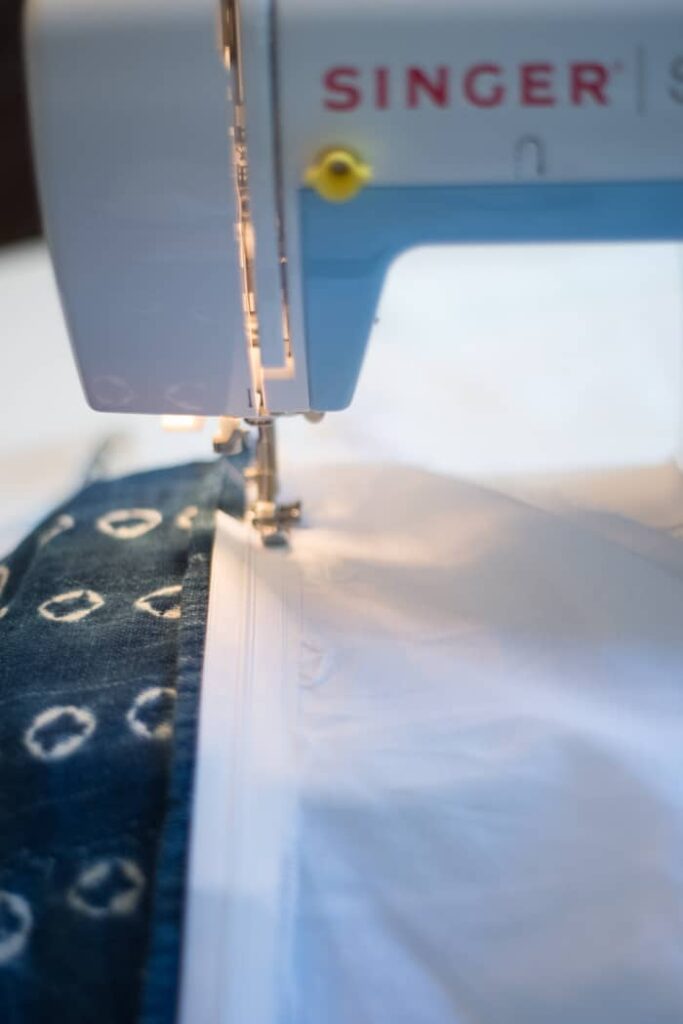
Step Six: Sew in the zipper
Sew down your one side of the zipper, backstitching at the beginning and the end. Then sew down the other side of the zipper.
Step Seven: Sew up the cover
First, unzip the zipper at least half way. Change the zipper foot to regular presser foot. Pin the edges together, that will help to sew a straight line and sew around the edges.
Turn the pillow cover out, and you are done! Well, Corey gives you such a detailed tutorial in her ebook, and she shares nine other super easy sewing projects, so grab a copy HERE!!

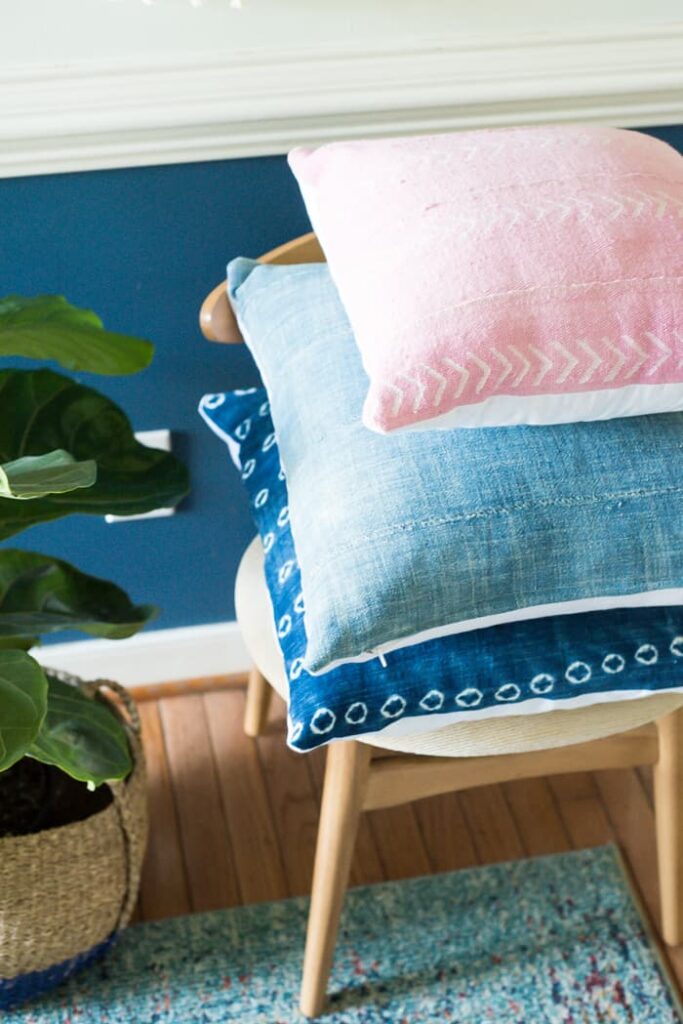
Aren’t these pillows stunning?? And I made them!!:-) I can’t get enough of them! I will sure order some more gorgeous African fabric from Morrissey Fabric!


And here is the peek of my bench with these gorgeous zippered pillows!!

Will you try those zippered pillows? I hope so! Changing out pillows is the easiest way to refresh decor in the house! Good luck my friends!
Thanks for visiting!
Be sure to come back next week and see the reveal of this amazing breakfast nook!
Cheers!
Aniko


This pillow looks amazing! Nice color combination.
such a great teacher and this post have me wanting to get my sew on. I’m not gonna lie, I liquid stitch a lot of my pillows, but having a zipper would make things sooooooo much easier. Pinned!
Thanks for stopping by and pinning! Have a great day!
My mother works for an upholstry and decore shop sewing cushins and slip covers and one trick shes taught me is to cut your fabric about 1 inch smaller then your pillow form. This will make a super plump pillow and will give your finished product that high end look. 🙂
I love this blog and I’m always so impressed with the high quality of your posts (that you put out EVERY DAY. How do you do that and stay sane???). It’s always a treat to read your blog in the morning before I tackle my day as a stay at home mom of four young kiddos. Thanks for helping me stay sane! ☺️
This pillow looks amazing! Nice color combination. Well explained tutorial. Pinned it.
Great design sense you have. Colors are so preety. Thanks for sharing Anika. Have some experience of sewing. Will try to make one specially that blue one.
Loved the pillow covers so getting my machine out to make some for the patio. Nice fabric couldn’t find a place for enter for the drawing.
That pile of pretty pillows looks like a picture from a catalog! Just like you, I’ve been afraid of zippers for a long time. Now I’m inspired and am going to make some pillows! Morrissey Fabrics, here I come!
You totally should! I think I’m gonna keep making them because I love my pillows!!
oh how i love your color combo! gorgeous!
Your pillows look amazing! Love them, and the colours are so pretty too.