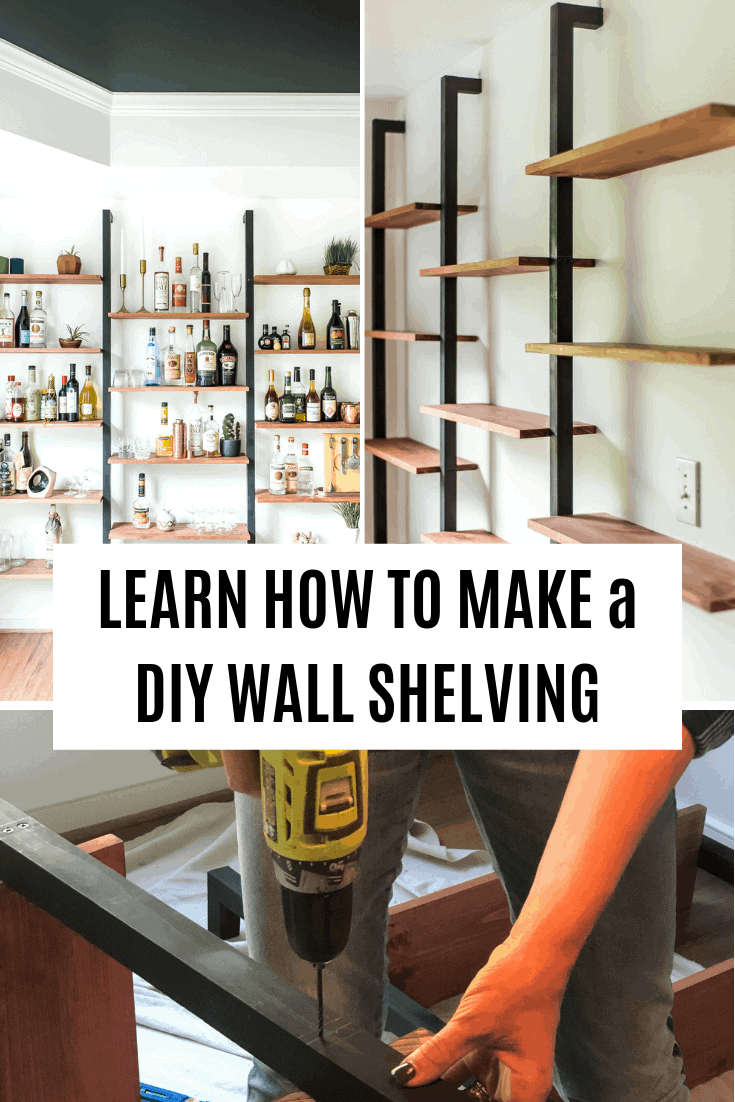
ONE ROOM CHALLENGE WEEK 4 | DIY WALL SHELVING \ BAR WALL
DON’T JUDGE!:-)
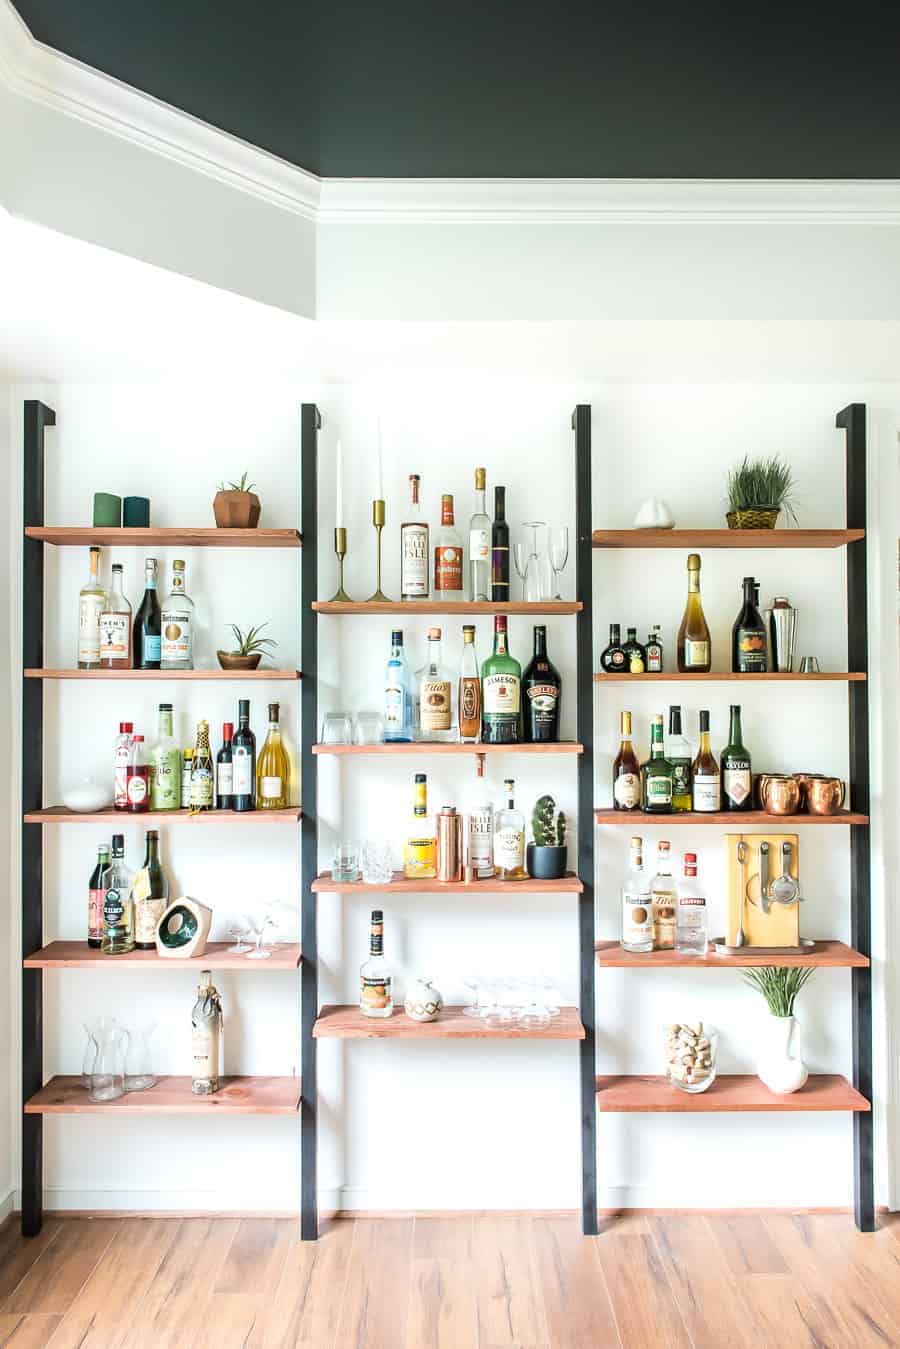
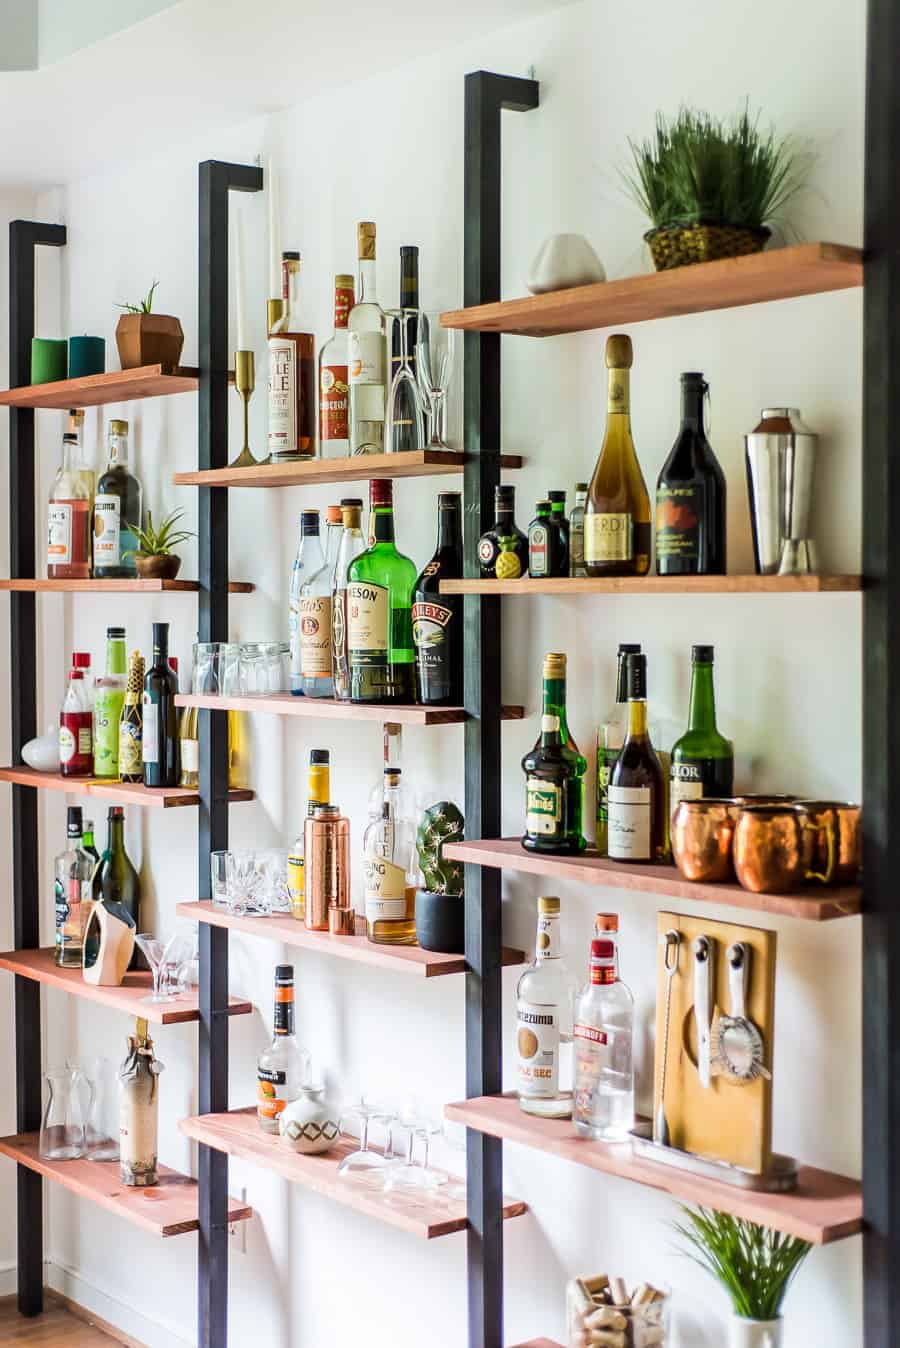
But please don’t…When you look at this amazing DIY WALL SHELVING we built, you are going to say one or two things…
You will either say. Wow! That looks so cool!
OR
You will say: Wow! These people are alcoholic!:-))))

I heard you whispering: WOW, this looks so cool!:-)
Right?
This is week four for the One Room Challenge, and I finally have some things to show you.
A progress picture…
We tackled the BAR WALL idea, my friends and I think it turned out SUPER cool! And to confirm, we are NOT alcoholics, but my hubby and I love tasty, unique cocktails from time to time. And lately, I like to replica cocktails that I enjoy at restaurants at home so that’s why we have all these liquors.
One thing I learned about cocktails is that they require lots of different ingredients. One tasty, fancy cocktail may have five different ingredients, and that makes lots of different bottles to store.
I had all my bottles packed onto one single bar cart in the corner of my dining room.
And I wanted to see them organized. And I honestly never realized that we have this many bottles in the house lol!
So after playing with thoughts for a week or two, the idea of a fun DIY WALL SHELVING, BAR WALL was born.
I set down and planned.
Planned for some time and came up with an affordable also reasonably easy project.
What I really wanted to see was a beautiful wall shelving that covers the entire wall, looks organized.
Materials you will need:
- 4 pieces of 2×2 wood ( for the poles)
- 5 pieces 8 ft common boards ( cut up to 14 pieces for the shelves)
- screws ( we used drywall screws!)
- small corner brackets
- stain – the color of your choice
- black spray paint (to paint the poles)
Tools you might need:
- table saw
- tape measure
- level
- drill
- clamps
- kreg jig
Okay! Let me show y0u HOW EASY IT IS TO MAKE THIS DIY WALL SHELVING!!
Step 1: MEASURE YOUR WALL AND DO THE MATH!
We started out with measuring the wall. I wanted the entire wall shelved. Because this project may differ for everyone I am not giving you specific sizes.
The first thing you need to is to decide how wide and tall your shelving unit will be and how many sections will you build. (In my case, it was 3 sections!)
Step 2: CUT THE WOOD TO SIZE
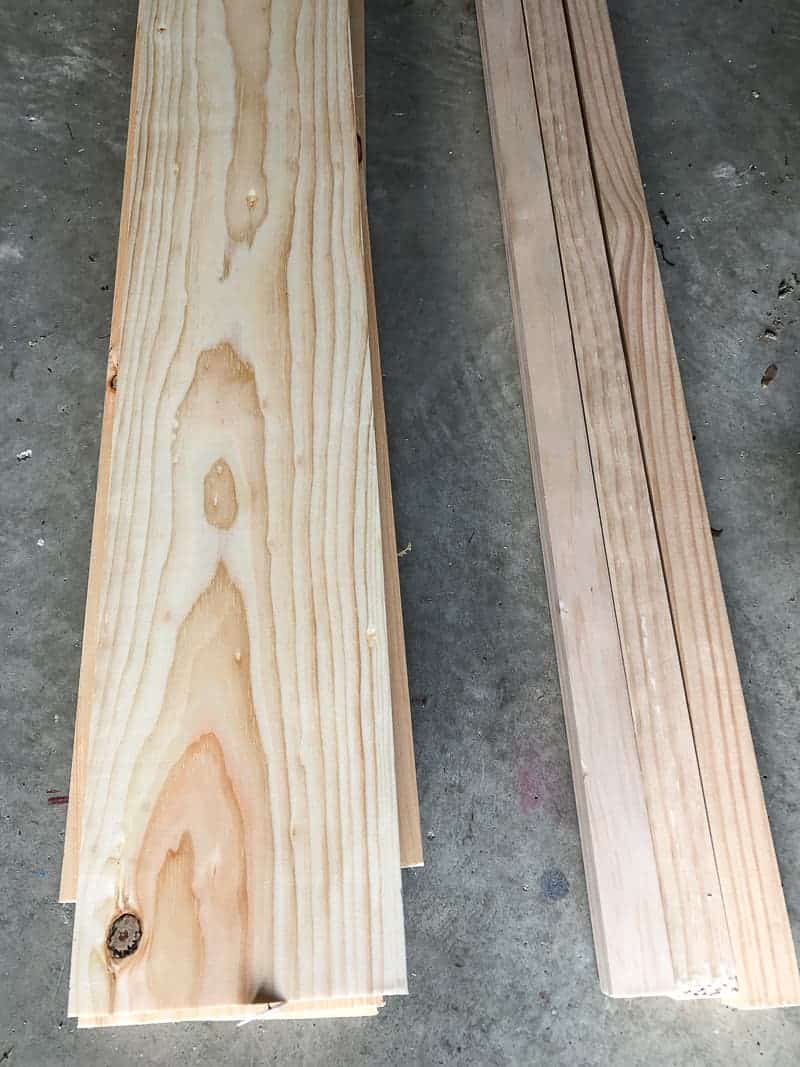
All my shelves are the same size and all my poles are the same size.
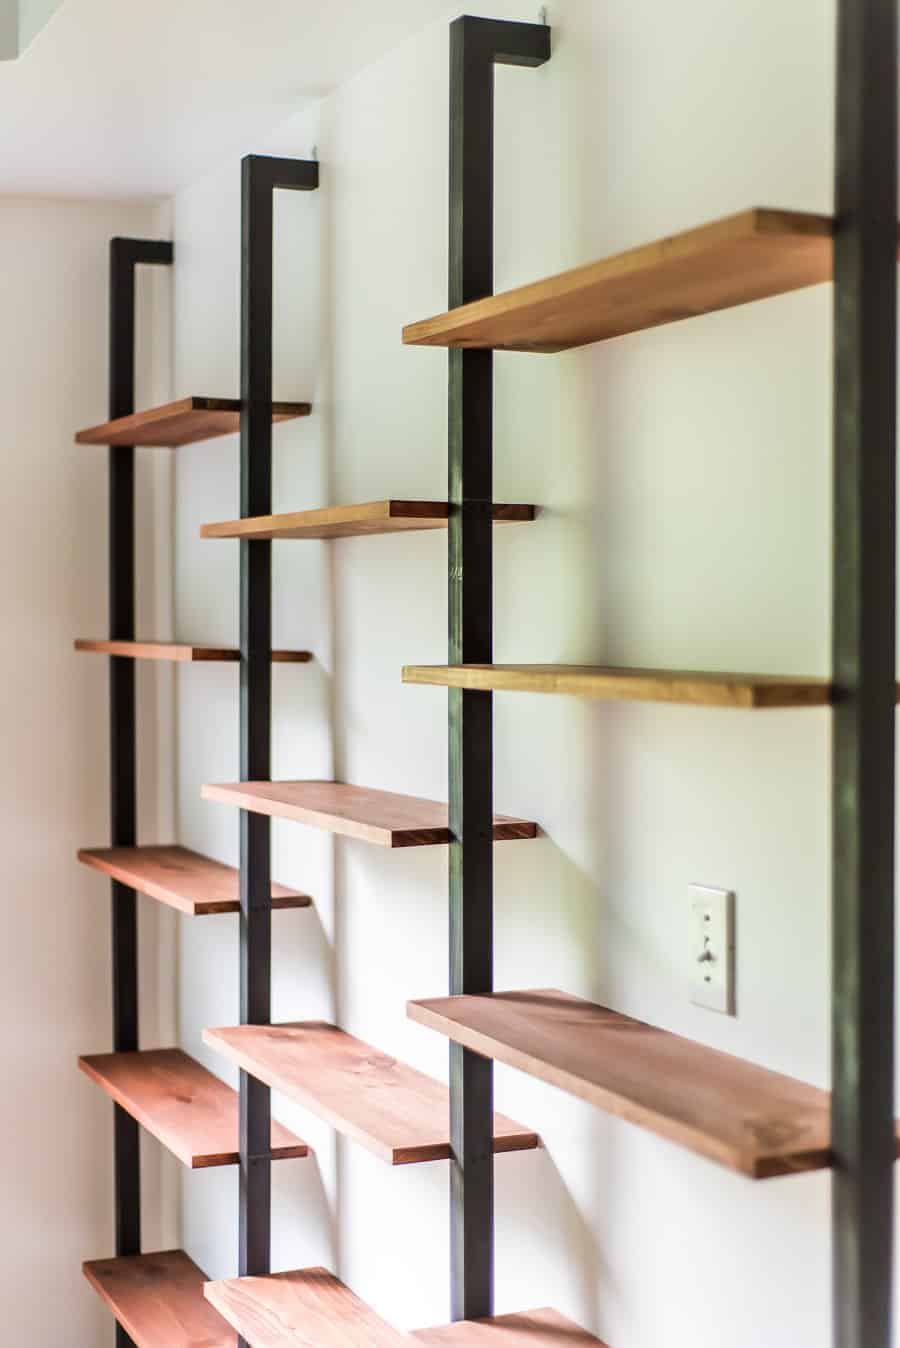
Step 3: MAKE THE L shape POLES
I wanted a simple solution for this shelving unit and building simple poles that would stand against the wall seemed like a great idea.
I made an L shape pole that would be leaning against the wall.
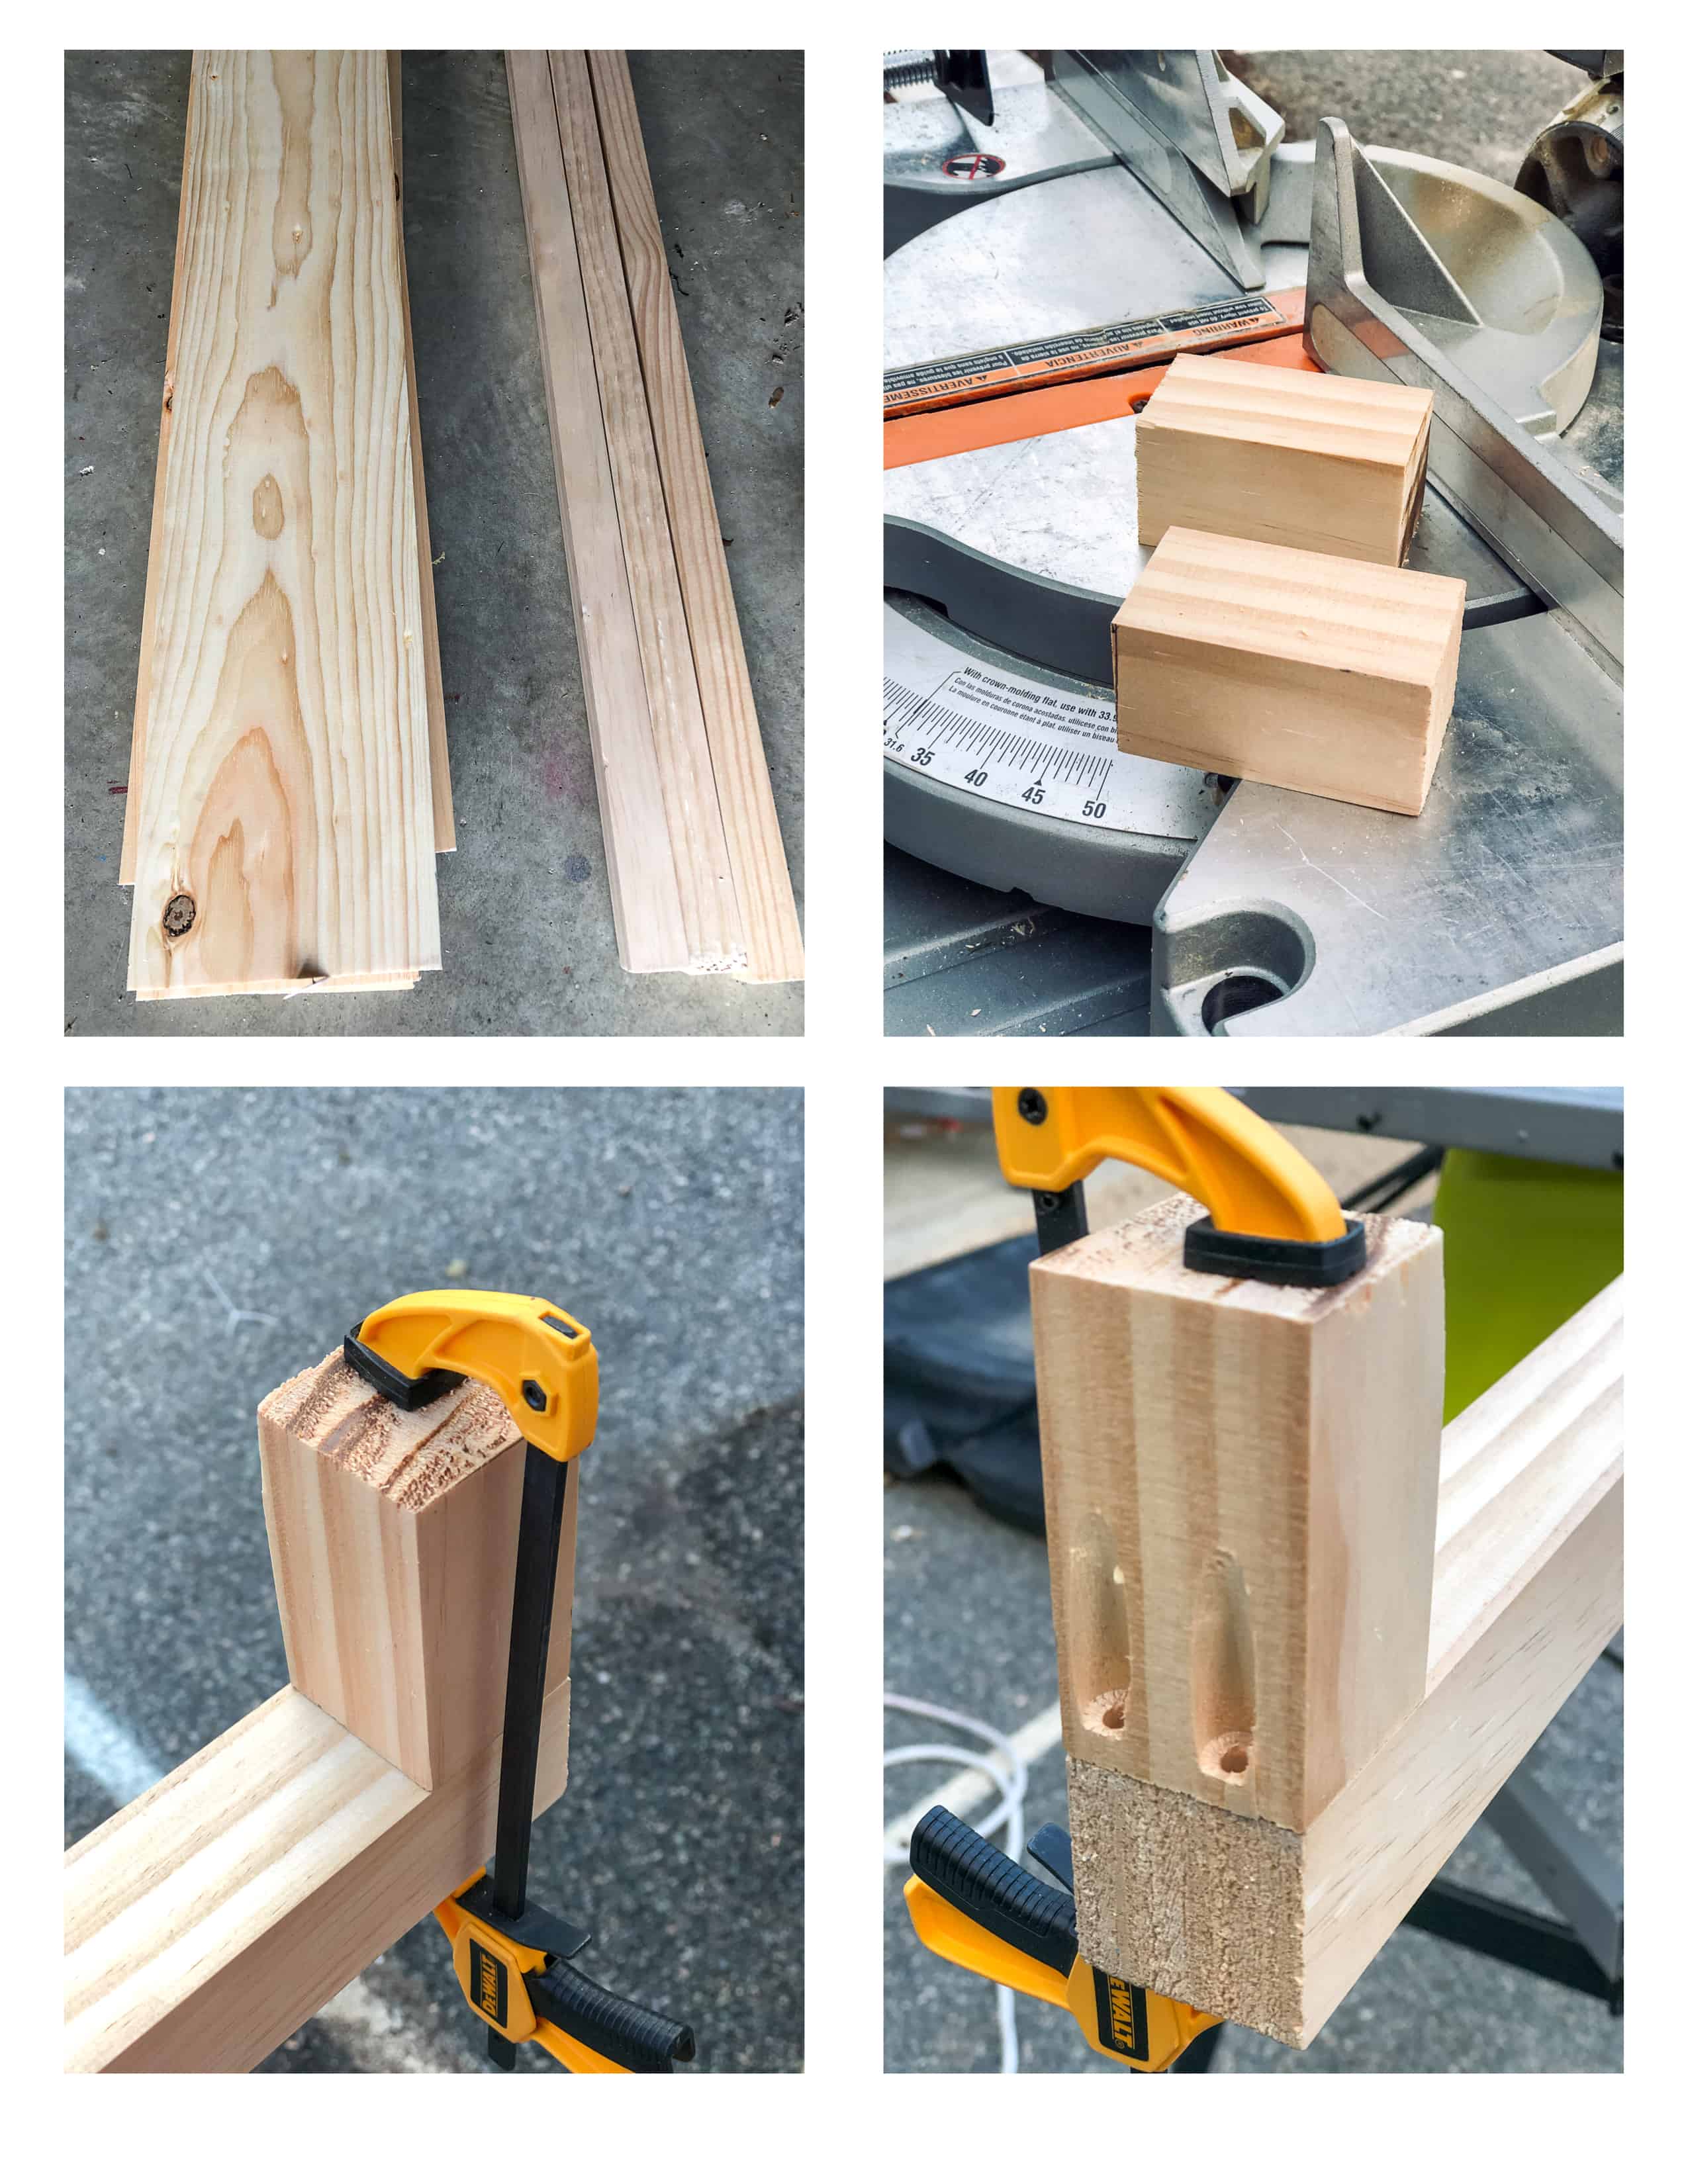
We cut the poles to size and attached a small piece to the top using the Kreg Jig pocket hole system. The BEST thing ever! If you don’t have one of this kit you need to get it ASAP!
Step 4: SPRAY PAINT THE POLES
The most COMMON questions I received about this shelving unit so far was if the poles were iron or metal?
No, my friends, they are simple WOOD POLES! Spray painted wooden poles!
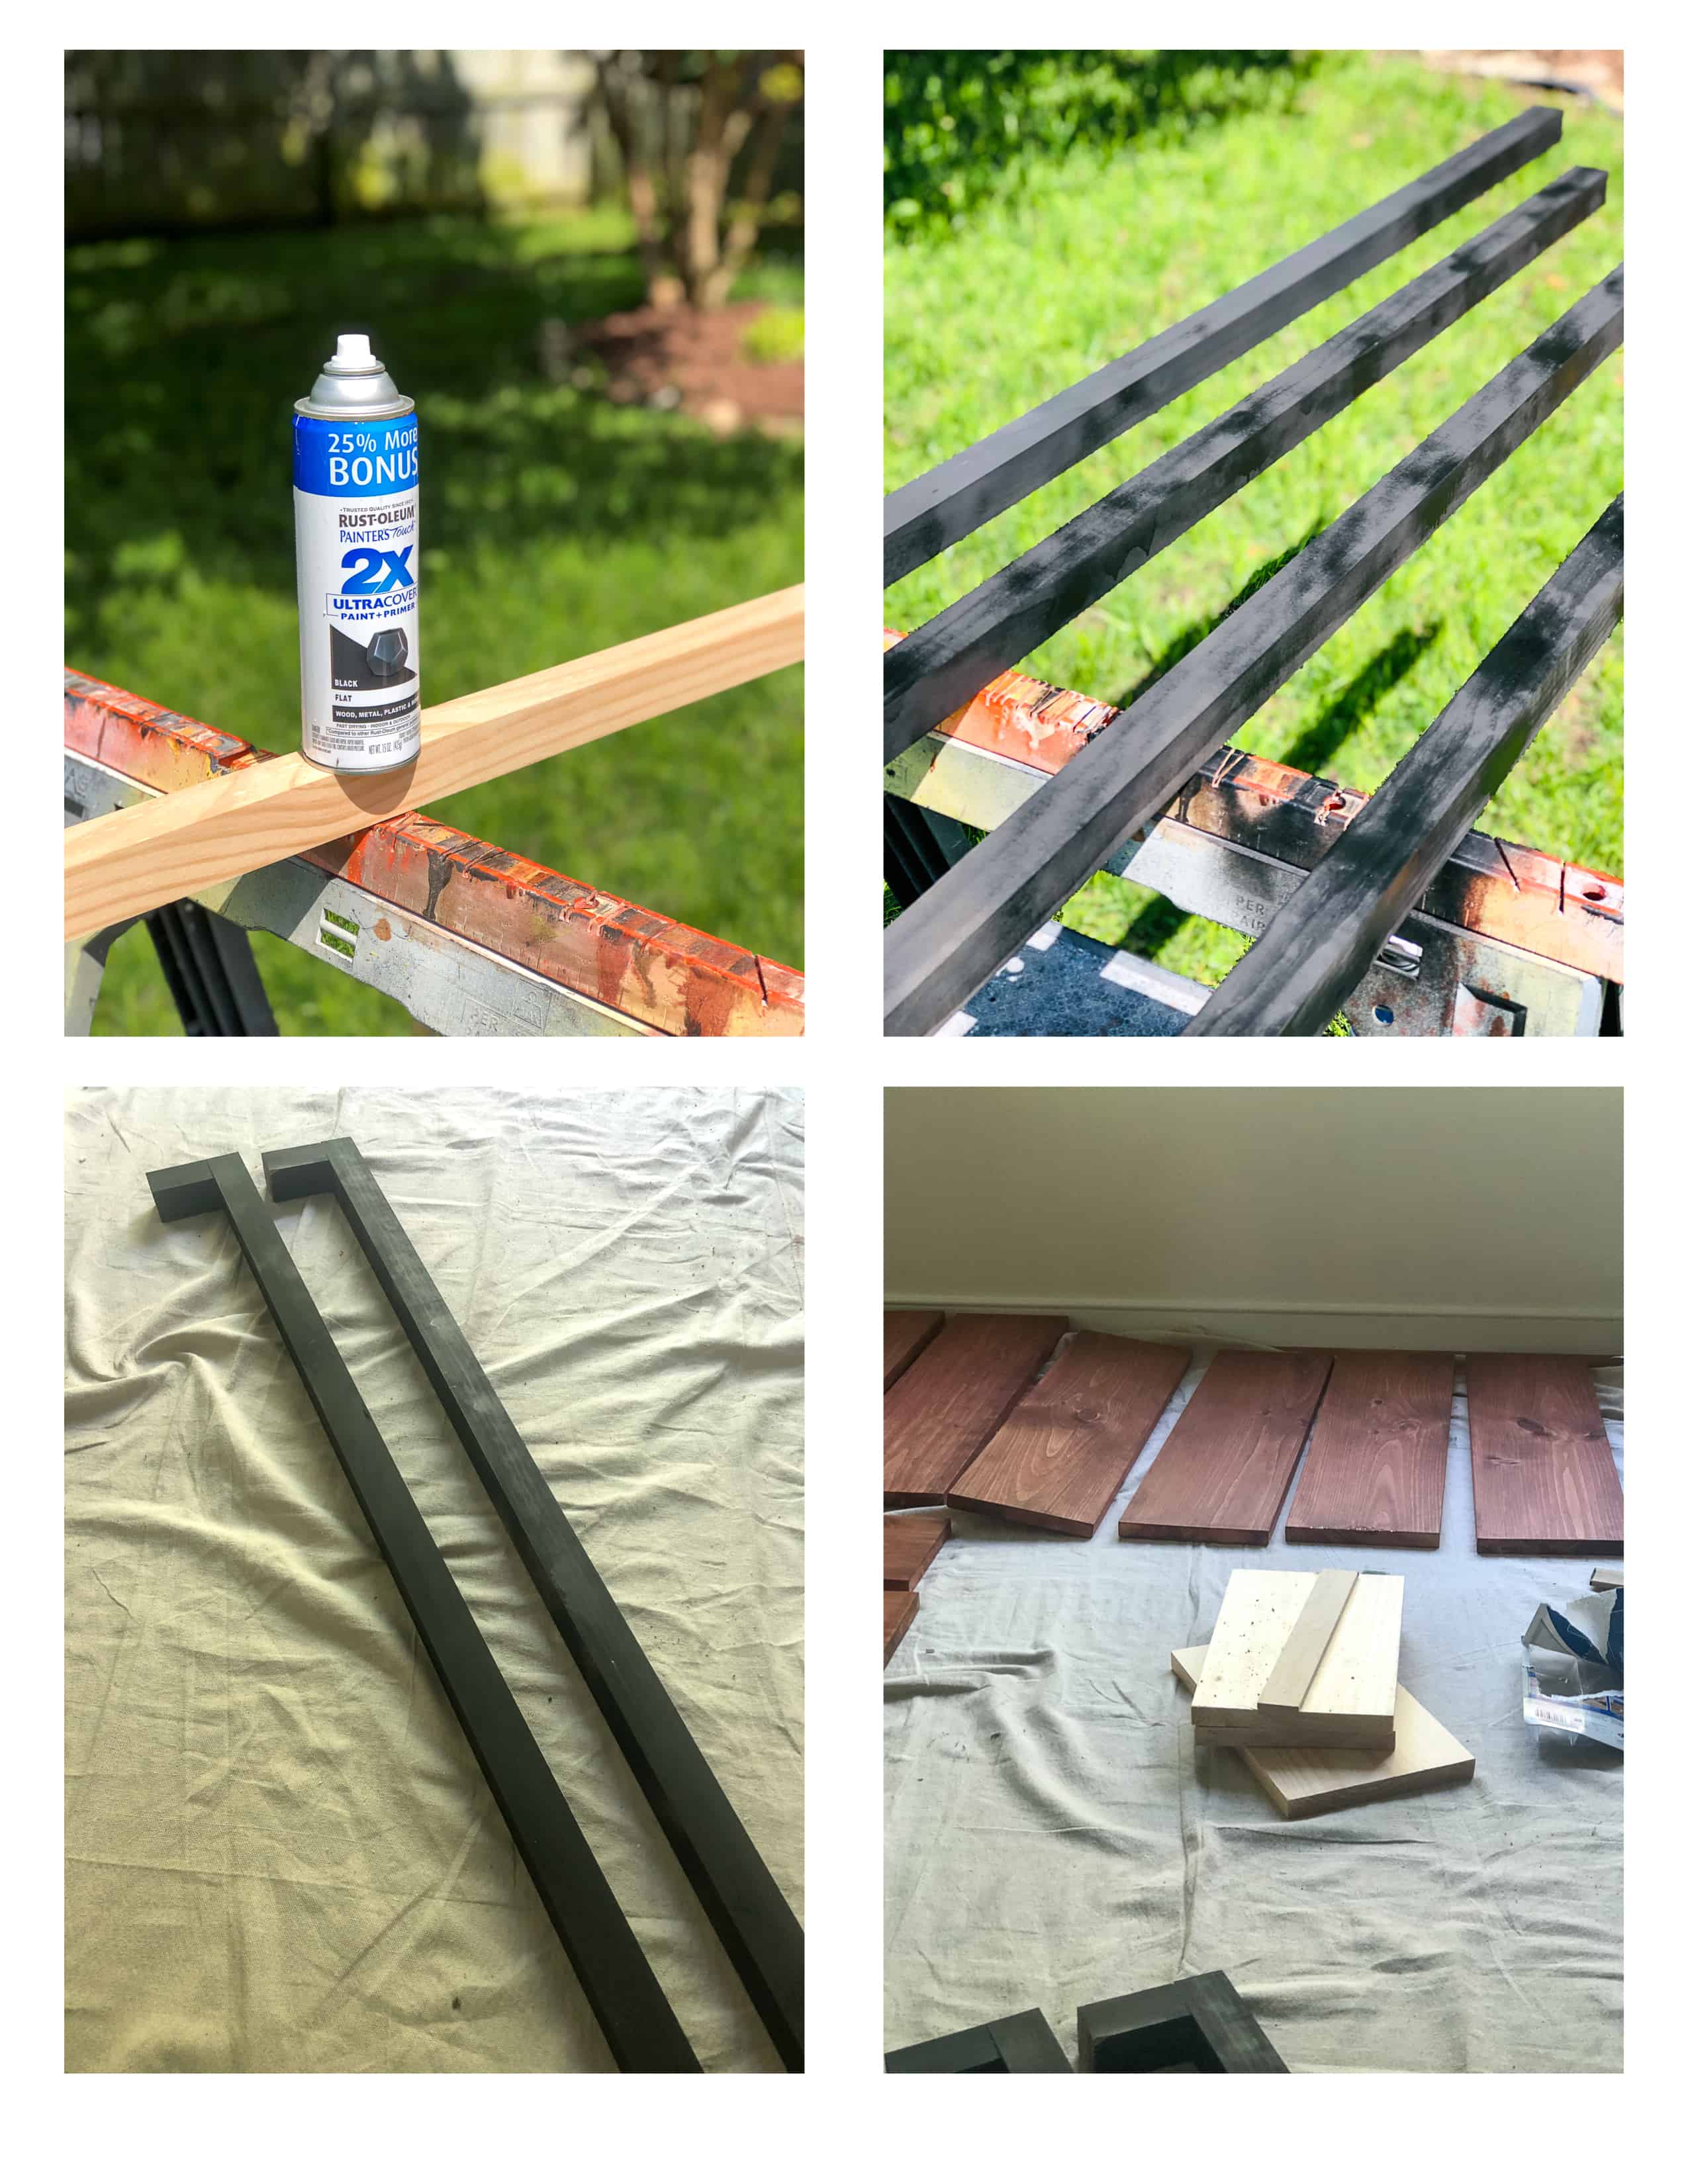
It’s amazing what an easy SPRAY PAINTING can do!!
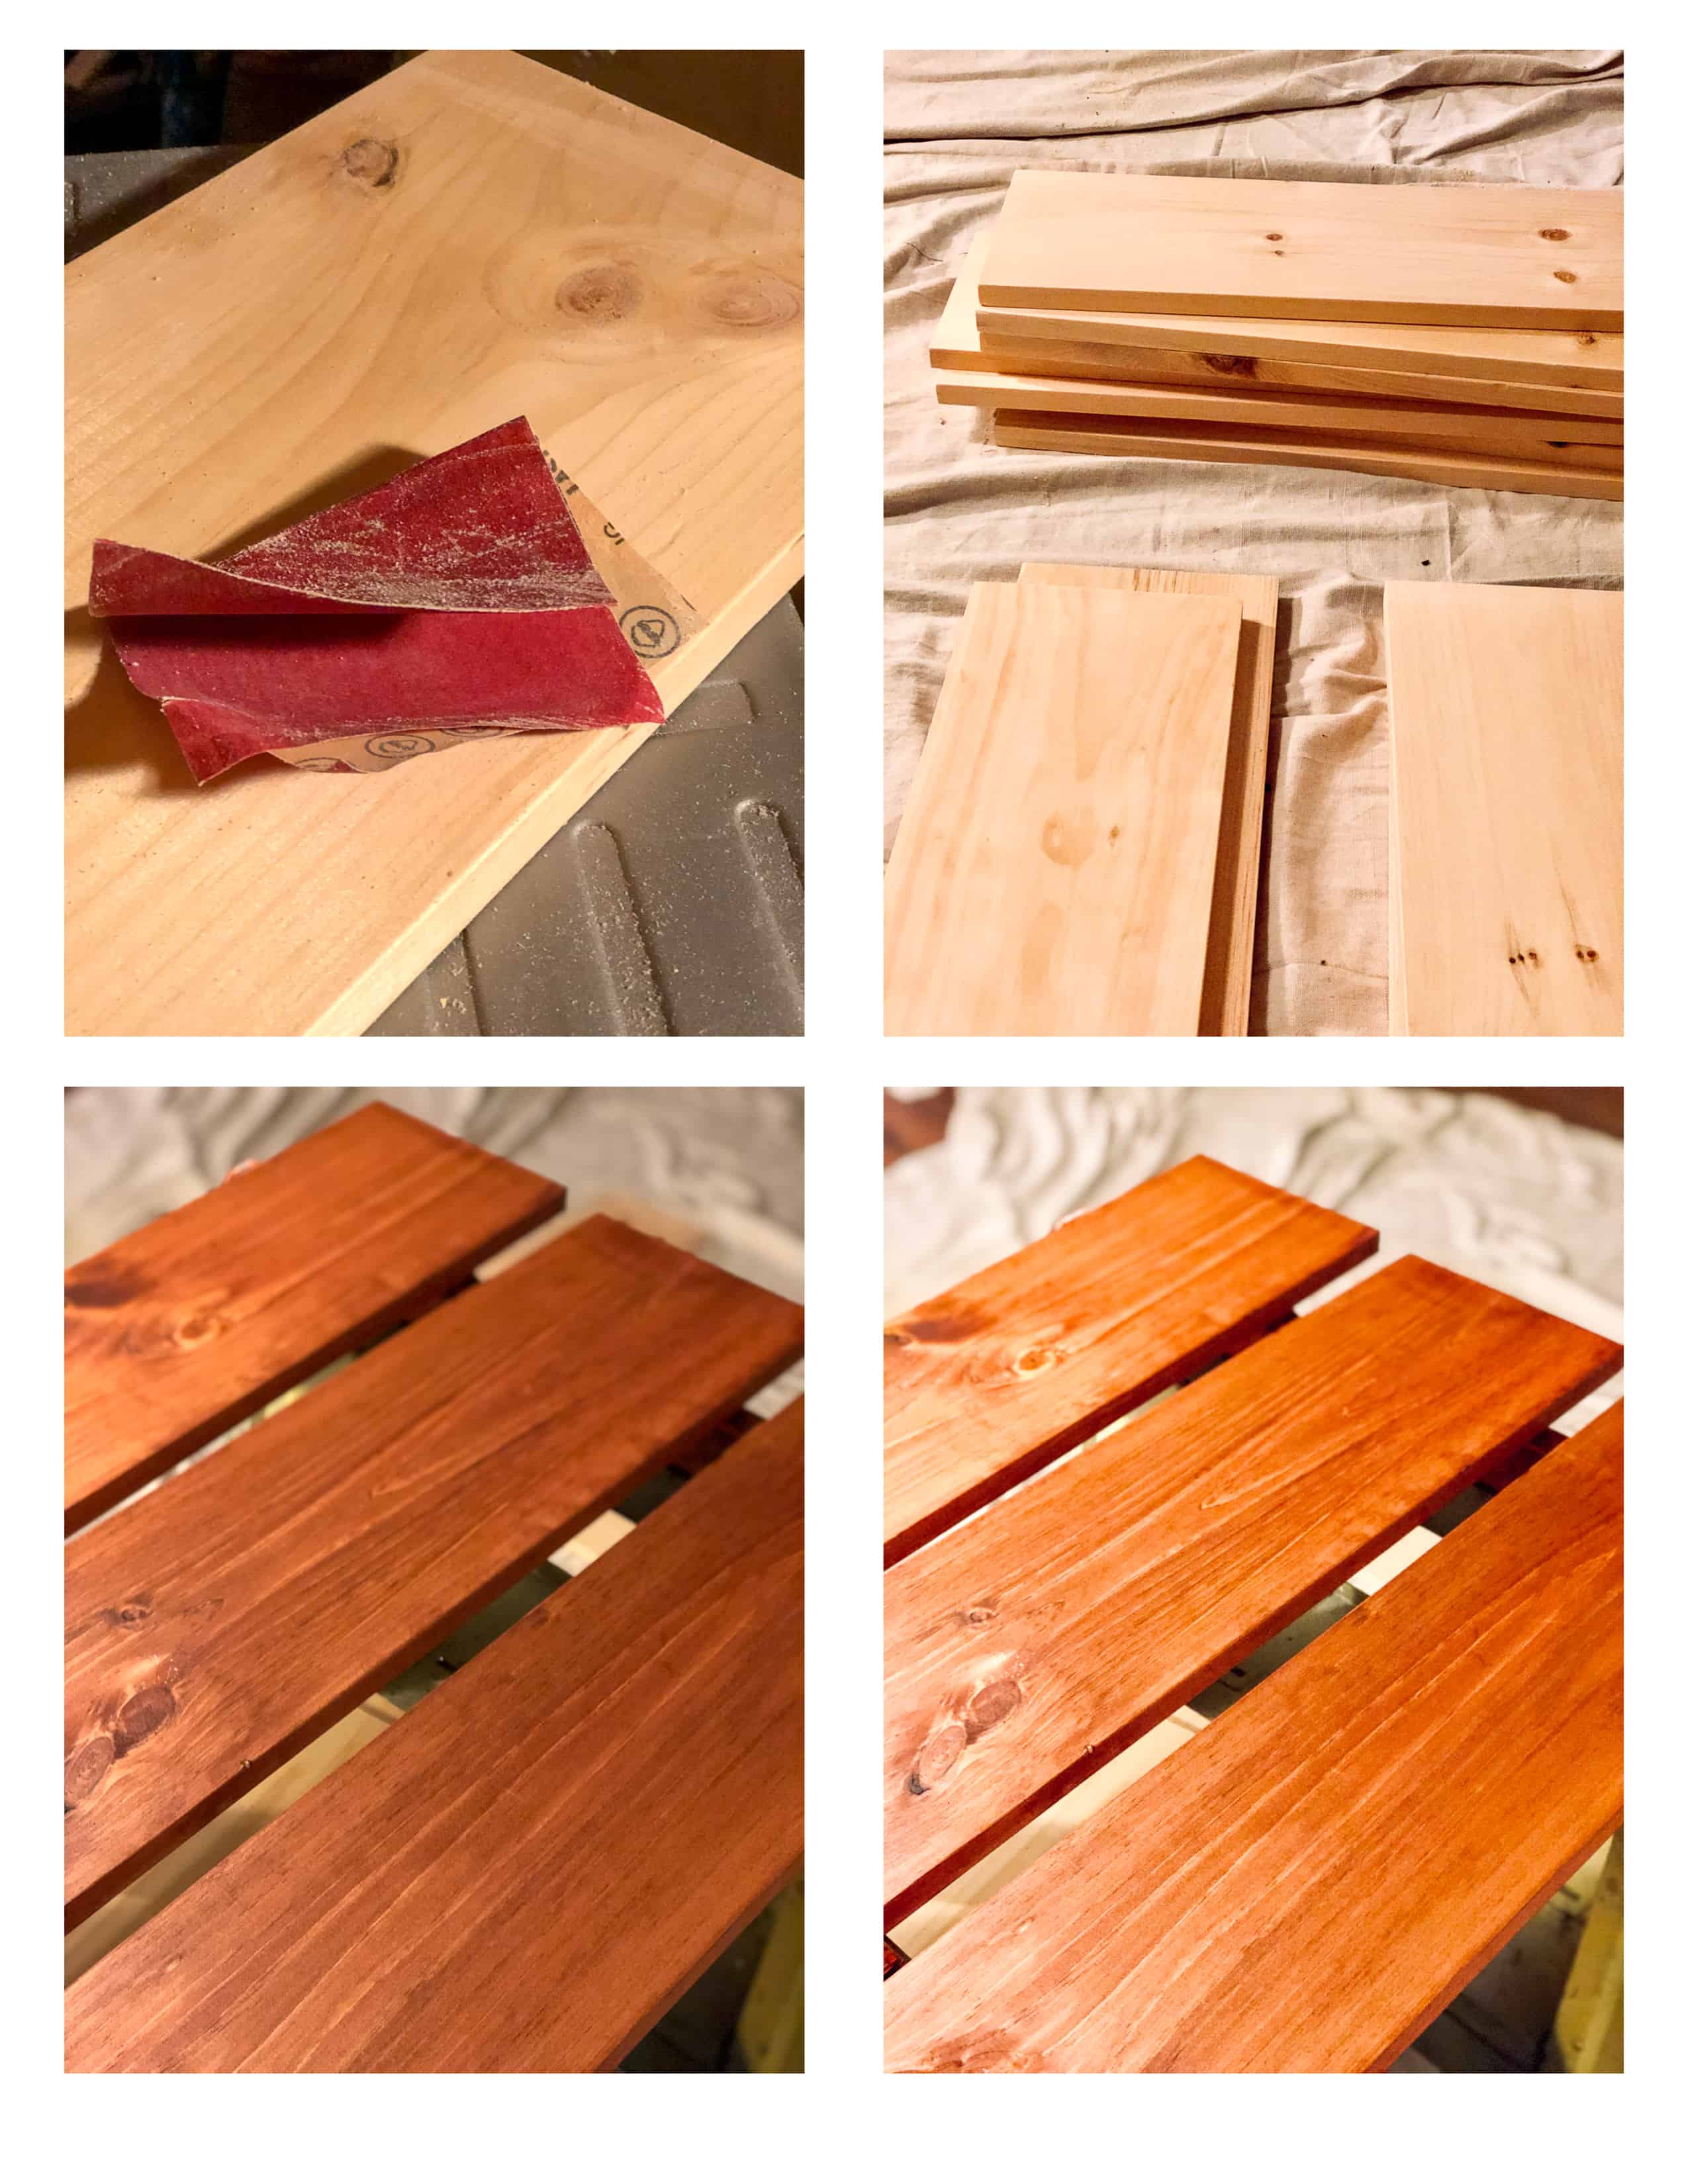
STEP 5: STAIN THE SHELVES
As a next step, stain the shelf pieces.! The ones you already cut to size!
I had 14 shelves to stain (5 on each side unit and 4 for the middle section!)
A few glasses of wine, some fun, and inspiring music and maybe an hour of my time AND IT WAS done!:-) I sanded all the wood panels lightly first and then applied two coats of stain. I used two different tones to get the color I was going for.
Then I let it dry overnight.
Now you have the poles painted and the shelves stained! Great!
Half of the work is done! :-))))
Now onto the FUN part!:-)
STEP 5: ASSEMBLE YOUR SHELVING UNIT!
You definitely need a hand with this! Do not try to attempt by yourself unless you want to fail lol.
And just for reference! Our garage is a HOT mess so we built this baby out in our dining room! Yup!
Okay! Let’s do it!
First, we built the 2 side section which was a stand-alone unit.
HOW WE DID IT??
Well! I have to make a confession.
I have great ideas. I really do LOL…
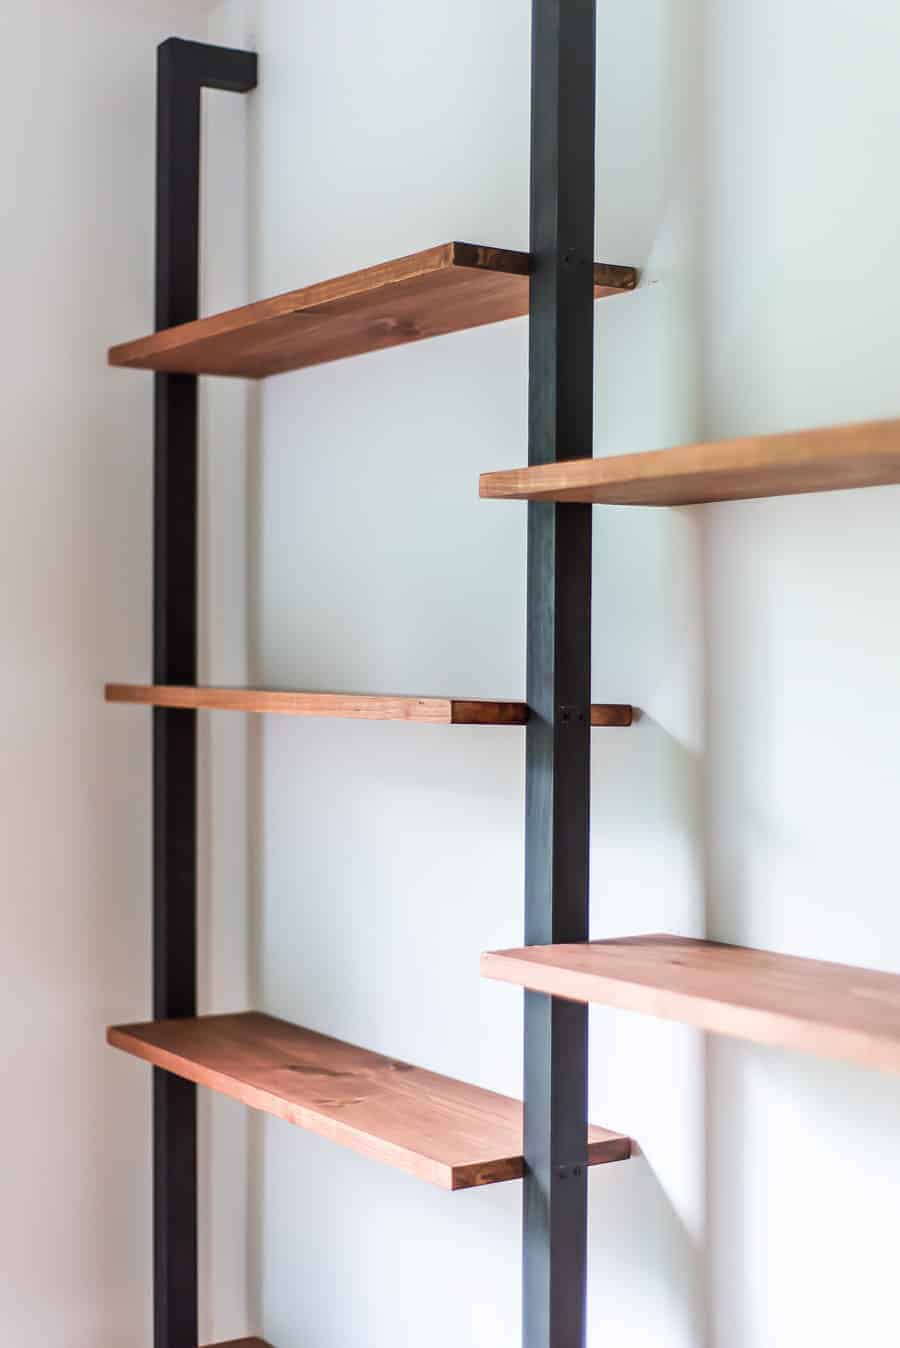
…but sometimes I can be stuck in my own little world and can’t figure out things on my own. Sooo…I had to dial up my badass woodworking gal Jen Woodhouse to ask her opinion on how she would attach the shelves to the poles…so she advised the butt joint method.!!:-) It’s good to have great friends handy!!:-) #loveyourtribe
Measure and mark the poles where your shelves will butt joint with your pole. Mark the spots for ALL the shelves on the poles and be sure to mark your shelves too. Get the measurements on BOTH side poles!
Then drill two pilot holes through the joint so the wood doesn’t split. The holes must be the same size as the dry-wall screws. Then drive the drywall screws into the drilled holes. Countersink the heads into the wood.
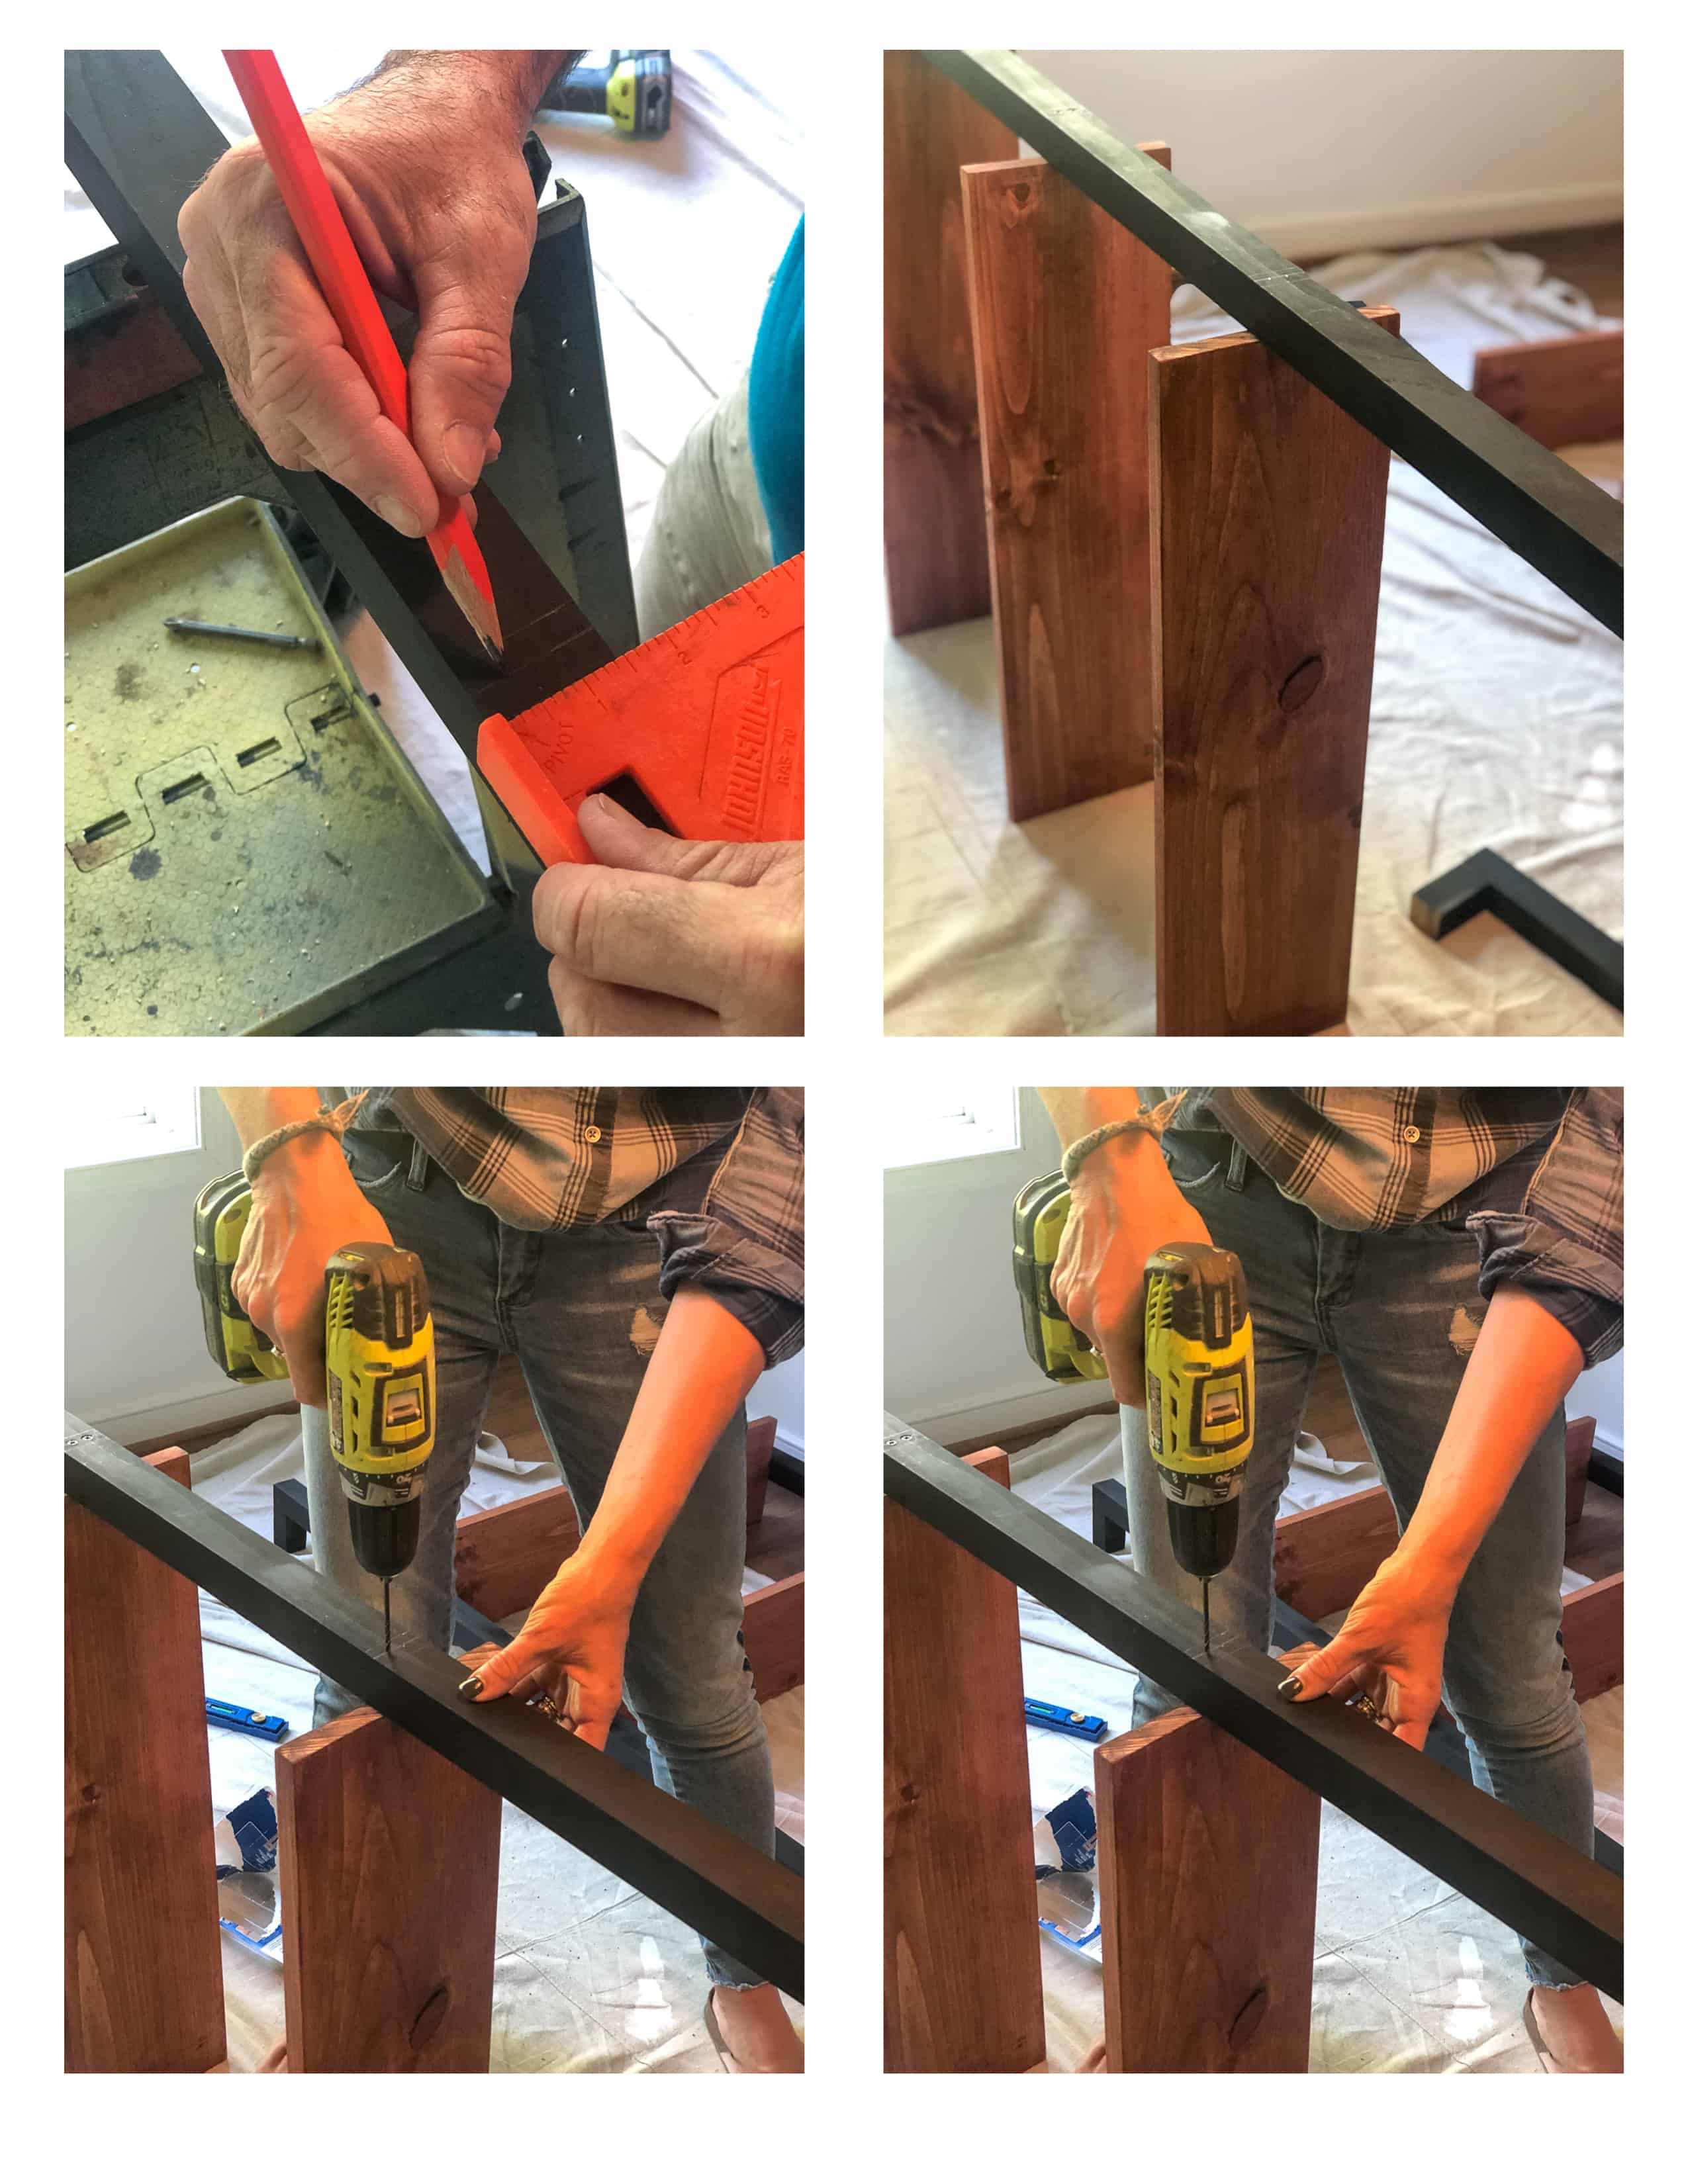

Screw all the shelves on one side then flip over your unit and repeat the same thing on the other side.

Tip: It’s very important to have the right measurements to build this DIY wall shelving. Be sure to be precise with measuring the shelves as well as the poles correctly. We measured the center for the shelves carefully!

STEP 6: STAND UP THE TWO SIDE UNITS AND ADD THE MIDDLE SECTION
This is the tricky part, guys! Adding the middle shelves.
We did not attach the SIDE units to the wall with screws but we stood them up, leaning them against the wall and screwed the middle shelvings. Of course, everything was measured out beforehand. Using a level we carefully screwed the center shelves to the poles with the same idea -Predrill the holes first then drive the screws into the wood.
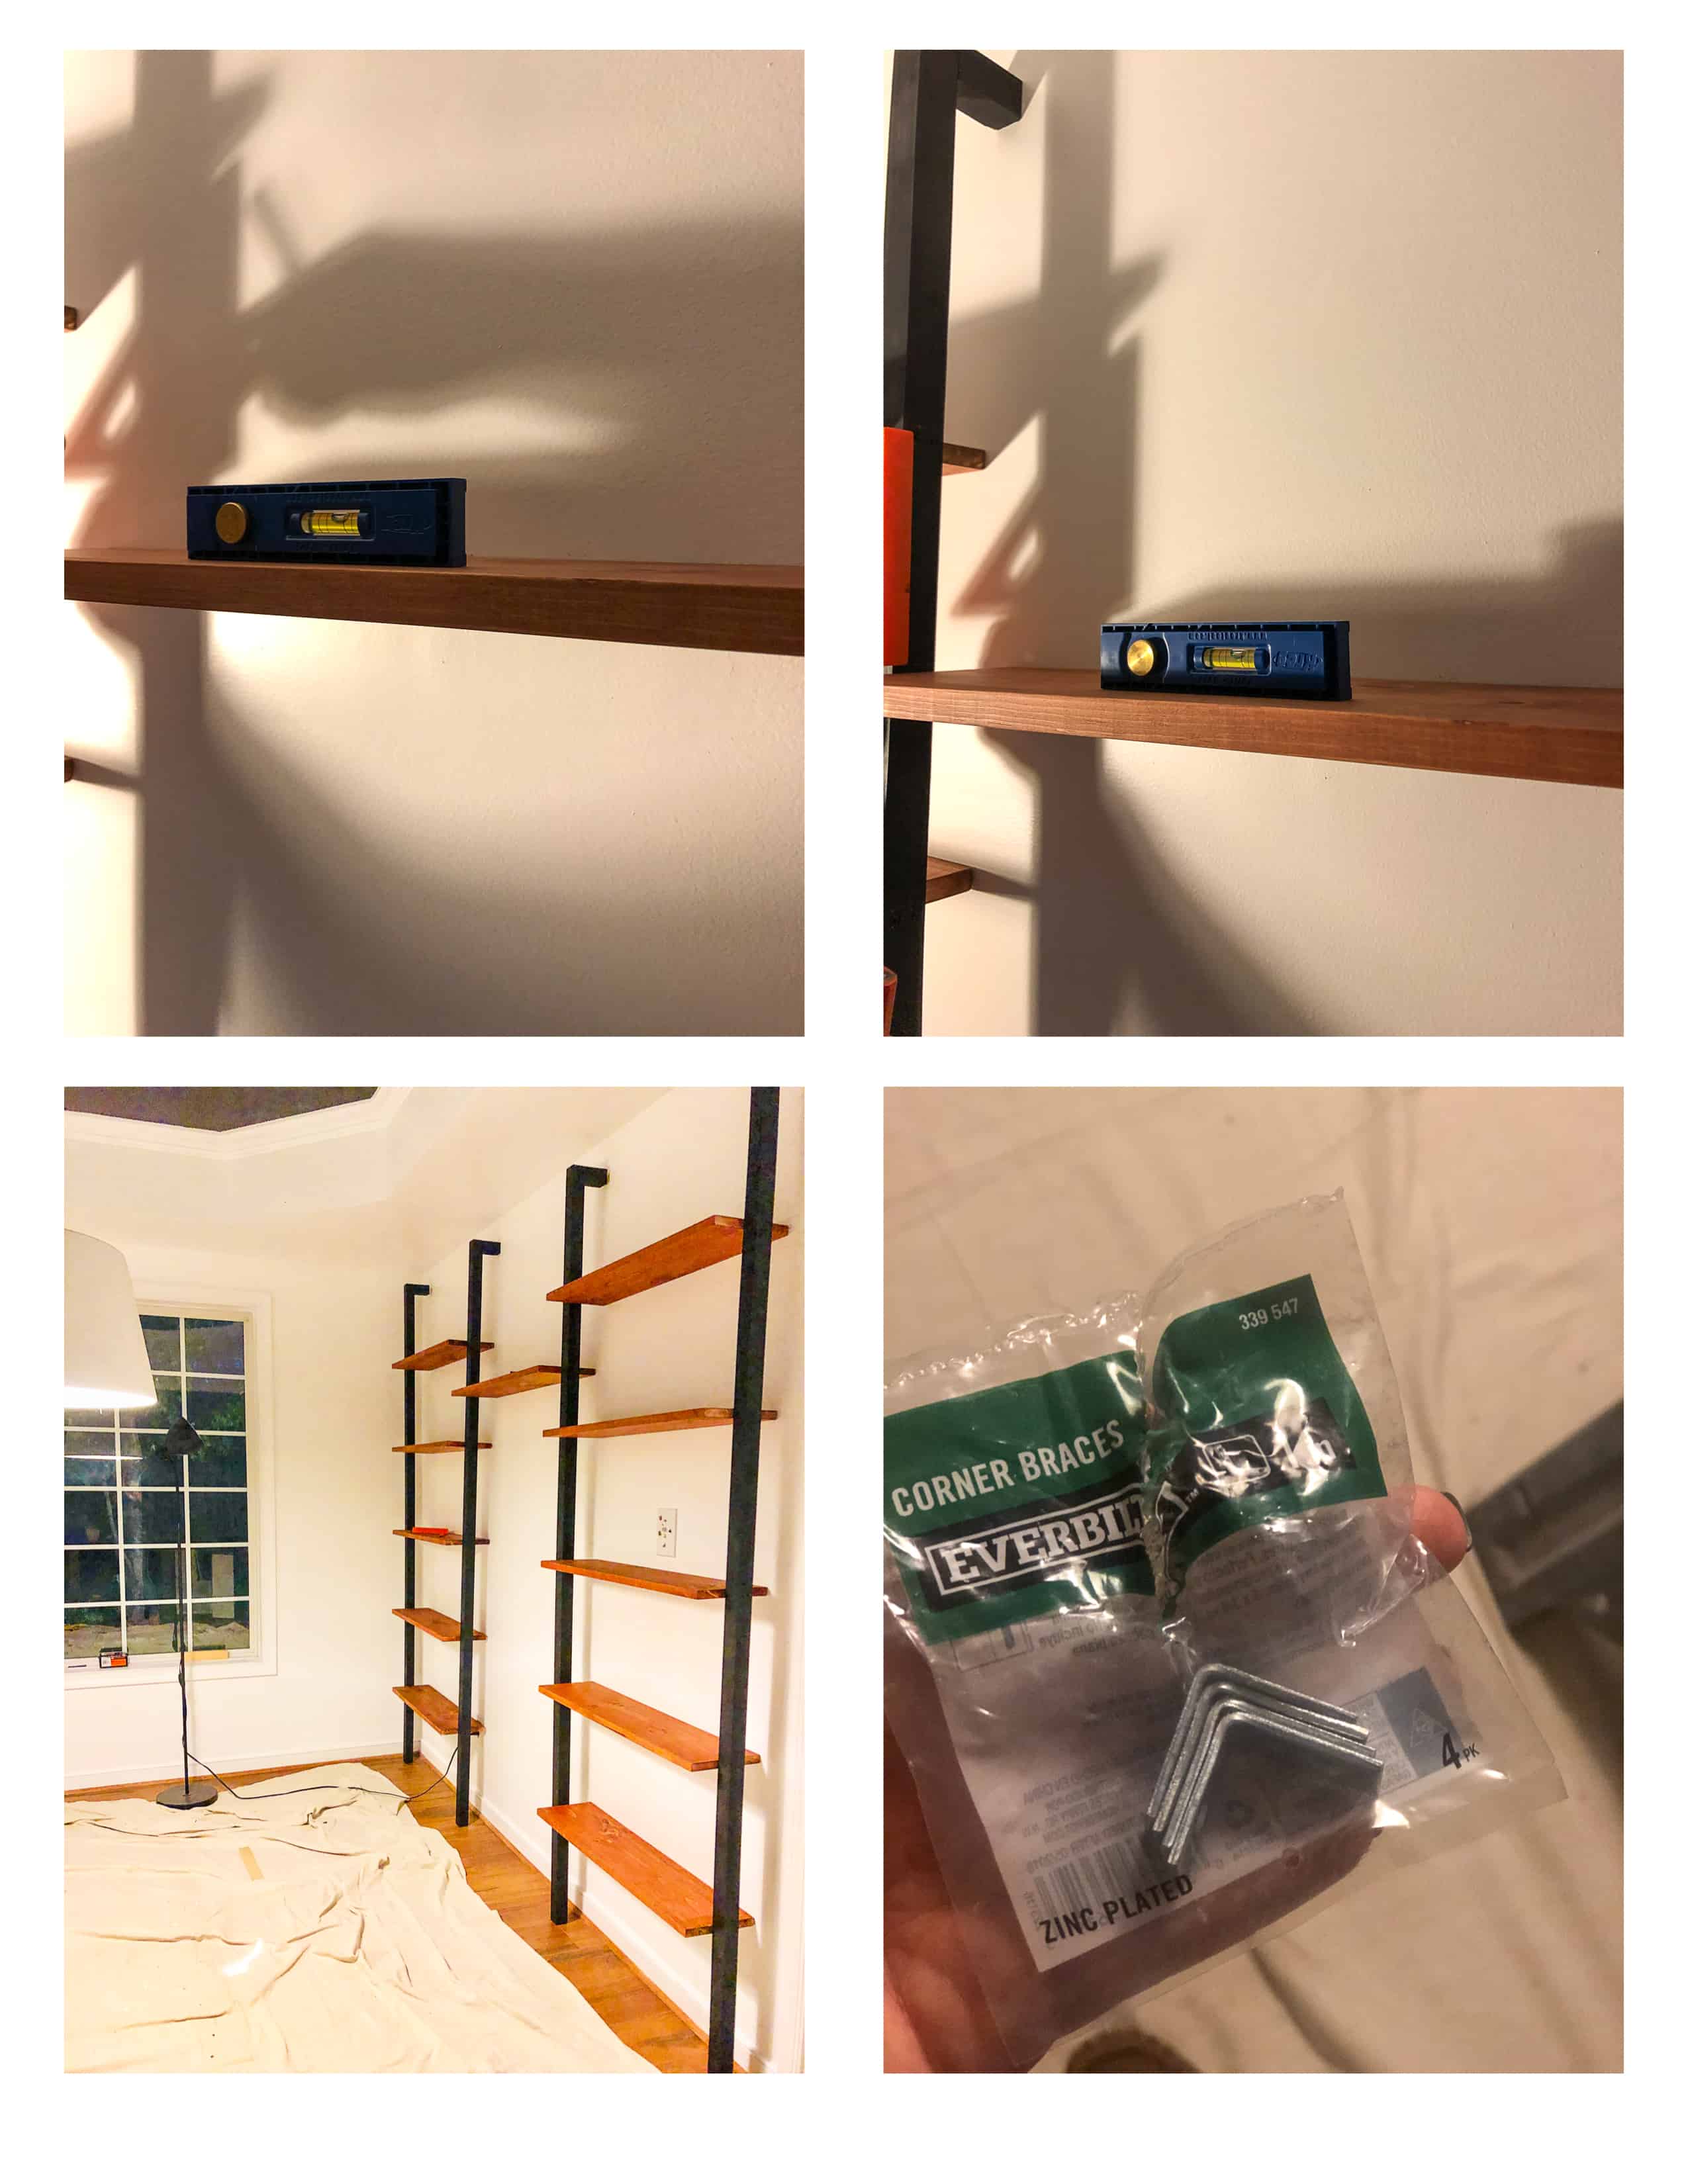
STEP7: ADD THE CORNER BRACKETS TO THE TOP OF THE POLE
This step has to be done actually before you stand up your units. We figured that out as we did it haha.

STEP 8: SCREW THE SHELVING UNIT TO THE WALL USING THE BRACKETS.
To be on the safe side, I added a small corner bracket under each lower shelf as well.
I painted the corner brackets with white paint so it is not visible at all!:-)
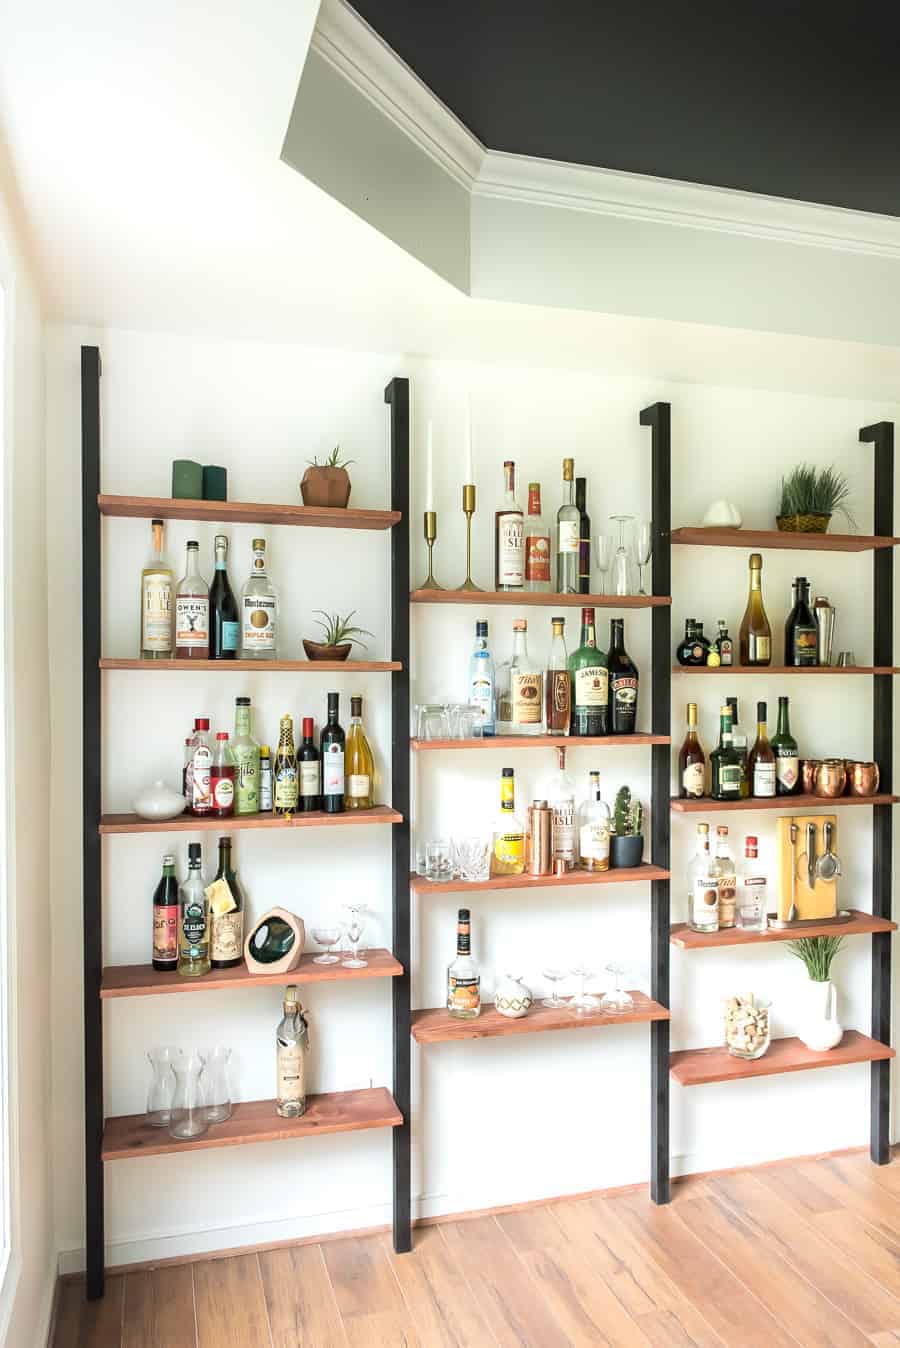
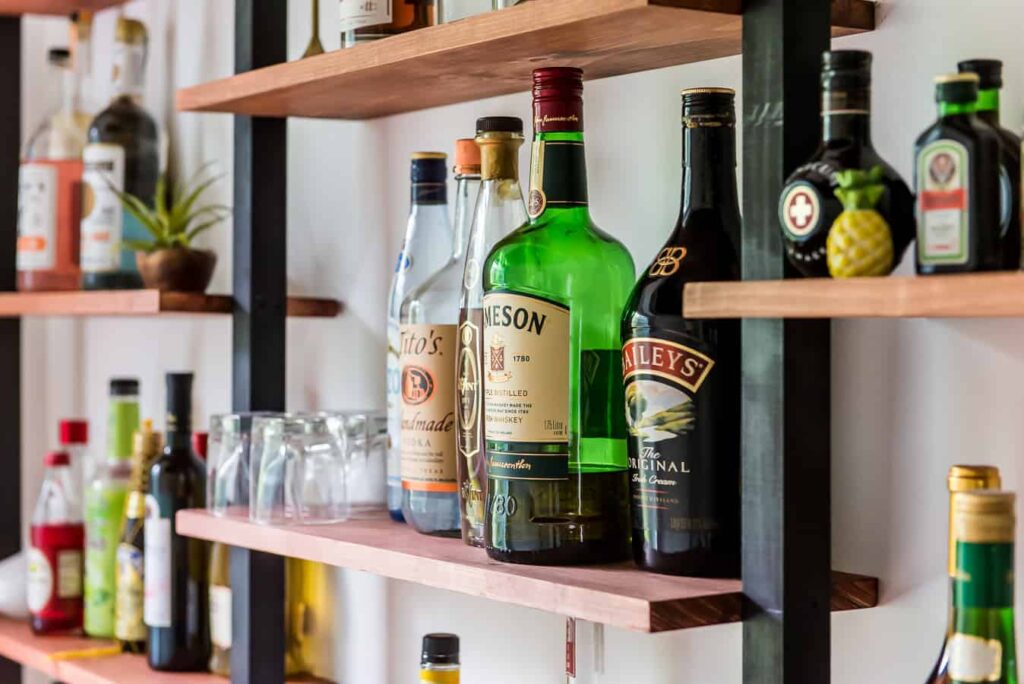
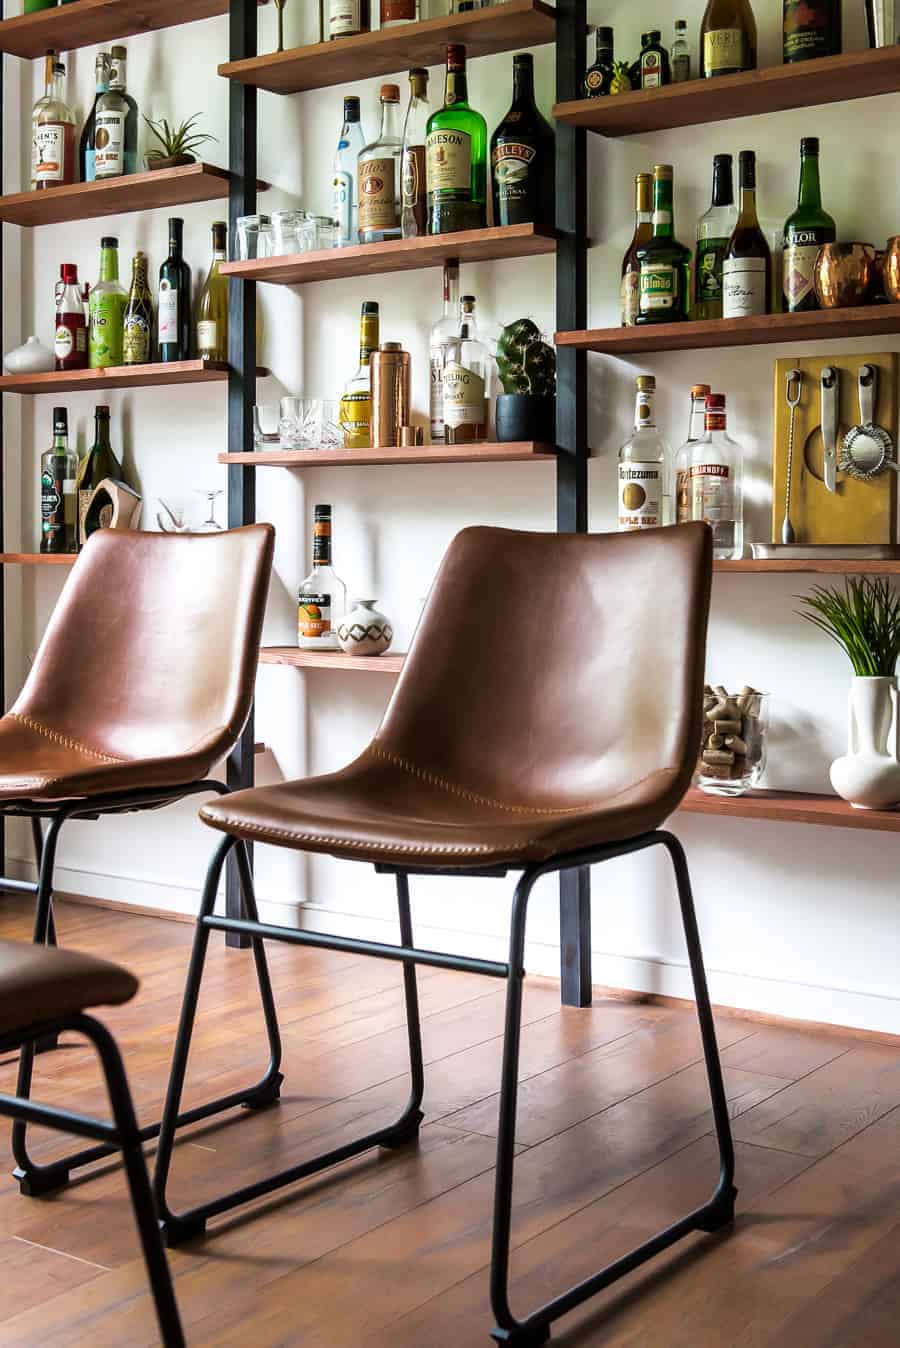
Then I organized my bottles and glasses nicely before I set down to drink my favorite cocktail!!
![]()
I promise it’s not as hard to make as it looks! Give it a go and build a good one!
And below are a few other sneak peeks from the items I have received already for this Moody Dining Room Makeover.
Can’t wait to see it all come together!
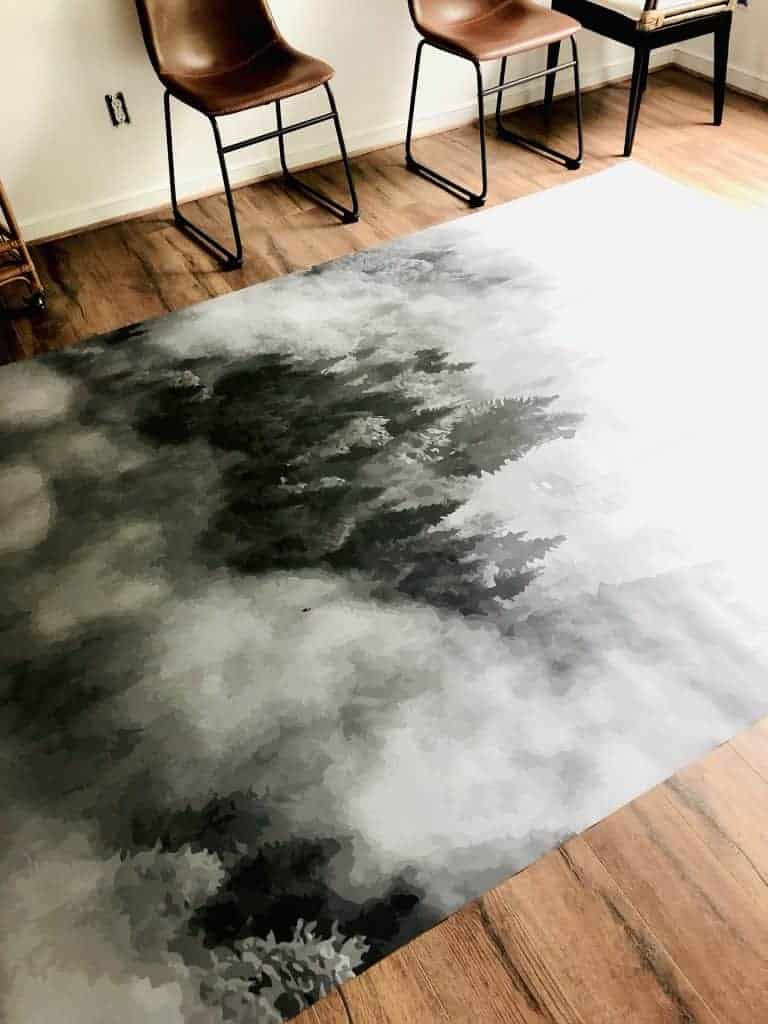
Eeeeeek! Loving it all already!
Be sure to catch up on WEEK 1, WEEK 2 AND WEEK 3 if you are new here.
And as always! Check out the rest of the participants on One Room Challenge official site and get inspired!
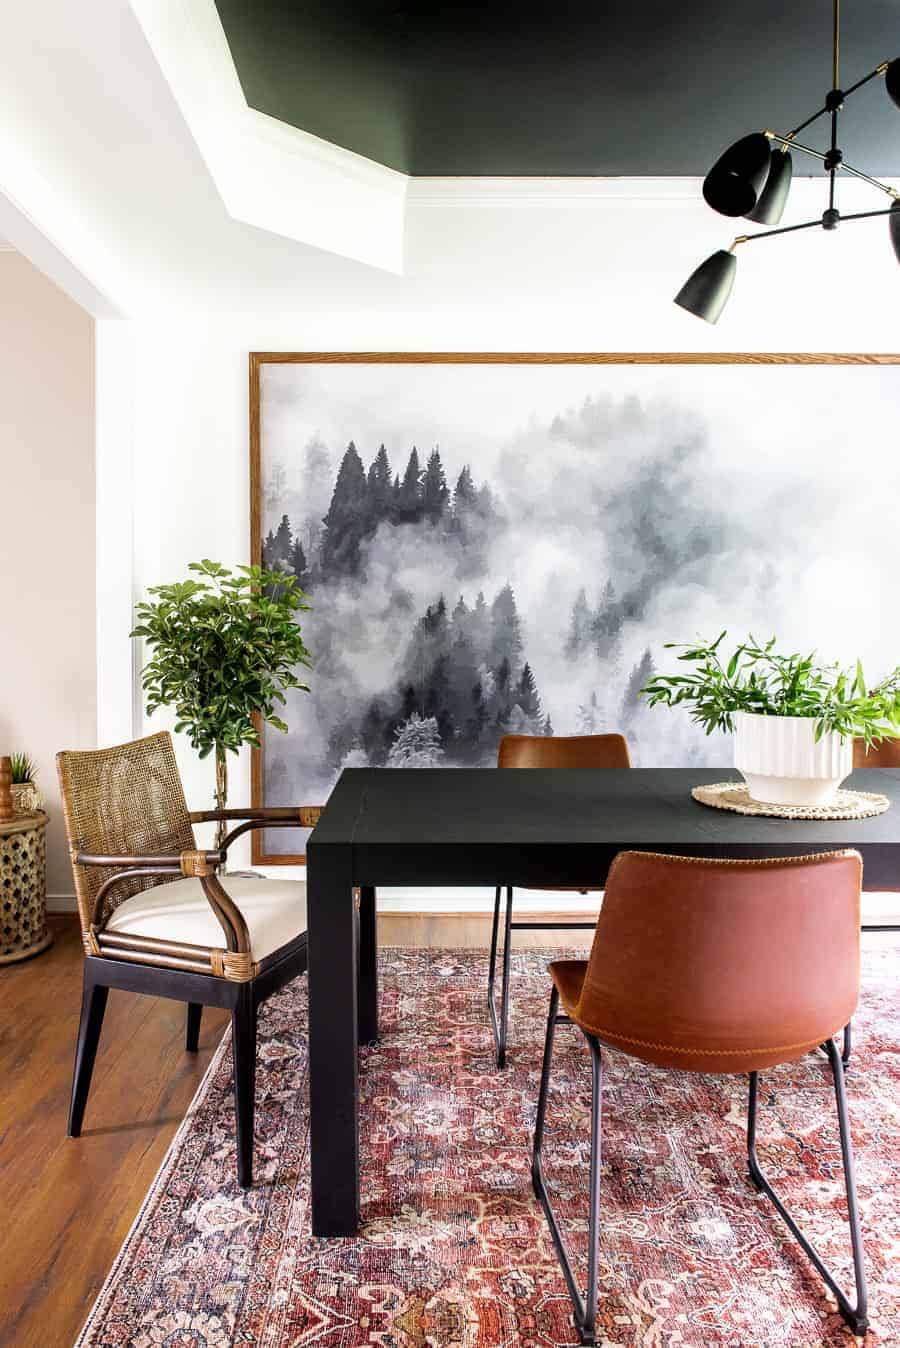
UPDATE:: Since this post, my MOODY DINING ROOM has been revealed!
Cheers,
Aniko

Did this the other day… and its beautiful! Thank you for posting this diy inspo. We need more people like you!
Love it! I’ve been searching for a way to diy metal shelves….because I don’t love the pipe look, I prefer square, but I NEVER thought of using wood and making it look like the metal pipe! I have to integrate a couple of very tall shelves with 4 kiddo work spaces. I’m going to take this idea and run with it! Thanks so much!????
Question if you have any concerns with the shelves pivoting in their axis? I really want the cb2 helix shelves but they are pricey and not quite the right size. This would be a perfect diy version!
What width are the shelves? Great job by the way.
Man this looks good! Loving the fact that the shelves are a DIY even more!
This is gorgeous! For some reason, now I think we need a bar wall… Hmmm….
This turned out AMAZING! Such a great design
I definitely thought wow that is stunnnnning! And we probably have just as much alcohol, it’s just jammed into cabinets so it doesn’t look like as much. Pinning this beauty for sure girl.
Lol! I am glad we are not alone haha! Thanks for hopping over to check it out..:-) Xo
These shelves are gorgeous!! And beautifully styled! We were NOT as lucky with our intended shelving this week – ha.
Kayla- Thanks so much. I am very happy with the turnout!:-)
Those shelves look awesome! I thought the support posts were wrought iron. Smart, do-it-yourself, and affordable. Love your ideas.
That mural!! Can’t wait to see where that is going! 🙂
Right, I am measuring now…Can’t wait to see it up!:-) Xo
This looks so awesome!! I originally wanted to do something similar in my space, but I was way too intimidated to try! Great job! 🙂
Well! You should always go with your gut! My gut was telling me to go for it and I am glad I did. 🙂 Now I can finally see what I have available at home instead of keep running to the ABC store for vodka:-))) Xo
Eep! It’s so good!!! I love a good cocktail too — no judgement here. I can’t wait to see how it all comes together.
Brianna! High Five on those cocktails! 🙂 thanks for hopping over to check this out! Xo