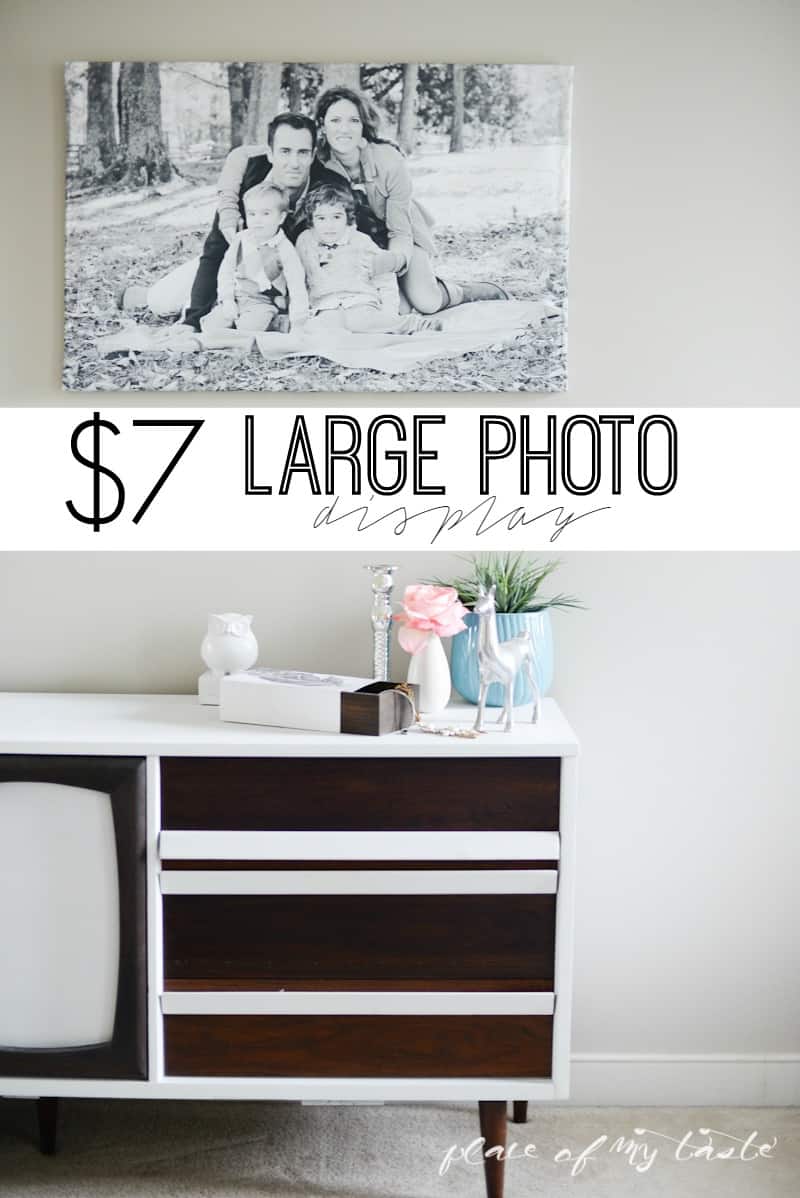
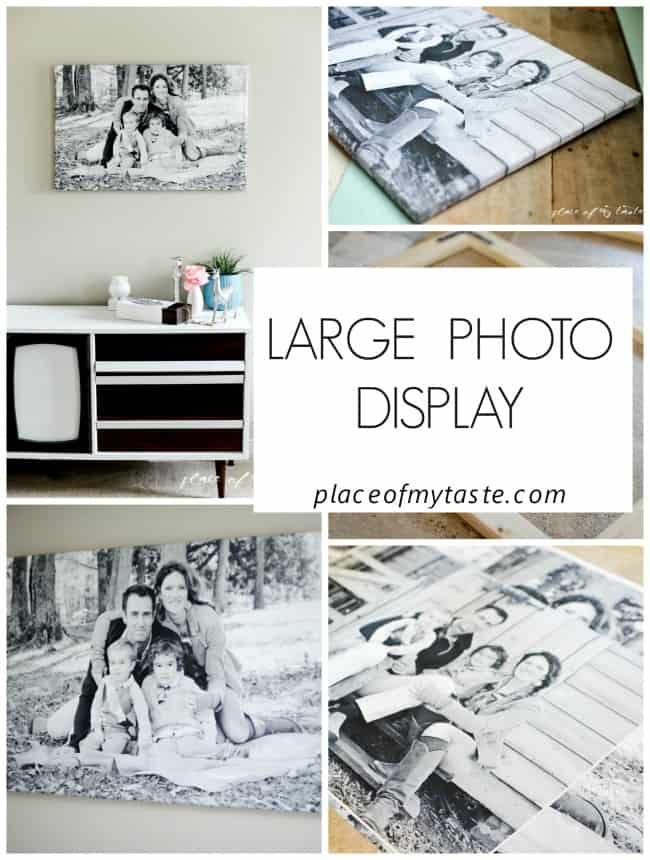
LARGE PHOTO DISPLAY
LARGE PHOTO DISPLAY – Showcase your family pictures in your home with a photo display covering large wall surfaces as part of your home decor.
This is the perfect time of the year to get your family pictures done. I am a photographer and if you live in the area,
contact me to get your fall mini sessions! 🙂
I love to display photos in my house… – a lot.
It makes me happy to look at them when I walk by them.
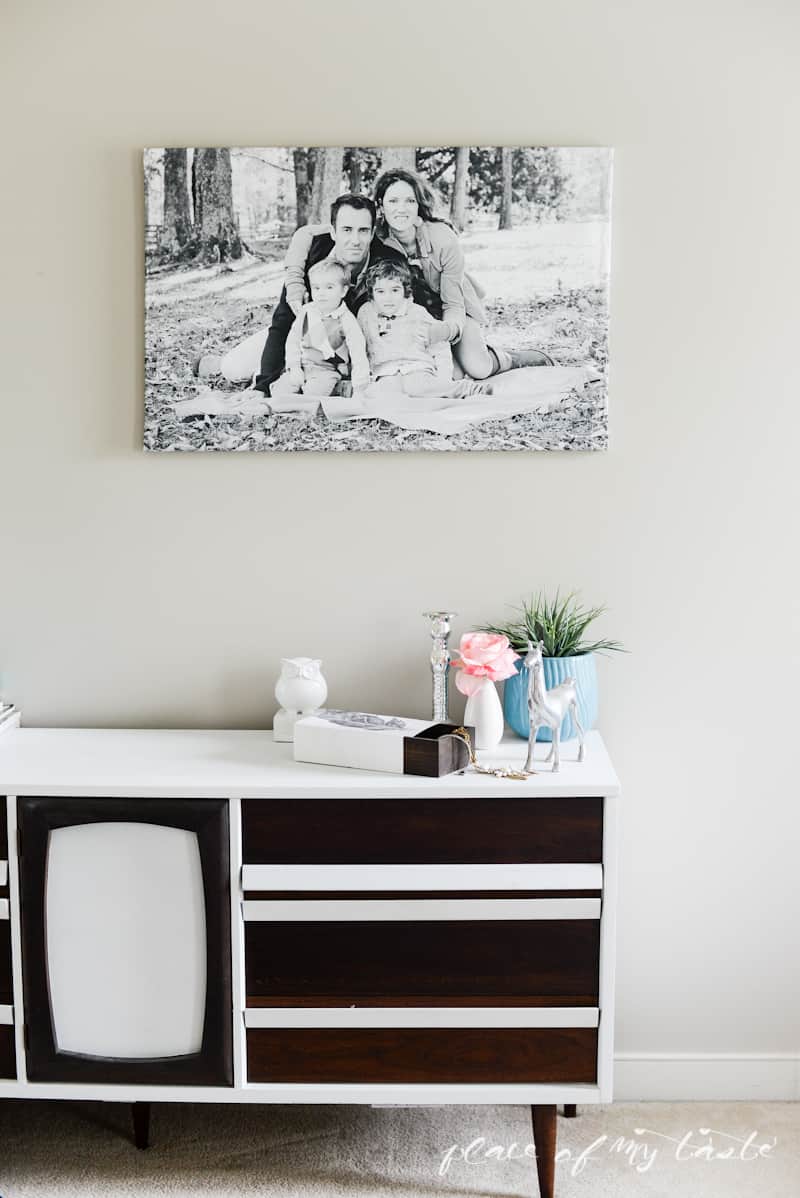
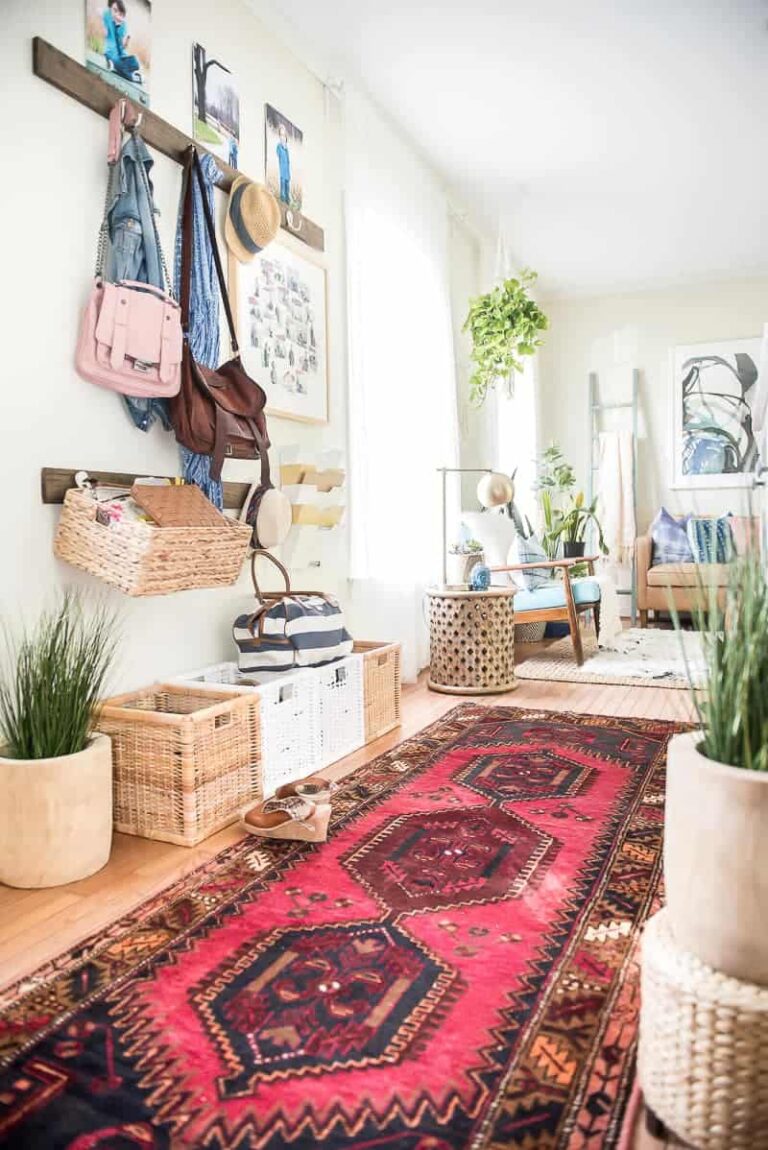
This LARGE PHOTO DISPLAY is one of my favorites.
(Photo courtesy – me and my tripod :-))
I will show you today the most inexpensive way to DIY that great photo display.
No, it is not a joke. This large black and white photo display only cost me $7. I surprised my hubby with this gorgeous gift last Christmas. Wait…last Christmas..? It’s almost Christmas again. Oh well, I think I had a busy year:-)
I guess I have to realize how fast time flies. It is crazy!
When I started pinning on Pinterest (couple years ago), I pinned a “LARGE photo” (from Sugar Bee Crafts) image to my board
that inspired me to DIY this massive photo art.
MATERIALS NEEDED:
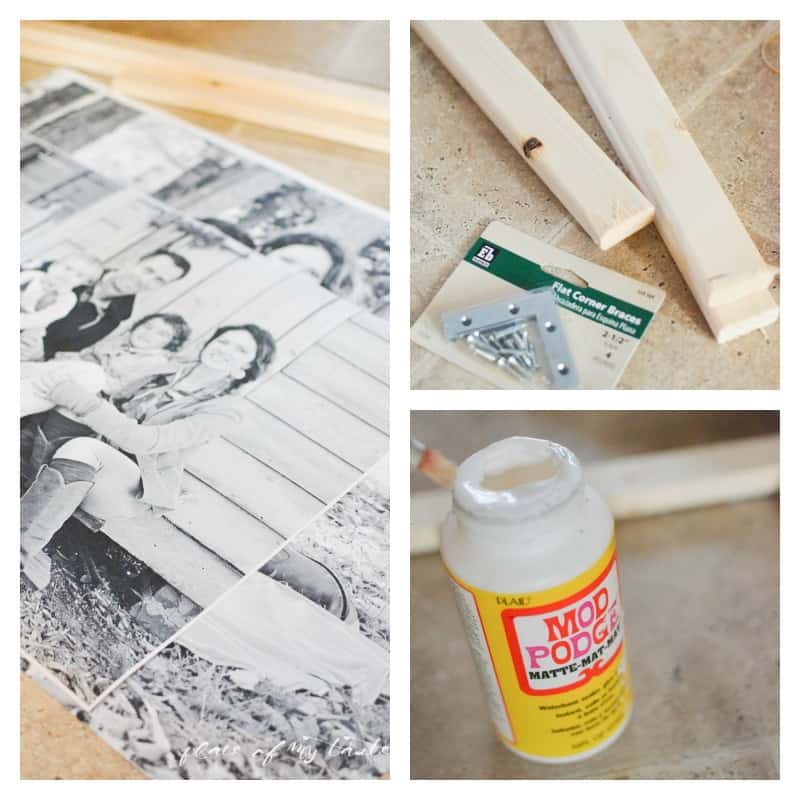
– Large (2’x3′)engineering black and white print of your photo (cost less than $4 at Office Max or Staples)
*Note: Some readers hadn’t had much luck printing their photos as an engineering print at their local store*:-(
– Wood panel (the most inexpensive kind is more than perfect -$1.79- Home Depot)
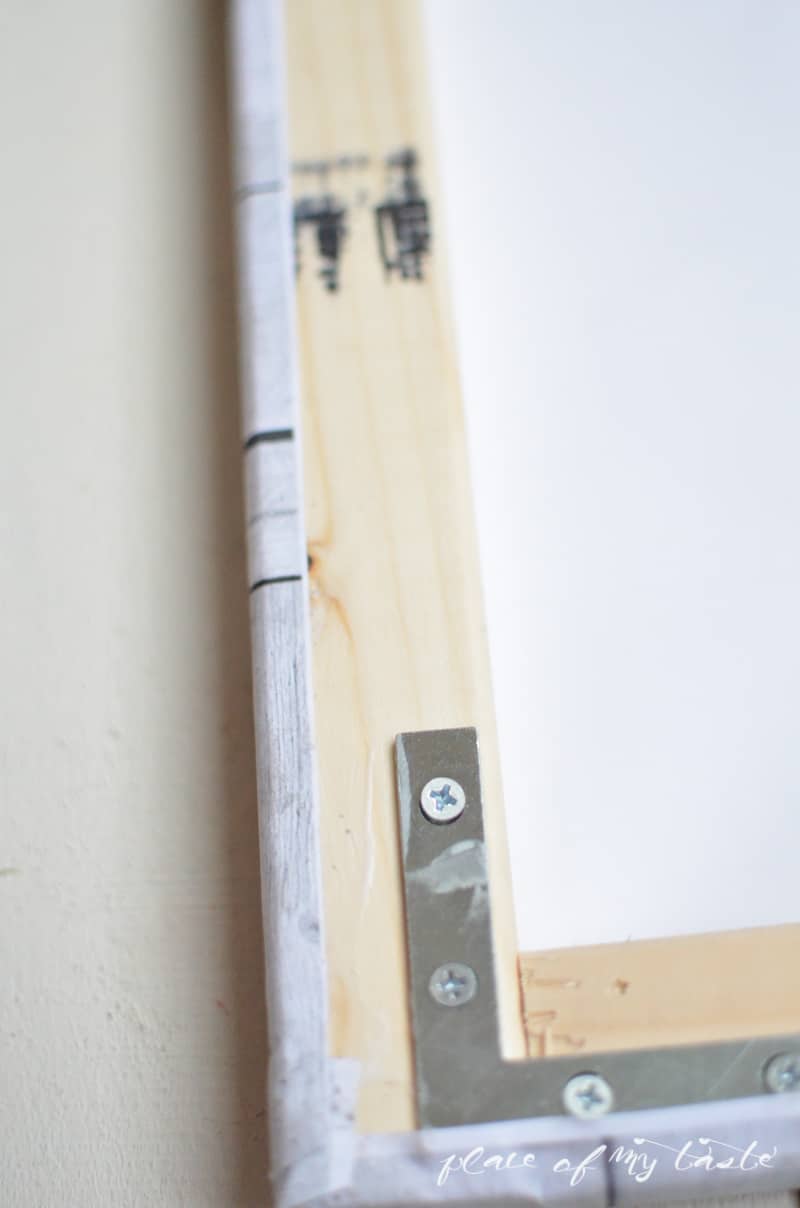
– Flat corner braces ($ 2.00)
TUTORIAL:
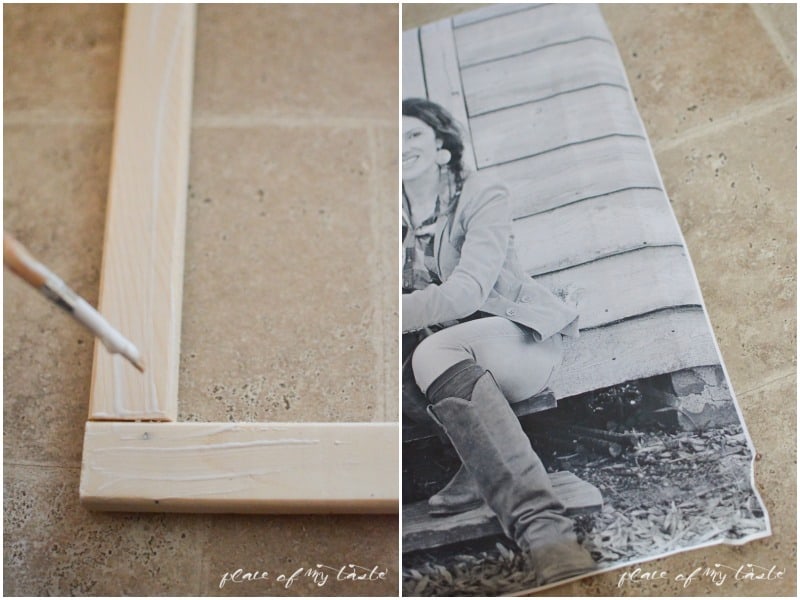
Get your engineering prints (it can only be black and white) printed at Office Max or Staples. Just like Ashley did for her POSTER PRINTING!
Black and white is my favorite way to display my images. My print is about 2 feet by 3 feet in size.
Huge!
But I also made a smaller one, about 1.5 feet by 2 feet in size.
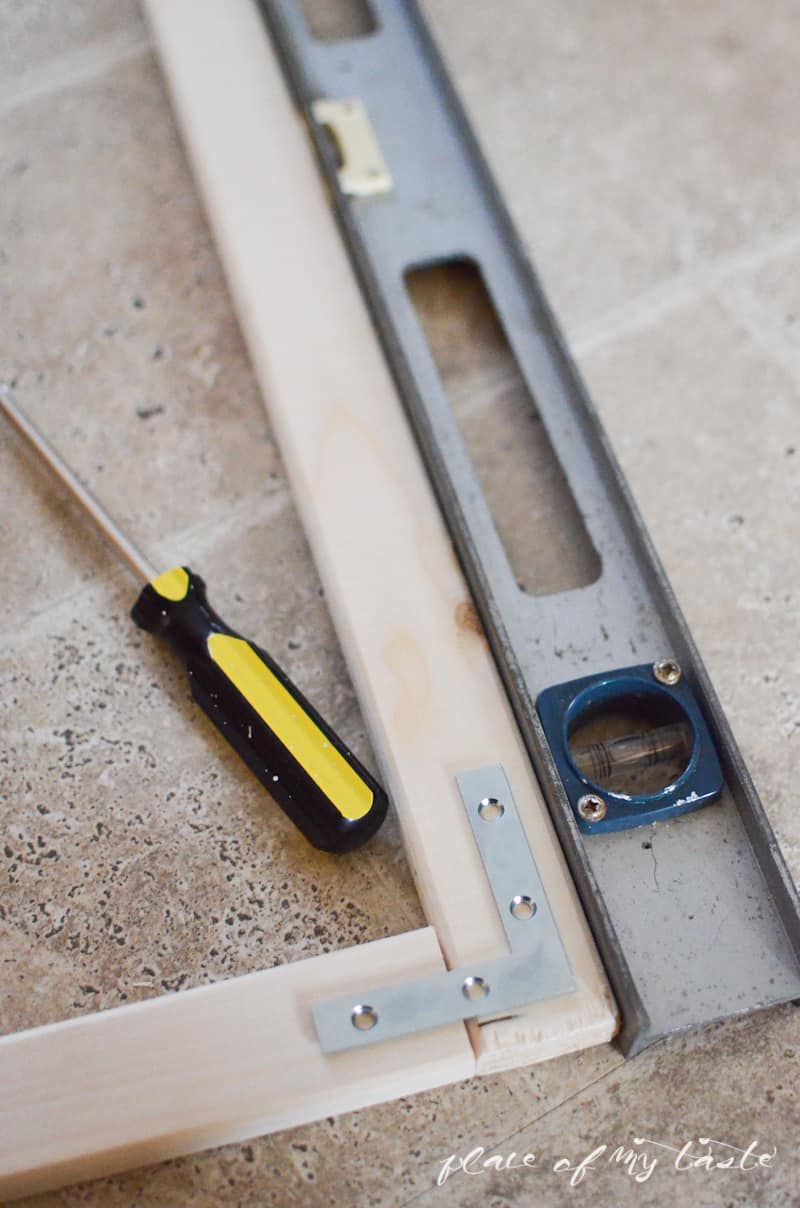
At home depot, make the wood panel cut to the right size, according to your print. For a 2′ x 3′ print my cuts were:
two 19″ and two 34″ pieces of wood panels.
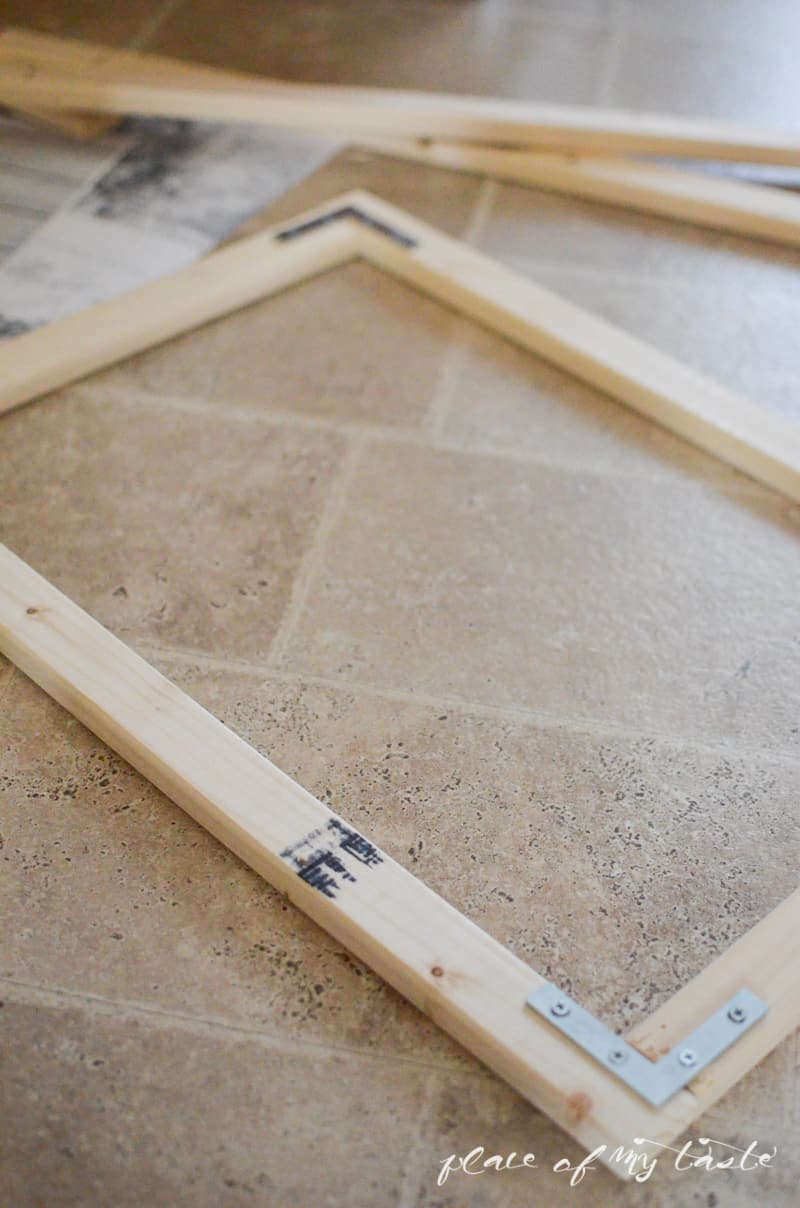
With the flat corner braces, secure the wood panels together to make a large rectangle frame.
Here is the large frame after it’s done.
I covered the frame with mod podge and carefully smoothed the print on the frame.
Tip: One of my reader’s paper had wrinkled from the mod podge. I haven’t had any issues with any of my photo displays
but maybe try to mod podge the back of the frame only. That should be enough to keep the print in the frame:-)
Be very careful on the corners and fold the print nicely on.
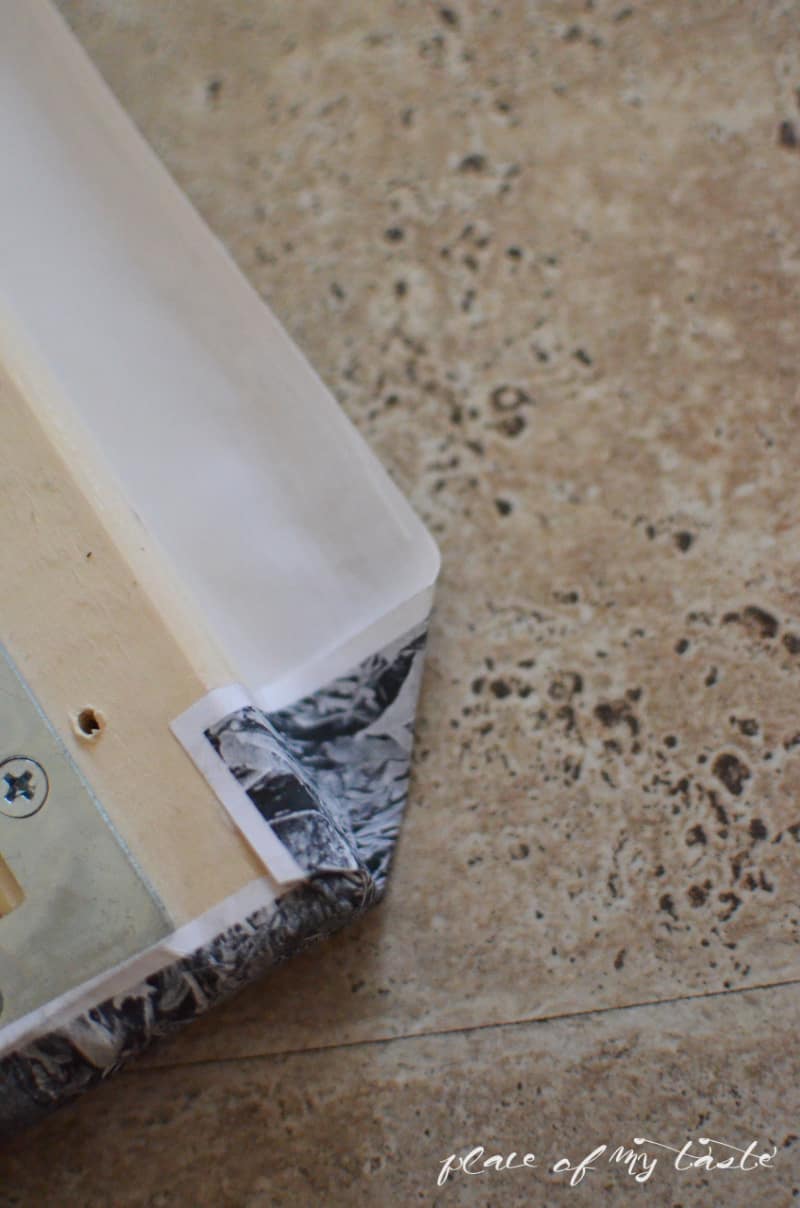
This is how it looks in the back of the frame. If you prefer, you can make your frame smaller,
so when you fold the print you have more to work with.
Here is the final product, my friends! Large beautiful photo display for only $7.

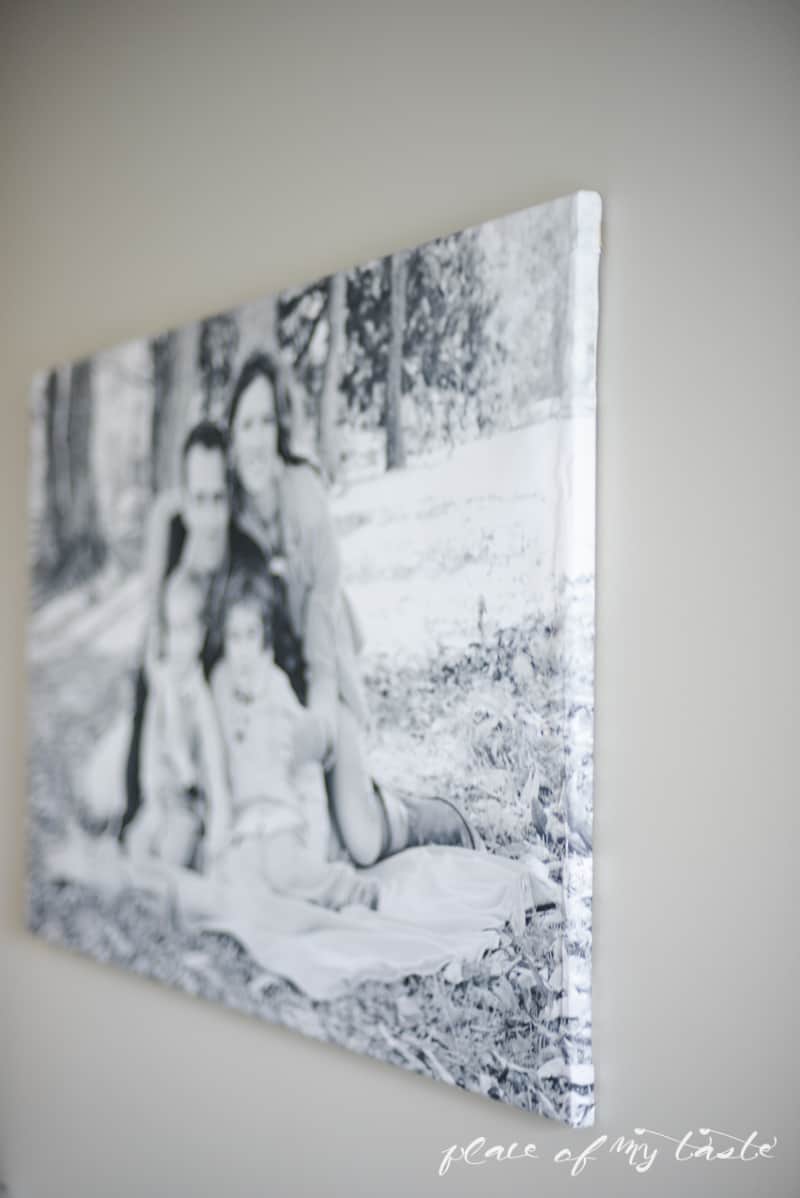
This will make a perfect gift to anyone. I made one to my BFF of her son, and she was more than amazed with it.
Pin it to make it later
Are you ready to make your DIY photo display?
Have fun with it.
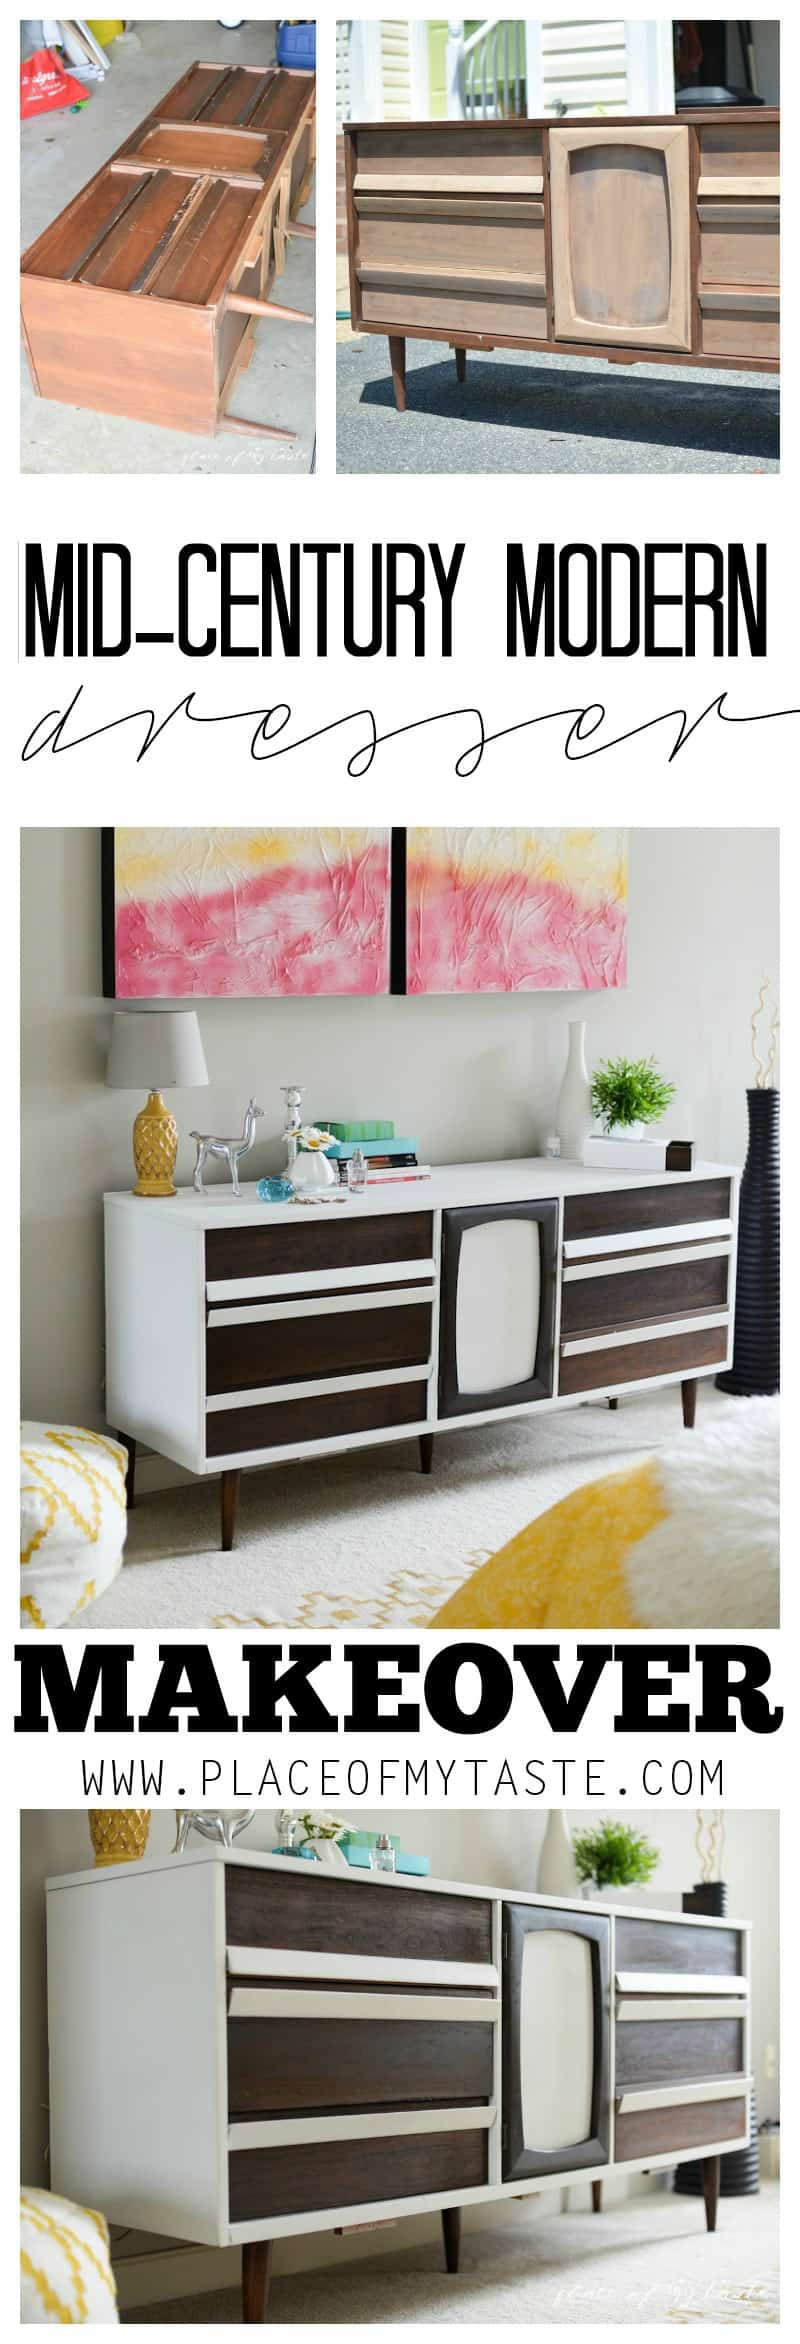
Before you leave, check out how I turned this fabulous dresser to what it is today.
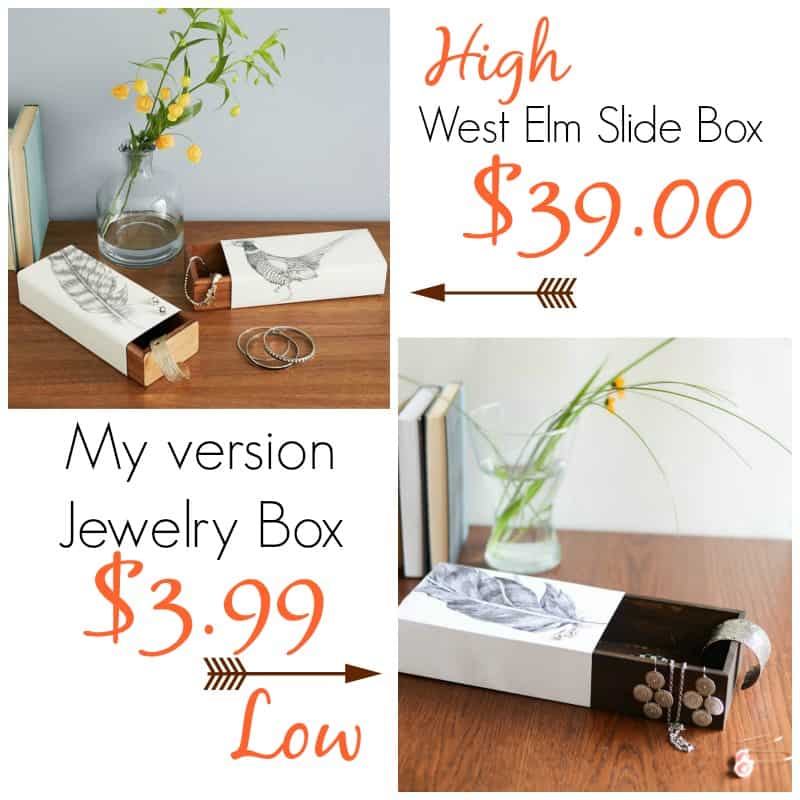
Or check out how I made this easy West Elm inspired jewelry holder
If you click here, you can find some inspiring projects to tackle.
DIY PICTURE FRAME
DIY WINE RACK
DIY BUILD IN BENCH
DIY BOOKCASE
Thanks for reading!
Xoxo


Thanks for publishing such a nice post. I tried searching for wood panels in Home Depot, but I see big squares of wood panels. It doesn’t show the nice thin frame type of panels you’ve used. Can you please tell me what search terms to use to look for similar wood panels?
I ordered my print online from Staples. I couldn’t just find engineering prints on the website so I used their nifty little search bar at the top which led me right to it. When I selected the engineering B&W print it even said ‘not compatible with photos’ but I said what the heck, if it turns out bad I’m only out 4 dollars. Boy did it turn out beautiful! I had no problems at all. Hope this helps some other readers! Thank you for this incredible money-saving project!
Oh my goodness, that is so awesome! And yes hopefully it will help order readers as well because some people does have trouble finding engineering prints! Yay for photo display! I just love looking at my huge photo display every single day , seriously! Have a great rest of your week!
When you get an engineering print made, is it on regular photo paper? the way you folded the corners of yours onto the frame, it loks thinner, like copy paper.
It’s not photo paper…it’s thicker than normal paper though…hope it helps!xo
If you go to the Staples website the engineering prints range between $1.99 and $7.79, depending on the size.
I was wondering if you ever tried decoupaging the print on a piece of canvas first?
Nancy….Thanks for the info! I have not tried decoupaging the print on a canvas but I will give it a shot!Have a great weekend!
Love the idea ..where did you print your large copy? I’m worried about mine looking too grainy
I got mine printed at Office max but a reader just noted that she could not get it done for the low price. I suggested her to try Staples as well. You want to make sure that the image that you are printing is high resolution so it won’t be blurry!have a great week!
Not sure how you got Office Max to print for $4! Just went there and they wanted $30!!!!! Yikes!
Oh no!! I had no problems…I heard that Staples prints engeenier prints as well,..you may give that a try if you have one close by. Have a great weekend.
I am so happy to see this as a recent project. I’ve pinned several of these, and then was disappointed to read so many comments about people not being able to print their pictures because the office stores were not allowing pictures to be printed as engineering prints any more. So maybe some places aren’t on to us die-hard diy-ers and will still do it! You’ve inspired me to give it a go! 🙂
Where did you print the picture from?
Ashley, I walked into Office Max and printed there. I told them I would like an engineering large print and they printed it for less then 4$. Hope it helps. Have a great week!
How did you order the engineering prints? I’m having a hard time finding that online. What/how did you ask for it?
Allie- I walked into Office Max and asked them to have a large engineering print of my photo. They printed it for less then $4 and it was huge.:-) Hope it helps!
ok… tried this. the entire edges are all wrinkled because of the modge podge – tips for making it smooth?
Hi there! Mod podge can be tricky to work with .Make sure to apply mod podge over the entire surface and maybe smooth it with a straight edge(not damaging the paper). I also know from experience that mod podge needs a little drying time… Give it a few days and see if the wrinkles will shrink (and let me know). I made 3 of this photo display (2 for me, 1 for a friend ) and I didn’t experience issues. I would assume that the paper quality would be the same as mine was…lighter paper possible could wrinkle. If wrinkles won’t go away and you would try for another one you can maybe try to only mod podge the back of the frame where you fold the paper onto and it’s not visible (incase if it would wrinkle again) Hope you can make this project work!! Have a great weekend!
Thank you for sharing so easy & so fabulous!!
Love how easy an inexpensive this is.
Great idea!
It is super easy and inexpensive, Daphne! Thanks for your visit!Xo
Such an awesome project Aniko, and a gorgeous picture of your beautiful family!!
Thanks for your kind words, they always make my day:-) Xoxo
Looks great A! I love b + w for photographs too 🙂 xoxo
Have you tried this in color? I want to try both black and white and color. Do you think color wil compromise picture quality?
I have not tried it in color. I believe that engineering prints can only be black and white ( colored print in this size would be much more expensive).Let me know how it is if you end up trying:-)Thanks for hopping over to check it out!
You can never go wring with B and W photo displays:-) Good day my friend!Xo
This is sooo perfect! By the way, you have a beautiful family 🙂
Awww…thank you Selene! You are so sweet:-) Xo
Turned out great!!
Thank you Mandy to popping into check it out:-)Have a great week!