DIY FRAMED WALL MURAL
Have you ever thought about adding a DIY FRAMED WALL MURAL to your home decor?
So here is the thing…
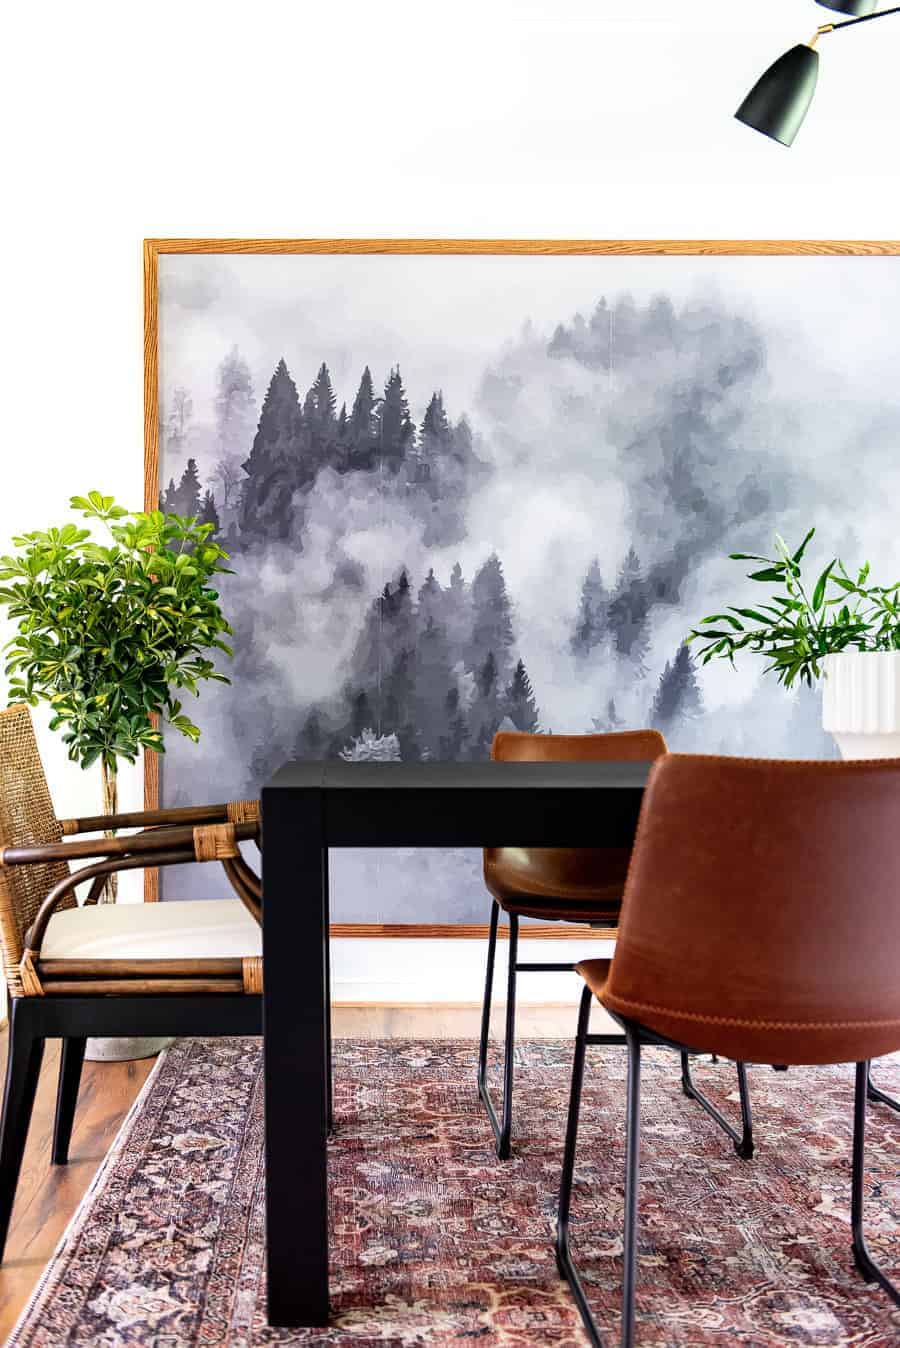
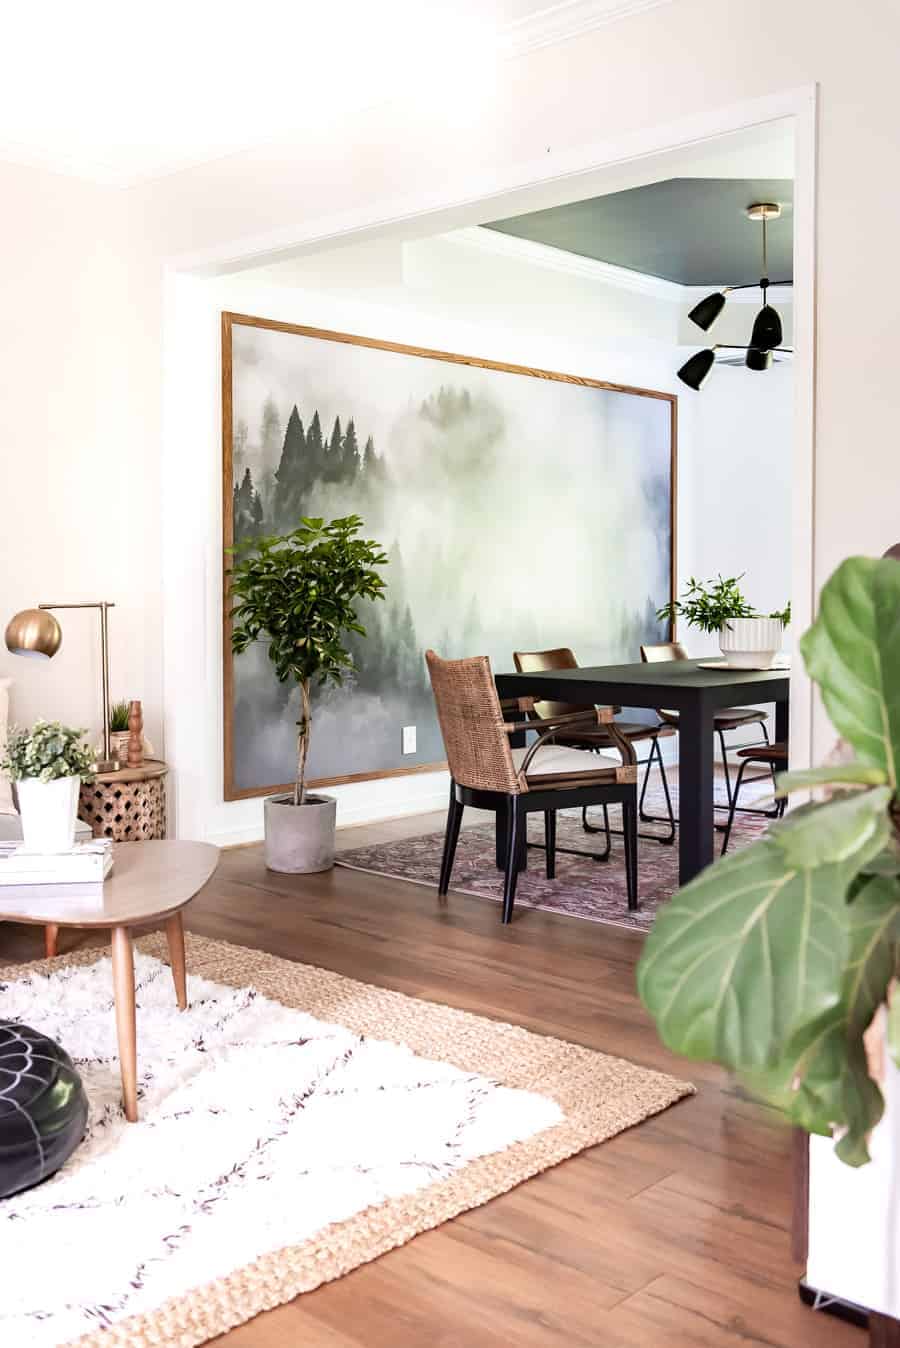
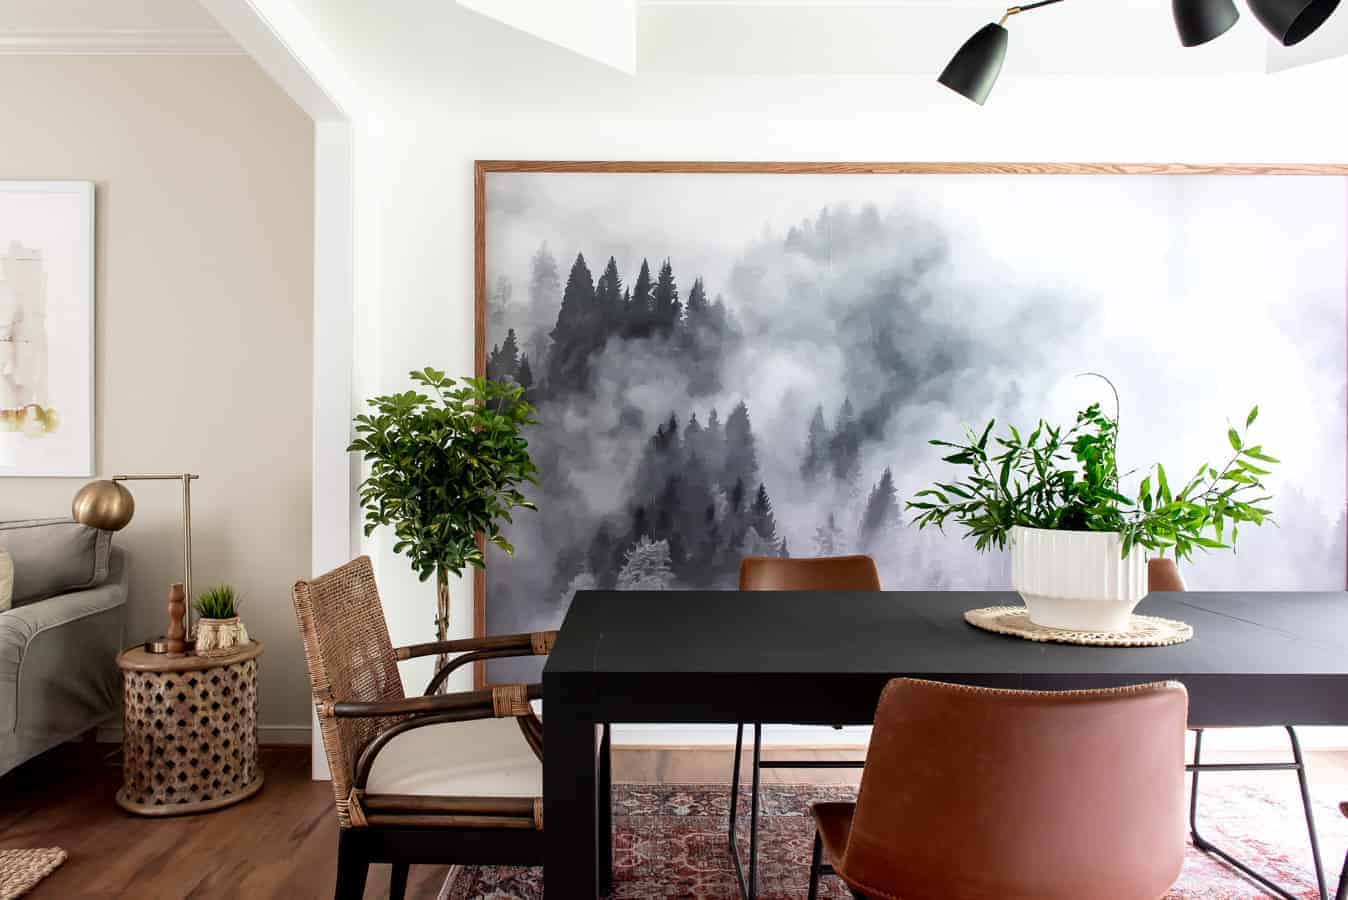
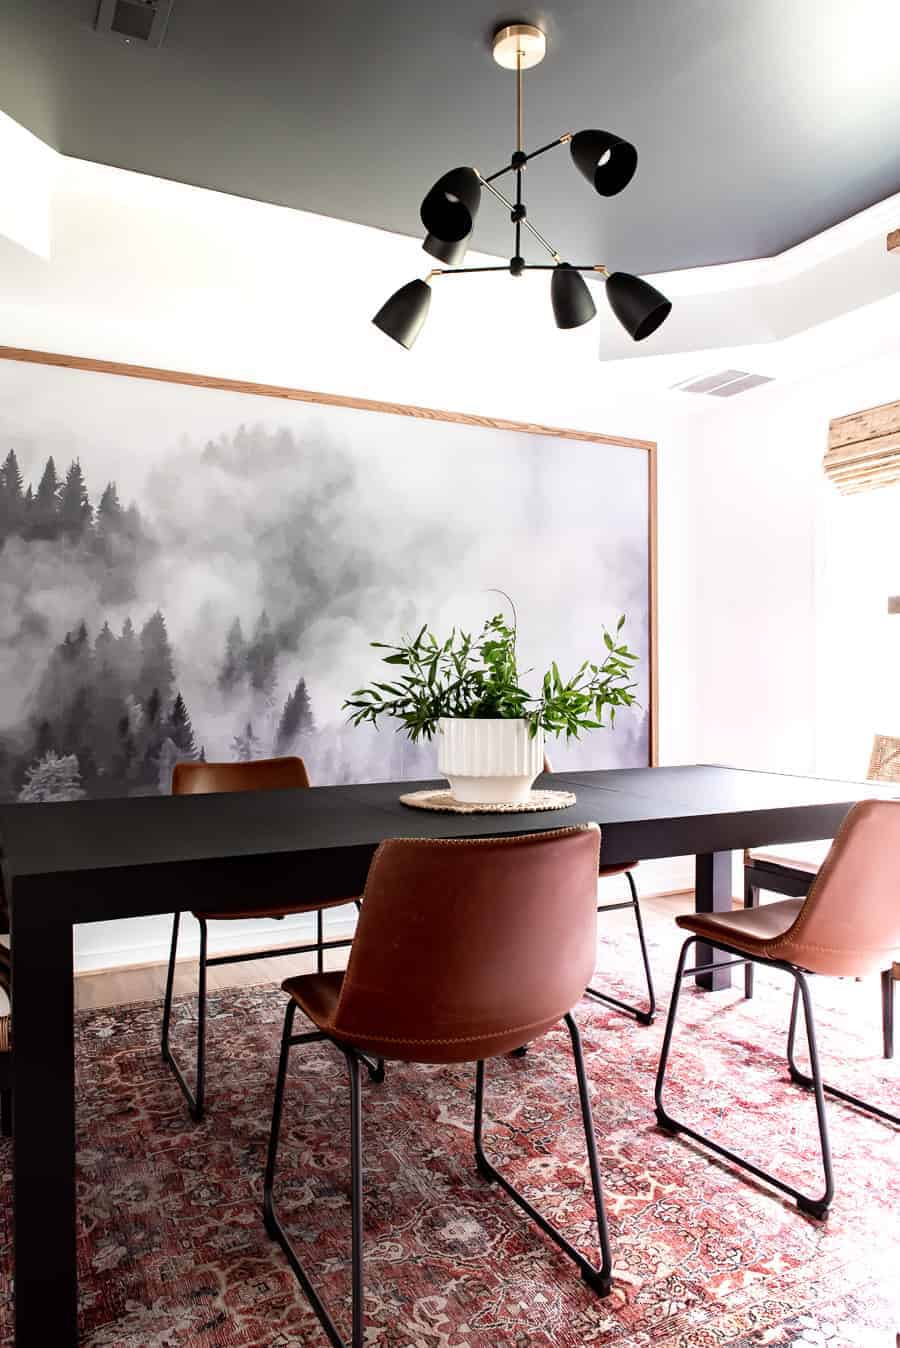
I just revealed my spanking hot MOODY, MODERN dining room last week for the One Room Challenge and it seems like LOTS of you are in LOVE with the dramatic large FRAMED WALL MURAL that I added as an accent wall.
But let me take you back first to where the idea is coming from. Cause you know, when credit is due, credit is due!!
I stumbled upon on this framed wall mural when I was in the planning stage of my dining room, and I completely fell in love. I could not get it out of my mind, so I went for the project.
Jenna framed her in a different style that I thought did not fit in with my style of home decor, so I made my framing MINE with adding a chic, simple, modern frame to the mural.

I loved her way, but again, I wanted to see something more modern in my home.
HOW TO FRAME A LARGE WALL MURAL
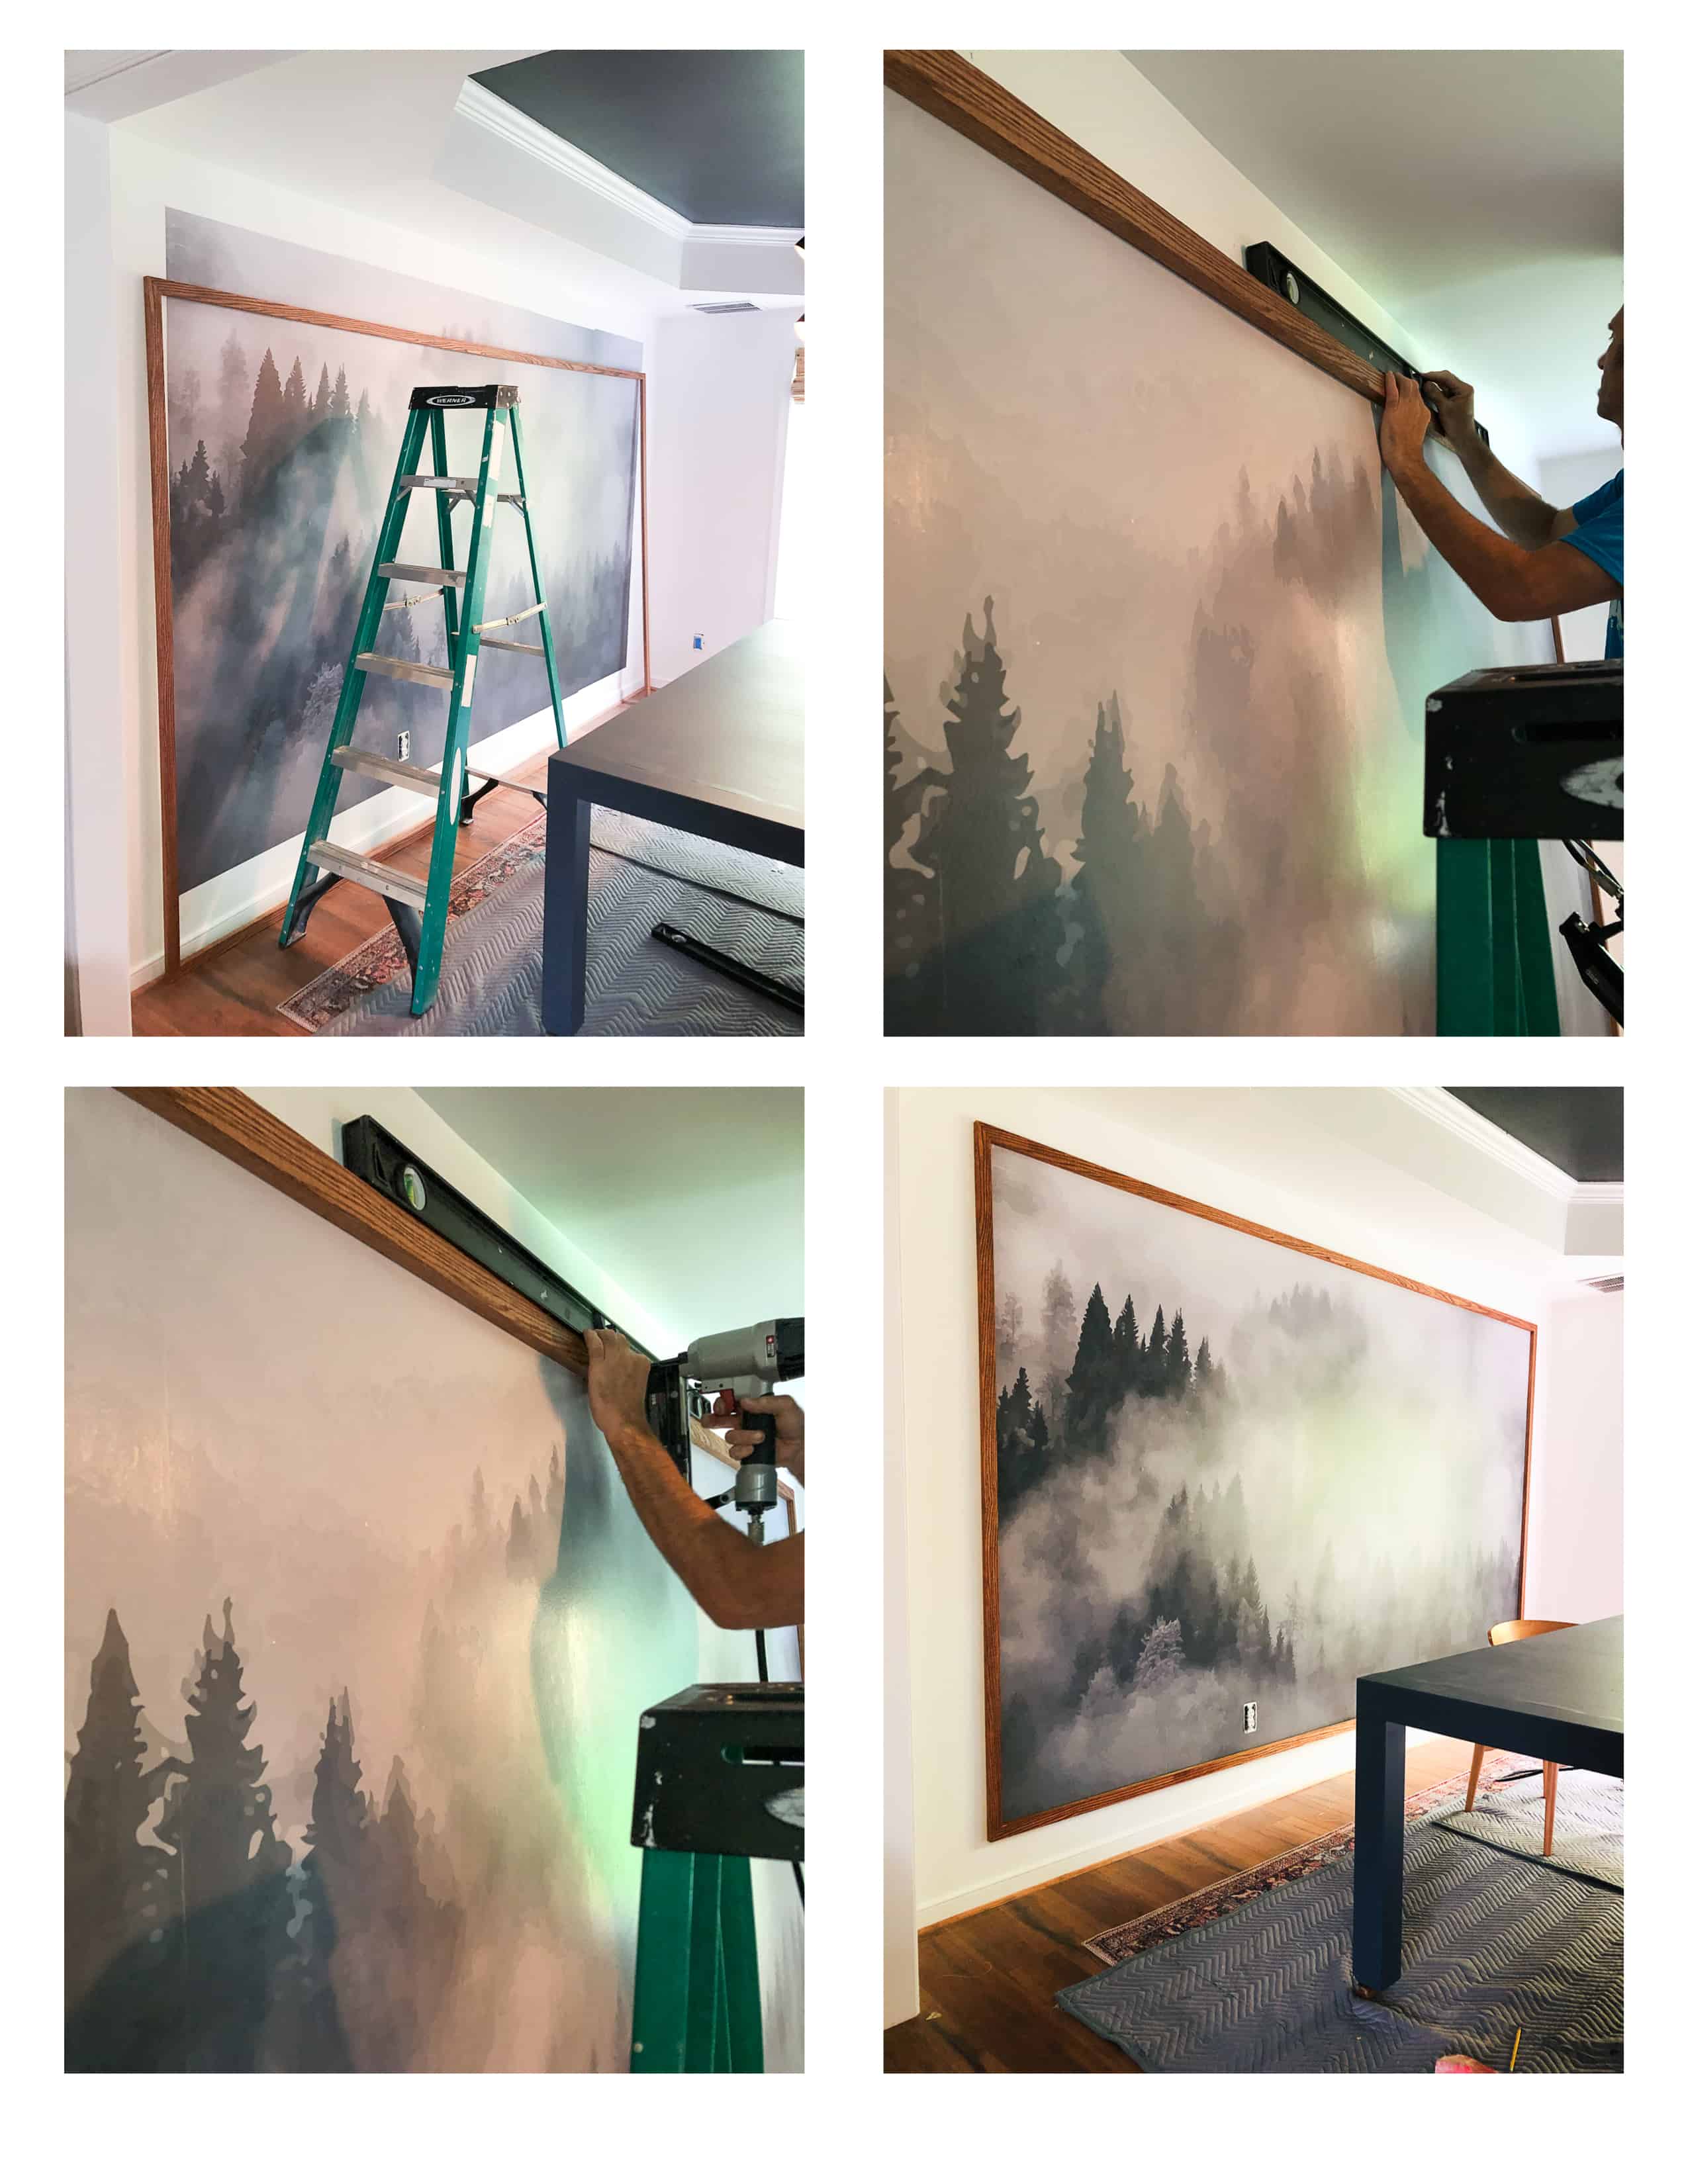
Step 1: MEASURE
Measure your wall and decide what size the framed wall mural on your wall will be. I measured out 15 inches from both sides and 10 inches from top and bottom. I was aiming for a dramatic look, so I wanted this mural to cover almost the entire wall. You can also use regular wallpaper if that’s your option. This how to wallpaper for beginners will help you get started on a wallpaper project.
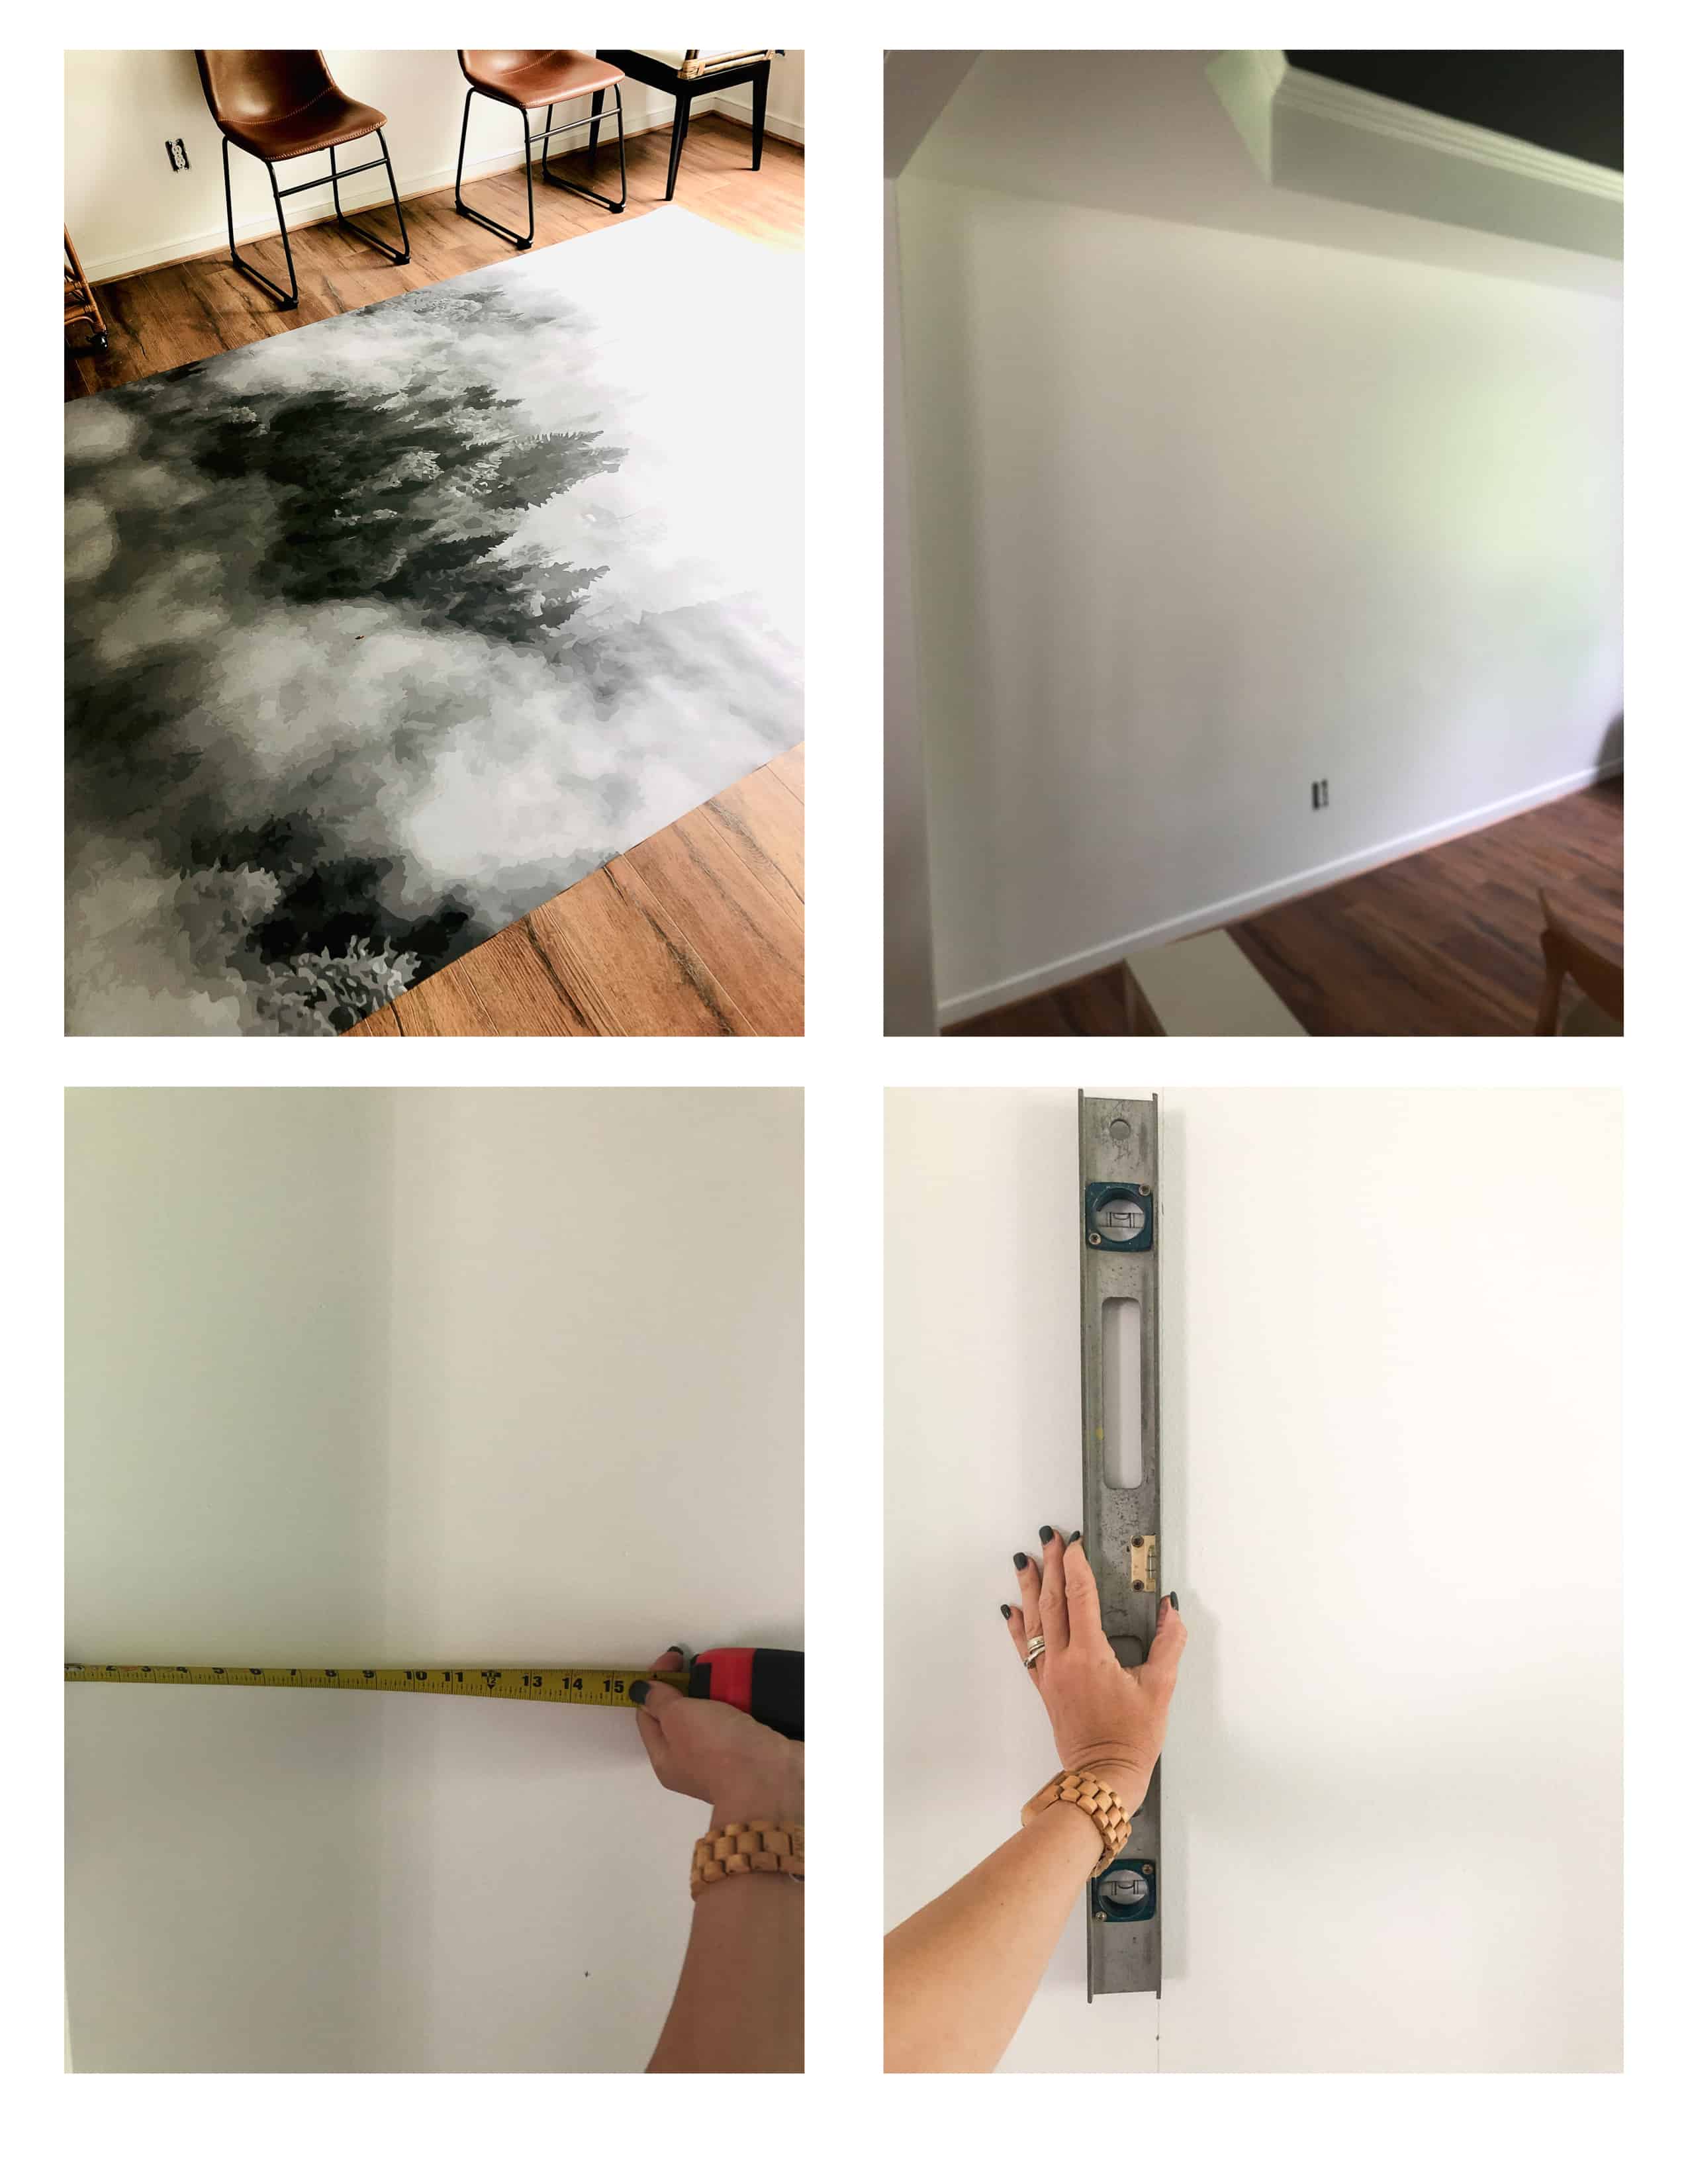
I measured precisely.
I used a level to make sure I mark straight lines on the wall.
STEP 2: INSTALL THE WALL MURAL
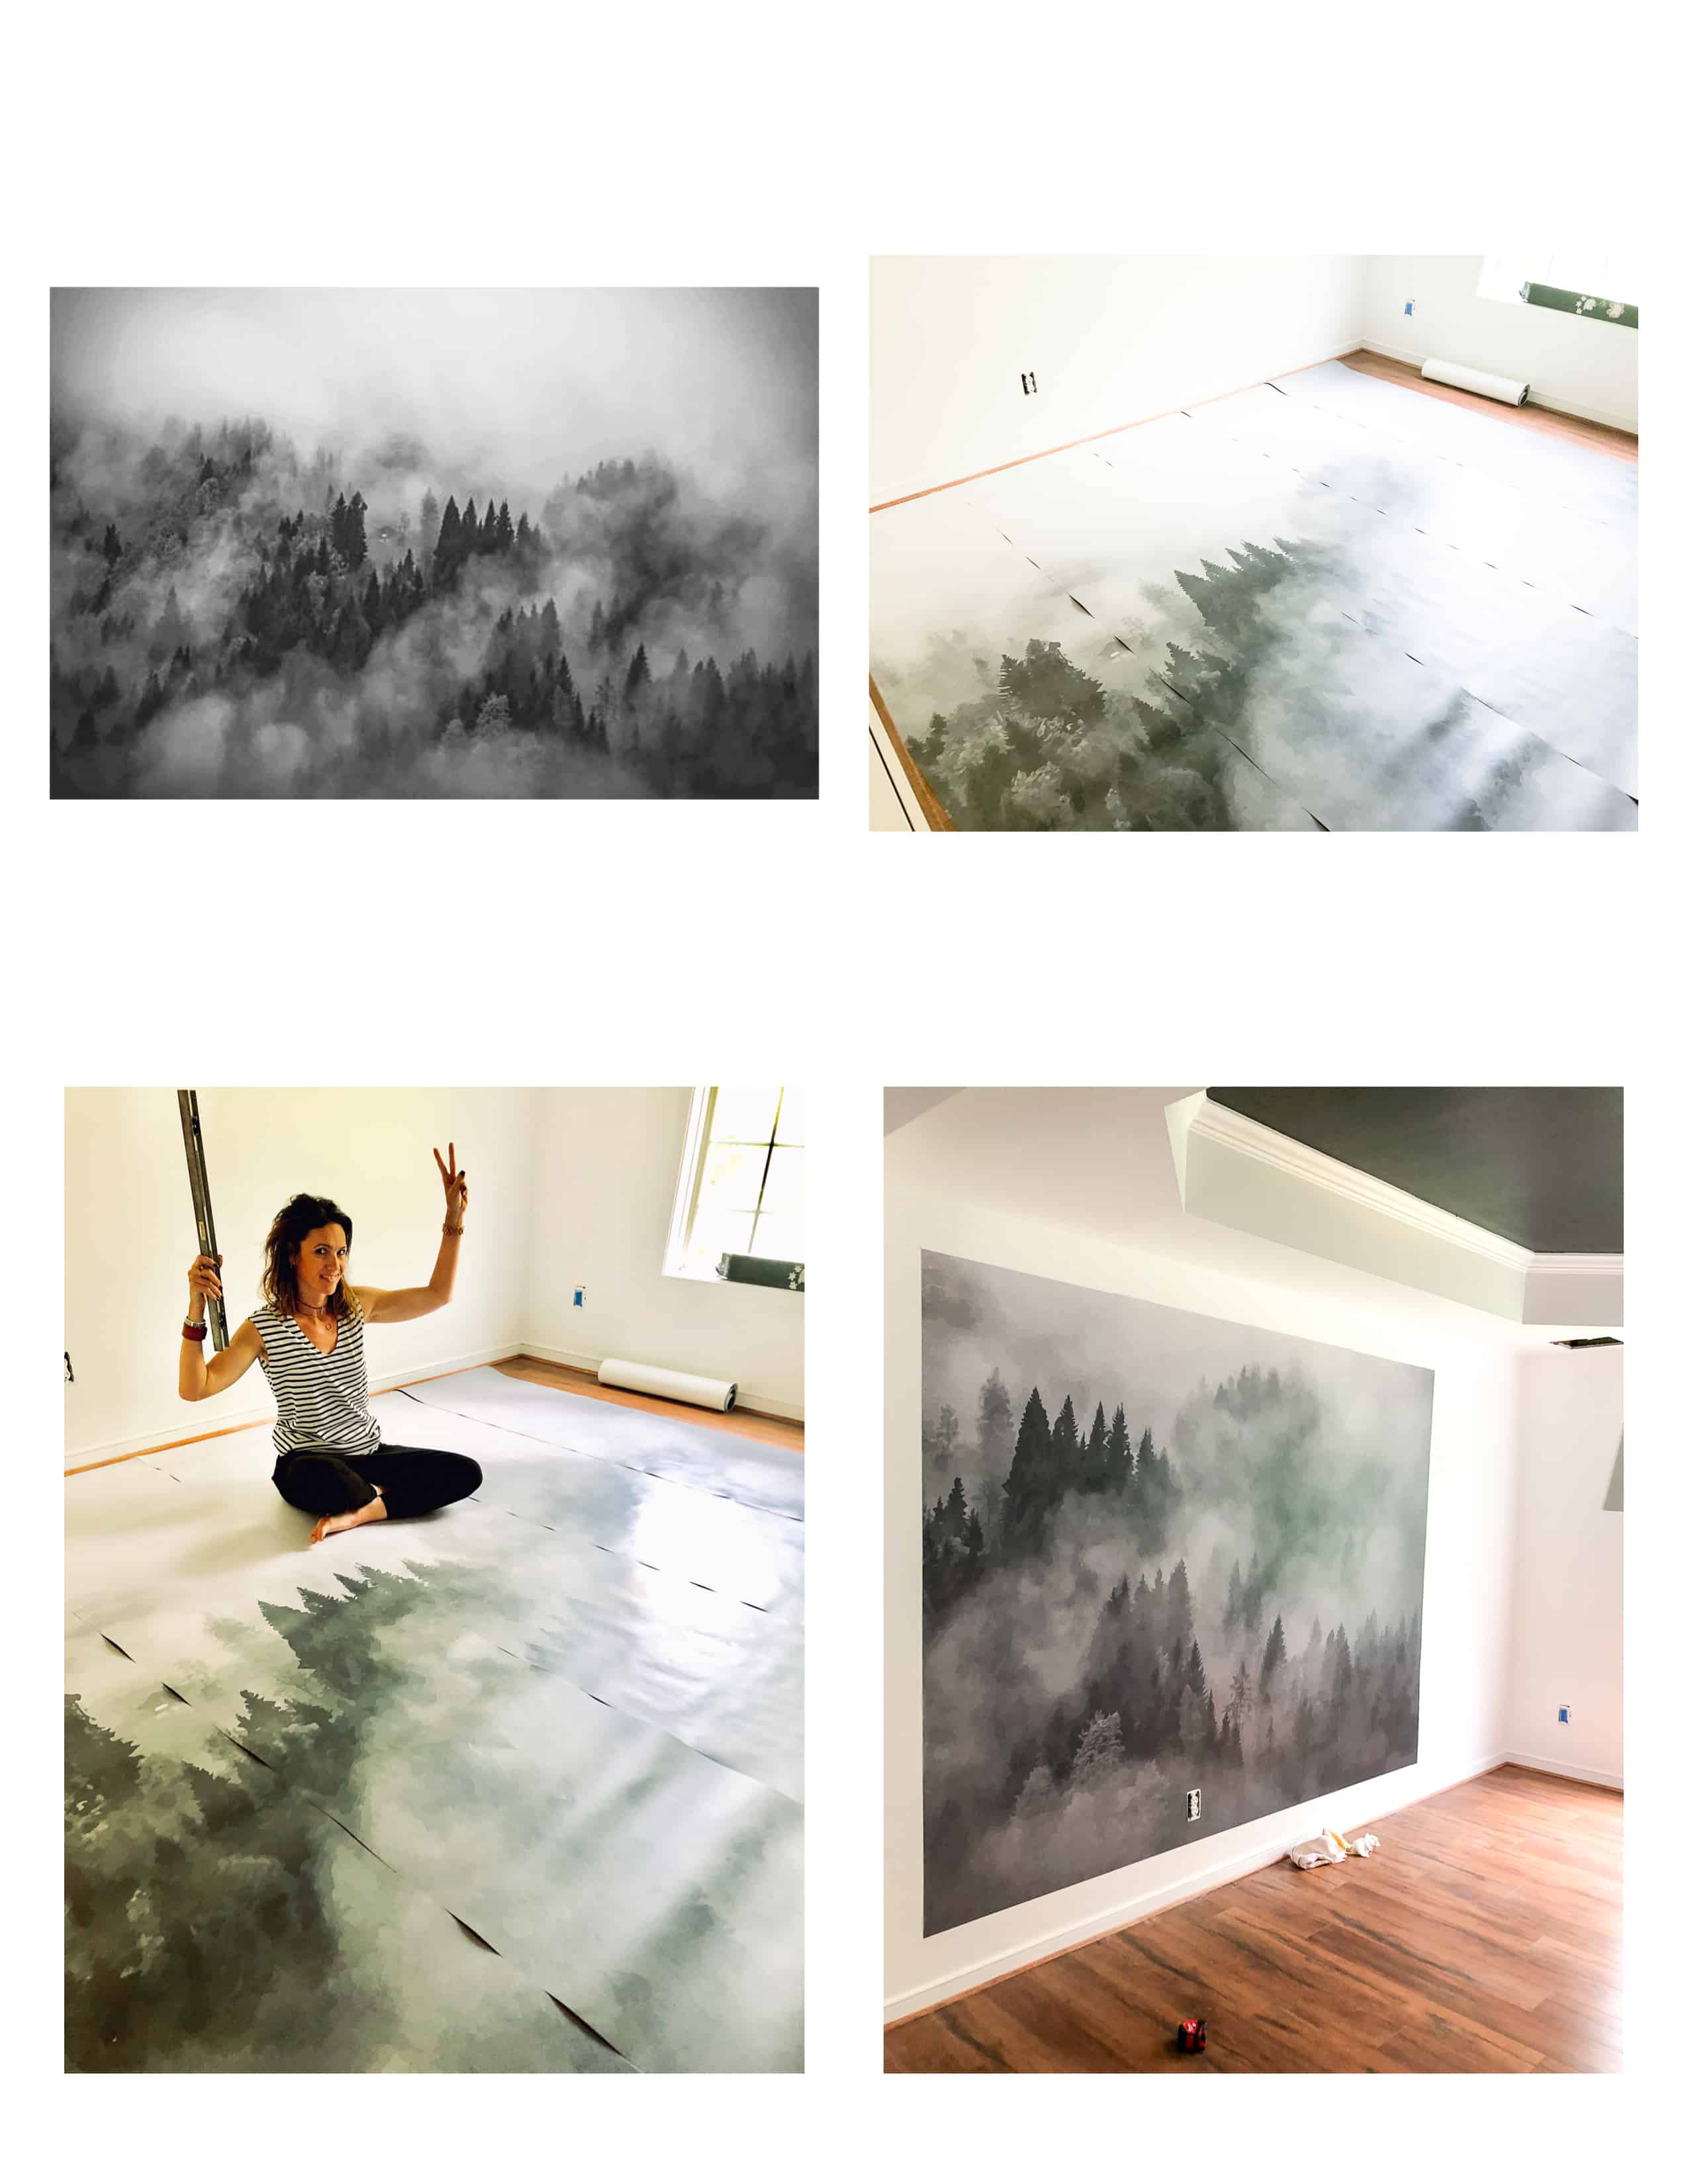
Follow the instructions you get with the mural. I ordered mine from A NEW WALL DECOR, and I was thrilled with my purchase.
I laid the entire mural out on the ground before installation ( and I still messed the order up LOL!!). You can grab a few peeks on how I installed the mural in my IG story highlights.
STEP 3: PREPARE FOR THE FRAME
We decided to build out the frame instead of installing the sides of the frame individually. And the reason why is because we wanted to nail the frame onto the wall ( I didn’t want to see screws!), and studs were not available alongside the side boards of the frame.
We also wanted to make sure that my longest piece of board is not going to be cut in the middle, so we ended up buying the more expensive wood boards ( the total price was $50 for the frame!) because that was the only LONG board available. I needed an 8ft board for the top and bottom piece.
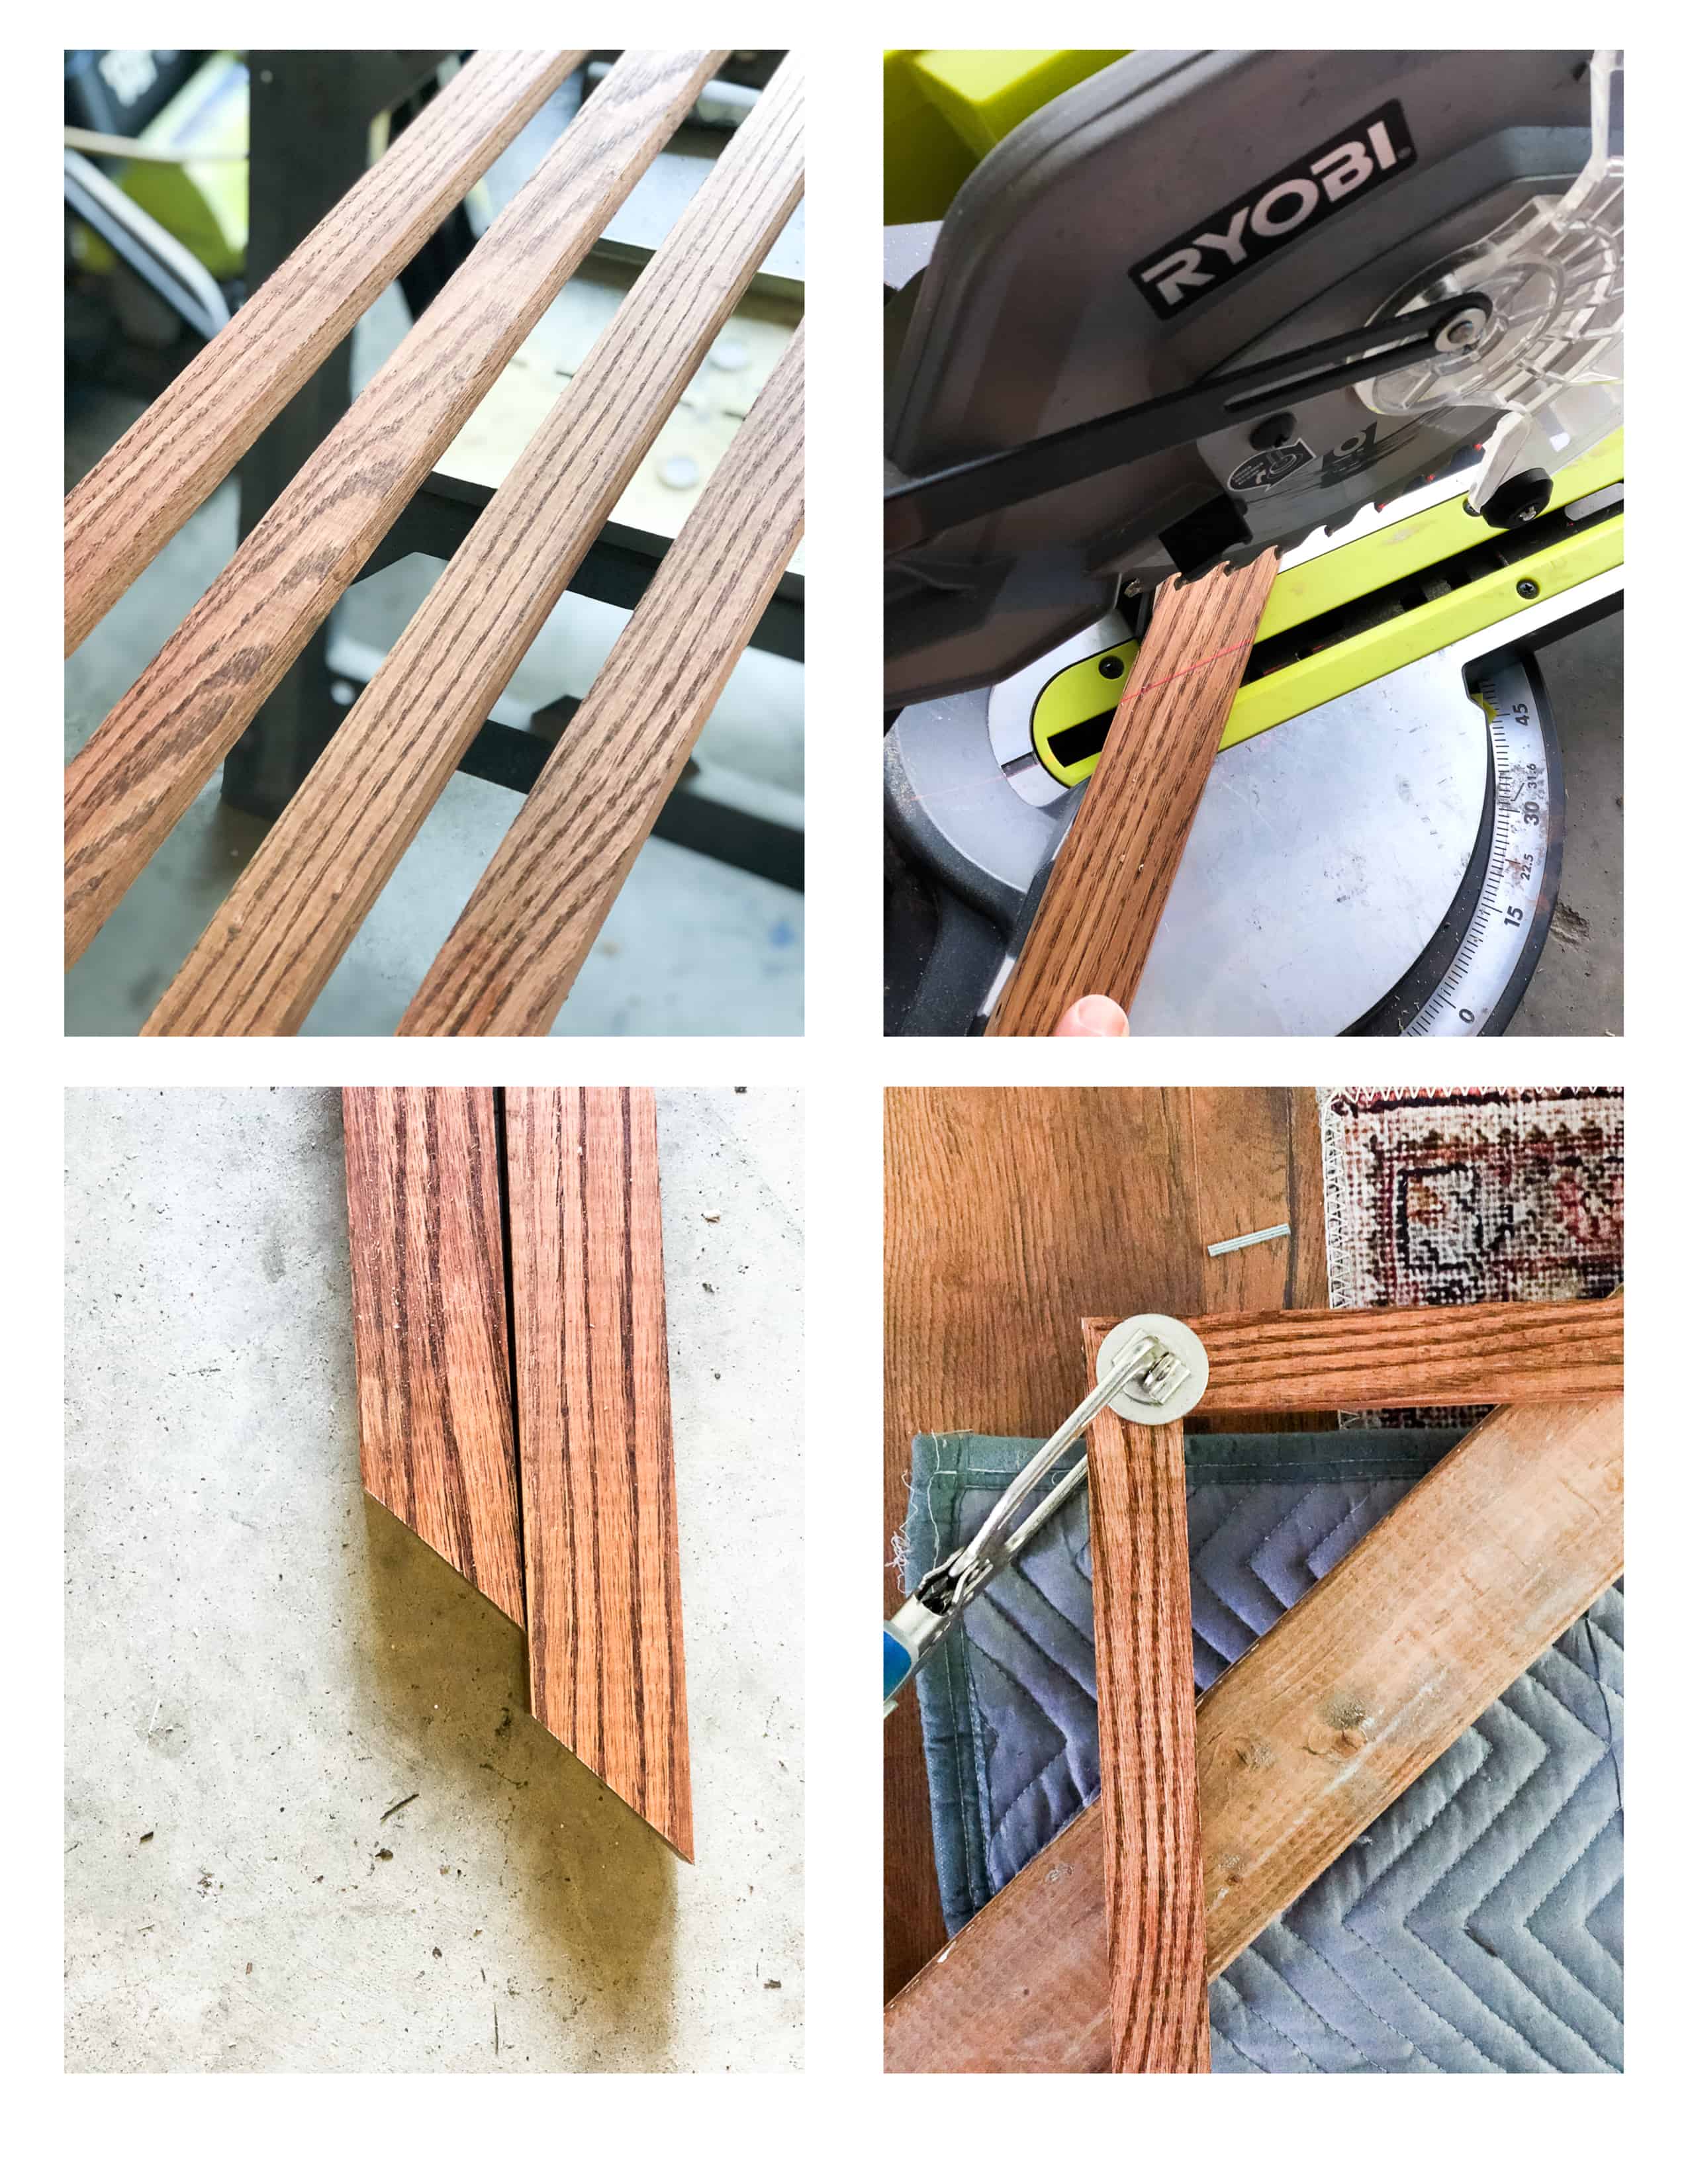
STEP 4: BUILD THE FRAME
As a first step, I stained my wood boards. I used the same stain I used for the BAR WALL SHELVING!
Then we measured and cut our boards.
And then we pieced them together, tightened the edges with a clamp and nailed them together. We also added some wood glue to make sure we they’d hold up well.
As the last step, we stood up the frame and nailed it in around the wall mural. (This step requires two people.!!!)
We used a level to make sure that the top frame is in level, nice and straight. Then we nailed the top and bottom of the frame into studs and nailed the sides only on a few spots ( since there were no studs!).
Easy peasy! Right?
I love how dramatic this wall is, and I think it makes the whole vibe for the room!
Be sure to check out the ENTIRE process of my ORC, and let me know if you are going to frame a large mural or not!
Cheers,
Aniko


Thanks for reinforcing my plans for completing my soon to go up on my wall mural. I knew that the mural I chose was too small for the wall it was to go up on so I figured I would have to frame around it to make it look like it belonged and was indeed part of my overall plan. I haven’t seen much conversation at all about what to do if the mural does not fit the wall and is too small. There’s no problem if the mural is too big, you just cut off the overage and it’s done.
Thanks
This is beautiful and so creative! Where did you find the light fixture? It’s perfect!
What are the dimensions for the boards and what type of wood was used?
What is the exact size of your framed mural? I have been looking into doing this and would have to cut so much of it. Did you exact knife cut it to fit? 8’x ?
Thanks
I had to cut a lot from the length too. I laid all the pieces down and cut each of them to the same length before installing.:-)
Love the mural! How did you know what size thickness to use for the frame?
Do YOu mean what size thickness for the wood? Well0 I didn’t want it to be too wide or too thin so I chose one in between!:-)
So beautiful! Can you please tell me if you bought the wallpaper or the matte paper print?
( or canvas)
Thanks for your help! I want to make sure that I am framing the proper material.
J’adore cette murale et que dire de la déco de toute cette pièce: SUPERBE!
I love this mural and what to say about the decor of this whole room: SUPERB!