HOW TO MAKE A TUFTED HEADBOARD
Today we are talking headboards. Specifically a tufted headboard? But I shared a fun tutorial of how to make an Arch Headboard also, so check out that post too when you get a chance.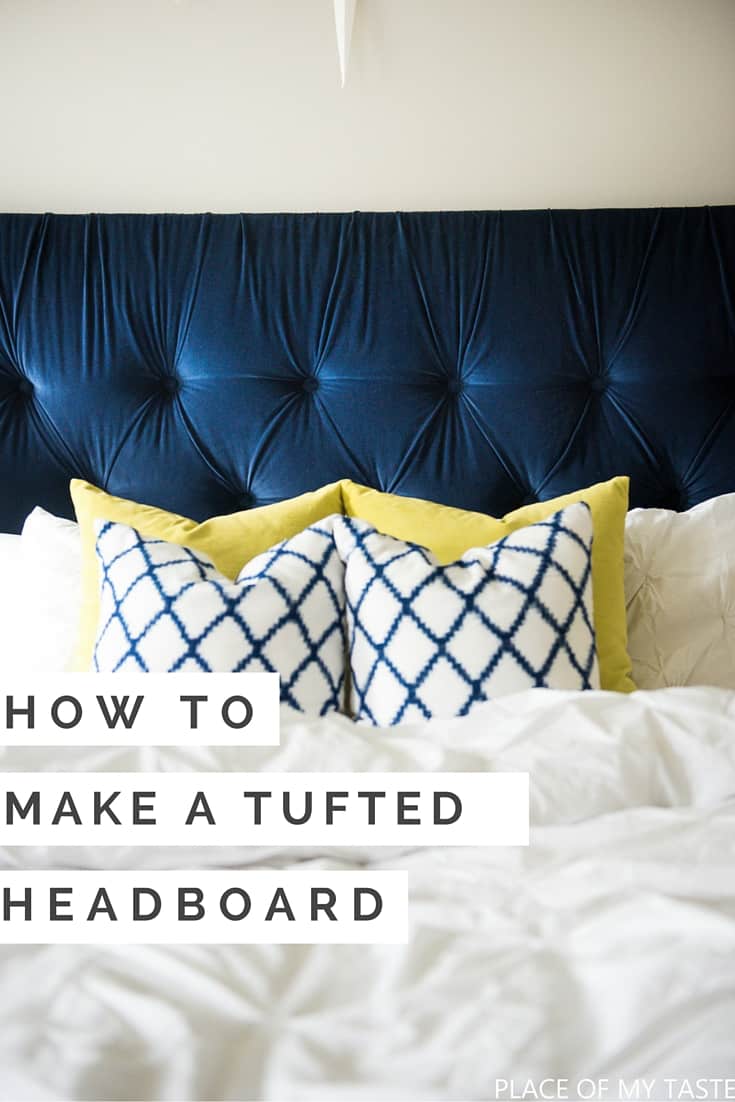
I (and by ‘I’, I mean ‘We’ :-)) made a giant; king size tufted headboard and boy, do I LOVE it!
I DIY-ed a headboard before (see it HERE), but it wasn’t real-tufted, it was fake-tufted. 🙂 This lovely piece is the real deal, guys. During the process, I covered buttons, drilled all the holes and sweated for hours to get this giant beauty done.
No, I was just kidding. It wasn’t that bad.
But let me tell ya! Before you attempt this project, I want you to know that YOU NEED AN EXTRA HAND! Don’t try to be a hero and start doing it on your own, because you WILL need a set of hands to help you. The only reason this headboard took so long to finish is because I needed help from my hub and he wasn’t always available. And you know, when you have the little people around you, you can’t just ignore them and send them away to play.
We attempted to finish this DIY tufted headboard on a few weekends but realized that it wouldn’t work. The majority of the work had to be done when the kids weren’t home or when they were in bed.
This entire project wasn’t planned until my hub, and I decided to upgrade to a KING size bed. We just could not deal with being 4 of us in our queen bed anymore. Can you relate? It is not an everyday thing that our kiddos hop in with us, but when they did, no one had a good night’s sleep. So we finally upgraded to KING.
Then, of course, mommy came up with her fantastic project idea and the hub was oh so “thrilled”. Every time I come up with something new my dear hub would say: NO, honey! No more projects in this house. But then, I know he always loves the idea in the end, and he is the most supportive husband ever. 🙂 Sigh! #luckyme
After browsing the web for tufted headboards and I found some amazingly done DIY HEADBOARDS, like the one here, here and here.
I knew I was going to love the look of a REAL tufted headboard, so I went for it!
When it comes to blue hues, I am all fallen. 🙂 Did you know? I always have been. Blue and yellow are definitely my fav colors. Ok. Let me take that back. Blue still is my favorite, but I said goodbye to yellow.
I’ve had a dream of a BLUE VELVET headboard for a while now. I just could not let the idea go, so I marked my project list with this Indigo Velvet King size tufted headboard.
I reached out to my friends over at Tonic Living to get a few yards of their fantastic INDIGO velvet fabric. Did I fell in love with their fabric at first sight? Oh yeah! It is just gorgeous, and I knew it would look fabulous on my headboard.
How to make a tufted headboard
Are you ready?
TOOLS you need:
- drill
- power saw
- tape measure
- hammer
- staple gun
- upholstery needle
MATERIALS you need to make the tufted headboard:
- 1/2 “Plywood ( cut to size 80×35)
- -2×2 pine wood
- -2×4 pine wood
- -3″ thick foam
- Batting
- Super spray adhesive
- Fabric (mine was from Tonic Living) -I had 4 yards of fabric, and it was just enough so get a little more to be on the safe side
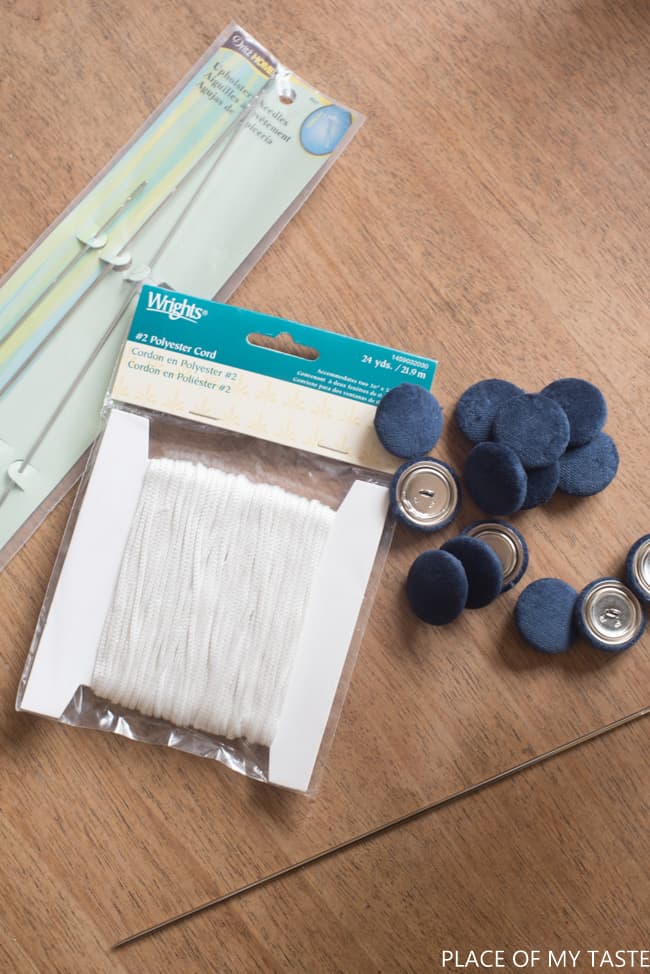
- Half ball cover buttons to cover
- Upholstery thread
- HANGMAN 200LB
Let’s dive into the step by step!
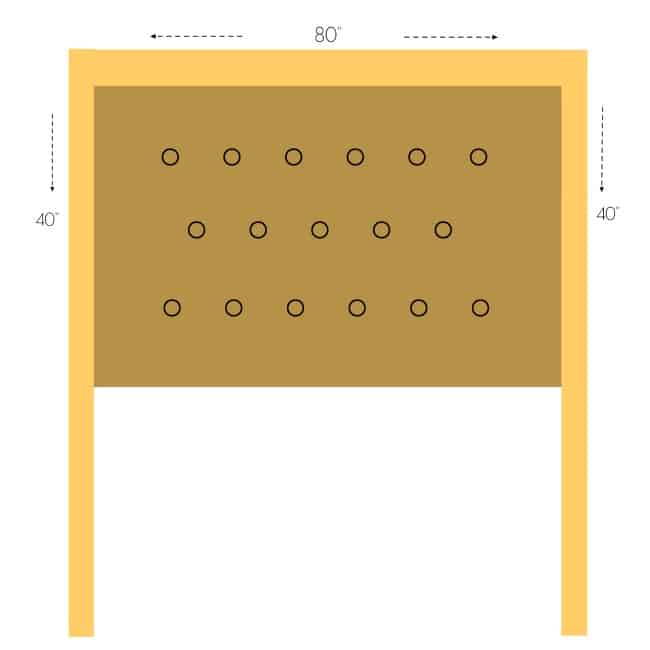
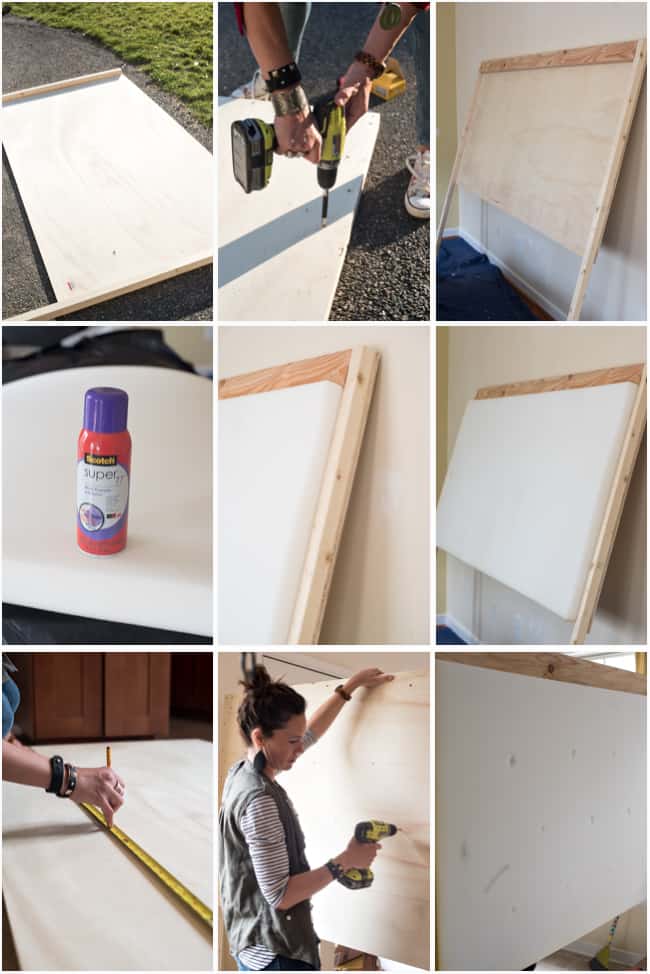
My measurements for the KING SIZE headboard were 80″ x 40″ and then 22 inches height for the legs.
We had The Home Depot people cut our plywood to size. They are awesome, and you can totally have your plywood cut at the store:-)
- We screwed our 2×2 wood on each side of the headboard (from the back)and the 2×4 across the top. The only reason I wanted to add a wider wood panel to the top as my initial plan was to add nailhead up there (just like this tutorial shows here). But after adding a few nailheads, I wasn’t too crazy about the idea, so we let it go.
- So if you are not planning to add nailheads across the top, I would add a 2×2 across the top as well, not the 2×4.
- I used Scotch Super Glue adhesive to glue the 3″ thick foam to the plywood. (I sprayed the plywood, and I pushed the foam onto the plywood.)
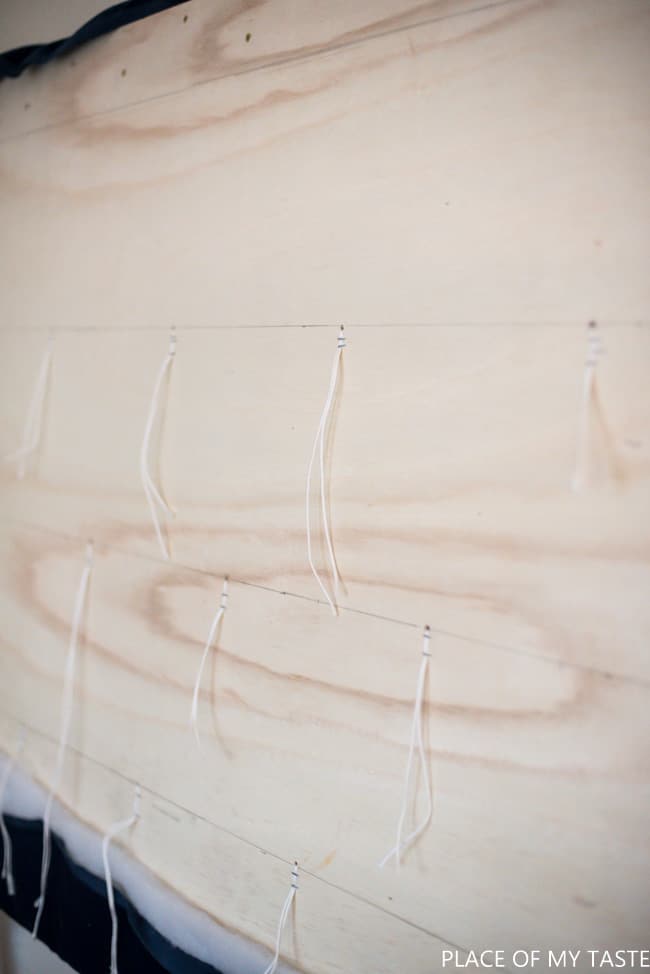
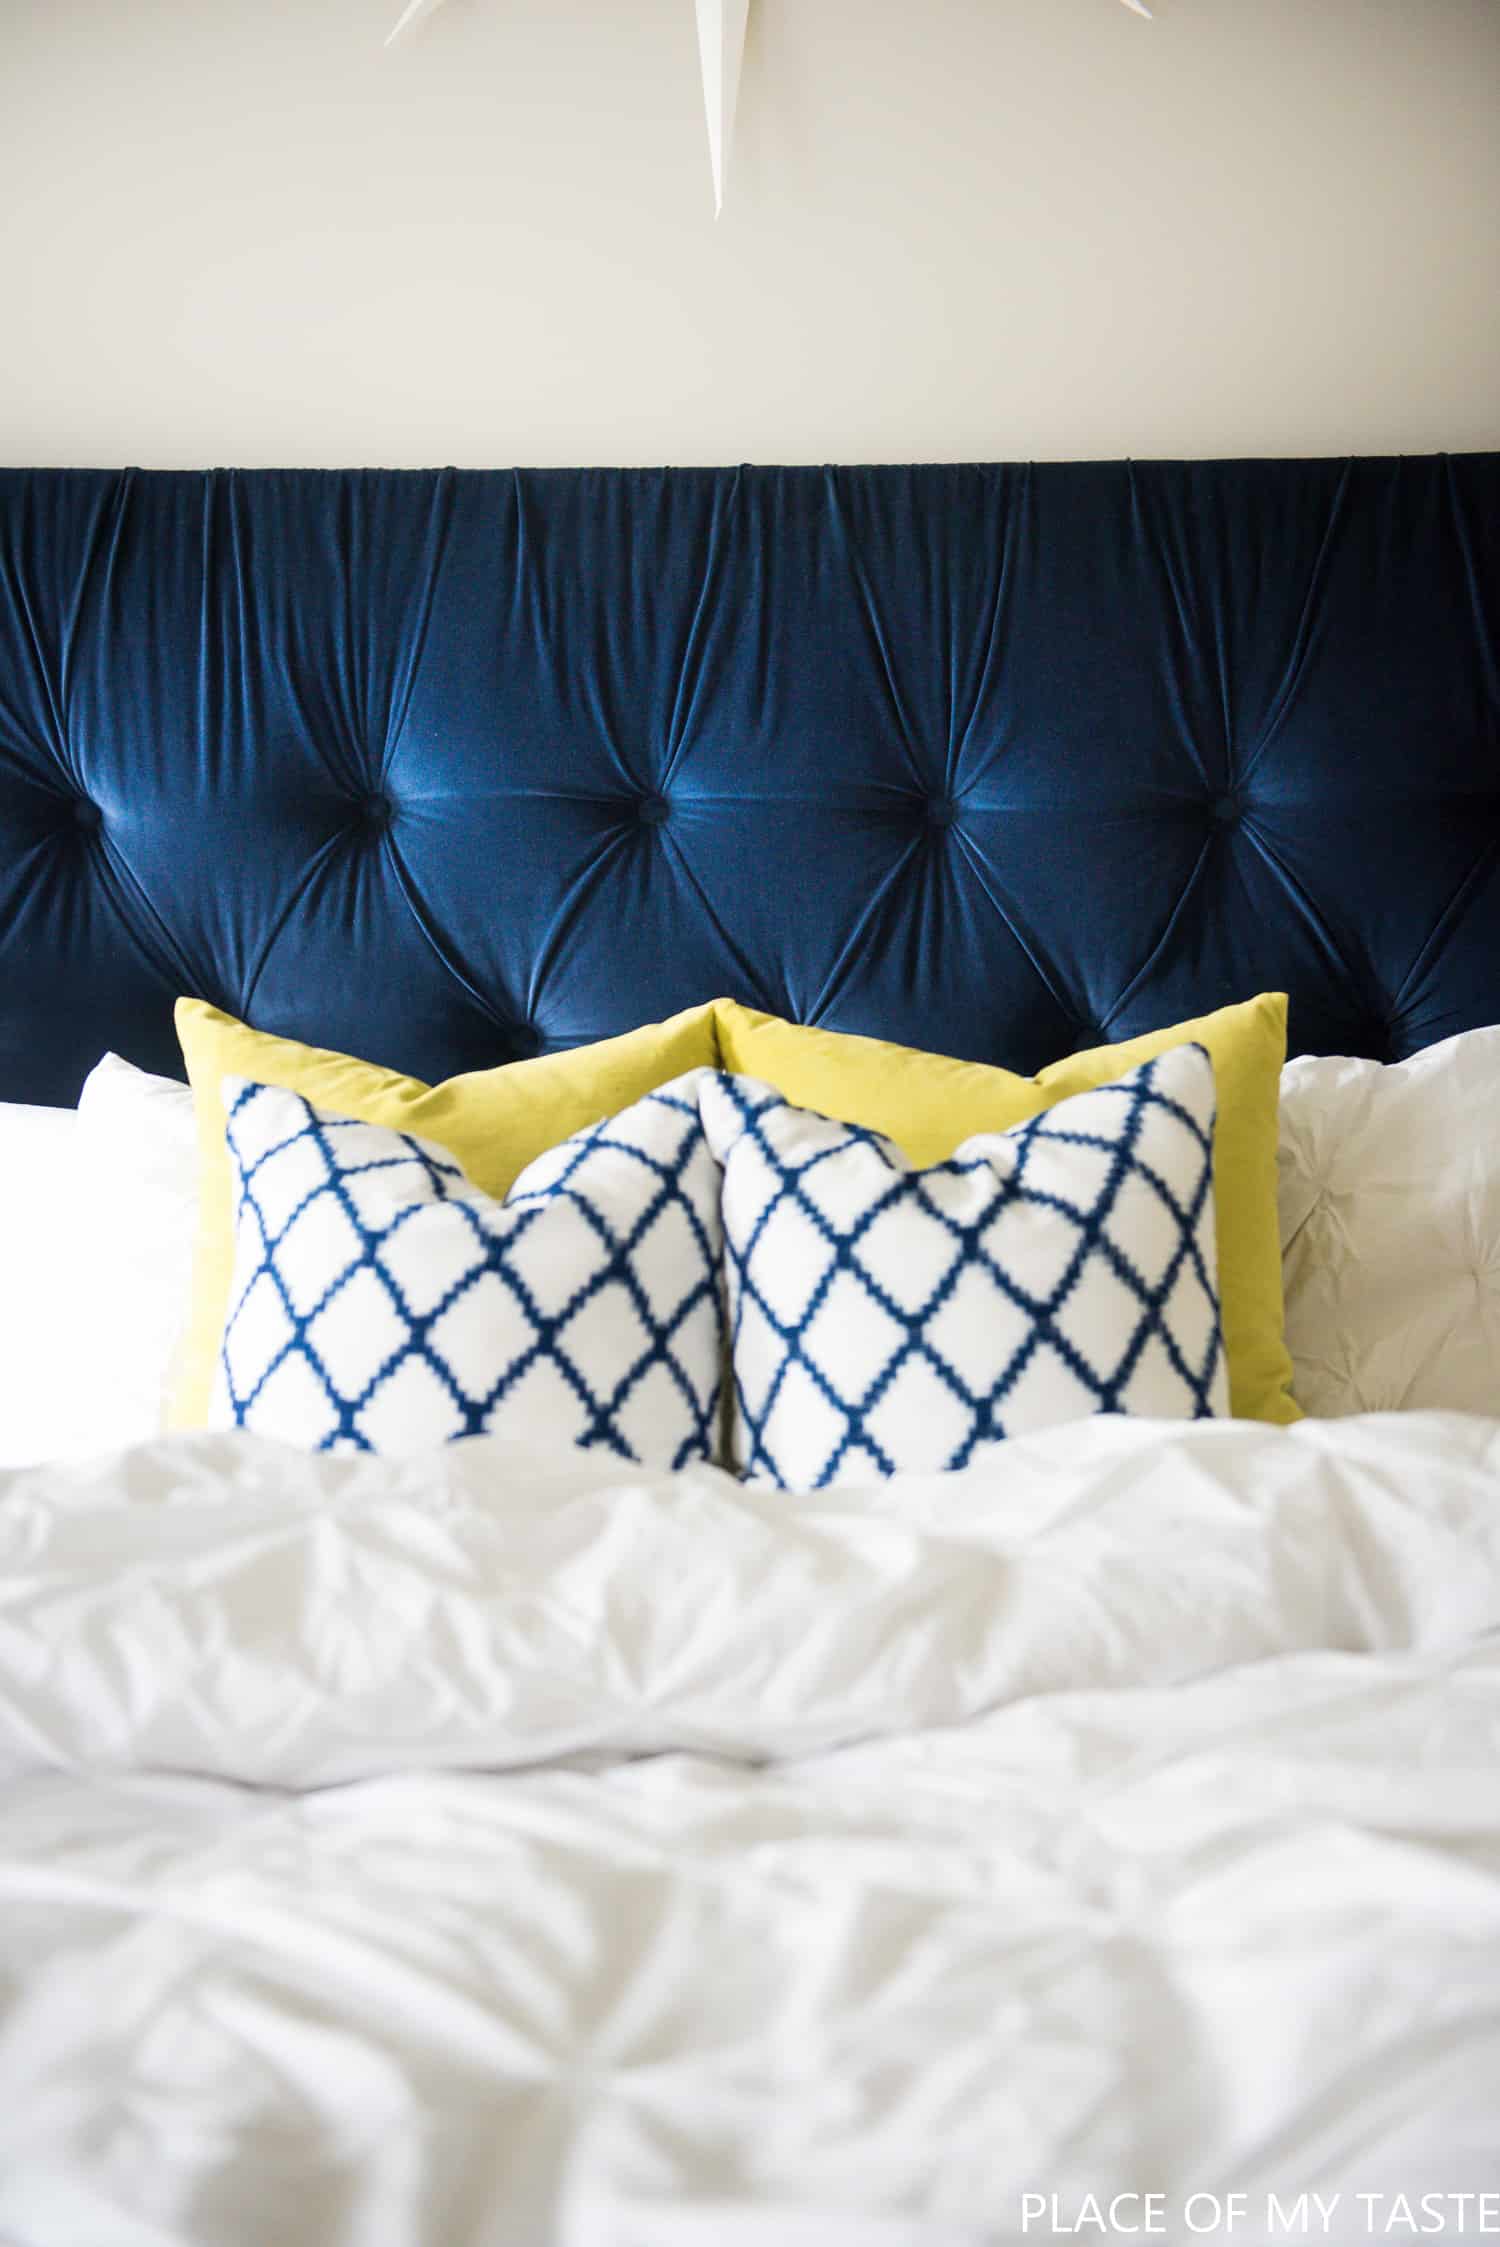
- Then I turned my giant frame upside down, and I measured spots for my buttons. I added six holes on the top row, five holes in the middle and six holes again to the bottom row.
- After that, I drilled through the plywood from the back, and through the foam.
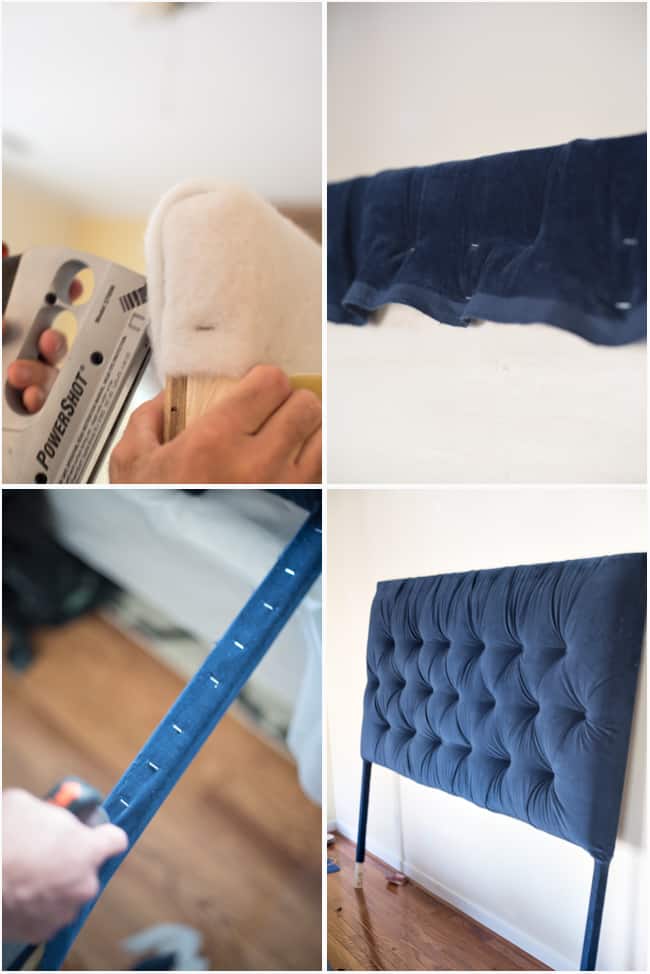
- Well, after we were done with the holes, I added the batting on top ( and now I know that I could have done drilling through the plywood, foam and through the batting, too). The batting is important to create the deep tufting look. I also chose the 3″ foam because I wanted to create the kind of deep TUFTED look.
 7. We sprayed the foam with the adhesive glue and pushed on the batting so it would stick to the foam. At the bottom of the headboard, we turned the batting under and stapled it onto the back. And then I had to dig the holes through the batting. I know I could have been smarter:-) At least, you can be SMART if you tackle this project.
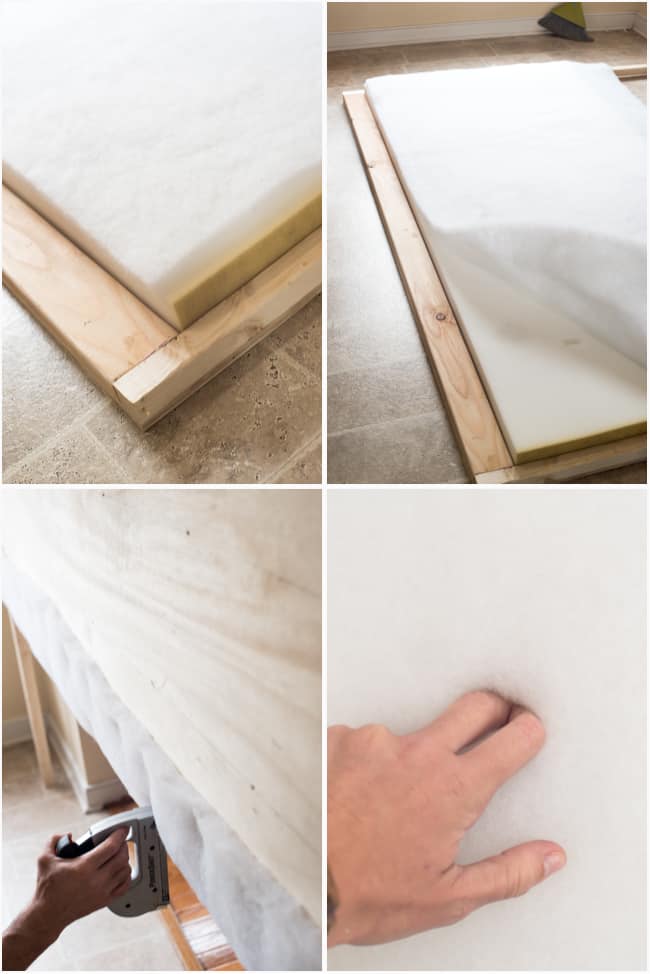
When we had all the holes found through the batting, it was time to put on the fabric.
I covered my buttons previously (which did not take a whole lot of time), so that was handy and ready.
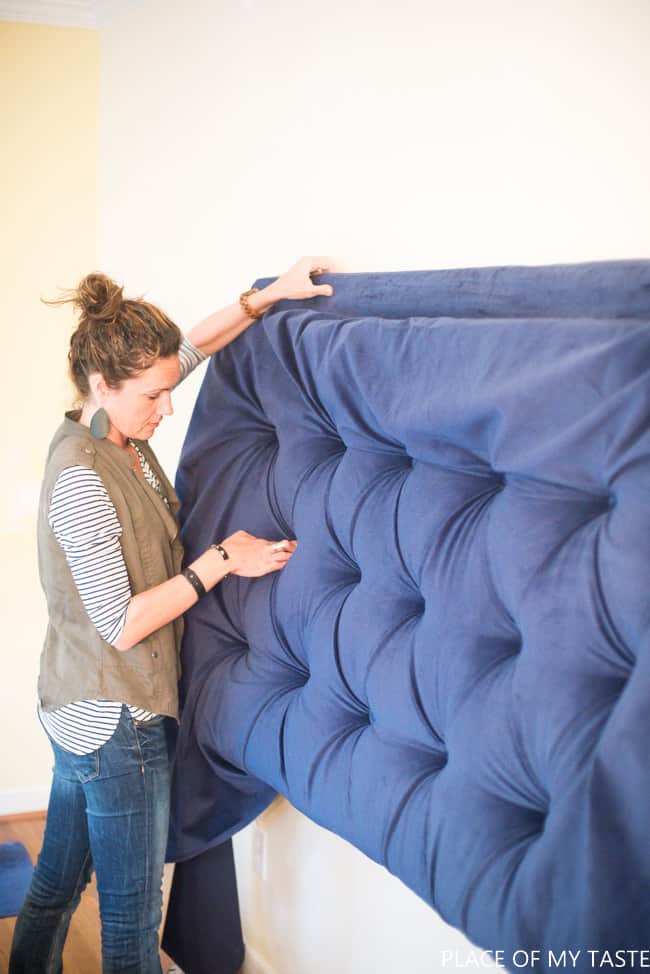
I started the tufting right in the middle of the headboard. Right at the middle button (in the second row). That was the time when I needed that second hand. My hub was behind the headboard, and I was in the front. We both had to hold the headboard in place. I pushed through my LONG upholstery needle, my hub grabbed the needle on the other side and pulled the needle all the way through and out. I pushed on the button with a piece of a wood fork to make sure it’s pushed in deeply enough. My hub stapled the thread onto the back of the headboard.
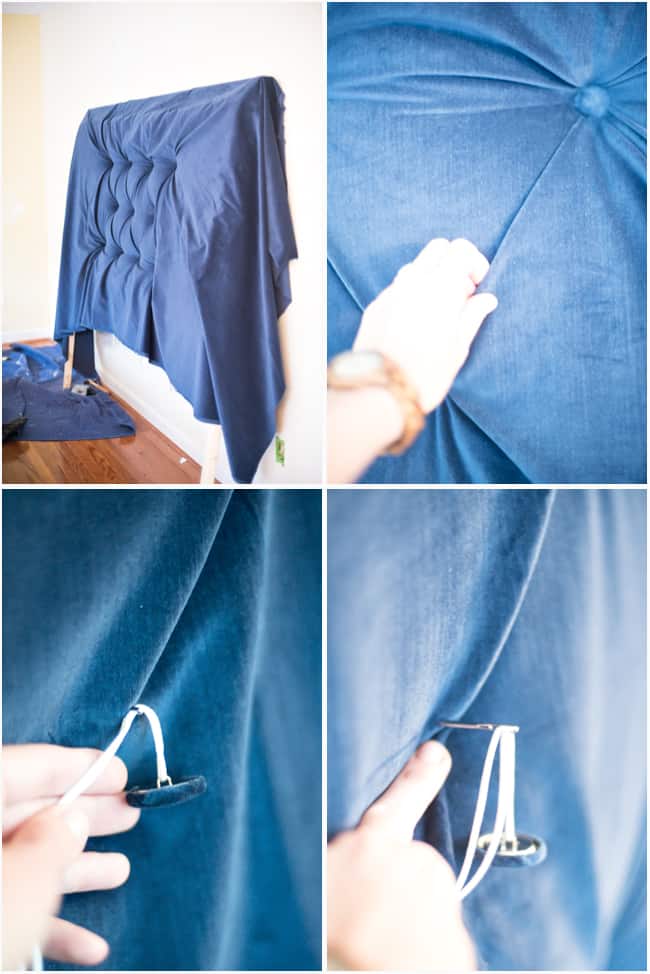
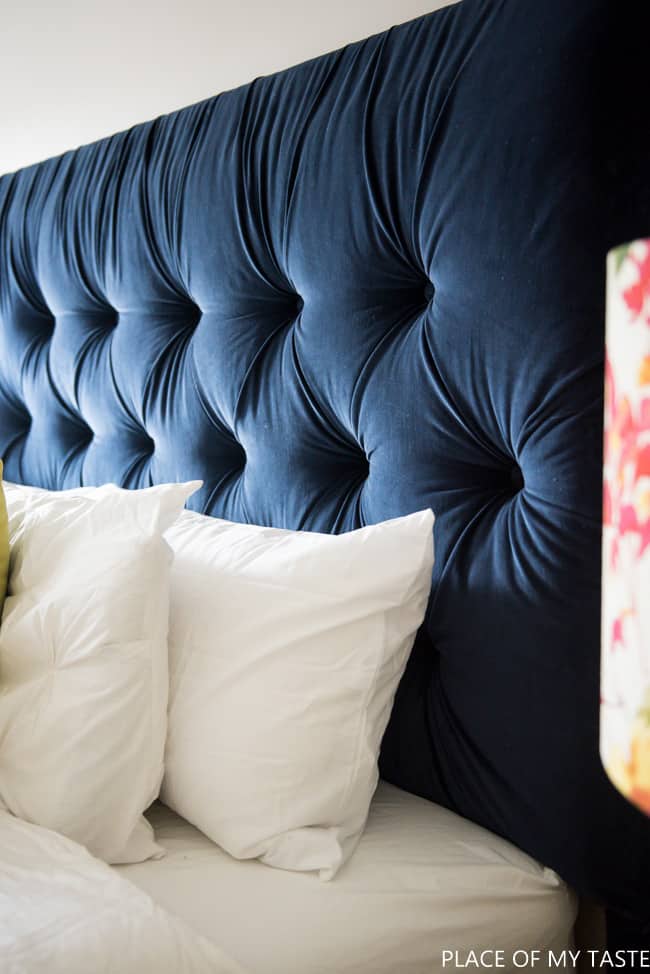
To create the DIAMOND TUFTED look, I pinched the fabric at an angle ( see above) at each button. I think this was the most time-consuming part of the project. But in the end, all the buttons were beautiful, deep and we were able to create a gorgeous tufted look.
The image below is the back of the headboard after pulling all the buttons through.
You can skip this next step if you are not planning to add nailheads across the top (which I did not end up doing either). I needed to add a piece of batting over the top so the fabric would nicely go over and would create smooth edges. Again, just cut your batting long enough to go over the top of the headboard when you add on your batting, to avoid this step.
Then we pulled the fabric over and stapled it to the back of the headboard.
As the last step, we covered the legs with fabric as well.
Phew! Seriously! It was a labor of love!
I was smitten with this giant piece when it was done!
But being “so smart” again, we tackled this project downstairs, and we had to drag this monster piece to our bedroom. Ghaw! Do you know the work smarter not harder thing? We totally failed at it for this project. But, it didn’t turn out any less stunning of a piece!!!
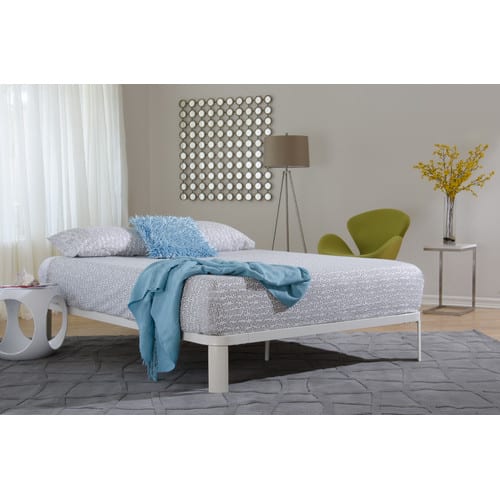
We chose to attach the headboard to the wall. I ordered a simple platform bed online before the headboard was done and I knew that there was no way to secure the headboard to that platform bed.
 We found this cool Hangman picture hanger ( holds up to 200lb) though and used that to secure this monster headboard to the wall. It was a winner! Highly recommend it!
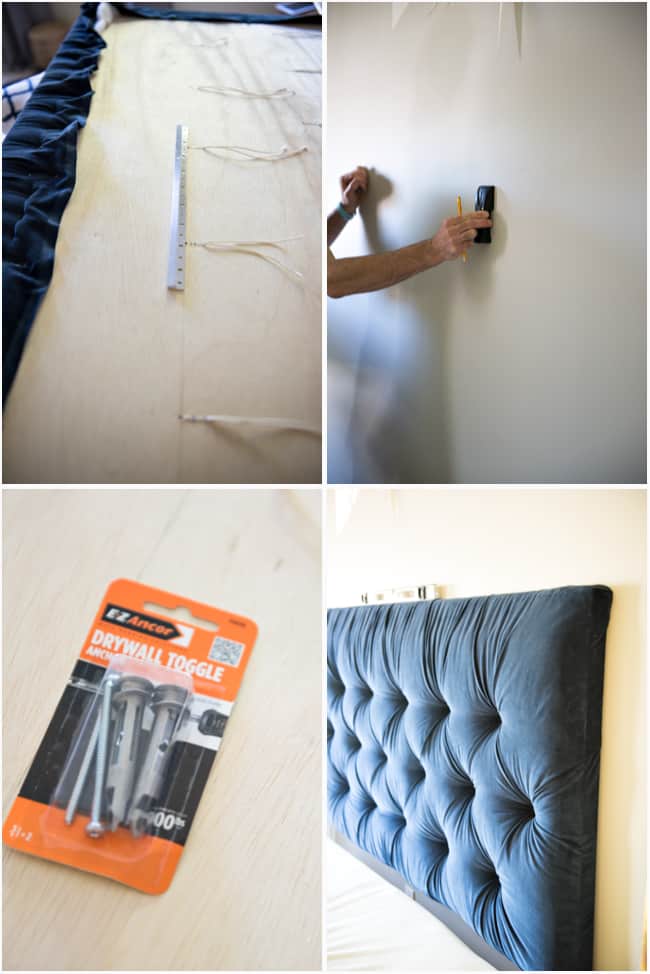
Before we secured the headboard to the wall, we needed to measure the platform bed + mattress height from the bottom so that we could push the mattress and bed under the headboard.
And voila!!!
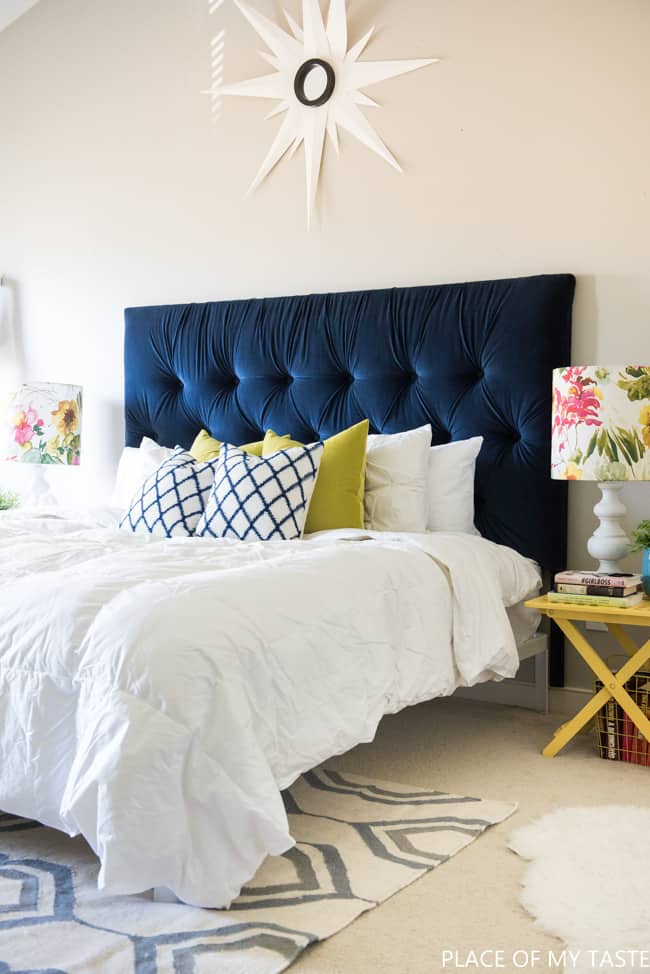

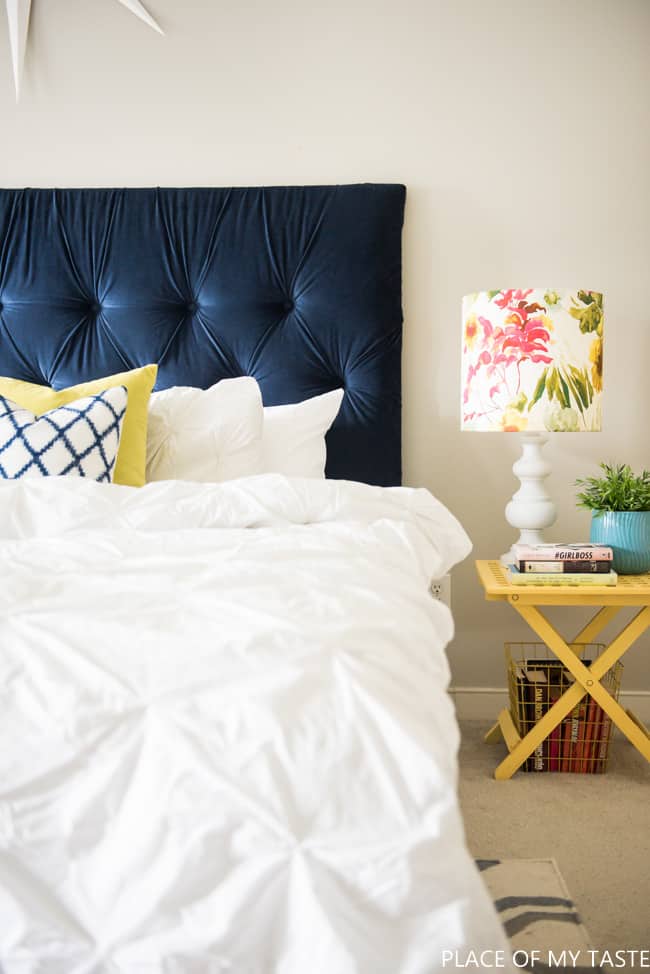

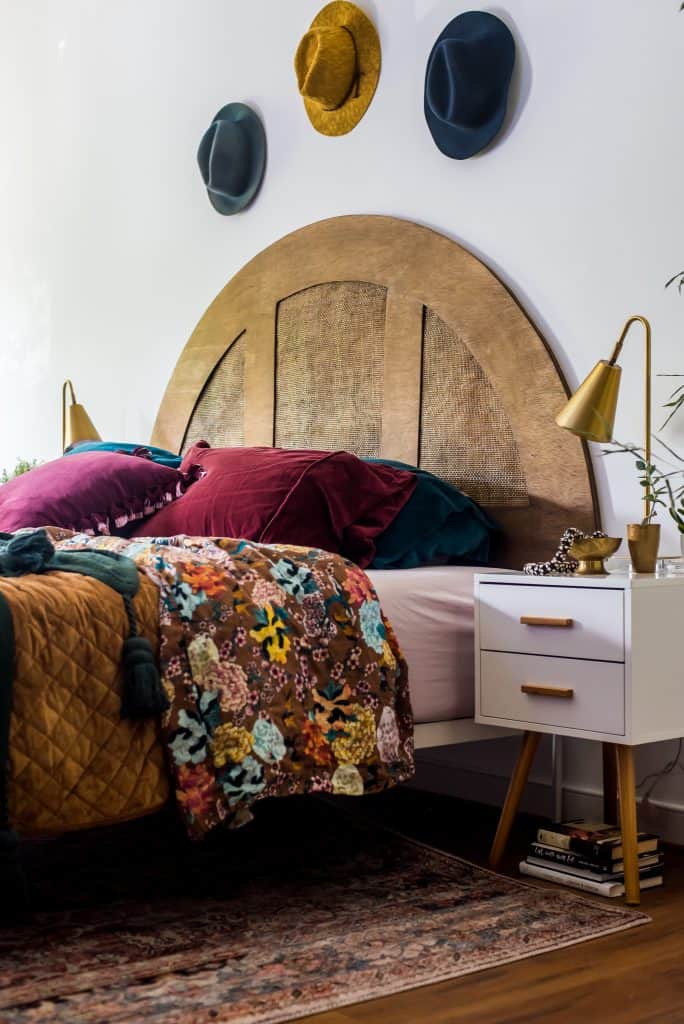
Oh, and wait! Do you spot those pretty CITRUS VELVET PILLOWS? They are from Tonic Living as well. They are dreamy quality pillows! I am a firm believer (and a huge pillow lover!) that decorating with pillows is a great way to add texture, luxury, and softness to your space, and this perfect citrus color was what I needed to complement the pretty blue. This luxury pillow is made of 100% Cotton velvet and has a faux down pillow insert – faux down inserts create the most impressive look and feel of soft fluffy pillows.
So what do you say, guys? Love the indigo velvet headboard or not?
(yes, yes, yes…….I do….)
TOTAL COST of THE HEADBOARD:
Plywood: $20
Wood panels (2 – 2″x 2″+ 2″x 4″): $15
3″ foam for king size bed, 80″ x 40″: $110
Batting: $15
Buttons (4 package): $18
Upholstery Thread: $3.50
Fabric: Depending on the type of fabric. Keep in mind that you need 4 yards of fabric at least to cover a KING size headboard: $20-30
Hangman ( optional): $12
Roughly: $230
It might not be a whole lot cheaper than getting one online but I think of it like this: It’s a custom build headboard with the choice of fabric I LOVE:-)
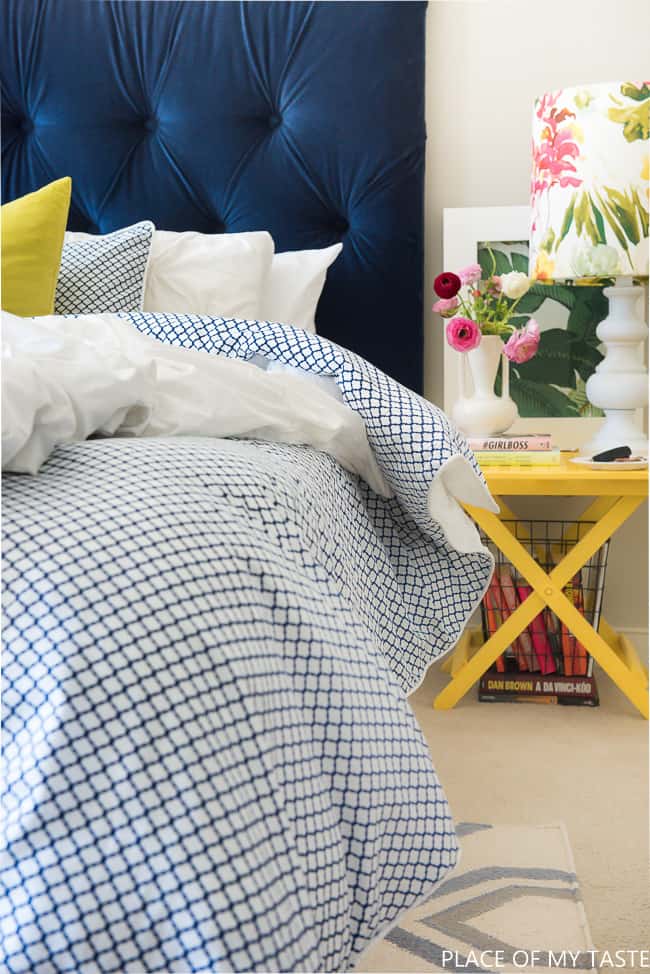
Stay tuned as next week I will share my new bedding with you all as well! I had no choice but to get a new KING SIZE duvet that goes with this fabulous headboard.
UPDATE: You can head here NOW and check out my pretty duvet cover!
UPDATE:: Since this post, a few years have gone and I upgraded my bedroom decor.
CLICK TO SEE MY NEW BEDROOM DECOR. (Psst! I still have this awesome headboard up in the attic, waiting for me to bring her down to style her up once again in my bedroom!:-))
Thank you for stopping by today!
If you like my decor style download your FREE mini-guide where I share 5 quick tips on how to stylishly decorate your home!
Download your mini-guide NOW! I share 5 quick tips on how to create a stylish home!
Check out some of my other fun DIY projects as well
DIY ARCH HEADBOARD
DIY HAMMOCK STAND

Cheers,
Aniko
*Huge Thanks to Tonic Living for providing me with free product and a great GIVEAWAY for my readers!*
This post includes affiliate links. Please read my disclosure.


Hi, Love what you did with the headboard. Can you tell me how much spacing you left in between buttons? Your instructions do not say.
Thank you.
My husband is making your headboard for our daughter-in-law. We don’t see any mention of the spacing between the buttons. What spacing distance did you use? One picture has 3 rows, 6 -5 -6, and another picture has 6-7-6. Please advise. This is for her birthday in July.
Thanks, Debbie Hatz 6/24/2020
LOVE LOVE LOVE! Gonna try it myself as well! (King size too) Great tutorial. Great instructions. Easy to follow.
My daughter is trying to do this head board but what we are having trouble with are the spacing if the buttons! Her head board is a full size but we can’t seem to get the spacing and width of where the buttons go. Board is 54 x 36. Any suggestions?
Okay, your post was a game-changer for our headboard project! We’d been playing with the idea for months but it seemed super daunting. THEN, we found your post and it gave us the confidence to just DO IT. You were not joking about the labour of love in threading those darn button, but the pay off was great, and we’ve just mounted a gorgeous headboard in our main room. Thank you for sharing!!!
Hello. I love your work and I am getting ready to attempt this project for my King bed. Where did you buy your batting and 3 inch foam. I have joined your blog and am fascinated with your projects.
Hi. I love how this project turned out. My anniversary is coming up and I had been considering upgrading our bed completely as a gift for my hard working husband. His favorite color is blue and I think he would find the fabric you used pretty cool. How did you get the cost so low? With coupons? I went to the site you provided and the cost per yard is $23. For 4 yards that is close to $100. Please help.
Katrina,
You might be able to find a less expensive fabric if the budget is tight. But to tell you the truth, my velvet holds up so well (and it’s been more than 2 years), that it looks new still. this is going to be an amazing anniversary gift!:-)♥
Hello Aniko- I am interested in the comforter that was used in the wooden arch headboard. The comforter is mustard on one side and a flower design on the other side. Where could I buy that comforter? Thank you so much!! Love your style!
I wanted to make this headboard for my queen bed. How do I get accurate measurements? Do i measure directly across & go by exact width measurements or do I add a few inches on either end?
Beautiful and love the color! Question: If you are using the HANGMAN to install, do the legs serve any function? Was including legs just a stylistic choice?
We decided to use the HANGMAN after the legs were done so really, they only serve visual function ha! Good luck with your DIY!:-)
Hi,
Your headboard is gorgeous. We started making ours last night and we are almost completely finished (minus the legs and stapling the fabric around the edges) Somehow we missed the batting step. Do you think this is a huge deal? Do you think we will have issues since there is no batting between the foam and fabric? Thanks so much!
Very nice. I’m going to attempt one myself. Just wondering why you did not go all the way to the top with the thick foam?
So I am using your tutorial for making a tufted facade for my husband’s wedding business. I am struggling with the staples… when I go to staple they end up crinkled and not flat. What size staples did you use? Did you have this issue too?
can you please explain to me how you measured the holes for the buttons?
Made this headboard with wings over a couple days and your tutorial was SO HELPFUL! Wish I could attach a picture to show the finished project. Thanks for this step by step!
-Laura
Oh I want to see a picture! I love to see other ppl’s creations! Pop it over to [email protected] please:-)